2.46.0
General
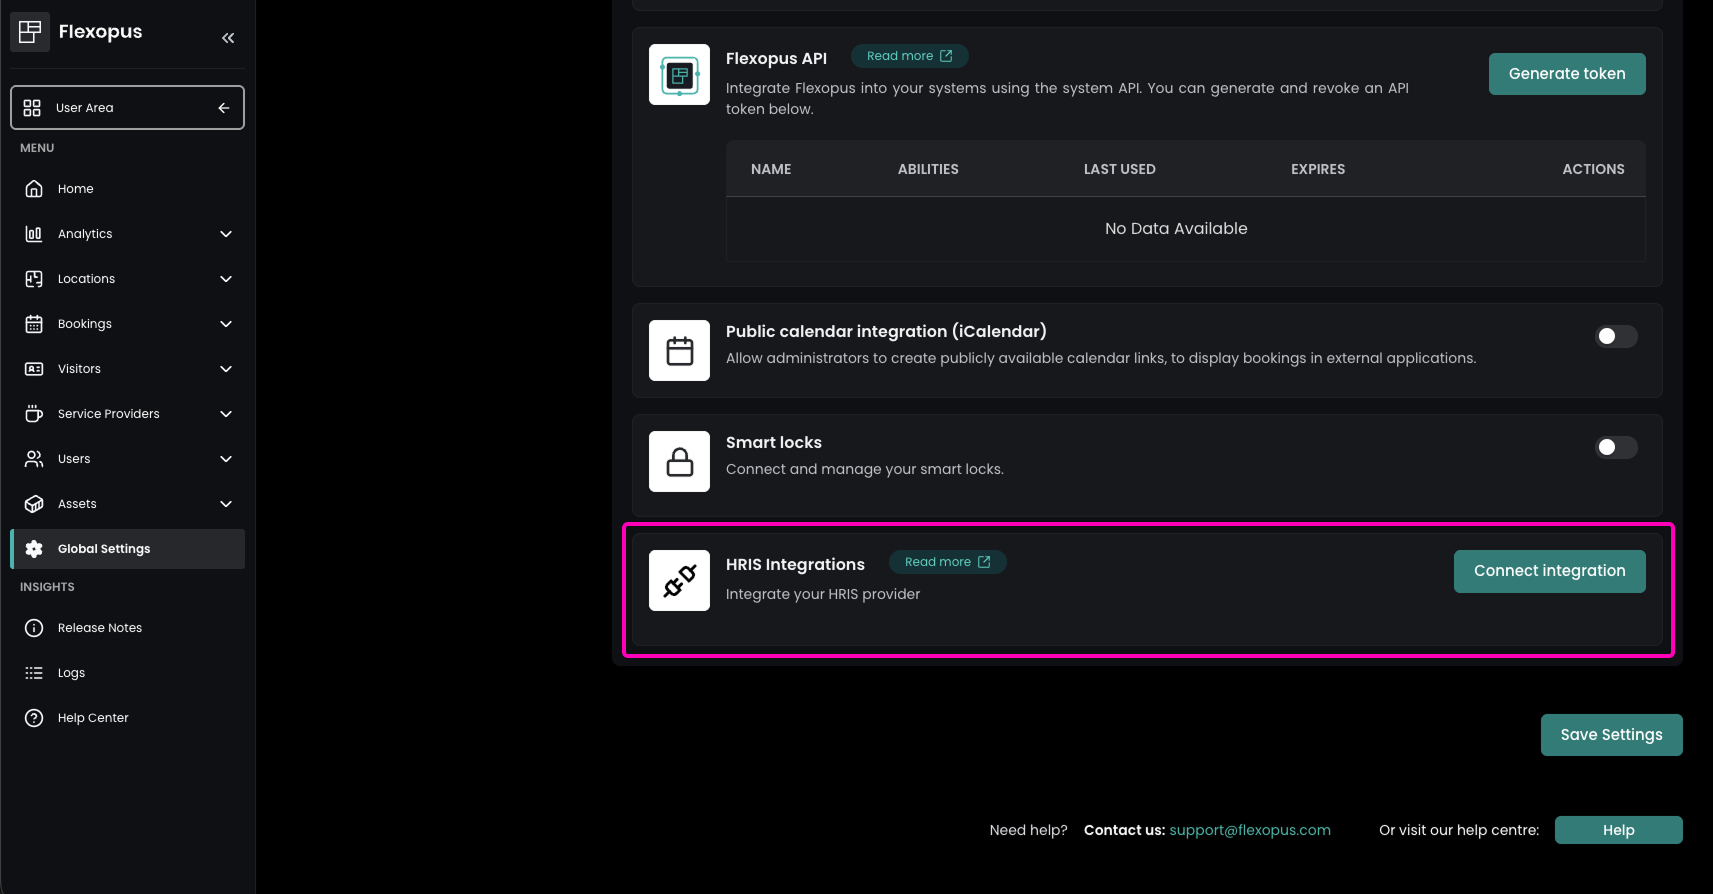
Added HRIS Integration
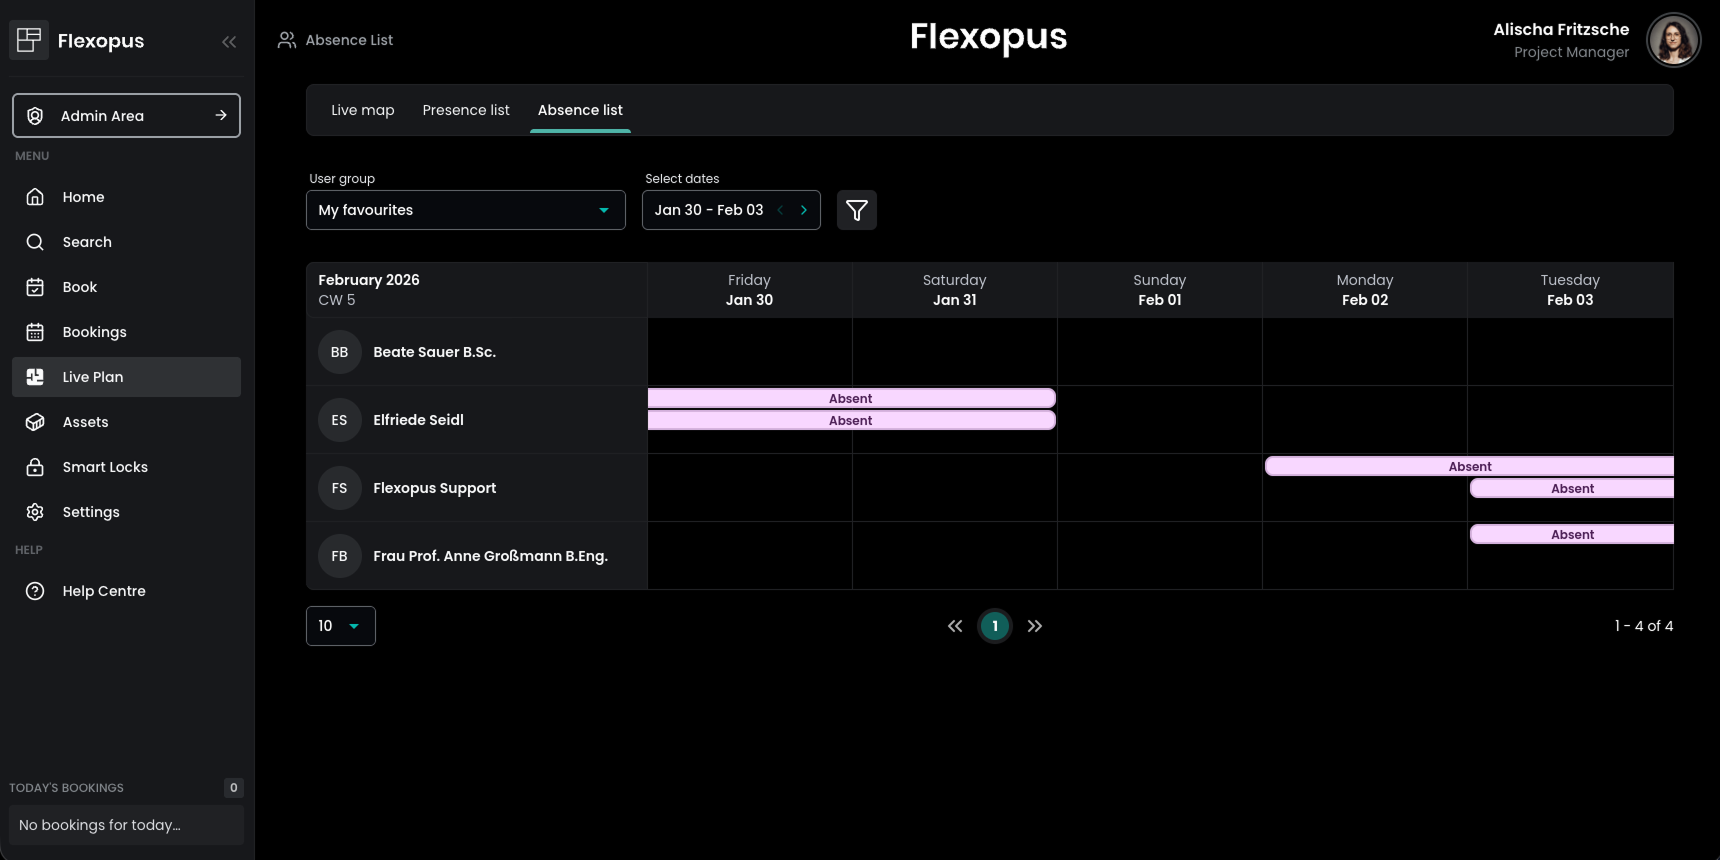
Flexopus now offers an HRIS integration that provides users with better visibility into absences within their organization. In the user area, it is now clearly visible which favorite colleagues (if the Favorites feature is enabled) and which members of a user’s groups are currently absent. For privacy reasons, the specific reason for an absence is not displayed.
This integration also lays the foundation for future enhancements, such as the automatic handling or deletion of bookings during employee absences — a feature that has been highly requested by many customers so stay tuned!
The connection to the HRIS can be configured in Global Settings → Integrations.
Added Restricted Availability for Service Provider Items
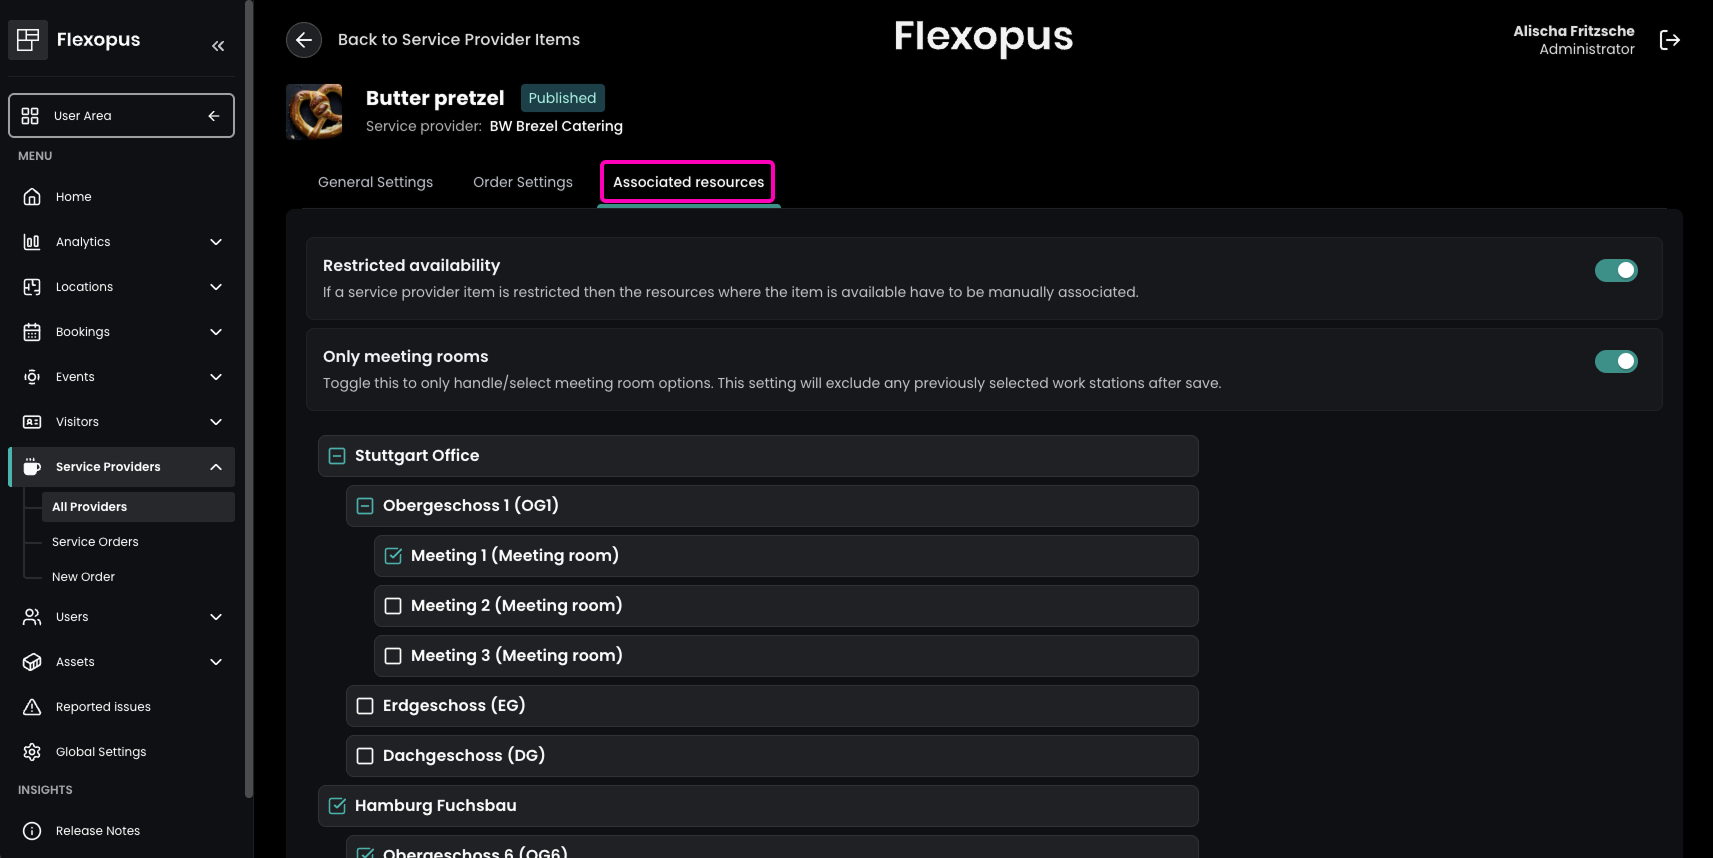
Service provider items can now be restricted to specific buildings, floor plans, and resources. This is particularly useful for services that are only available in certain locations — for example, room reconfigurations that can only be performed in selected meeting rooms, adding or removing partitions in specific spaces, or catering services that require rooms to meet defined conditions.
Administrators can configure this in the Admin Area by navigating to Service Providers → All Providers, selecting the desired provider, and opening the Provided items tab. After editing an item, the new Associated resources tab allows administrators to enable Restricted availability.
Once activated, administrators can define whether the item is limited to meeting rooms (“Only meeting rooms”) and specify the exact buildings, floor plans, and individual resources where the item should be available.
Added Simplified Domain Setup via MDM
Flexopus now supports domain configuration for your Flexopus application within Microsoft Intune Mobile Device Management (MDM). Administrators can define the application domain centrally, so it no longer needs to be entered manually by users during device setup. This streamlines device provisioning and reduces configuration effort and errors.
Flexopus Visitor
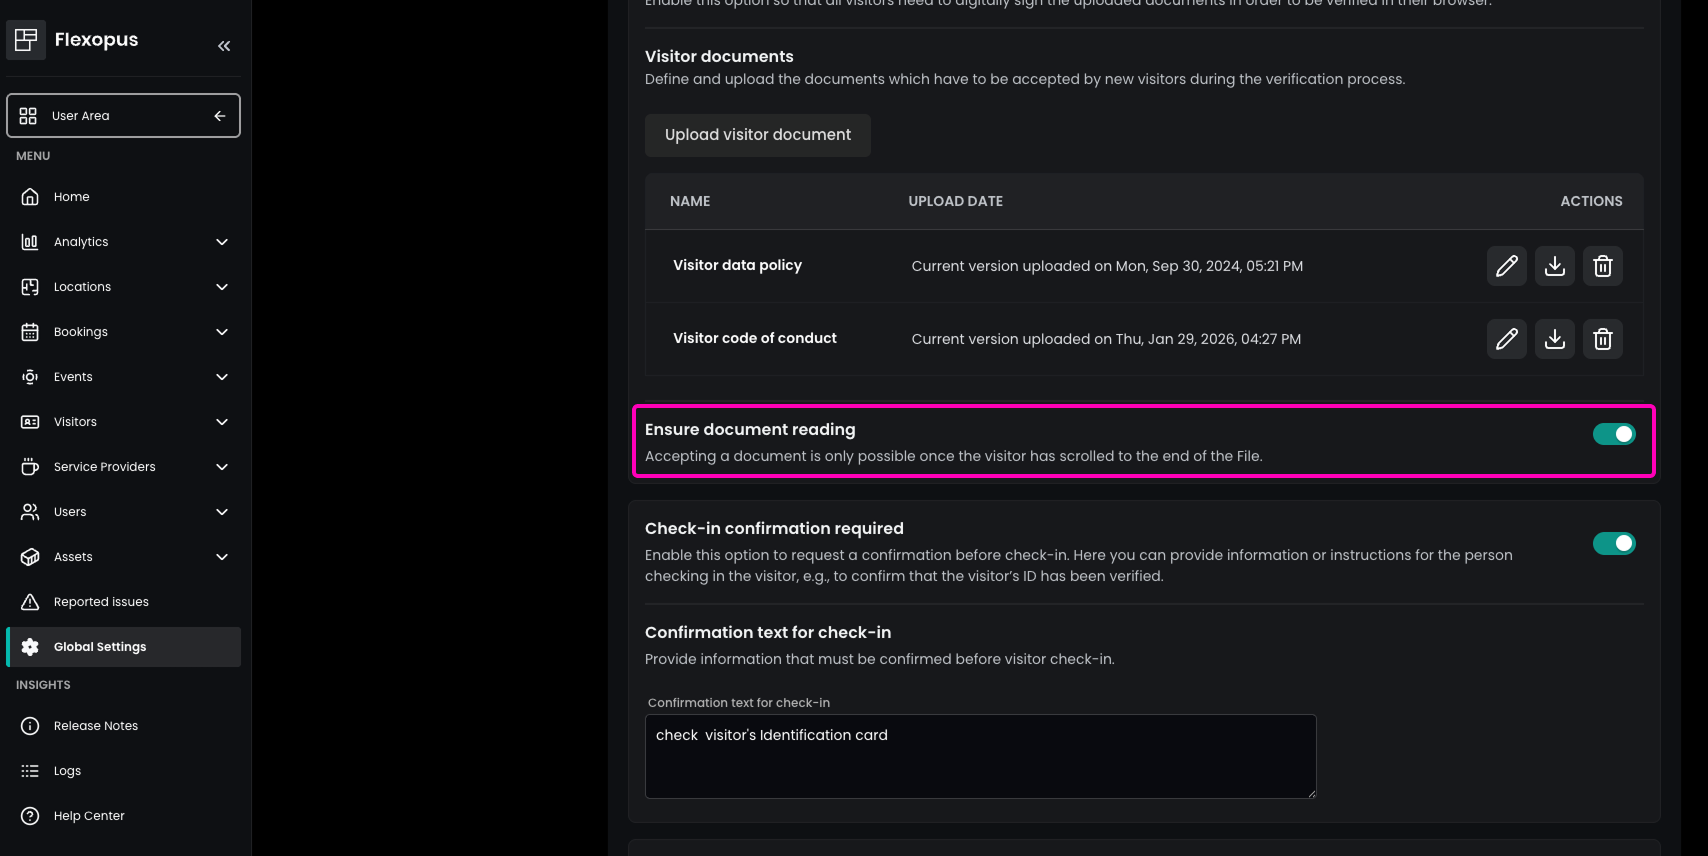
Added Mandatory Reading of Visitor Documents
Administrators can now ensure that visitors actually read required documents before completing registration. This option can be enabled in the Admin Area under Global Settings → Visitor and Guest Management → Visitor Management by activating Ensure document reading.
With this setting enabled, visitors must open the document and scroll to the very end before they can accept it. Only after this step are the required checkboxes enabled, and the registration process can be completed.

Improved Signature Quality on Visitor Kiosk
The quality of visitor signatures captured on the Visitor Kiosk has been significantly improved. Signatures are now recorded with higher precision and smoother lines, resulting in a more natural appearance. This improves overall professionalism at reception, ensures better readability for compliance purposes.
Fixed Visibility of Integrated Visitors in Guest Invitations
Visitors that are created in Flexopus via integrations are now correctly available when selecting existing guests during the creation of a visitor invitation. This ensures a consistent visitor list.
Flexopus Assets
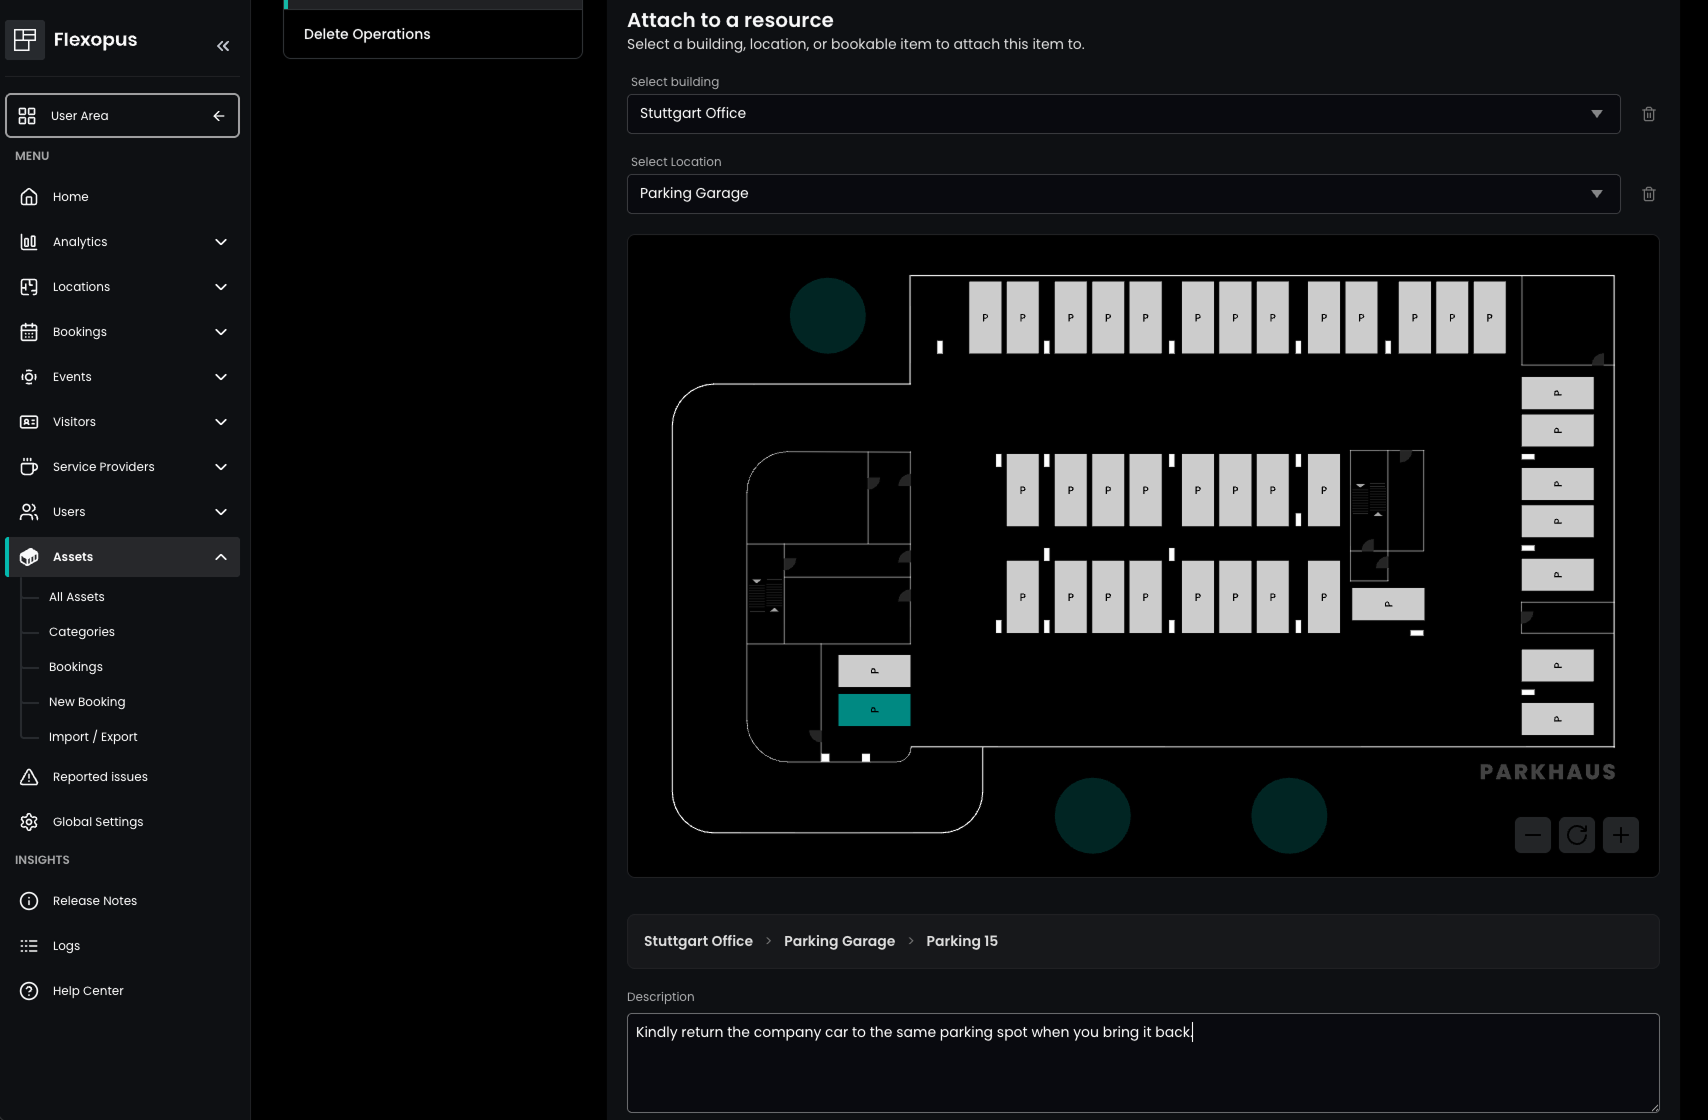
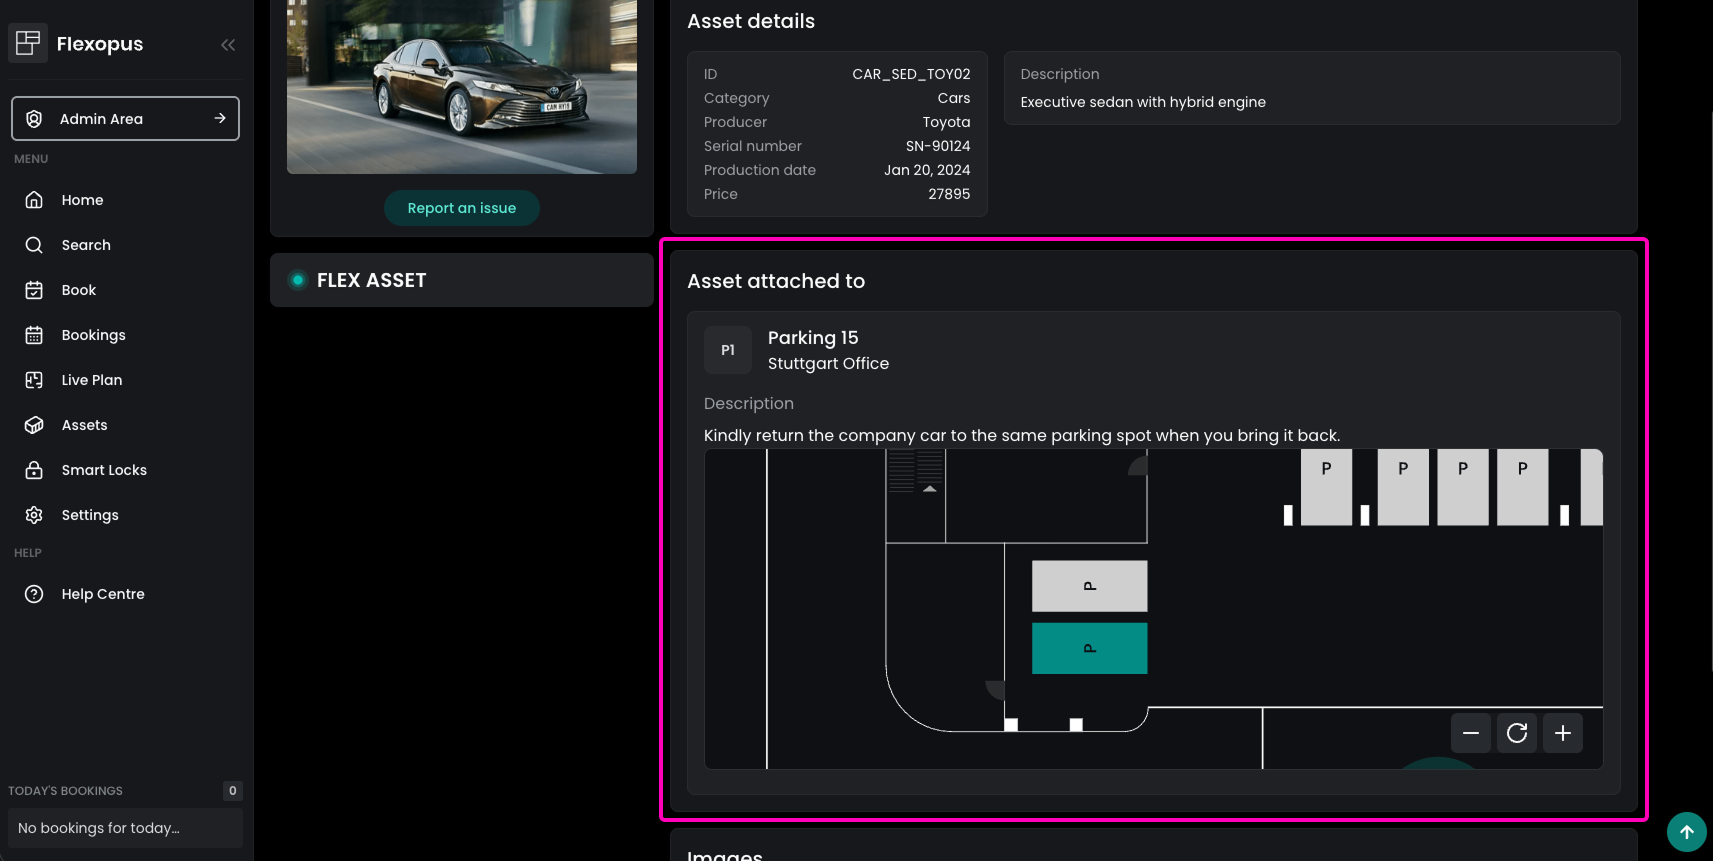
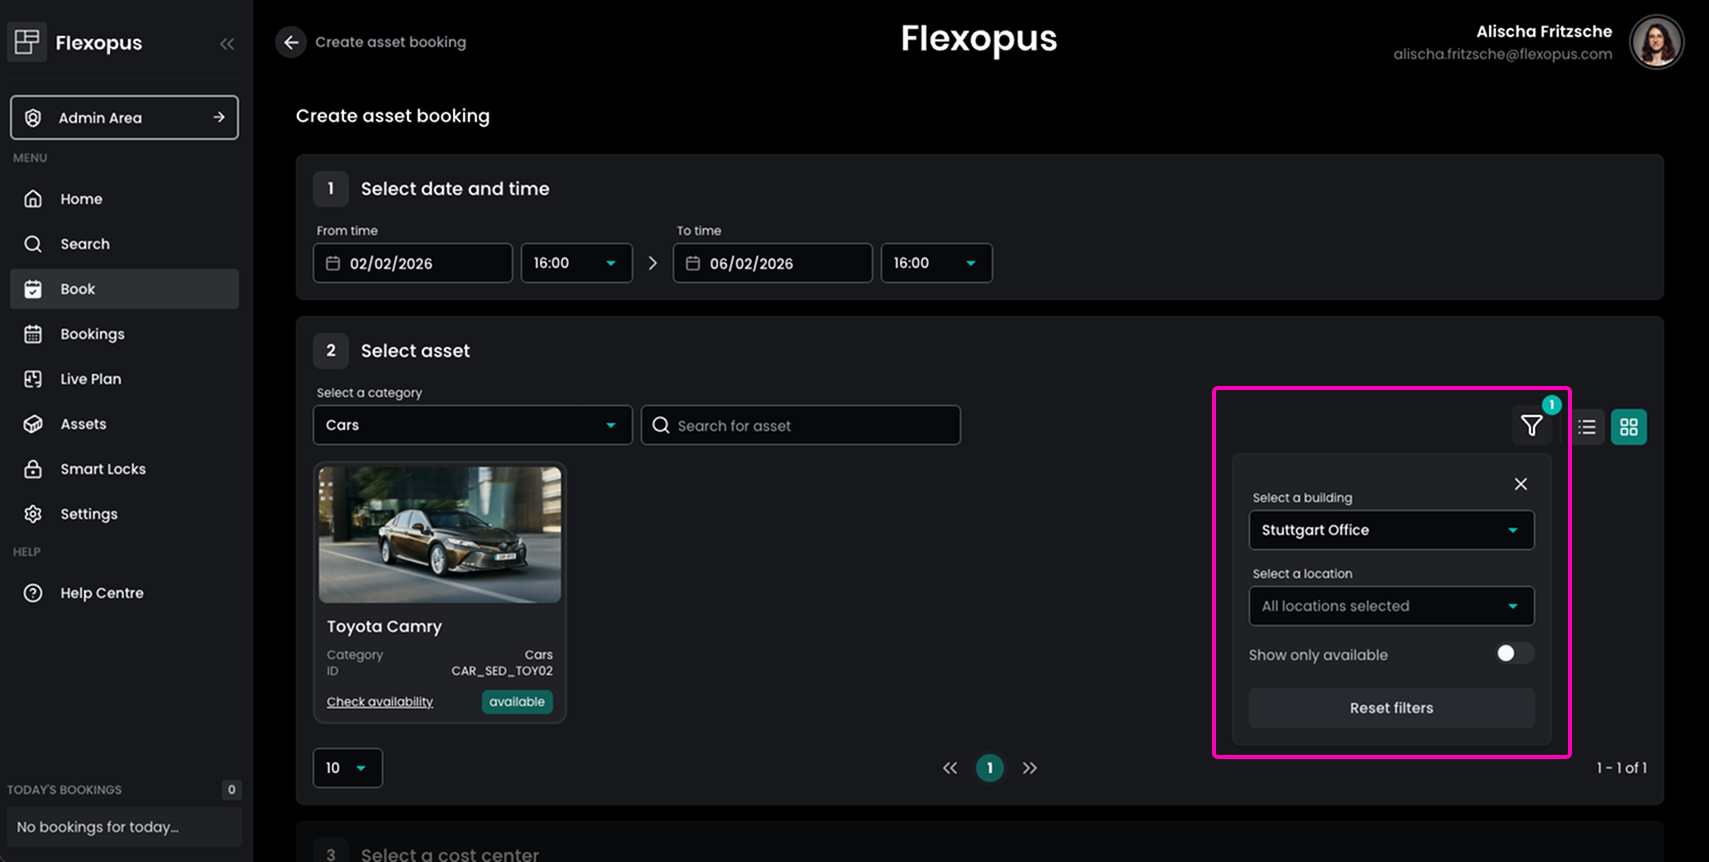
Added Asset Location
Administrators can now assign assets to a specific building, location, and even to a concrete resource. This makes it easier for users to find assets at the right location during the booking process and to know exactly where an asset can be picked up after booking.
The asset location can be configured in the Admin Area under Assets by opening the desired asset and navigating to the Attach to object tab. Here, administrators can select the building, location, and resource, and optionally add a description to further clarify the pickup location.
During booking, users can filter assets by location using the filter icon and can also view the assigned location directly in the asset detail view.
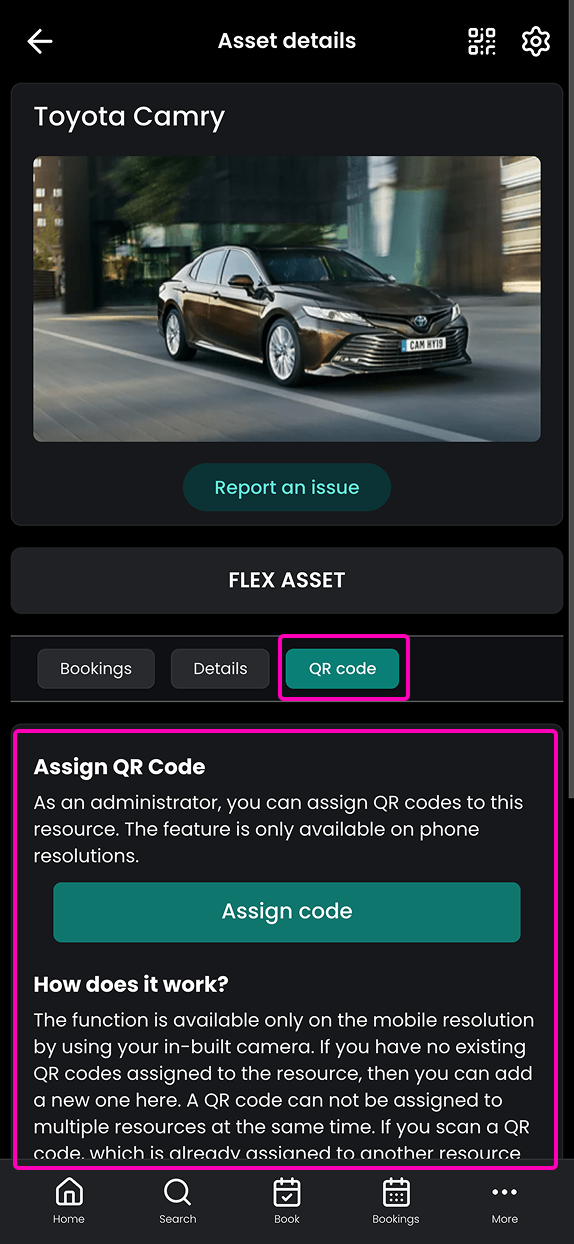
Added Asset QR Codes
Assets can now be assigned individual QR codes, simplifying both booking and asset management. Similar to QR codes for desks or other resources, administrators can assign QR codes to assets by selecting the asset in the user area using a mobile device. An additional QR Code tab becomes available for administrators, where the QR code can be assigned.
For an overall overview, administrators can export assets via Admin Area → Assets → Import / Export to review all QR code assignments. Additionally, the asset detail view under General Settings shows which QR codes are currently linked to the asset and allows them to be removed if necessary.
Users can scan the QR code to view asset details, directly create a booking, and check-in (if enabled).
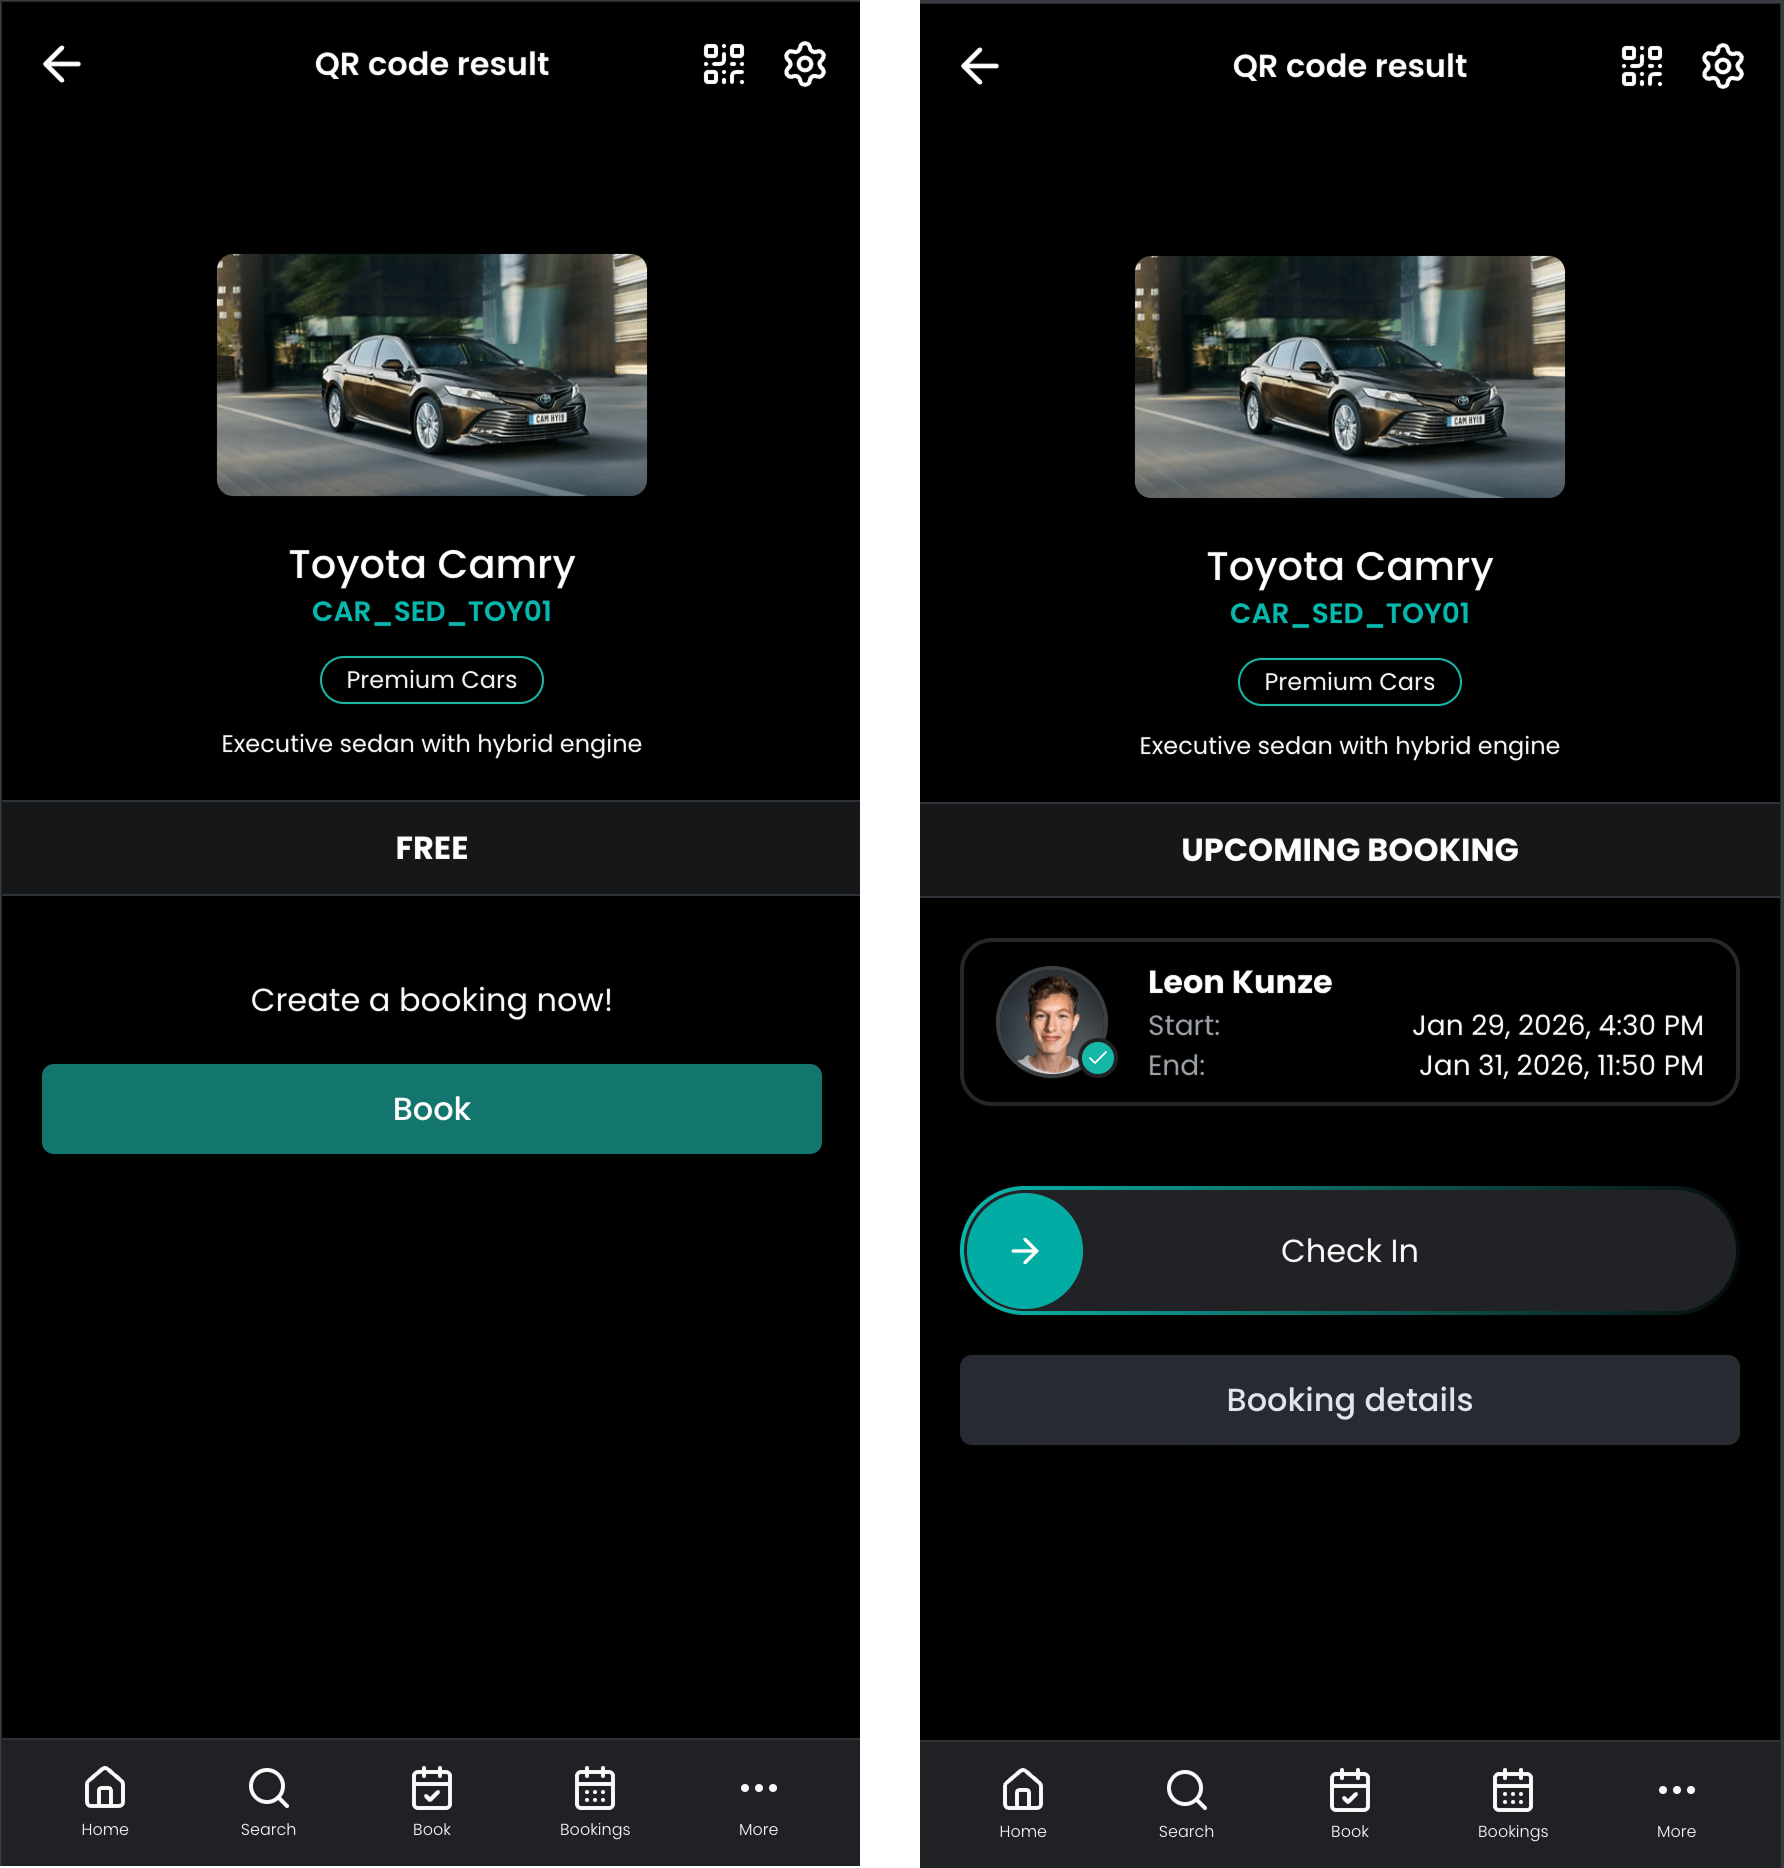
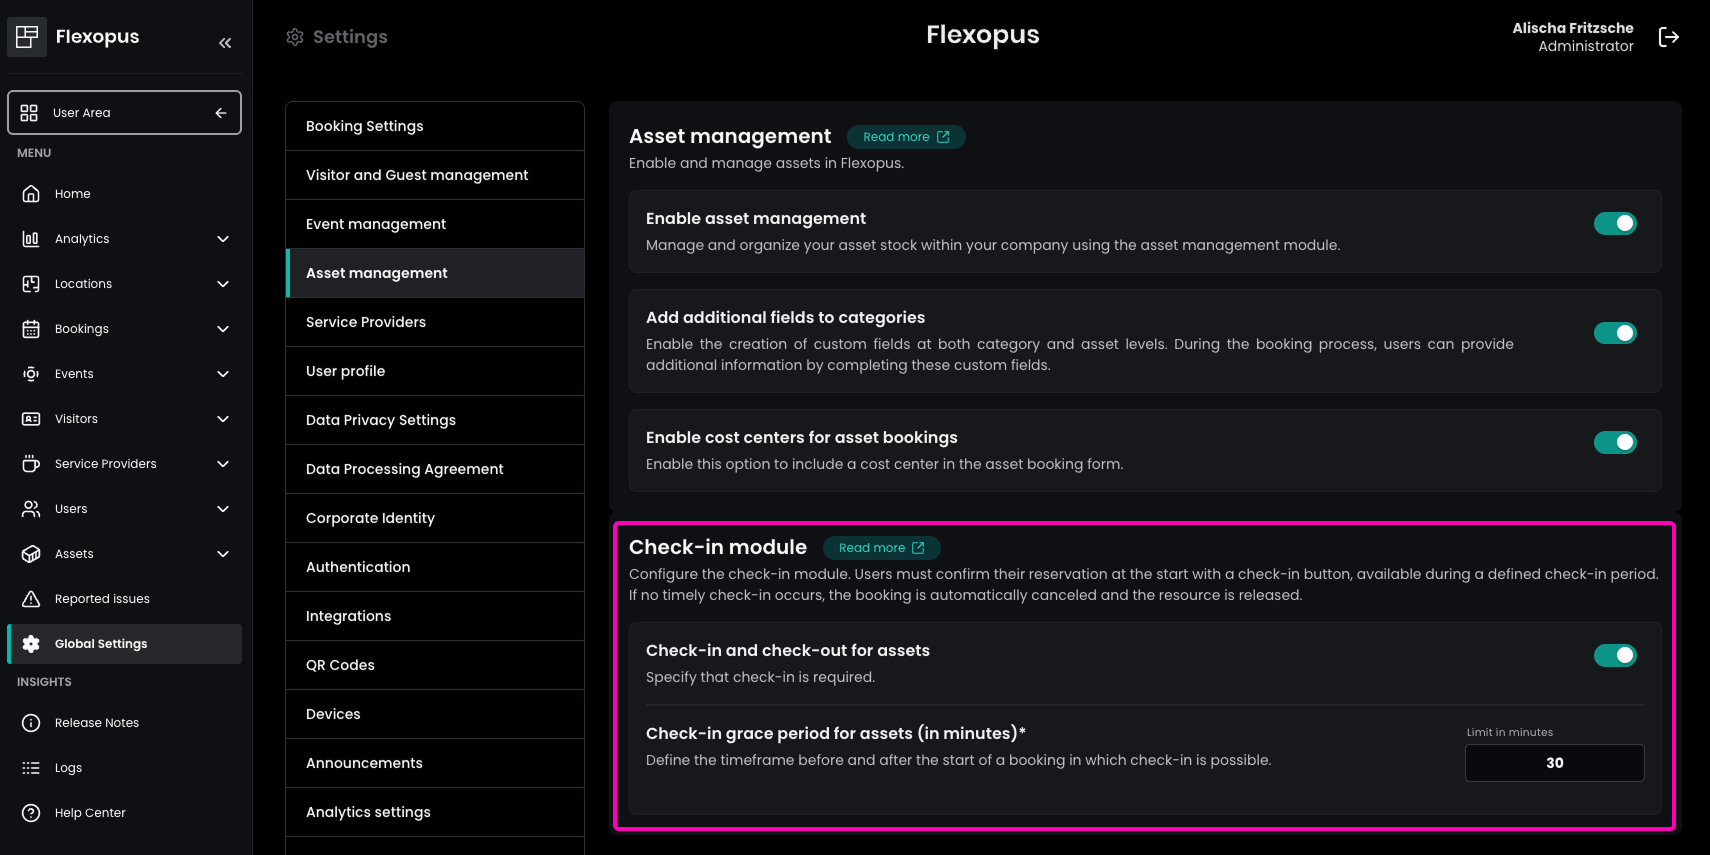
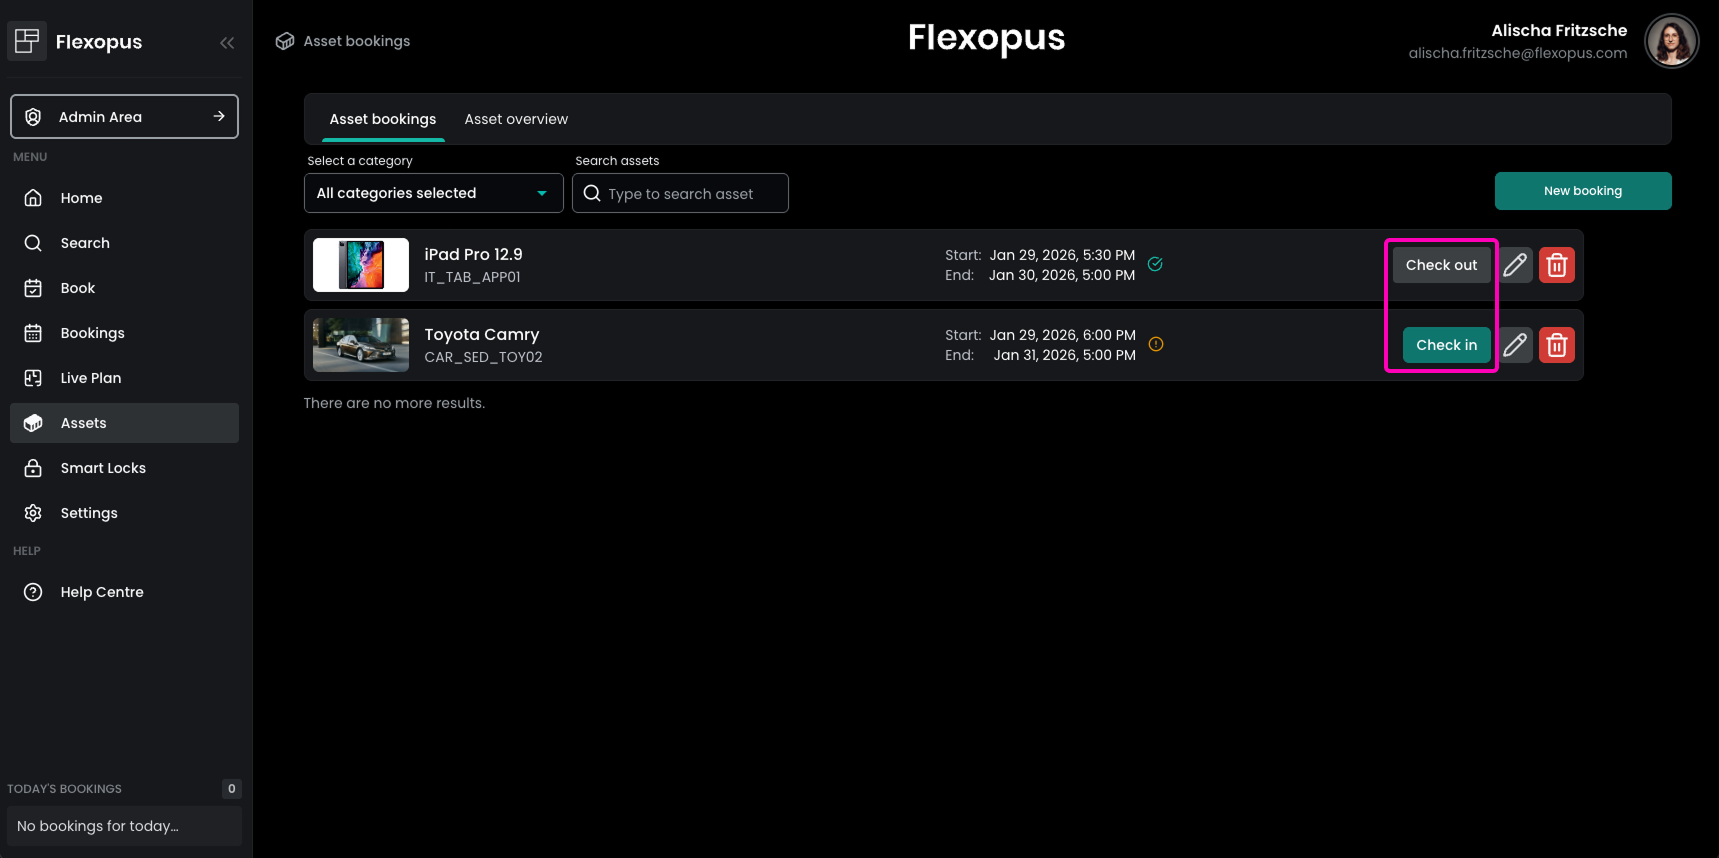
Added Asset Check-in
Assets can now be checked in, similar to the existing check-in functionality for workspaces, meeting rooms, and parking spaces. To enable this feature, administrators can activate asset check-in in the Admin Area under Global Settings → Asset Management and define a grace period.
Users are then required to check in within the configured time window before and after the start of their asset booking. If the asset is not checked in within this period, the booking is automatically cancelled. This helps prevent unused asset bookings, increases asset availability, and ensures fair usage across the organization.
Improved Sorting of Asset Bookings
In the user area, asset bookings are now sorted by their start date instead of the booking creation date. This provides users with a clearer and more intuitive overview of upcoming asset bookings.
Improved Alphabetical Order of Asset Categories
When booking an asset, asset categories are now displayed in alphabetical order. This helps users find the desired asset category more quickly, especially in environments with many different asset types.
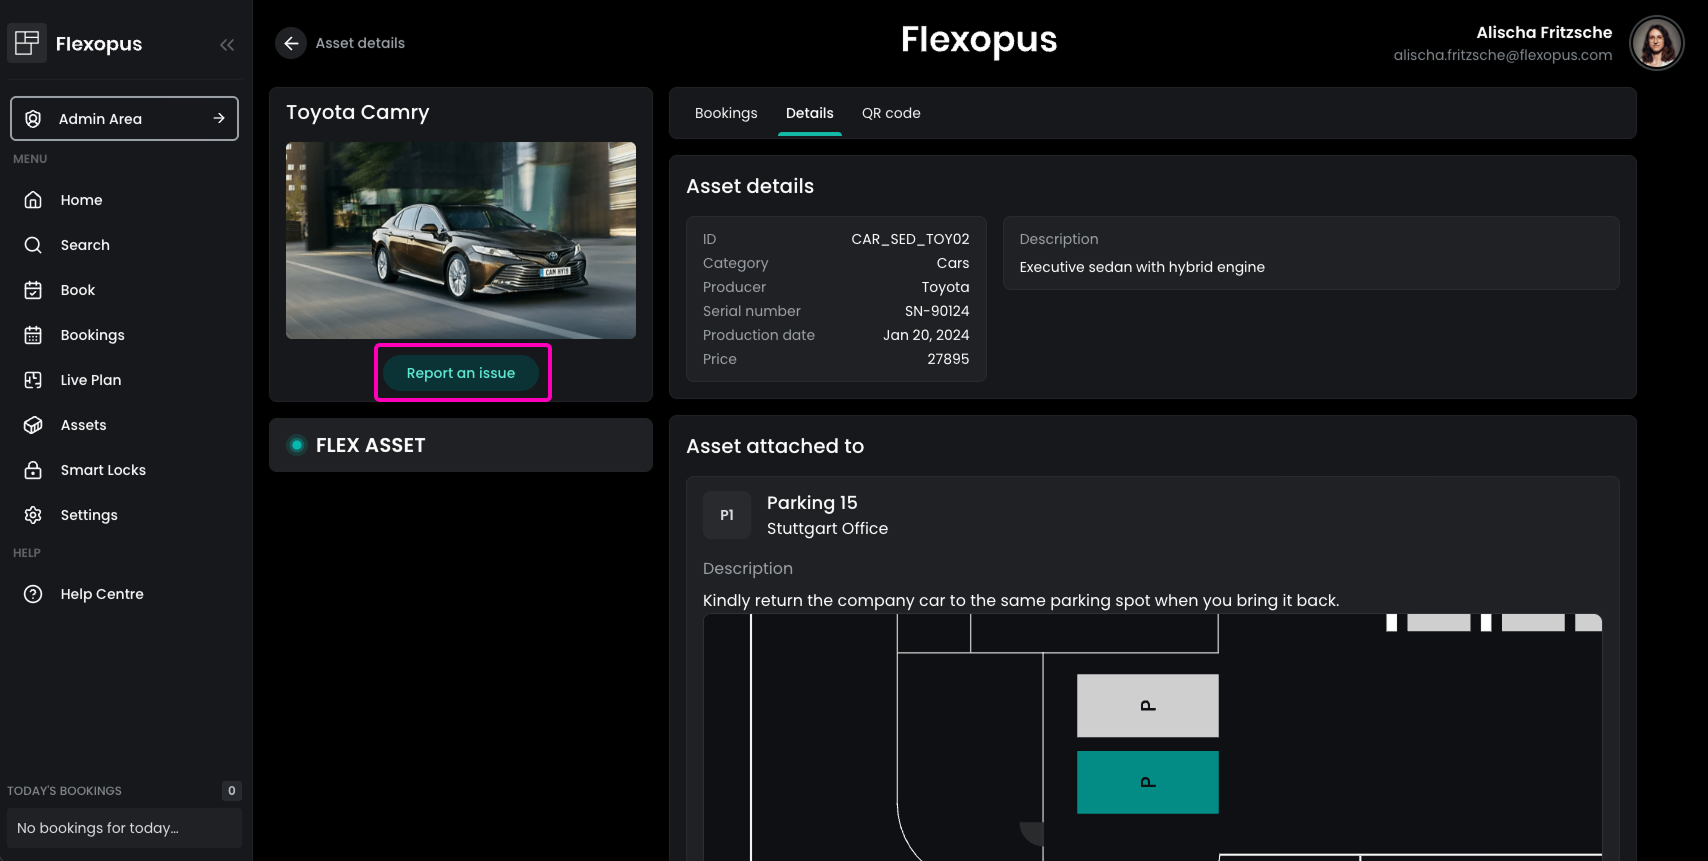
Added Issue Reporting for Assets
The Issue Reporting feature, already known from workspaces, meeting rooms, and parking spaces, is now also available for assets. It can be activated in the Admin Area under Global Settings → Booking Settings → Issue Reporting.
Once enabled, users can report issues for assets either by scanning the asset’s QR code or by selecting the asset directly. They can enter a title, category, and description for the issue.
Reported issues are sent via email to the configured asset manager email address and are also visible in the Admin Area under Reported Issues.