2.56.0
General
Book Desks for Multiple Users at Once
Booking desks for an entire team just got much easier!
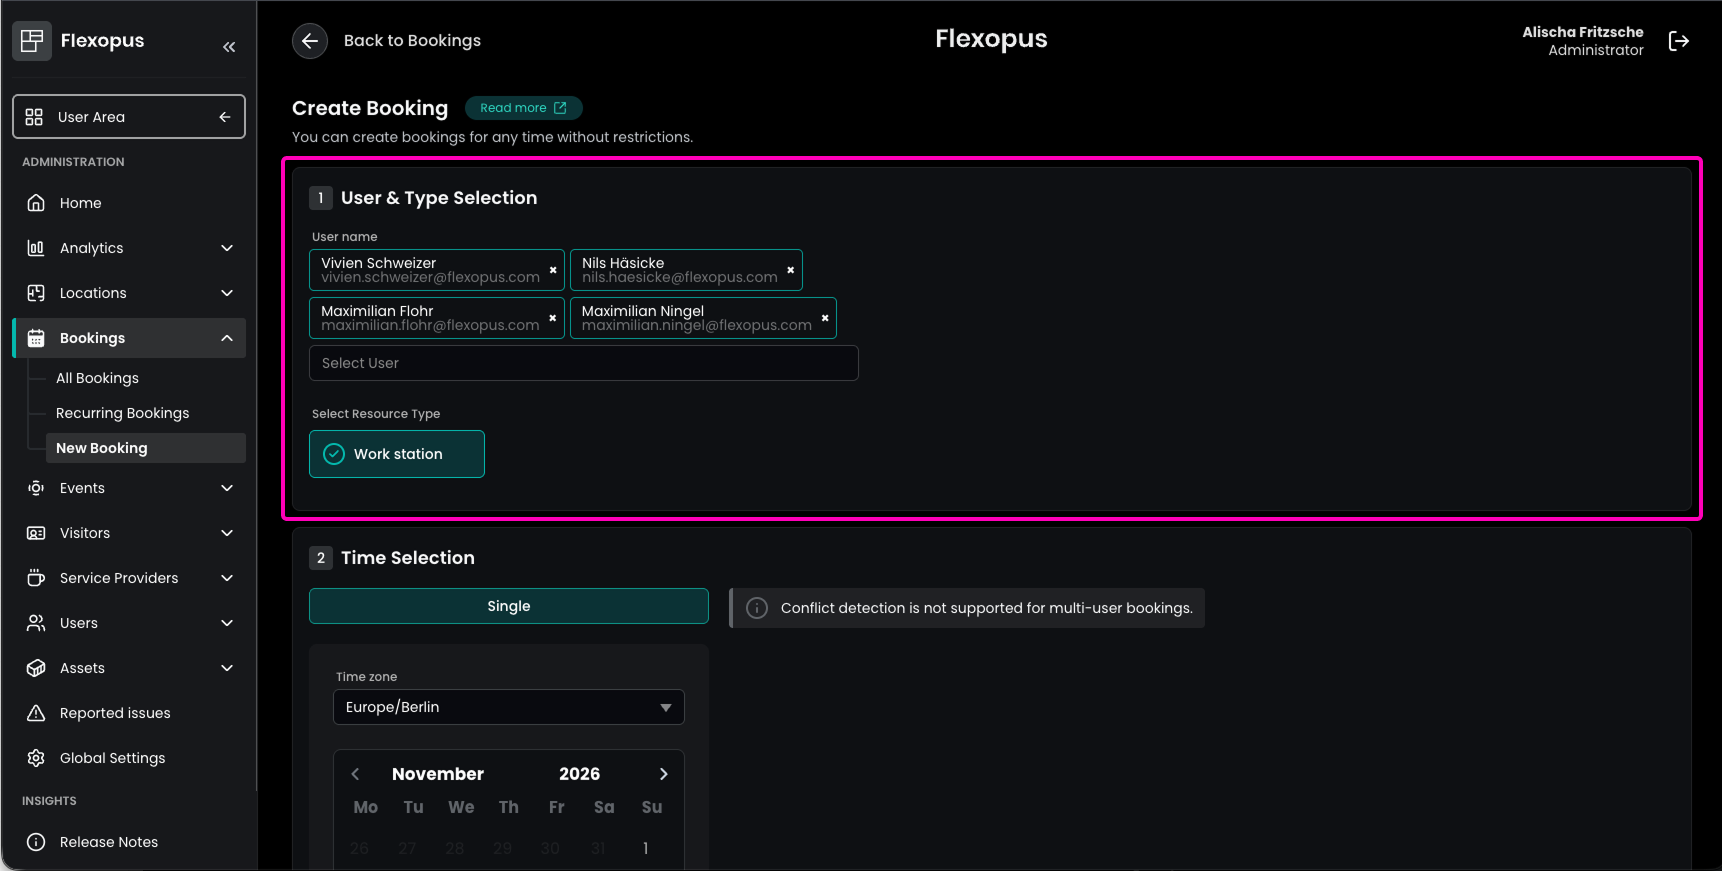
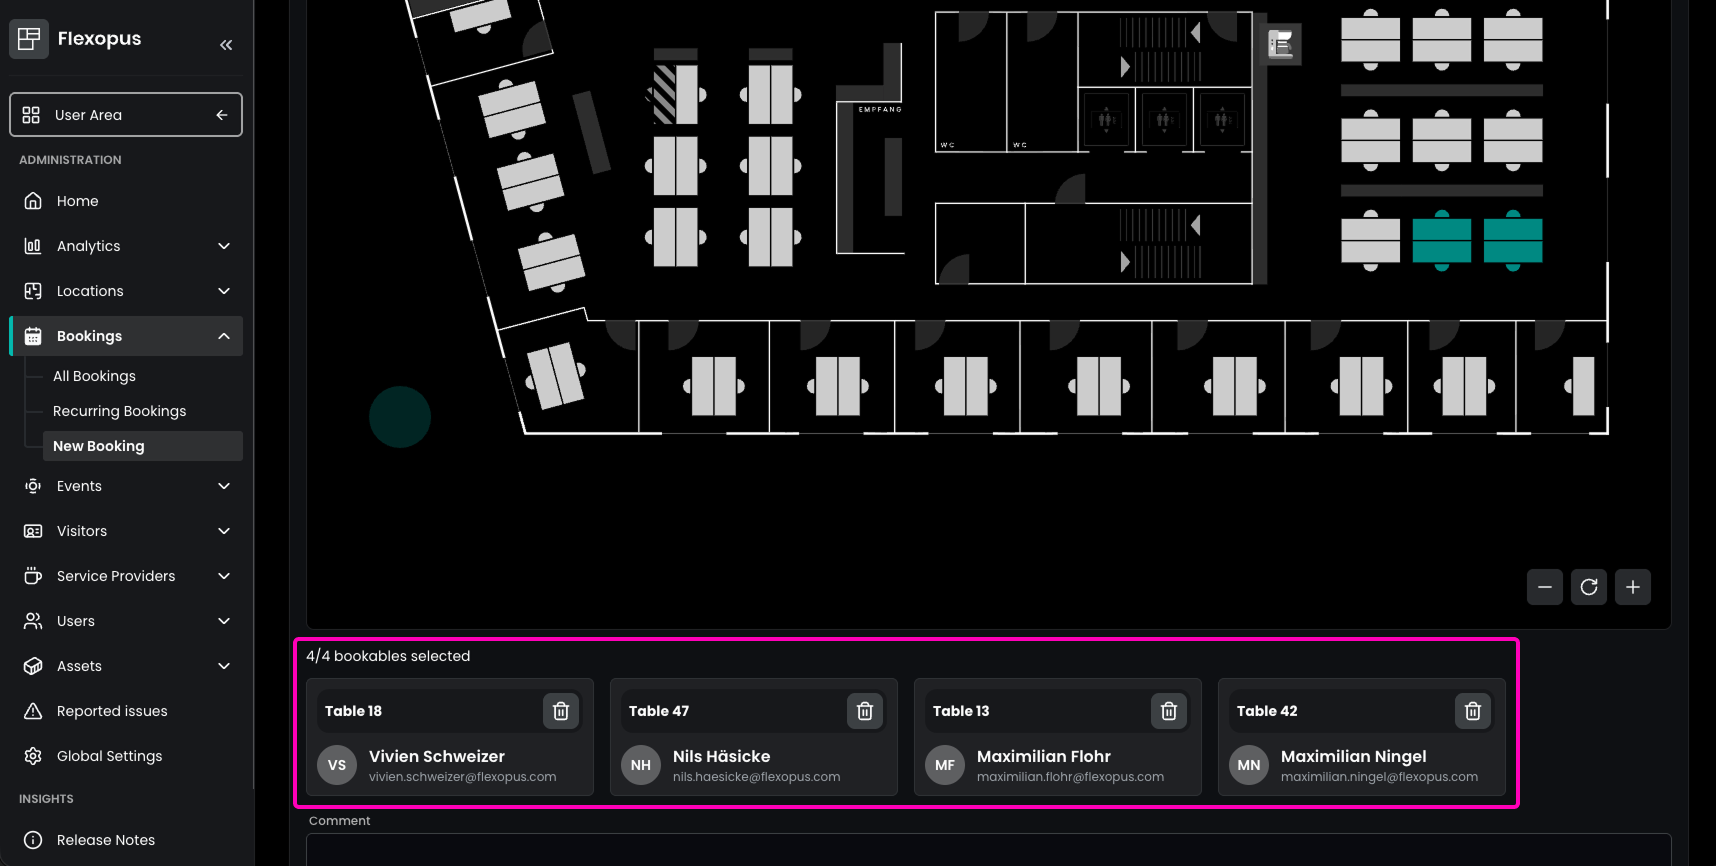
Administrators can now select up to 10 users at once when creating a booking and book the same number of desks for them in a single step. Flexopus automatically assigns one of the selected desks to each user, and every user receives their own booking in their personal booking overview.
To do so, navigate to Admin Area → Bookings → New Booking and add several users in the user selection. Multi-user bookings are available for desks as single bookings. Conflict detection is not supported for multi-user bookings.
This is particularly useful for team events or shared office days, as bookings for colleagues no longer have to be created one by one.
Custom Booking Periods
Booking periods can now be tailored to your organization's working hours!
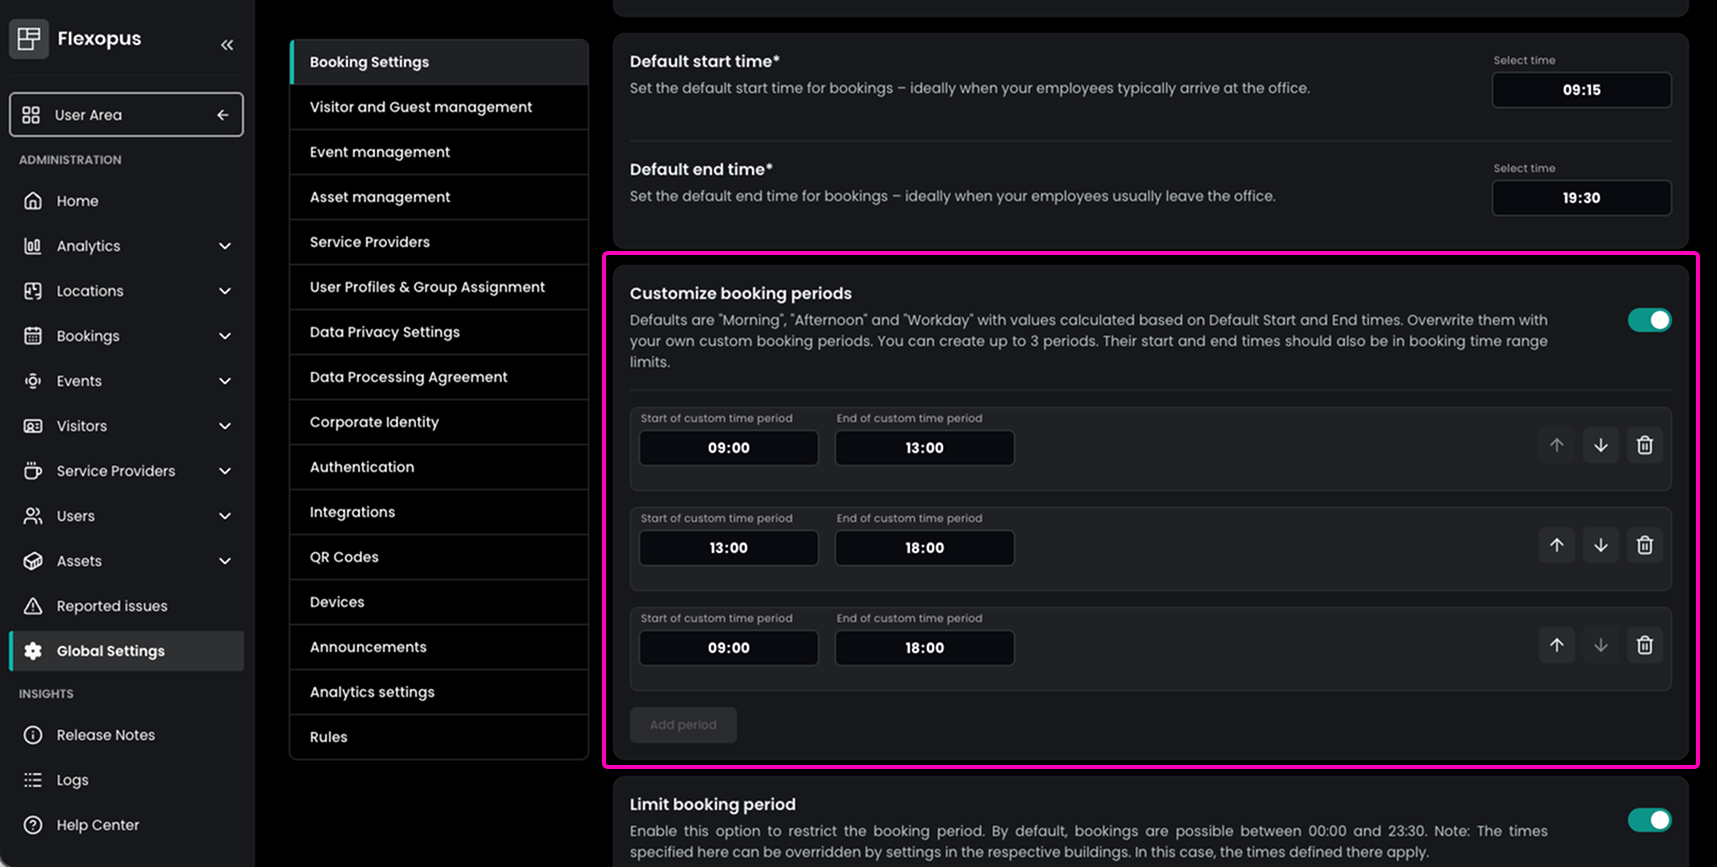
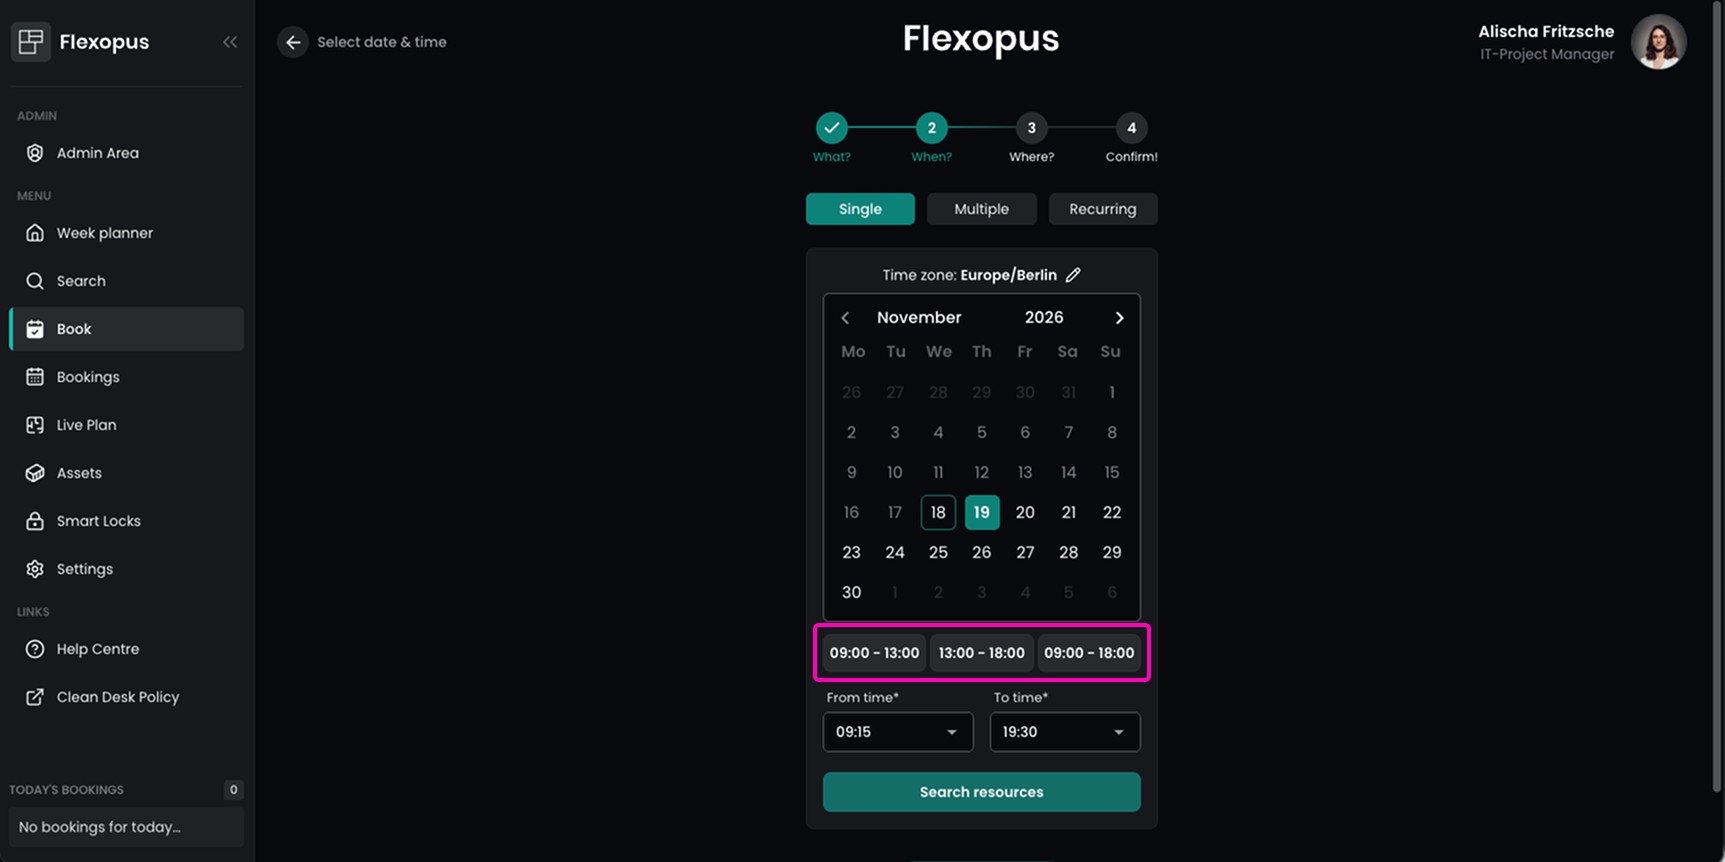
Instead of the fixed periods Morning, Afternoon and Workday, administrators can now define up to three custom booking periods with their own start and end times. They apply to desks and parking spots, but not to meeting rooms.
To set them up, navigate to Admin Area → Global Settings → Booking Settings, enable Customize booking periods and add your periods. Their times should be within the configured booking time range.
When booking a desk or parking spot, users can then select your custom periods directly. This is particularly useful for organizations working in shifts or with core working hours.
Automatic Group Assignment per SSO Provider (Beta)
Managing user groups is now even easier for organizations with several identity providers.
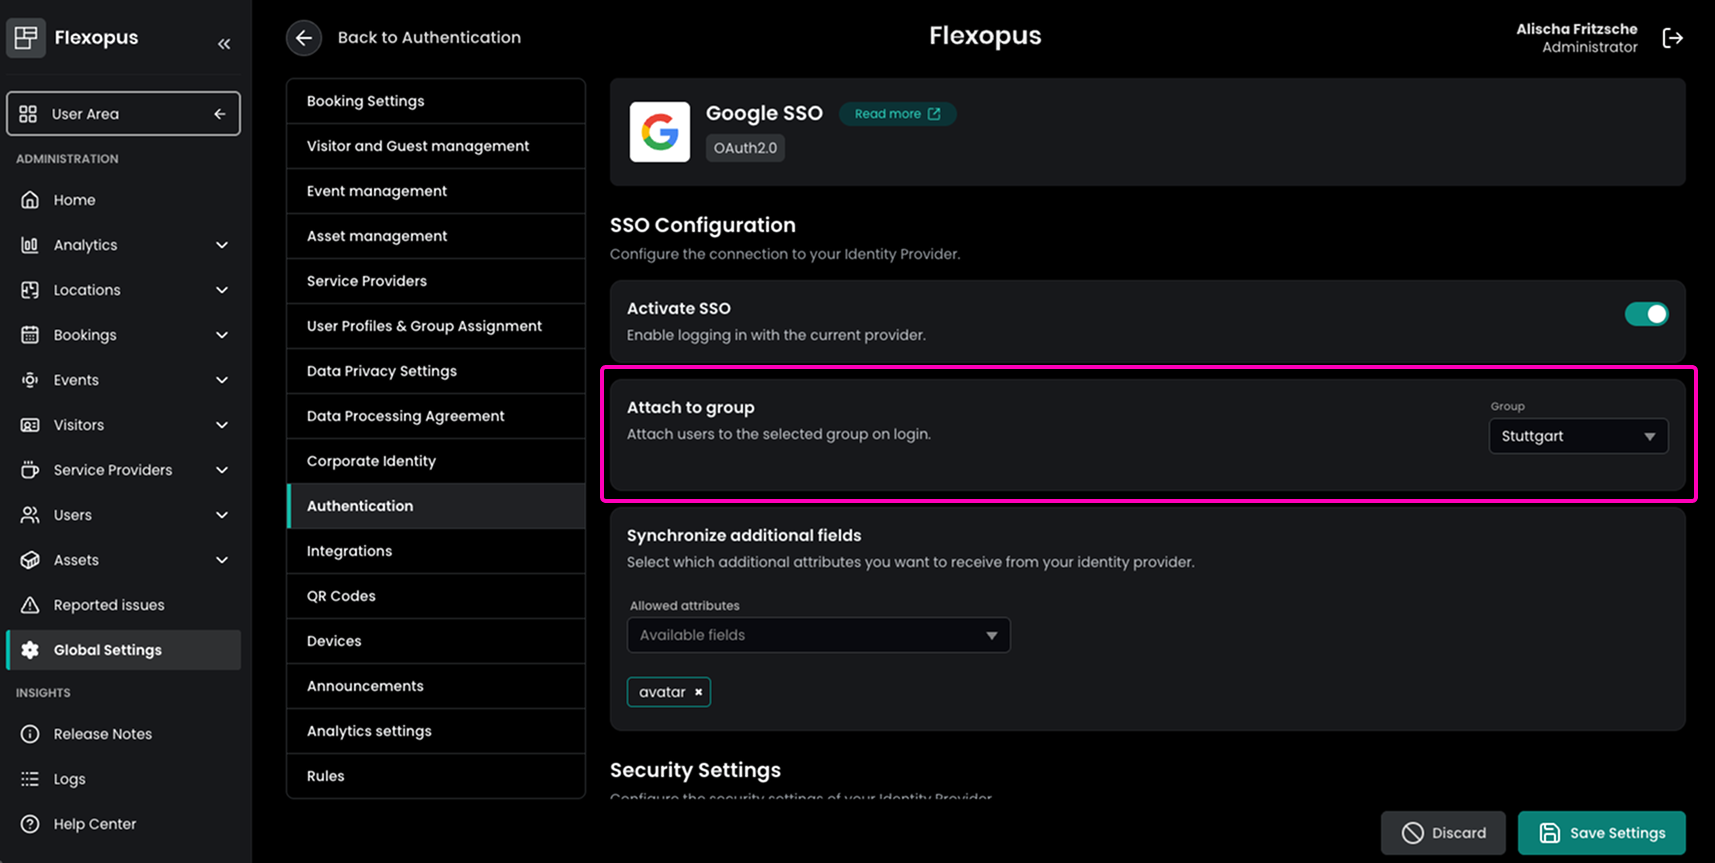
Administrators can now assign a group to each SSO provider. After a successful login via this provider, users are automatically added to the selected group. If the group is changed in the SSO settings, users who received the previous group through their login are removed from it.
To set this up, navigate to Admin Area → Global Settings → Authentication, open the desired SSO provider and select a group under Attach to group. More on SSO can be found in our article on the login configuration.
Control Booking and Check-in per Display
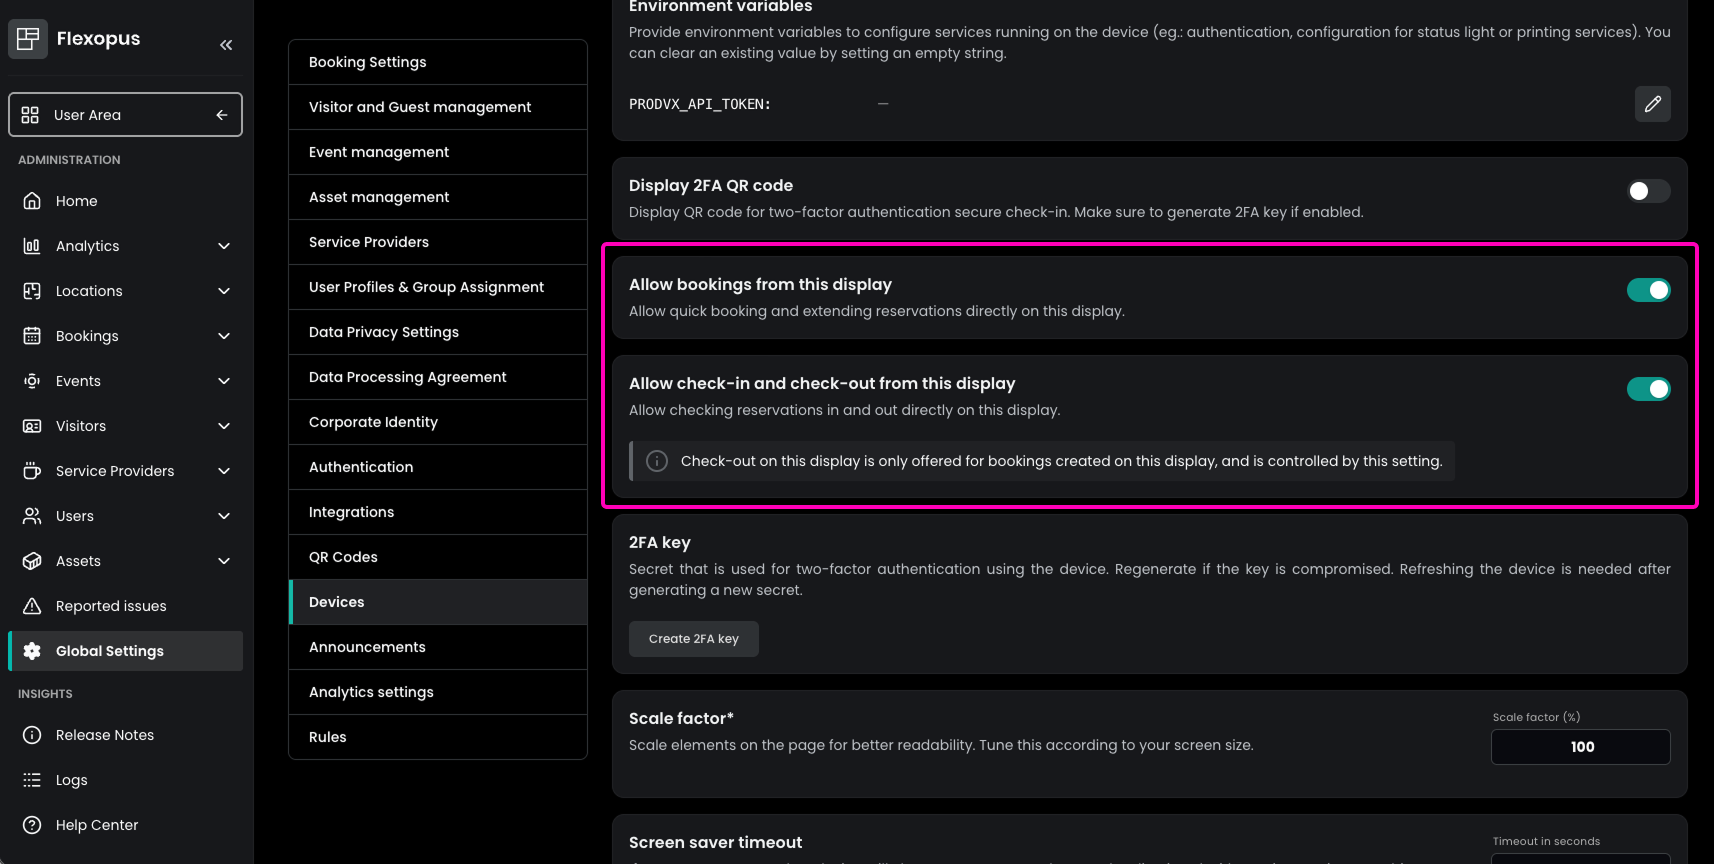
Administrators can now decide for each meeting room signage display whether bookings and check-ins can be made directly on the display.
Navigate to Admin Area → Global Settings → Devices, edit the desired display and use Allow bookings from this display and Allow check-in and check-out from this display.
If bookings are disabled on a display, only check-in remains available there, as displays can only check out bookings created on the display itself. This is particularly useful if a display should only show the room occupancy or be used for check-in.
Flexopus Visitor
Visitor Screening
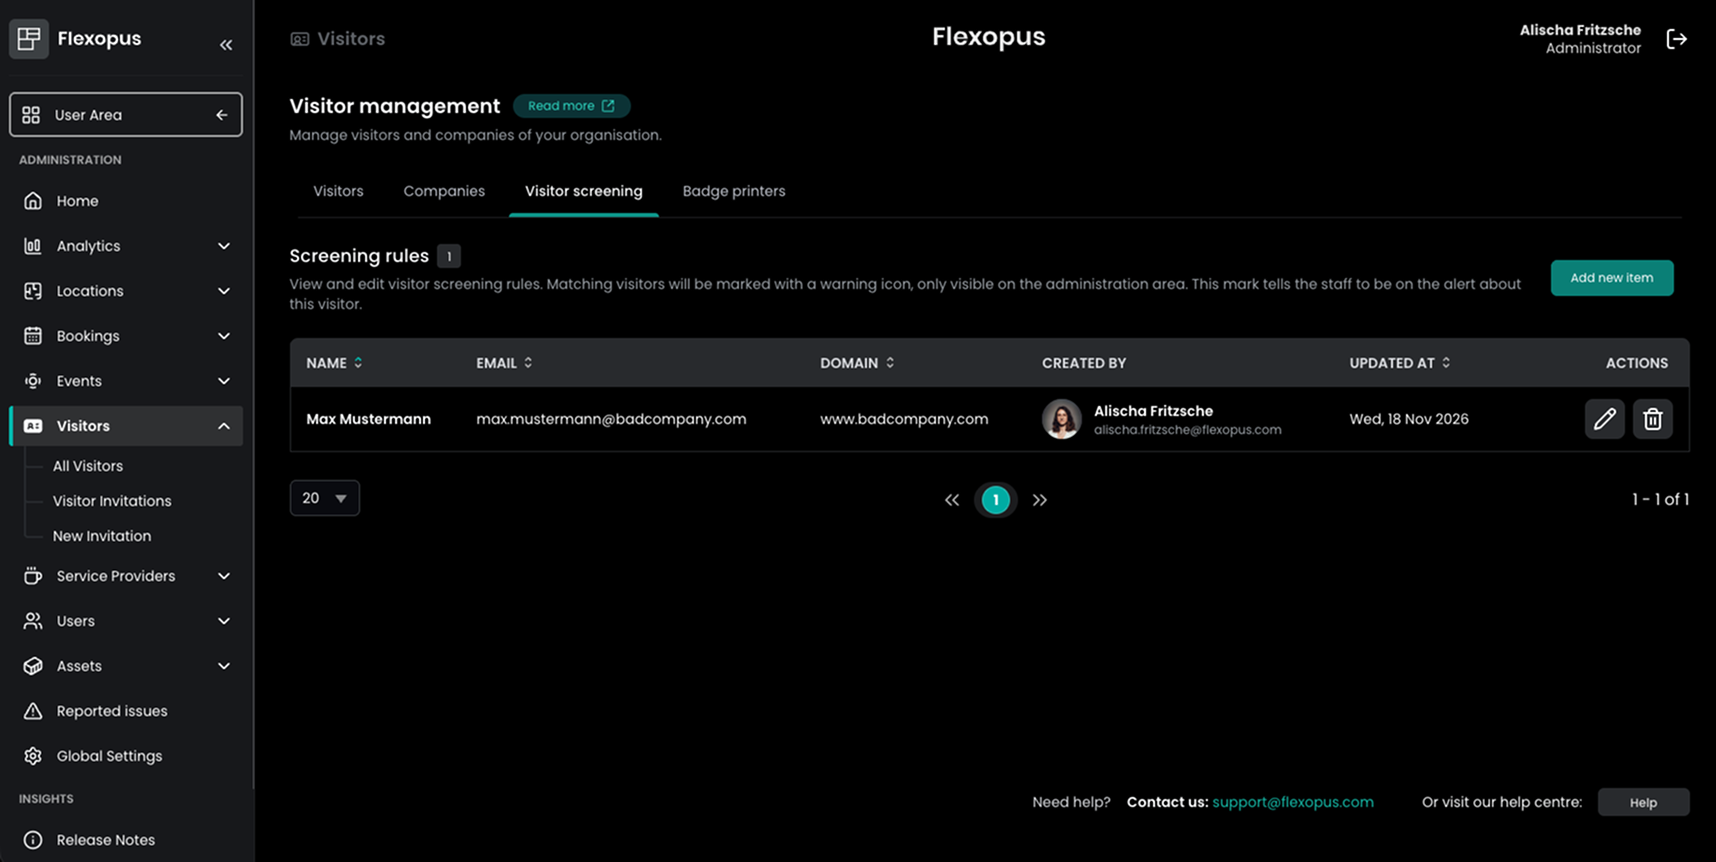
Keeping your reception secure is now easier with the new visitor screening.
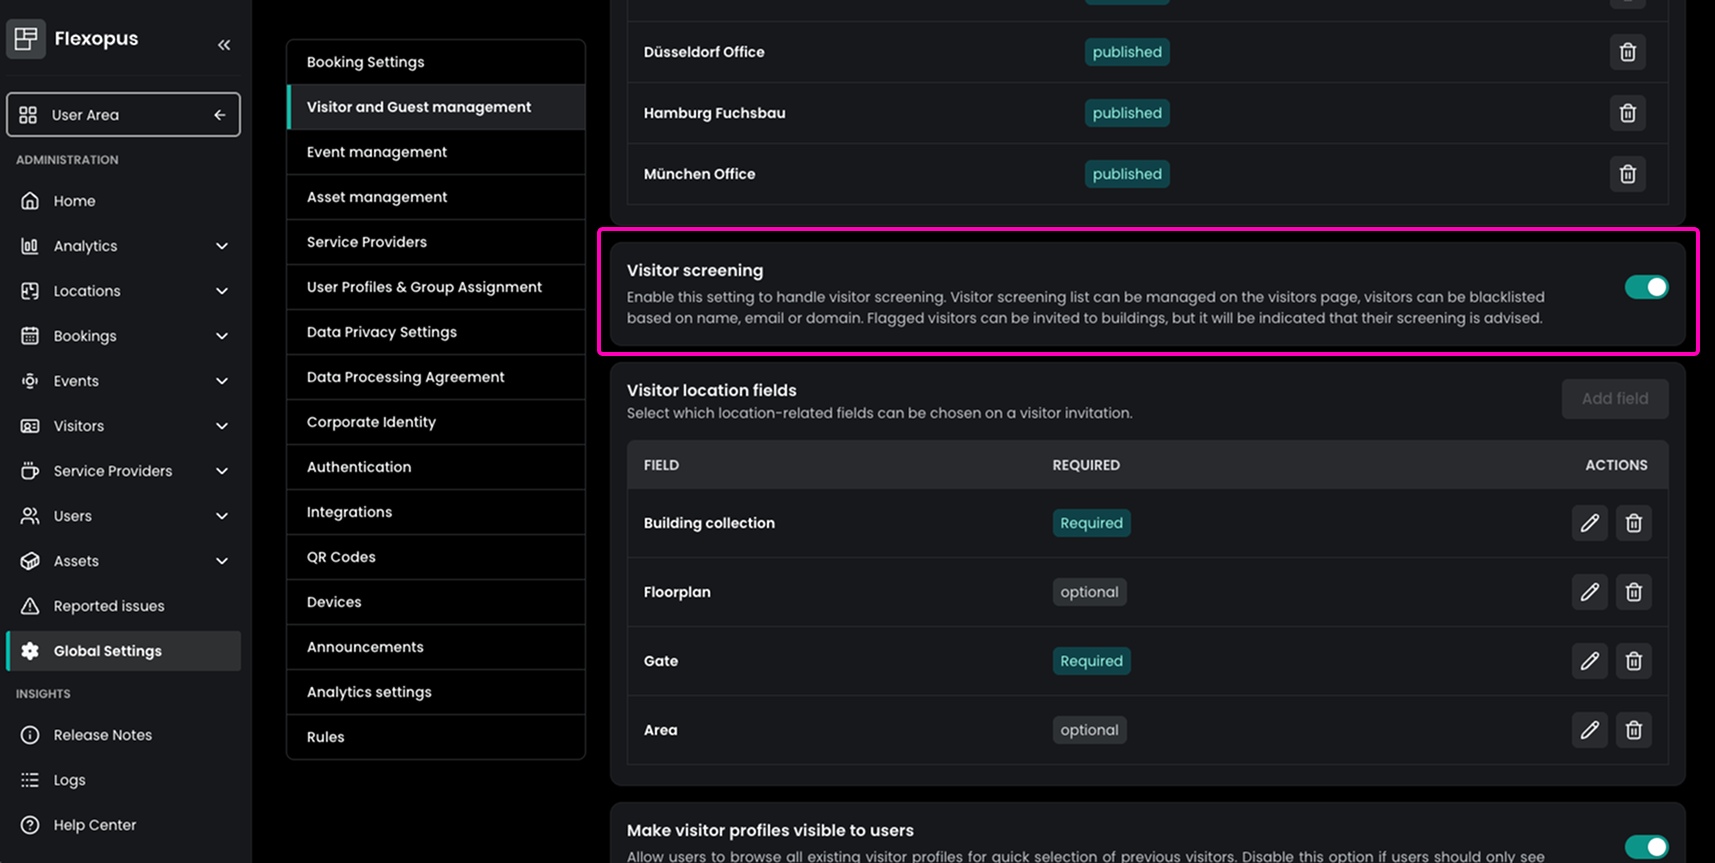
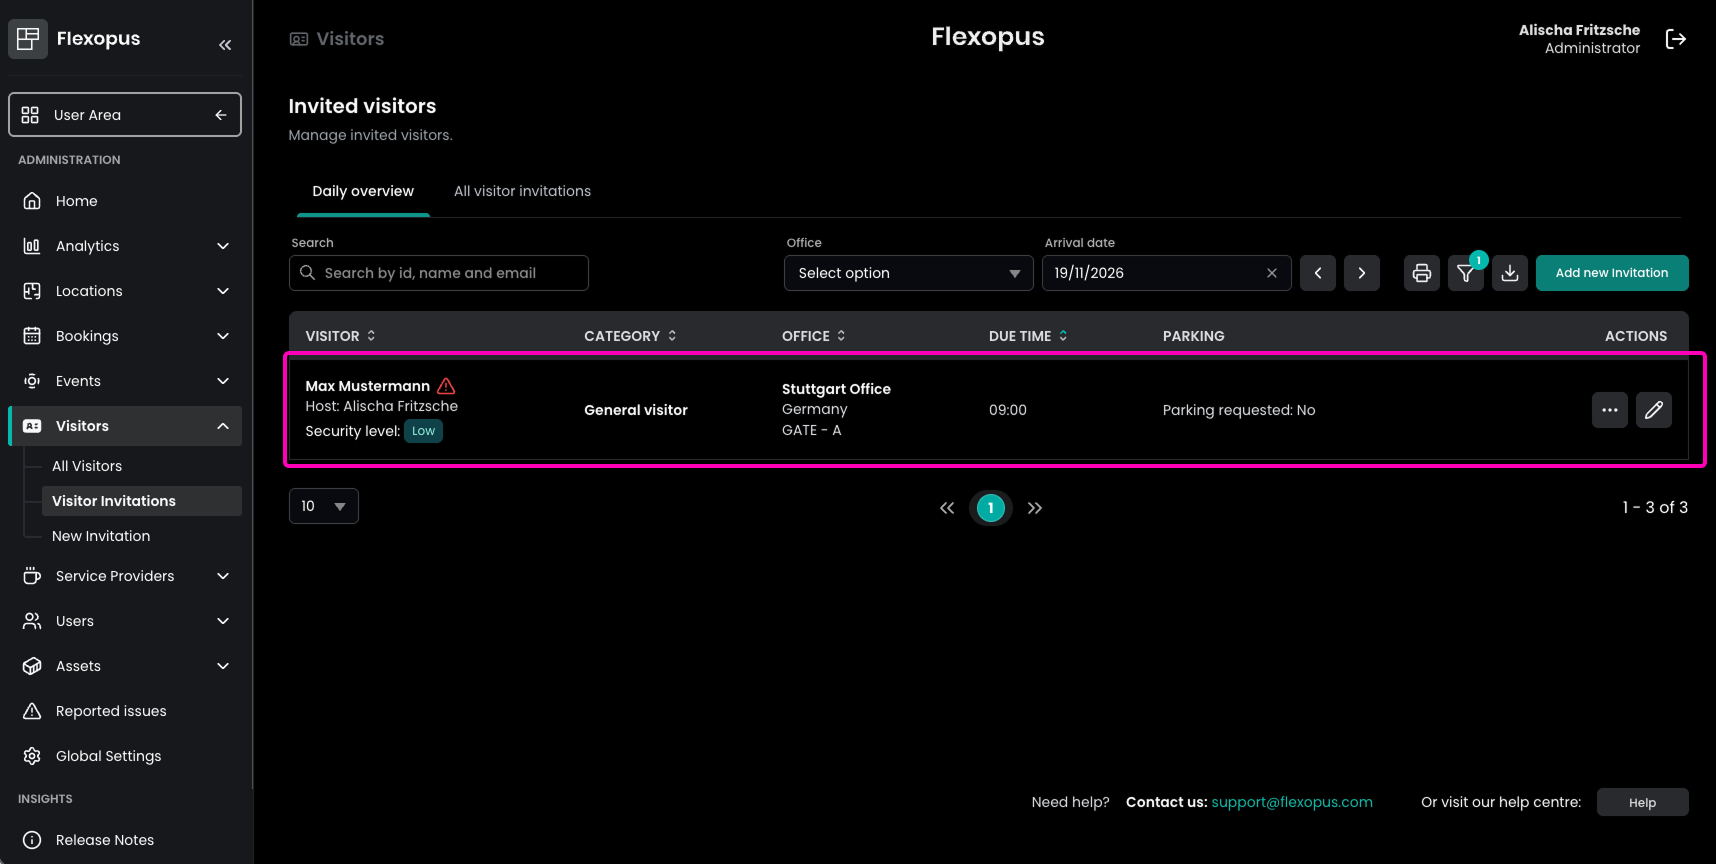
Administrators can now create screening rules based on a visitor's name, email address or domain, along with a reason. Matching visitors are marked with a warning icon that is only visible in the Admin Area. They can still be invited, but staff can see that screening is advised.
To activate the feature, navigate to Admin Area → Global Settings → Visitor and Guest Management → Visitor Management and enable Visitor screening. The rules can then be managed under Visitors → All Visitors → Visitor screening.
Verify and Merge Visitor Companies
Keeping your visitor companies tidy is now much easier!
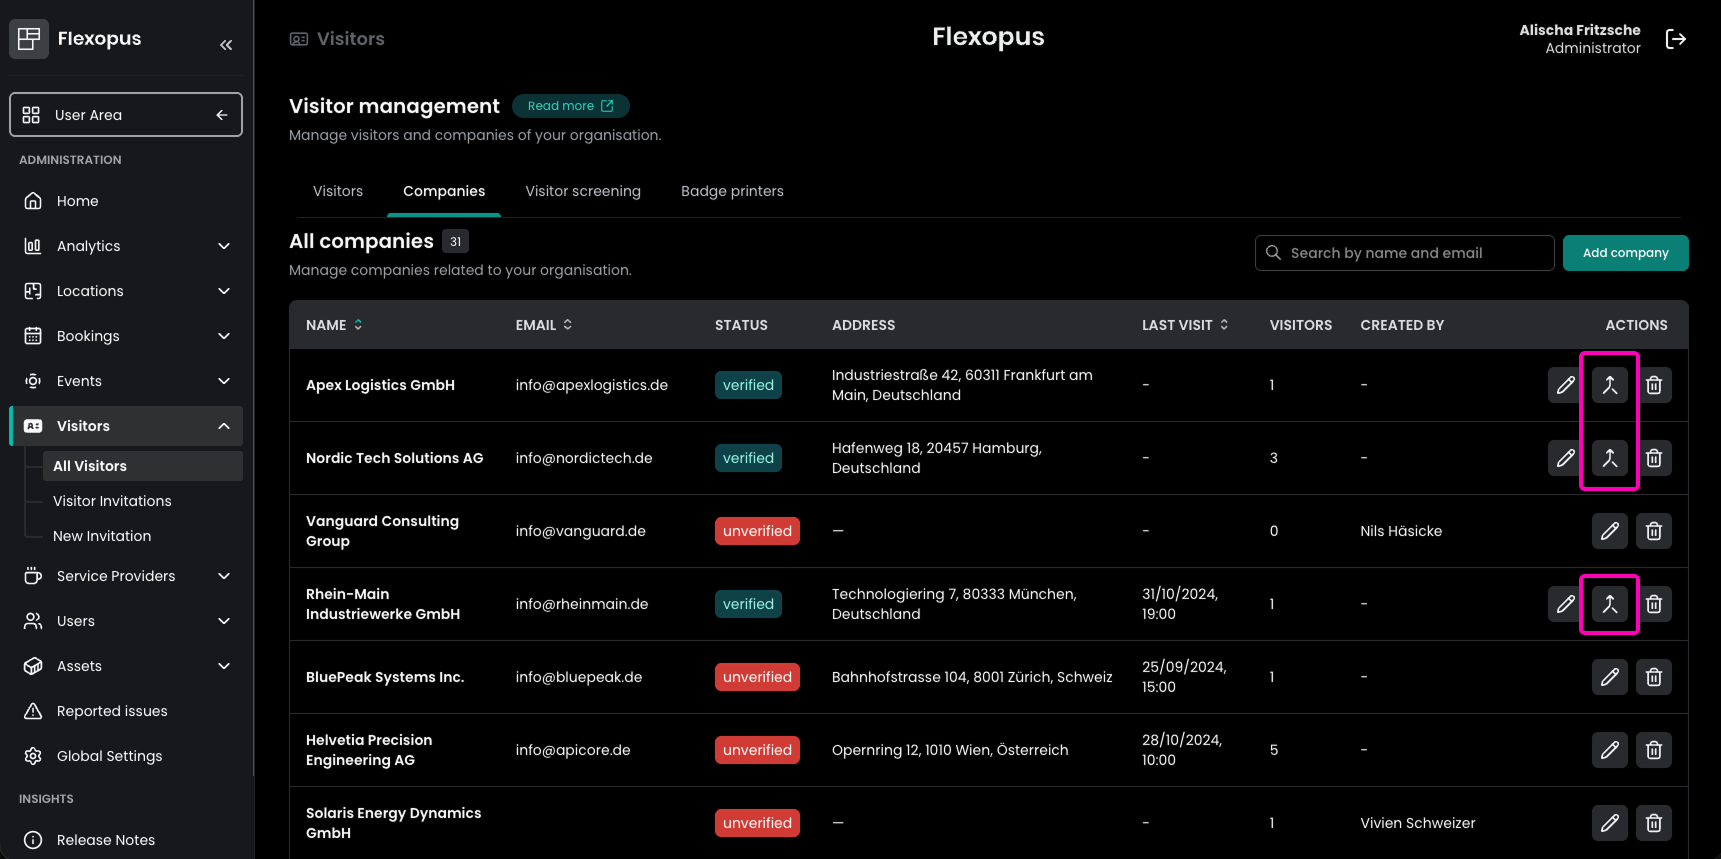
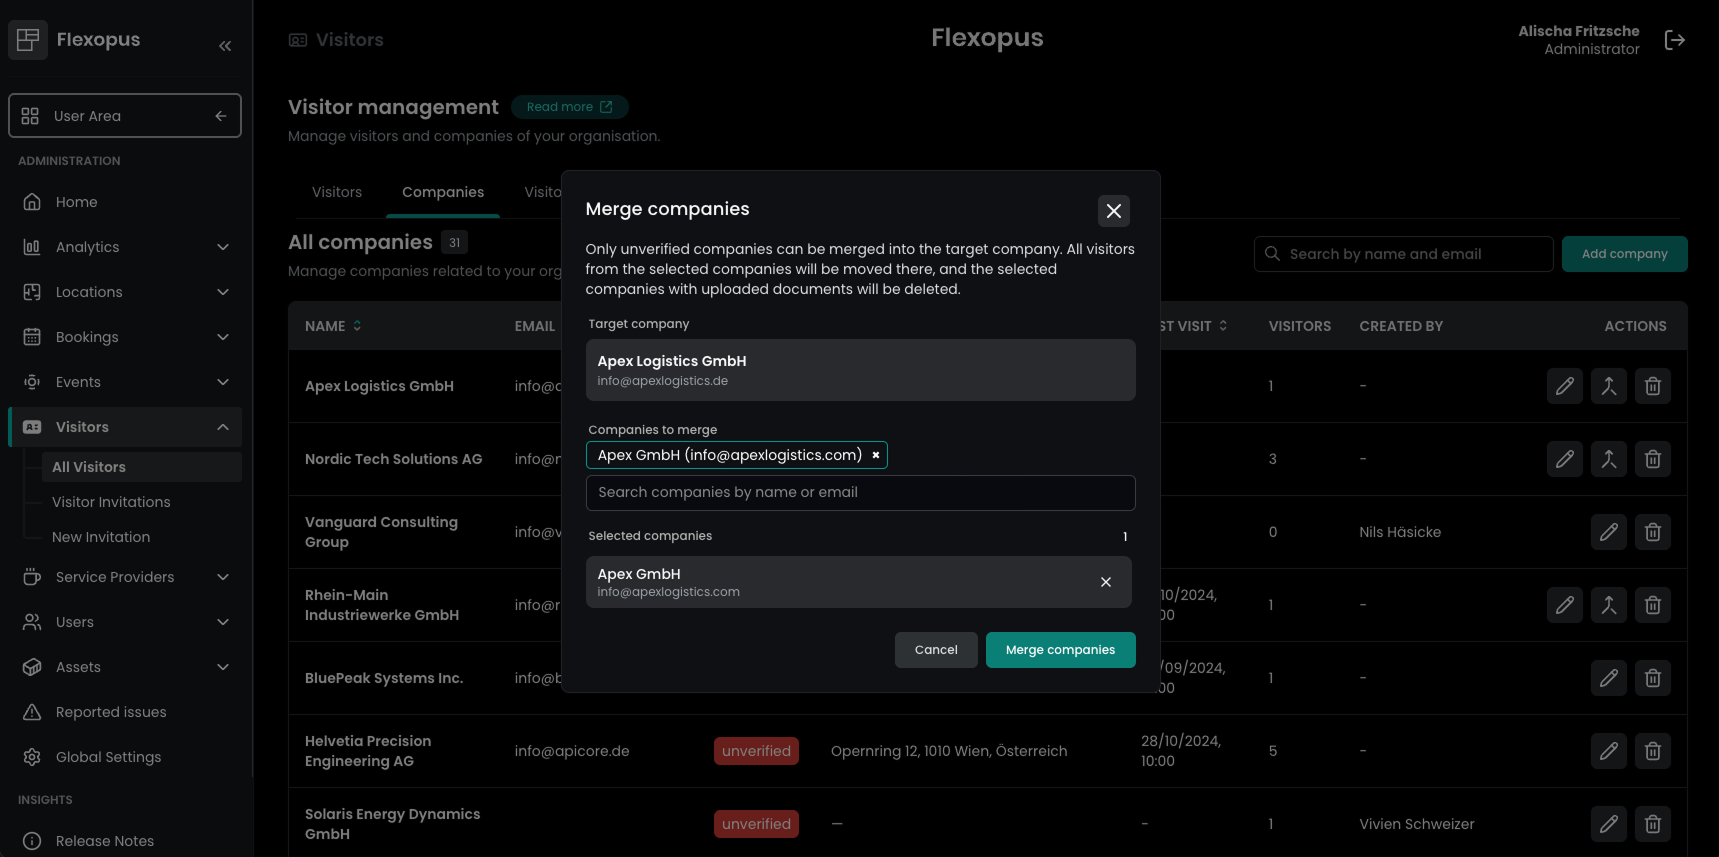
Administrators can now verify companies and merge duplicate company profiles into them. Only unverified companies can be merged into a verified company. All their visitors are moved to the verified company, and the merged companies are then deleted.
Navigate to Admin Area → Visitors → All Visitors → Companies, verify the company to be kept using Verify company and then start Merge companies in its row.
Flexopus Assets
Daily Summary of Asset Bookings
Preparing assets for the next day just got easier!
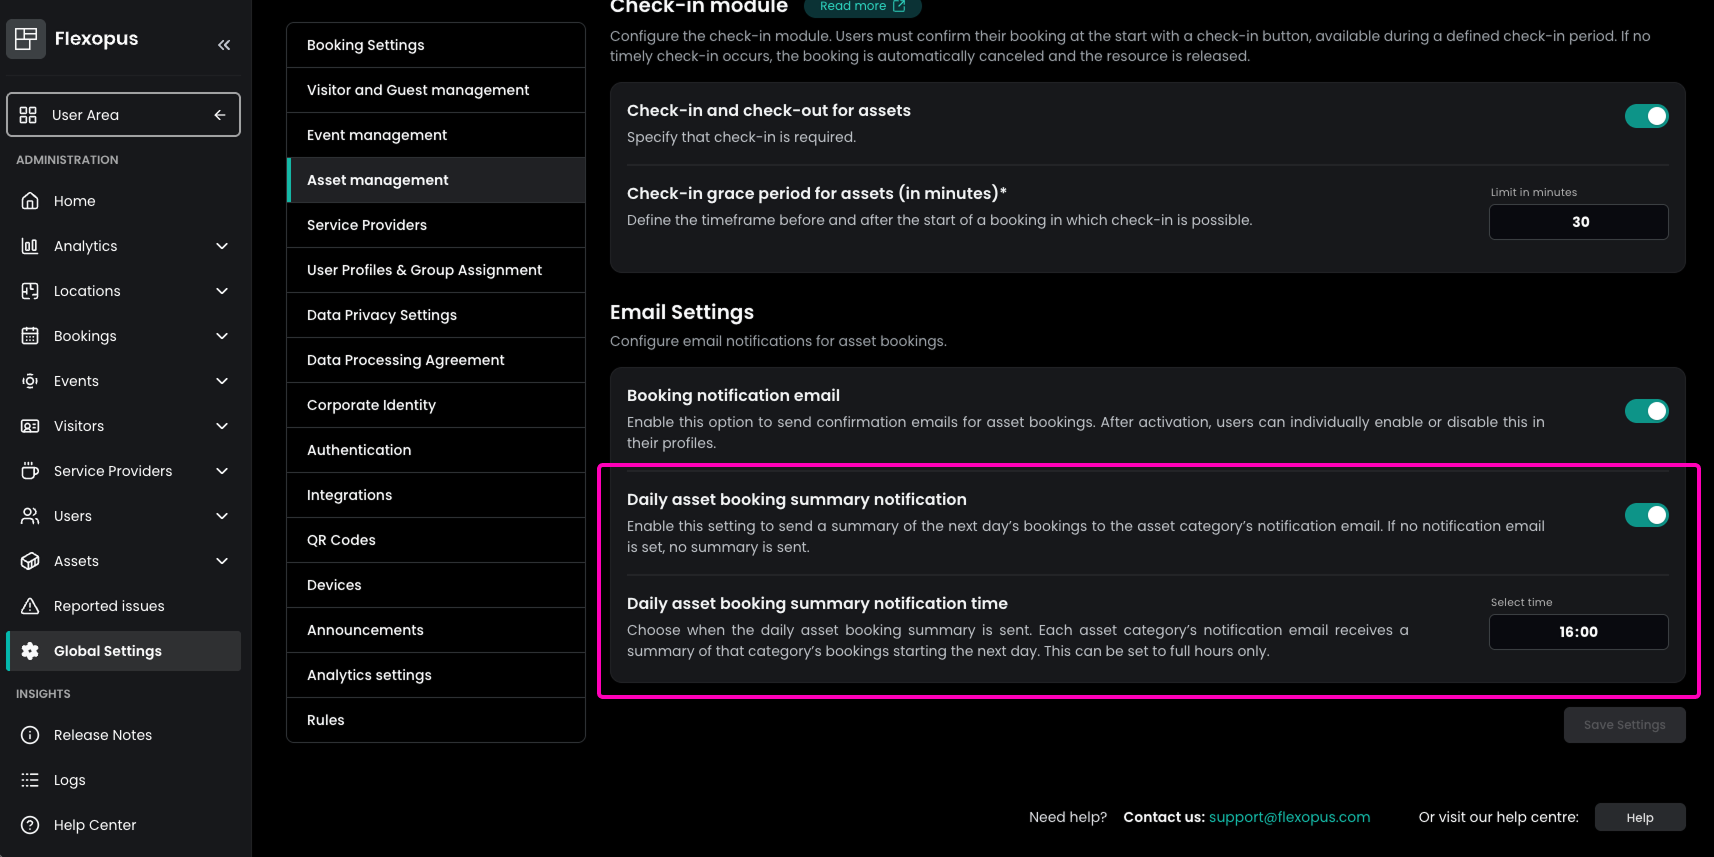
Flexopus can now send a daily email summary of the next day's asset bookings to the notification email address of each asset category. It lists every booking with its start and end time and the person who made it. Categories without a notification email address do not receive a summary.
To enable it, navigate to Admin Area → Global Settings → Asset Management, enable Daily asset booking summary notification and choose the time under Daily asset booking summary notification time.
This is particularly useful for teams that prepare or hand out assets such as laptops or vehicles in advance.