[DEPRECATED] KIOSK: Android Management API
![[DEPRECATED] KIOSK: Android Management API](/en/content/images/size/w1600/2024/11/Android-Management-API.png)
We introduced in 11/2025 a simplified Android Management API configuration. You no longer need a Collab Notebook.
Overview
The digital signage displays are mostly Android Displays. To install an application on an Android device in a kiosk mode, you have multiple solutions:
- Use a third party application
Install an application which puts the application into a kiosk mode. Feel free to explore other, third-party solutions to put our app in kiosk mode (e.g., Fully Single App Kiosk). Note that these applications may cost extra. - Use the OS via the Android Management API
Put the device itself with the OS into a kiosk mode. This is the more recommended version by Flexopus. This is a free solution provided by Google.
In this article we will cover how to use Android Management API to put the display into a managed kiosk mode, however both solutions fulfill the requirements for an installation:
- Limited access
The display is set into a kiosk mode and the employees can not access anything else than the Flexopus application. - Remote management
The displays can be managed centrally through a device management system. - Auto update
New application versions are updated automatically.
To fulfill the above-mentioned requirement without involving a “paid” third-party service, we recommend using the Android Management API provided by Google.
Configuration manual
You have 6 simple steps to follow:
- Prepare a corporate (@yourcompany.com) Google account with access to the Google Cloud Console, or register a private (@gmail) Google account
- Copy the Flexopus template
- Create a Project in the Google Cloud Console
- Authorize Colab Notebook
- Create an enterprise on the Google Cloud platform
- Create a device policy
- Generate a connection code for your display
- Connect display
For a better understanding of this installation manual, step 8 will be described first:
STEP 8 - Connect display
Follow the steps:
- Power up the display with the provided adapter or through a PoE (Power over Ethernet) connection.
- The display will start and ask you for some configuration steps like selecting the language and connecting to the Wi-Fi network (if not PoE). When the setup process offers to copy data from another device, click
Don't copy. - Follow the steps until it asks for a Google Account. DO NOT ENTER an email address!
- Instead of typing in your email address, enter:
afw#setup
This will initiate an enterprise device setup process. - Agree with the terms and conditions. You enable the enterprise to manage the device externally (by you) through the registered Android Management API.
- Enter the generated
tokenfrom the Google API Console. - After entering the
token, the display will automatically install Flexopus and will be set into kiosk mode. This may take a few minutes. - Once it's done you can continue with the pairing of the display.
As you can see, for the installation, you just need to enter a code on the display. Now let's see how to get the code:
STEP 1 - Prepare your account
Make sure the account you are using has access to the Google Cloud Console, if not, ask your administrator for access rights. The used account needs to be able to create a project. Private (@gmail.com) accounts should have all these rights.
STEP 2 - Copy the Flexopus template
One way to access Google's Android Management API is through the Python code package provided by Google. This, however, requires some technical expertise, thus we have created a notebook. In the following steps, we will walk you through how you can use this notebook template to set up and manage your devices. You will need to create a Google Console Project:
Open the Flexopus Device Management template


Click on Copy to Drive in the left top corner. This will create a local version of the project in your Google Drive. This will be your project, all changes you make will be changed in your Google Drive. We recommend changing the name of the project in the left top corner from Copy of Flexopus Device Management template.ipynb to your preference. This will be your Google Colab Notebook.
STEP 3 - Create a project in the Google Cloud Console
Next, you need to create a project in the Google Cloud Console. Visit this page

Click CREATE PROJECT and enter a name like: Flexopus
In the case of a private account, you don't need to select an organization. Click Create
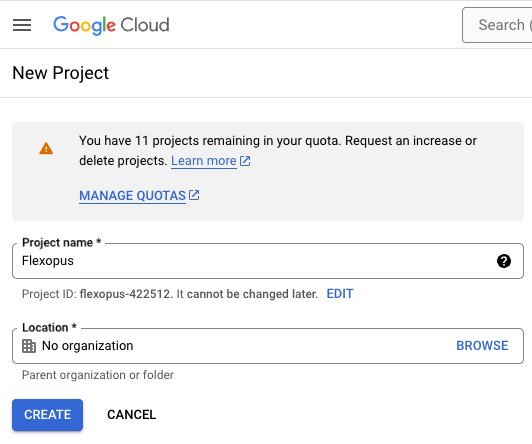
Take note of the project ID.
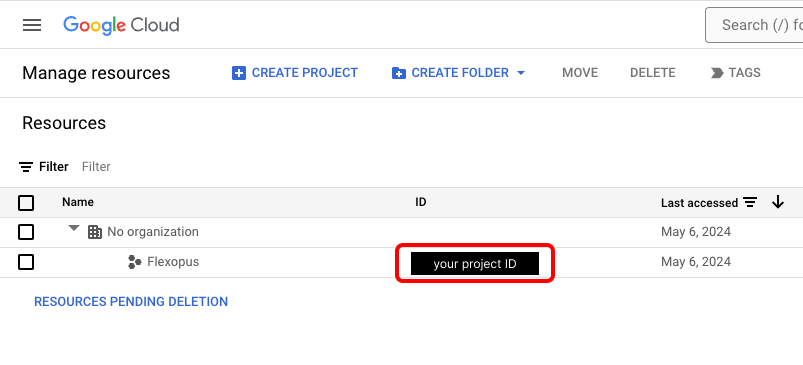
After the creation, you may need to refresh the page.
STEP 4 - Authorize Colab Notebook
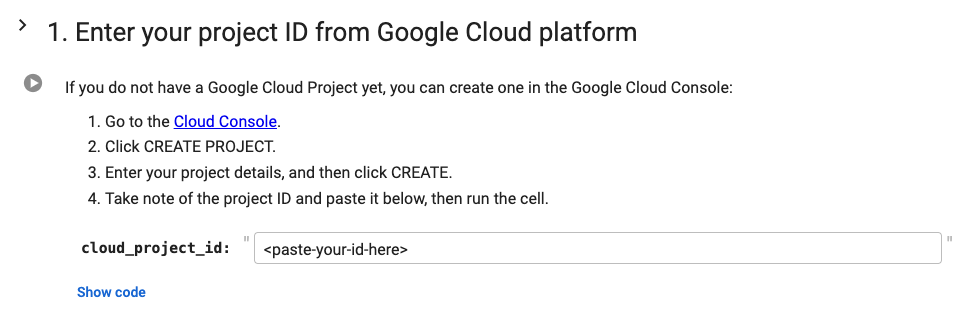
Go back to your notebook and paste the project ID from your Google Cloud Console into the cell below, then run the code. Click Run cell (Play button on the left) to save the variable to the runtime.
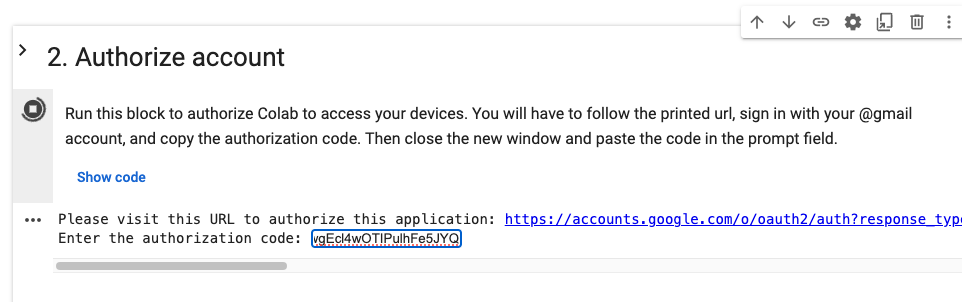
Run the second code part to authorize Google Colab to manage the devices. It will ask you to click the blue printed link and sign in with your Google account via OAuth2. After the login, you will see an authorization code. Copy the authorization code provided by the other page, and paste it into the input field in the notebook. Hit Enter, and you will see a message Authentication succeeded.
STEP 5 - Create an enterprise on the Google Cloud platform
You will only need to perform this step once. Later, when you come back to your copy of the notebook, just run the cell 6. Enter the enterprise name with your enterprise name.
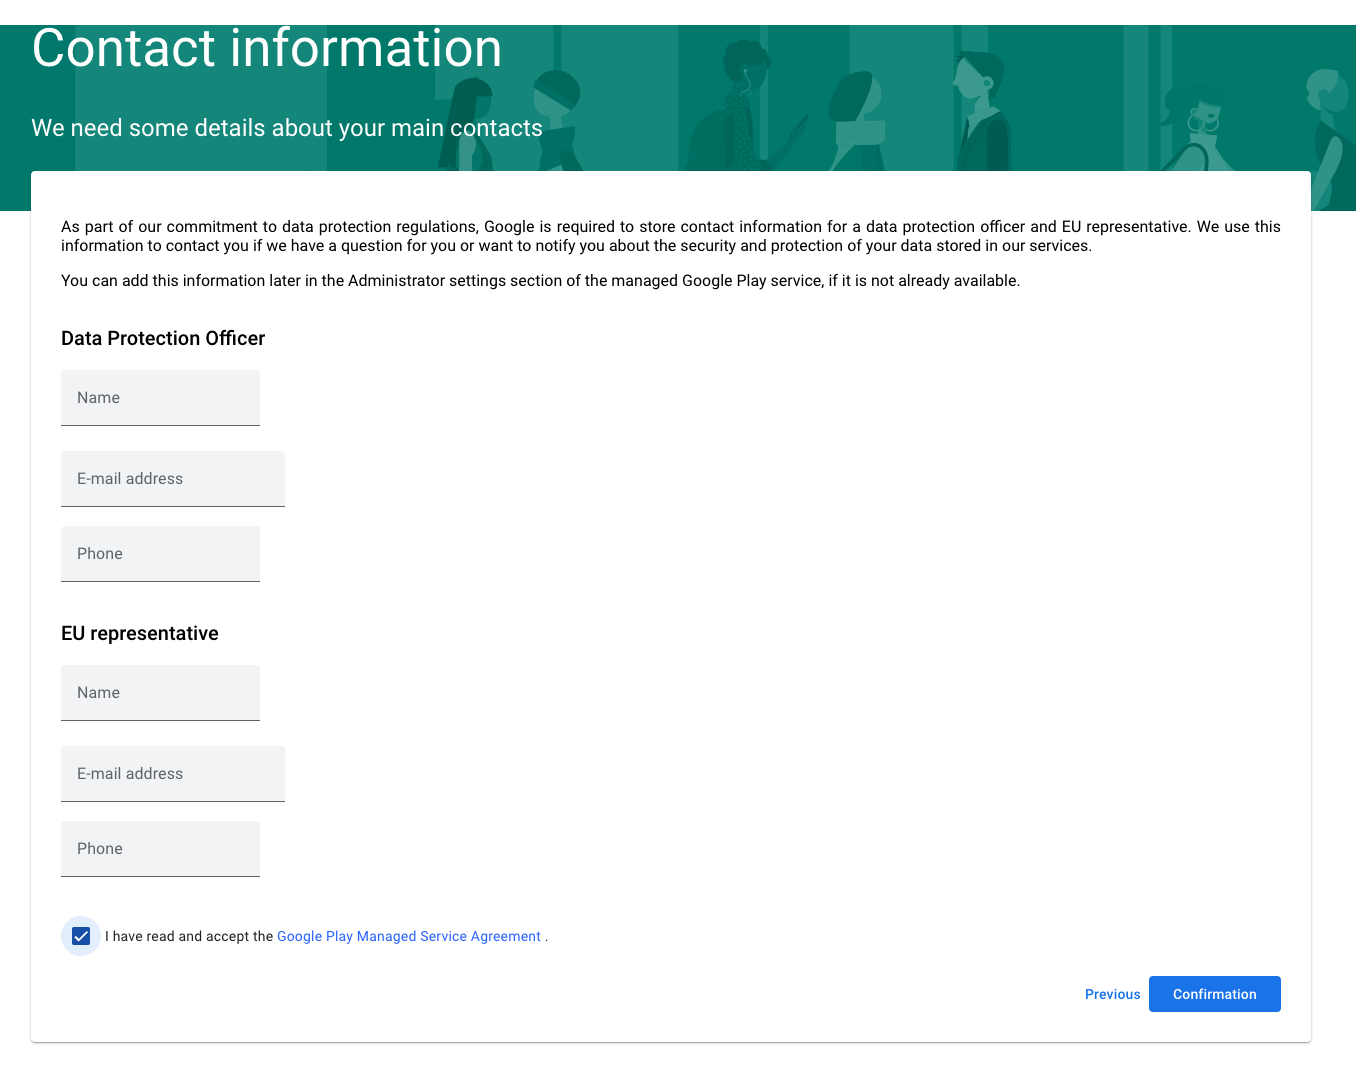
To create your enterprise Run the next cell to create an enterprise in your Cloud project. You will be taken to a page where you can create the enterprise.
Click on First steps and enter the organization name.
(optional) Enter the data protection officer, or just accept the terms and conditions and skip it without filling it out. At the end of the day Google will not have access to personal data through the Colab Notebook.
Finish the setup
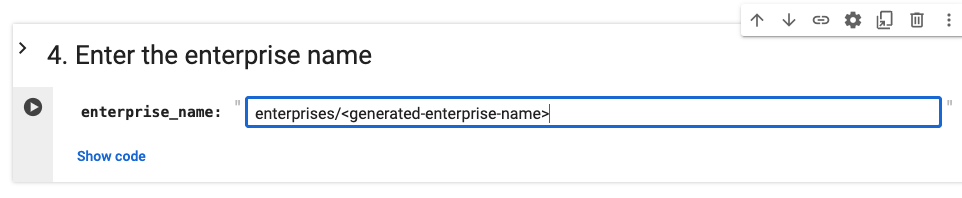
After finishing the configuration, you will get a code. Paste it back into the notebook.
The notebook will print your enterprise name. Enter this name in the next cell's input field: enterprises/<generated-enterprise-name>
STEP 6 - Create a device policy
In the Management API policies are configuration files that describe how a connected device should behave. This includes:
- update settings of the devices
- applications to be installed on the devices
- kiosk mode setting of the devices
With cells 5.1 and 5.2 you can list or delete your existing policies. But first, go to cell 6 to create your first policy.

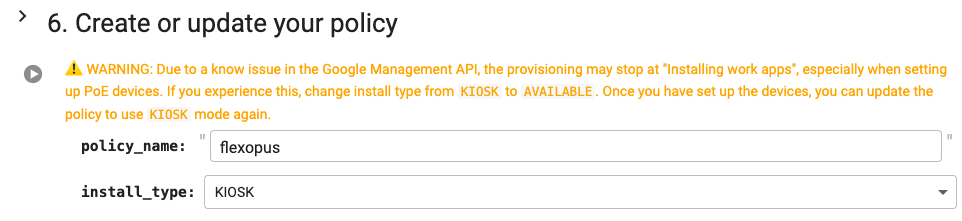
POLICY NAME
The policy_name uniquely identifies the policy, so every time you want to make changes to it, you will have to provide the exact name. Here we only enter the name flexopus, but it will be prefixed to enterprises/<generated-enterprise-name>/policies/flexopus.
INSTALL TYPE
The install_type defines how the Flexopus Device Connect application should behave. With the installation type KIOSK, the app is starting in kiosk mode and you can not exit this mode.
With AVAILABLE installation type, the app is not being installed automatically, just put onto the list of enabled apps. When you have to do some action on the device that is blocked in kiosk mode, you can change the app in the policy to AVAILABLE to exit KIOSK mode.
Run this section with the play button.
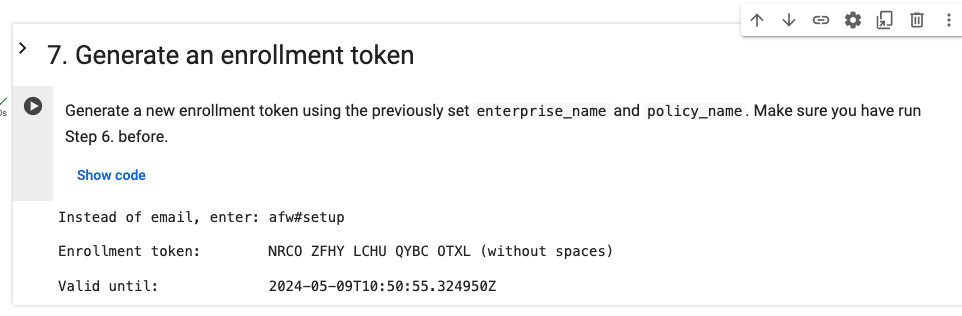
STEP 7 - Generate a connection code for your display
Once you have defined your policy, you generate an enrollment token. The token is a 16-character code, all capital alphabetic. Enter this code on your device (without the separating spaces). You will have to generate a new token for every device you want to enroll.
Run this section with theplay button.
Now you can go to STEP 8, which is described at the beginning of this article, to connect the display.
Frequently asked questions
Here you can find some common use case and question raised for the display management:
How to turn on / off the kiosk mode?
Once you have set up the device to be managed by the Management API, most of the features of the device are controlled by the policy it has been enrolled. Thus, to exit from kiosk mode, you will have to change the app installation type of the policy itself. Change it from KIOSK to AVAILABLE.
How to switch from the PoE internet configuration to the WiFi internet configuration?
Network configuration is one of the first steps of the provisioning and is not accessible when in kiosk mode. We recommend provisioning your devices in the final network environment to avoid issues with configuration. Still, there might be cases when it's necessary to make changes to the network settings. For example:
- The WiFi configuration changed (SSID, password, or security settings)
- You have configured the devices on PoE, but you would like to use WiFi
To access WiFi configuration, you have two options:
OPTION A:
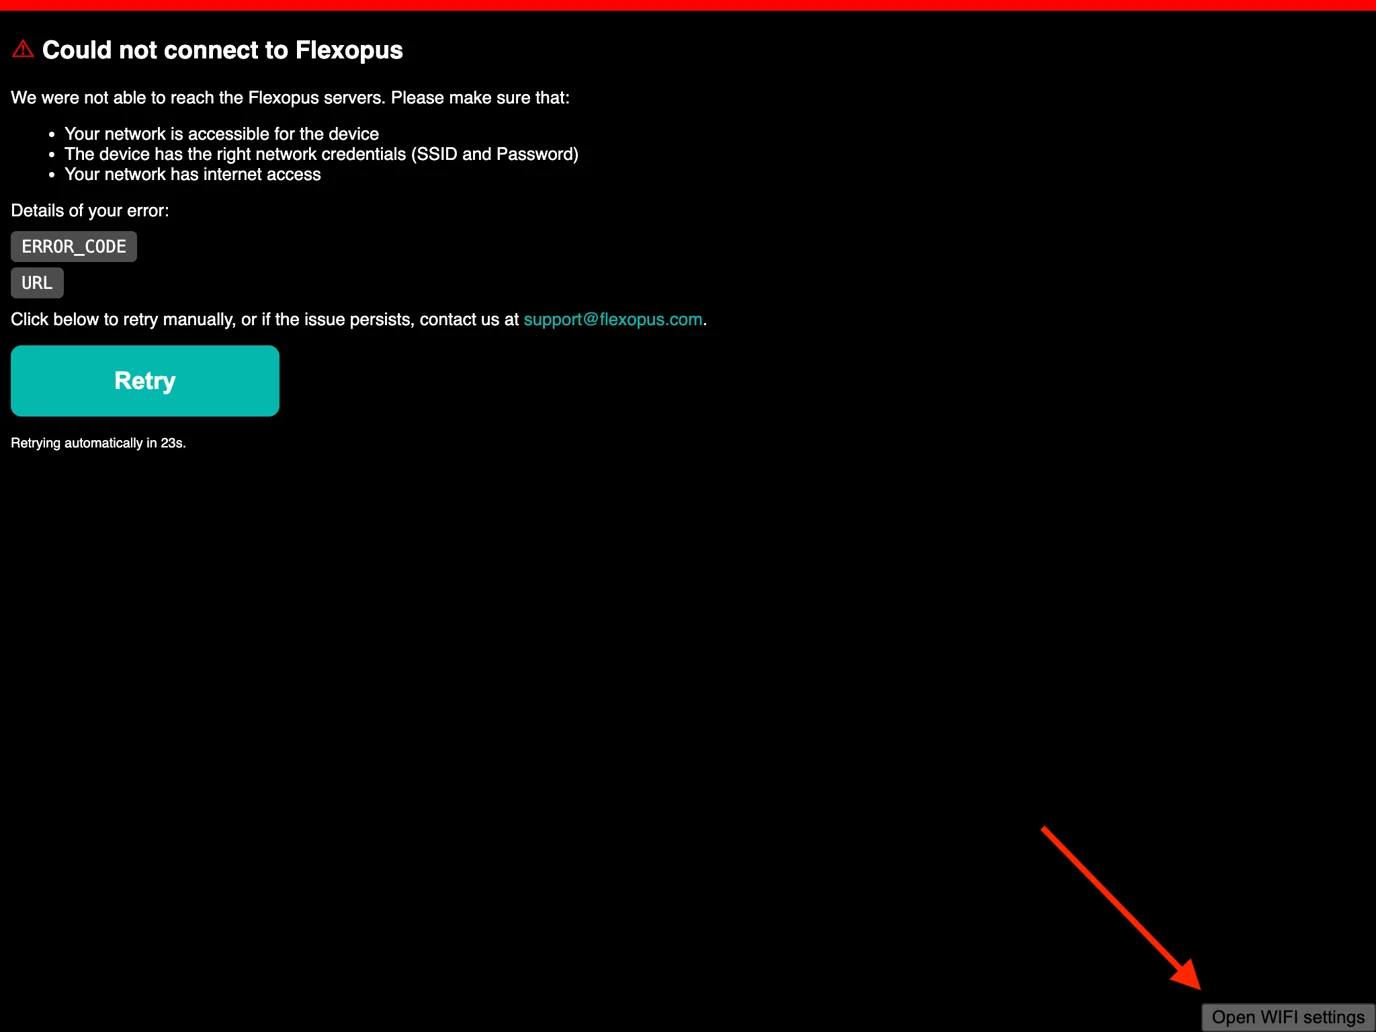
Access WiFi settings from the error page: when your device has a connection issue, an error page is displayed. In the bottom right corner of this page, we added a hidden button that opens the WiFi settings.
OPTION B:
Exiting kiosk mode to access the settings app.
- Make sure your device has internet access (plug in PoE, or reset the initial WiFi settings that the device knows)
- Turn off kiosk mode by modifying the device policy. Make sure the device syncs the policy and exits kiosk mode.
- Open Wifi settings on the device, and connect to the desired network. If you are using PoE, you may need to unplug and change to a regular power source to be able to connect to a WiFi network.
How to do a factory reset?
OPTION A
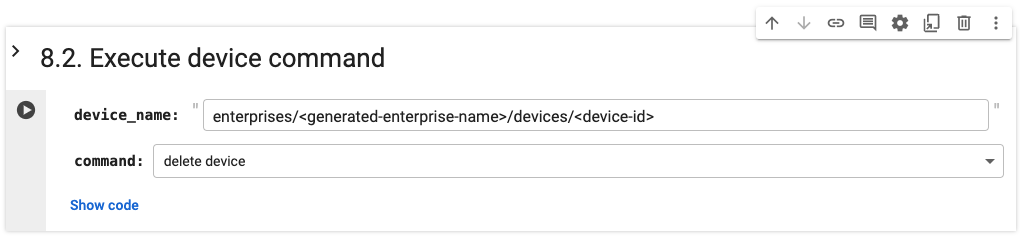
Delete the device from the Management API. If you have already provisioned the device, then just run cell 8.1 List devices to get the device's name, then run 8.2 Execute device command with the correct device name and delete command. The device will recognize that you have removed it from the enterprise and will perform a factory reset automatically.
OPTION B
If you can access the settings application on the device, you can just perform a factory reset in Settings > System > Reset options > Erase all data.