KIOSK: ProMGR Configuration

Overview
flexopus@konferenztraum.de.At the ProDVX warehouse, the displays are shipped on a first-in, first-out basis and are NOT checked for identical firmware/app versions. Depending on how long the displays have been in storage, they may have older firmware versions or even different versions if the shipment comes from different batches. The prices offered by Konferenztraum / Flexopus B2B Shop always include a pre-check and firmware update installation if required. Other distributors do not include this service by default, which may make the initial configuration more complicated due to the outdated preinstalled software packages. Please order the displays at Konferenztraum GmbH.
The ProDVX displays can be configured using the ProMGR application provided by the display manufacturer.
For the ProDVX displays, we recommend using the ProMGR installation. To install the Flexopus Device Connect Application in a kiosk mode on the displays. You don't need the ProMGR Cloud subscription and need no access to the ProMGR portal.
Which display is compatible?
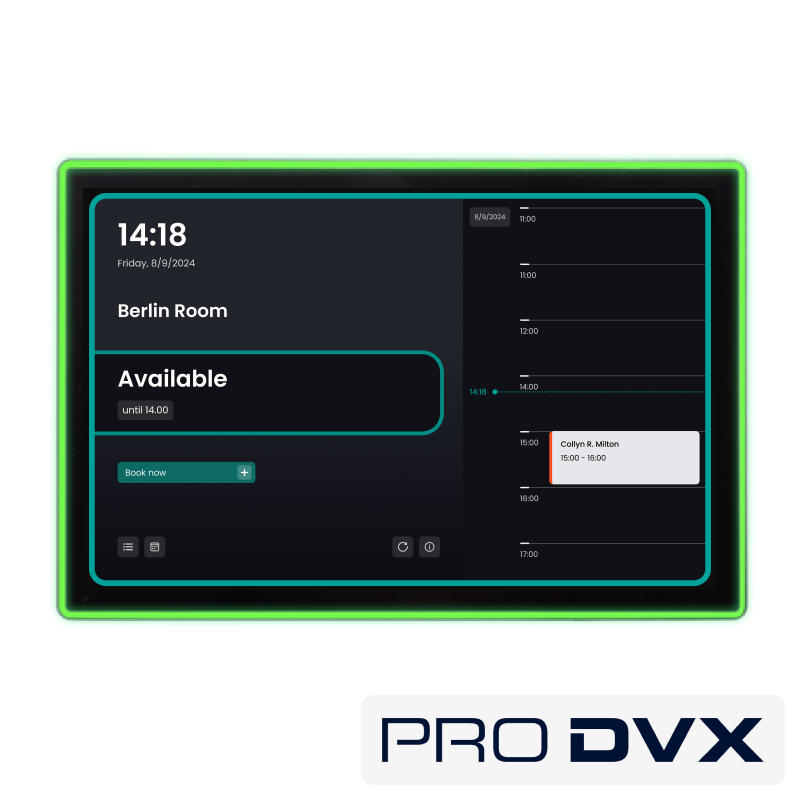
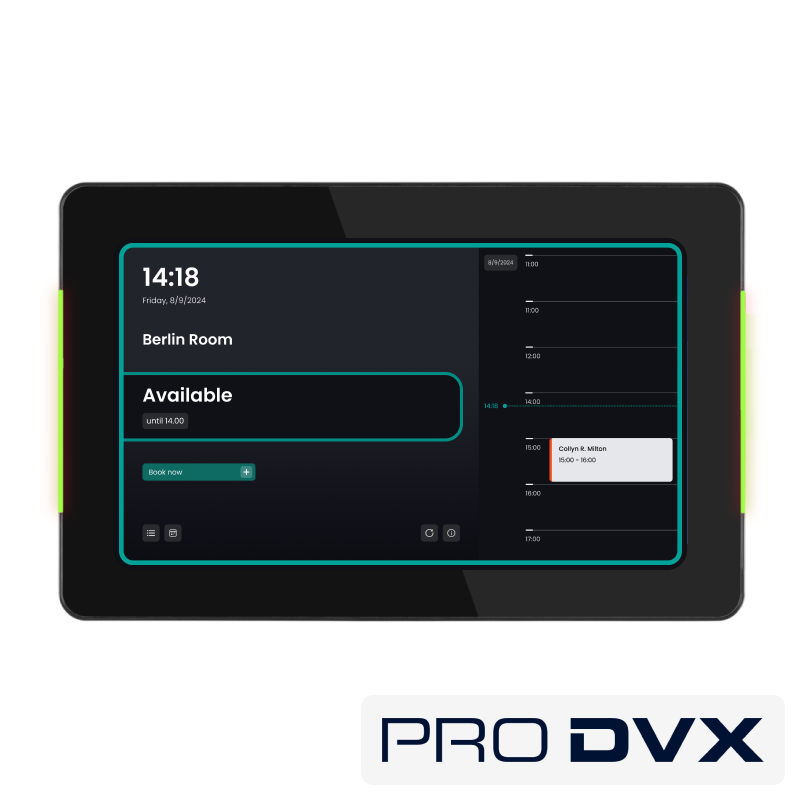
You can use the proMGR installation in theory with a lot of ProDVX displays, however we tested it only with the following supported products:
Why do I require ProMGR KIOSK?
The ProMGR solves the following problems for you:
- Set the display into a KIOSK mode
- Exit the KIOSK mode with a PIN code.
- Install the latest Flexopus Device Connect APK
- Automatically update the Flexopus Device Connect APK
- Set display timeouts for energy saving.
How do I get the ProMGR KIOSK licences?
Order the displays from our official display distributor:
KonferenzTraum GmbH
flexopus@konferenztraum.de
For each display you order, you get a ProMGR KIOSK license for free. The number of licenses will be assigned to a Flexopus mass license key. Konferenztraum will manage the license key for you.
Using the license key, you will get a 6-digit code to activate the licenses on the display after you order the displays.
Instruction manual
Follow the steps to configure your ProDVX display with ProMGR.
STEP 0/A- Buy the displays from an official Flexopus distributor.
Order the ProMGR displays through the Flexopus B2B Shop!
Ordering the displays from the official Flexopus B2S Shop will ensure a smooth configuration process:
- You will get the activation keys for ProMGR automatically.
- You will get the right OS version for the displays.
- You will get the right ProMGR version.
Our official distributor makes sure that you get the right product with the right firmware. You can get a custom quote as well:
Konferenztraum GmbH
oliver.klos@konferenztraum.de
Other ProDVX distributors may have the same displays as well, but they are not familiar with our setup process and often recommend buying another display or deliver the products with outdated firmware. You will also need to get the ProMGR license keys from them.
In case you bought the displays from another distributor, follow the instructions in STEP 0/B.
STEP 0/B - Displays from another distributor
By default, our distributor Konferenztraum makes sure that you have the newest available software versions for the displays you get, this way we avoid firmware updates after delivery. Also, the distributor prepares the configuration keys for ProMGR for you. This way you should have a well-prepared hardware after delivery.
Now, you got the displays from a third party. This complicates the setup process. The software versions need to be checked first:
Make sure you have the right OS firmware:
- You need to check, if the newest Android Firmware is installed or not. If not, you need to install it manually by requesting the newest firmware link from your distributor or ProDVX (support@prodvx.com)
- You need to check, if the newest ProMGR is installed. If not, you need to update it manually by requesting the newest ProMGR link from your distributor or ProDVX (support@prodvx.com)
By default, our official hardware partner Konferenztraum GmbH can not support you with the updates, since he is not the seller of hardware. You purchased the hardware from a third party. The third party and the manufacturer is responsible for delivering an up-to-date OS for you.
ProMGR configuration code
You get from ProDVX for each order device a ProMGR KIOSK license. Ask your distributor or ProDVX for the license keys. You have 2 options with the ProMGR license keys:
- Transfer the license keys to the Flexopus mass key by requesting it at ProDVX via support@prodvx.com. In this case, we can create a configuration for your displays. (STEP 1)
- Use the license keys by your own. You can request a ProMGR account at ProDVX and you can create your own configuration by following this article:
https://help.flexopus.com/en/displays/using-prodvx-devices/
STEP 1 - Get the configuration key
After transferring your ProDVX license keys to the Flexopus, we will create a configuration key for you. This code can be used for the installation of Flexopus.
We will create for you:
- The configuration key (6-digit code)
- The individual PIN to unlock the kiosk mode
- An individual password to access the ProMGR on premise
Demo configuration key: UQCDQA
Demo kiosk PIN: 1234
Demo admin password: 1234
The connected displays with the demo configuration key will show, that a license is required.
The configuration key is linked to your mass license key and includes the following configuration:
{
"configName": "0 - TEMPLATE - COPY THIS",
"showAppLauncherOnStart": false,
"startURL": "https://www.flexopus.com/promgr-setup-screen",
"launcherApps": "",
"keepScreenOn": true,
"kioskMode": true,
"kioskExitGesture": "3",
"kioskPin": "1234",
"disablePowerButton": false,
"forceScreenUnlock": true,
"forceSwipeUnlock": true,
"mdmDisableKeyguard": true,
"mdmDisableStatusBar": true,
"mdmDisableSafeModeBoot": true,
"mdmDisableAppsFromUnknownSources": false,
"mdmDisableADB": true,
"mdmRuntimePermissionPolicy": "1",
"mdmSystemUpdatePolicy": "2",
"mdmPasswordQuality": "0",
"mdmMinimumPasswordLength": "5",
"mdmApkToInstall": "https://github.com/flexopus/flexopus-device-connect/releases/latest/download/flexopus-device-connect.apk",
"mdmApkToInstallInterval": "15",
"mdmApkToInstallTime": "",
"mdmSystemAppsToEnable": "",
"remoteAdmin": true,
"remoteAdminPassword": "1234",
"cloudService": true,
"restartOnCrash": true,
"restartAfterUpdate": true,
"enableVersionInfo": false,
"showMenuHint": false,
"singleAppMode": true,
"singleAppIntent": "intent:#Intent;component=com.flexopus.deviceconnect/.MainActivity;end"
}
STEP 2 - Prepare the internet connection.
Recommended:
The displays should have an internet connection to do all the configuration steps. We always recommend connecting the displays with an Ethernet or PoE cable.
Not recommended, but it should also work:
You can also connect the displays with WiFi; however, a WiFi connection is often less stable and may result in internet connection issues in the long term. Some displays have an inbuilt WiFi module (APPC-10SLBe) others may need a WiFi USB stick (S-Series 10SFN) to connect to a WiFi network. You can order a WiFi stick from our distributor additionally.
The configuration is using the following URLs, in case you need to whitelist them for your network setup:
flexopus.com
device URL, tenant URL, central services URLsgithub.com,github.io,githubusercontent.com
The latest APK version is downloaded from Githubprodvx.com
ProMGR cloud for provisioning, currently onlyremoting2.prodvx.comfully-kiosk.com
Fully Kiosk license checking, currently onlylicensing.fully-kiosk.com
STEP 3 - Preconfigure the ProMGR
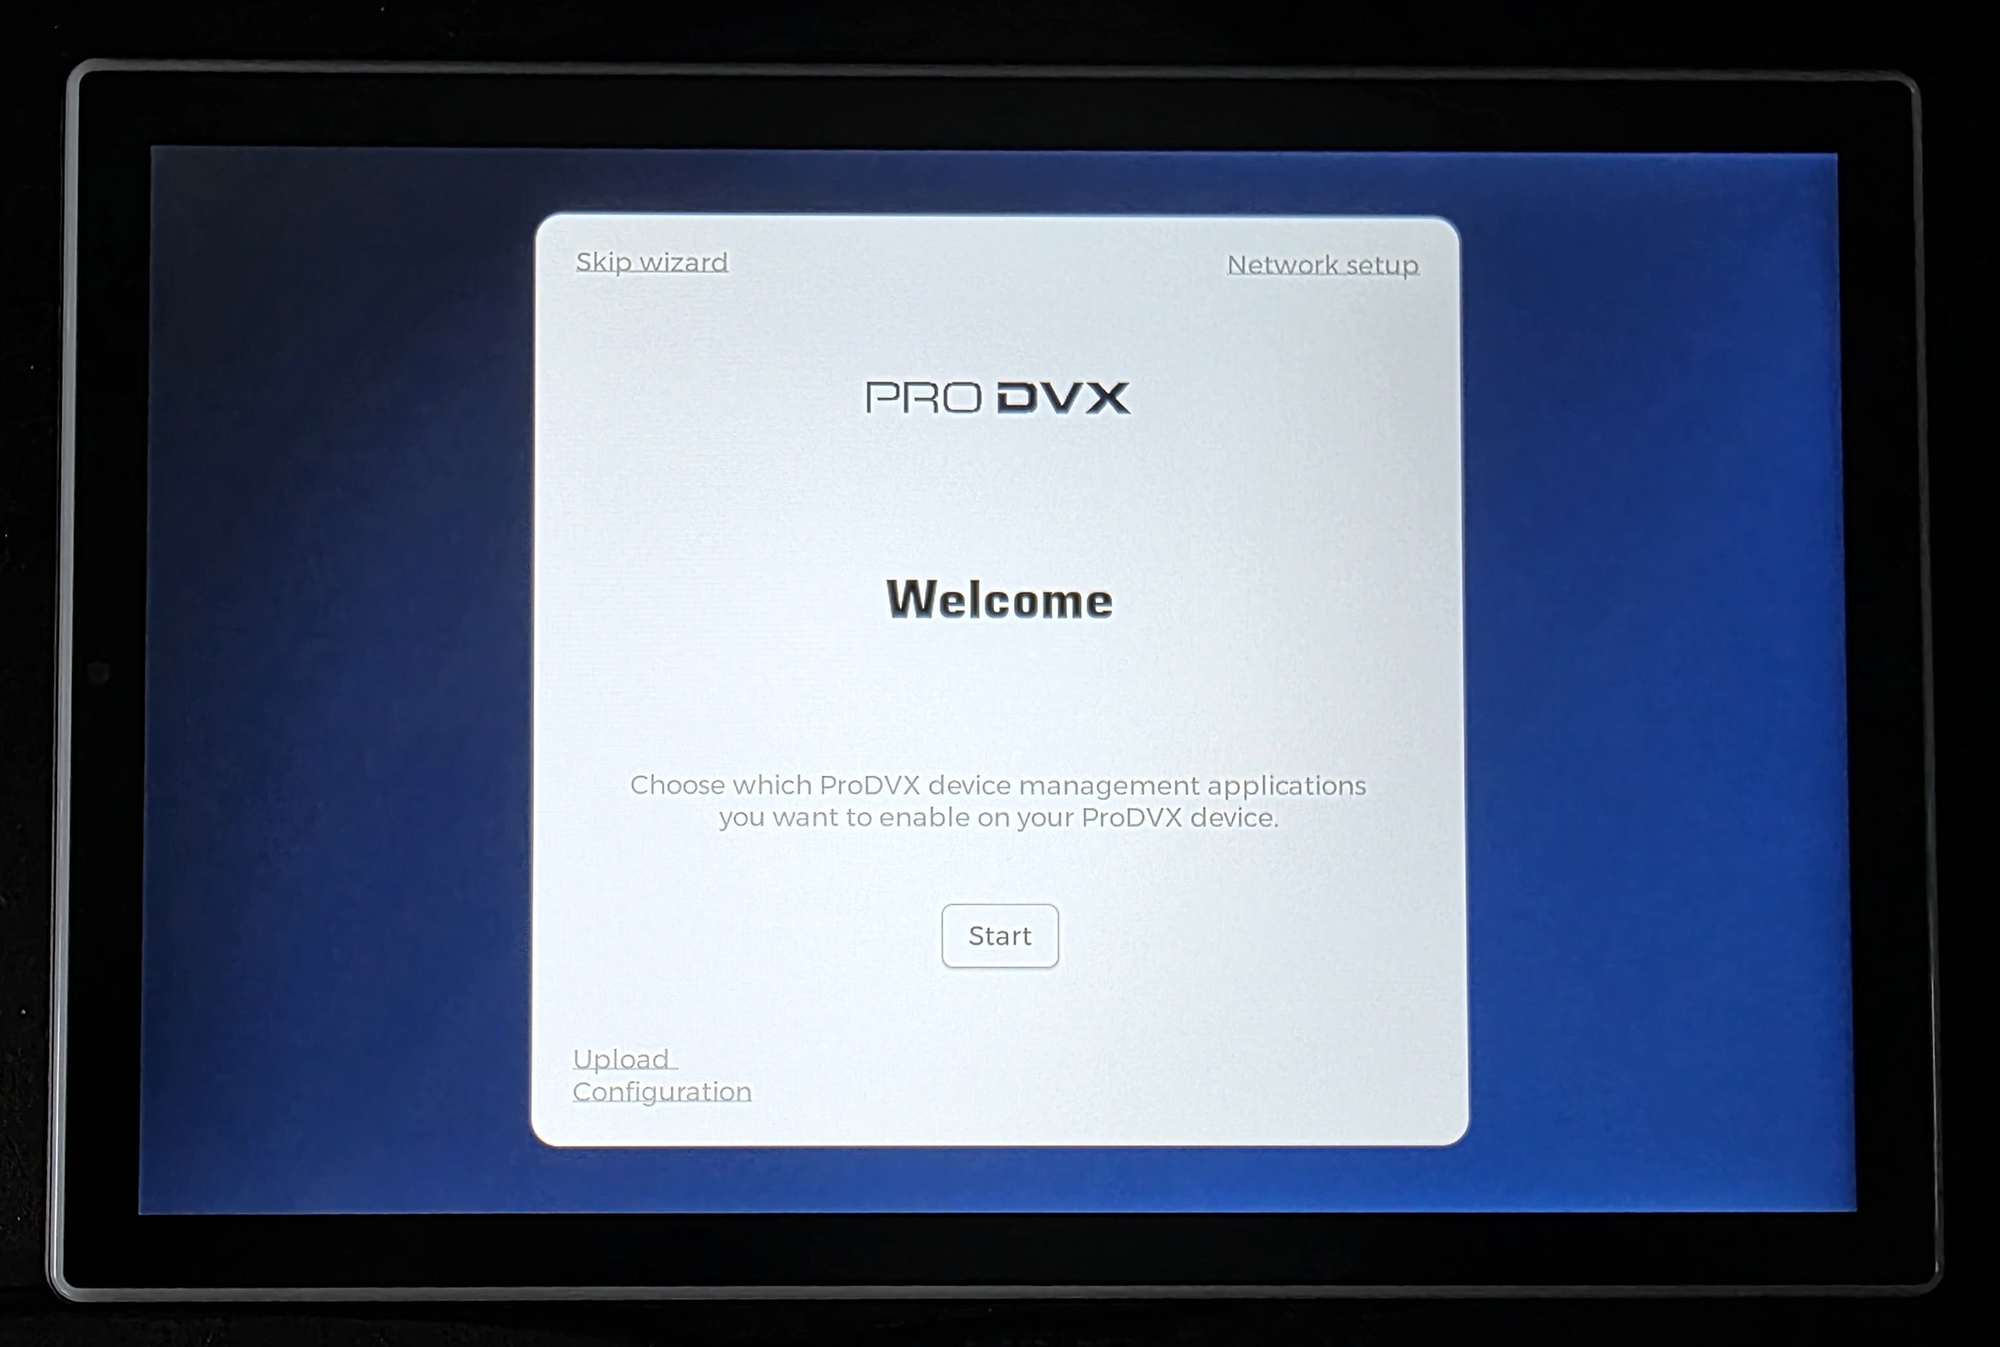
Plug in your ProDVX display. It should be in a factory reset mode, and it will show the following screen. On the first screen you can connect the display to WiFi, in case you wish to use a WiFi connection. Press Start.
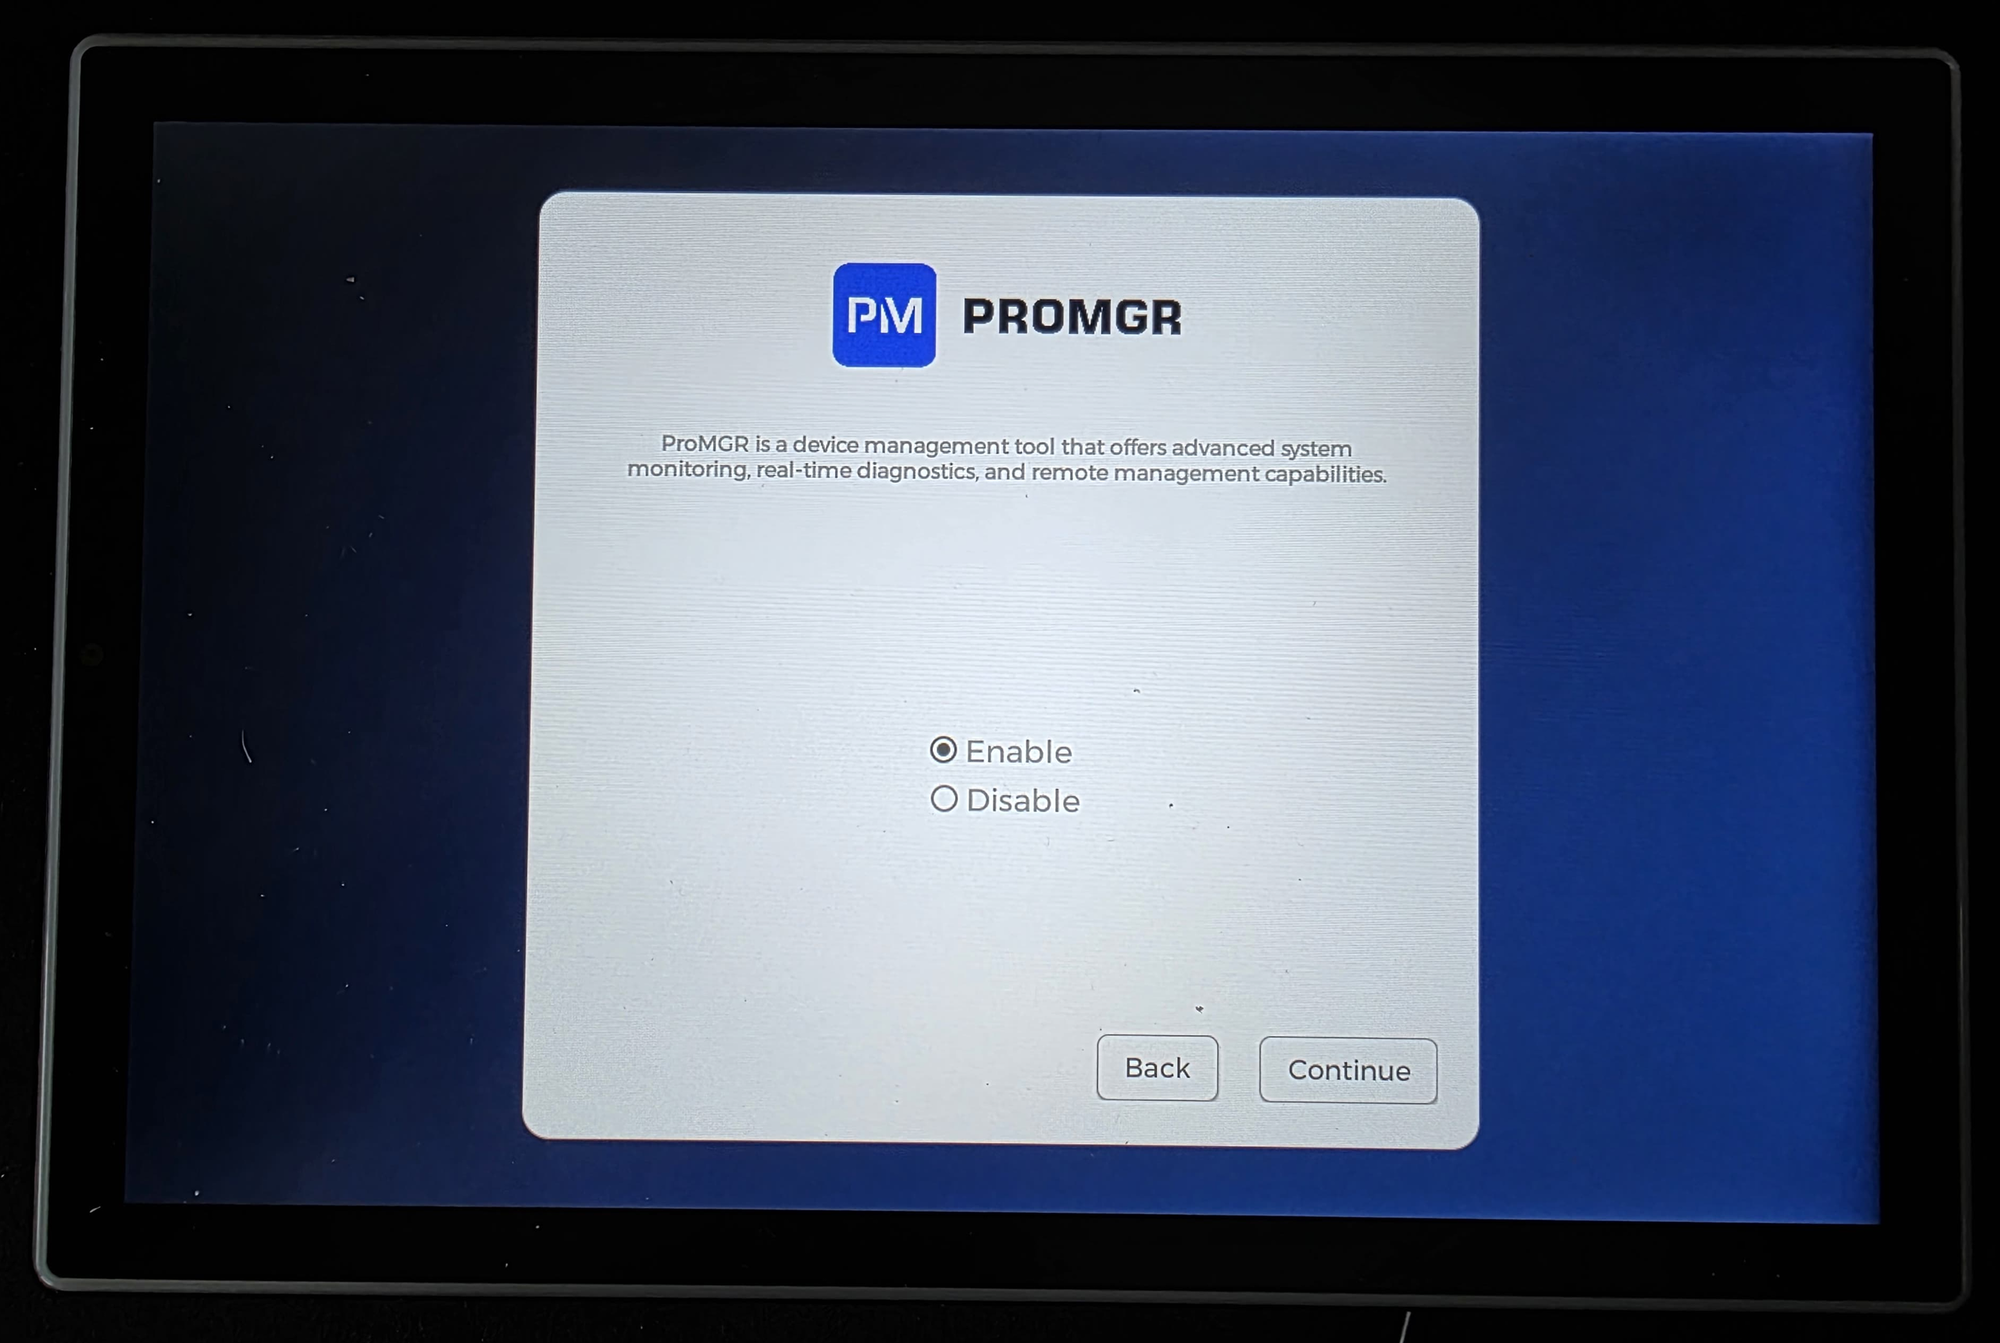
Enable the ProMGR usage:
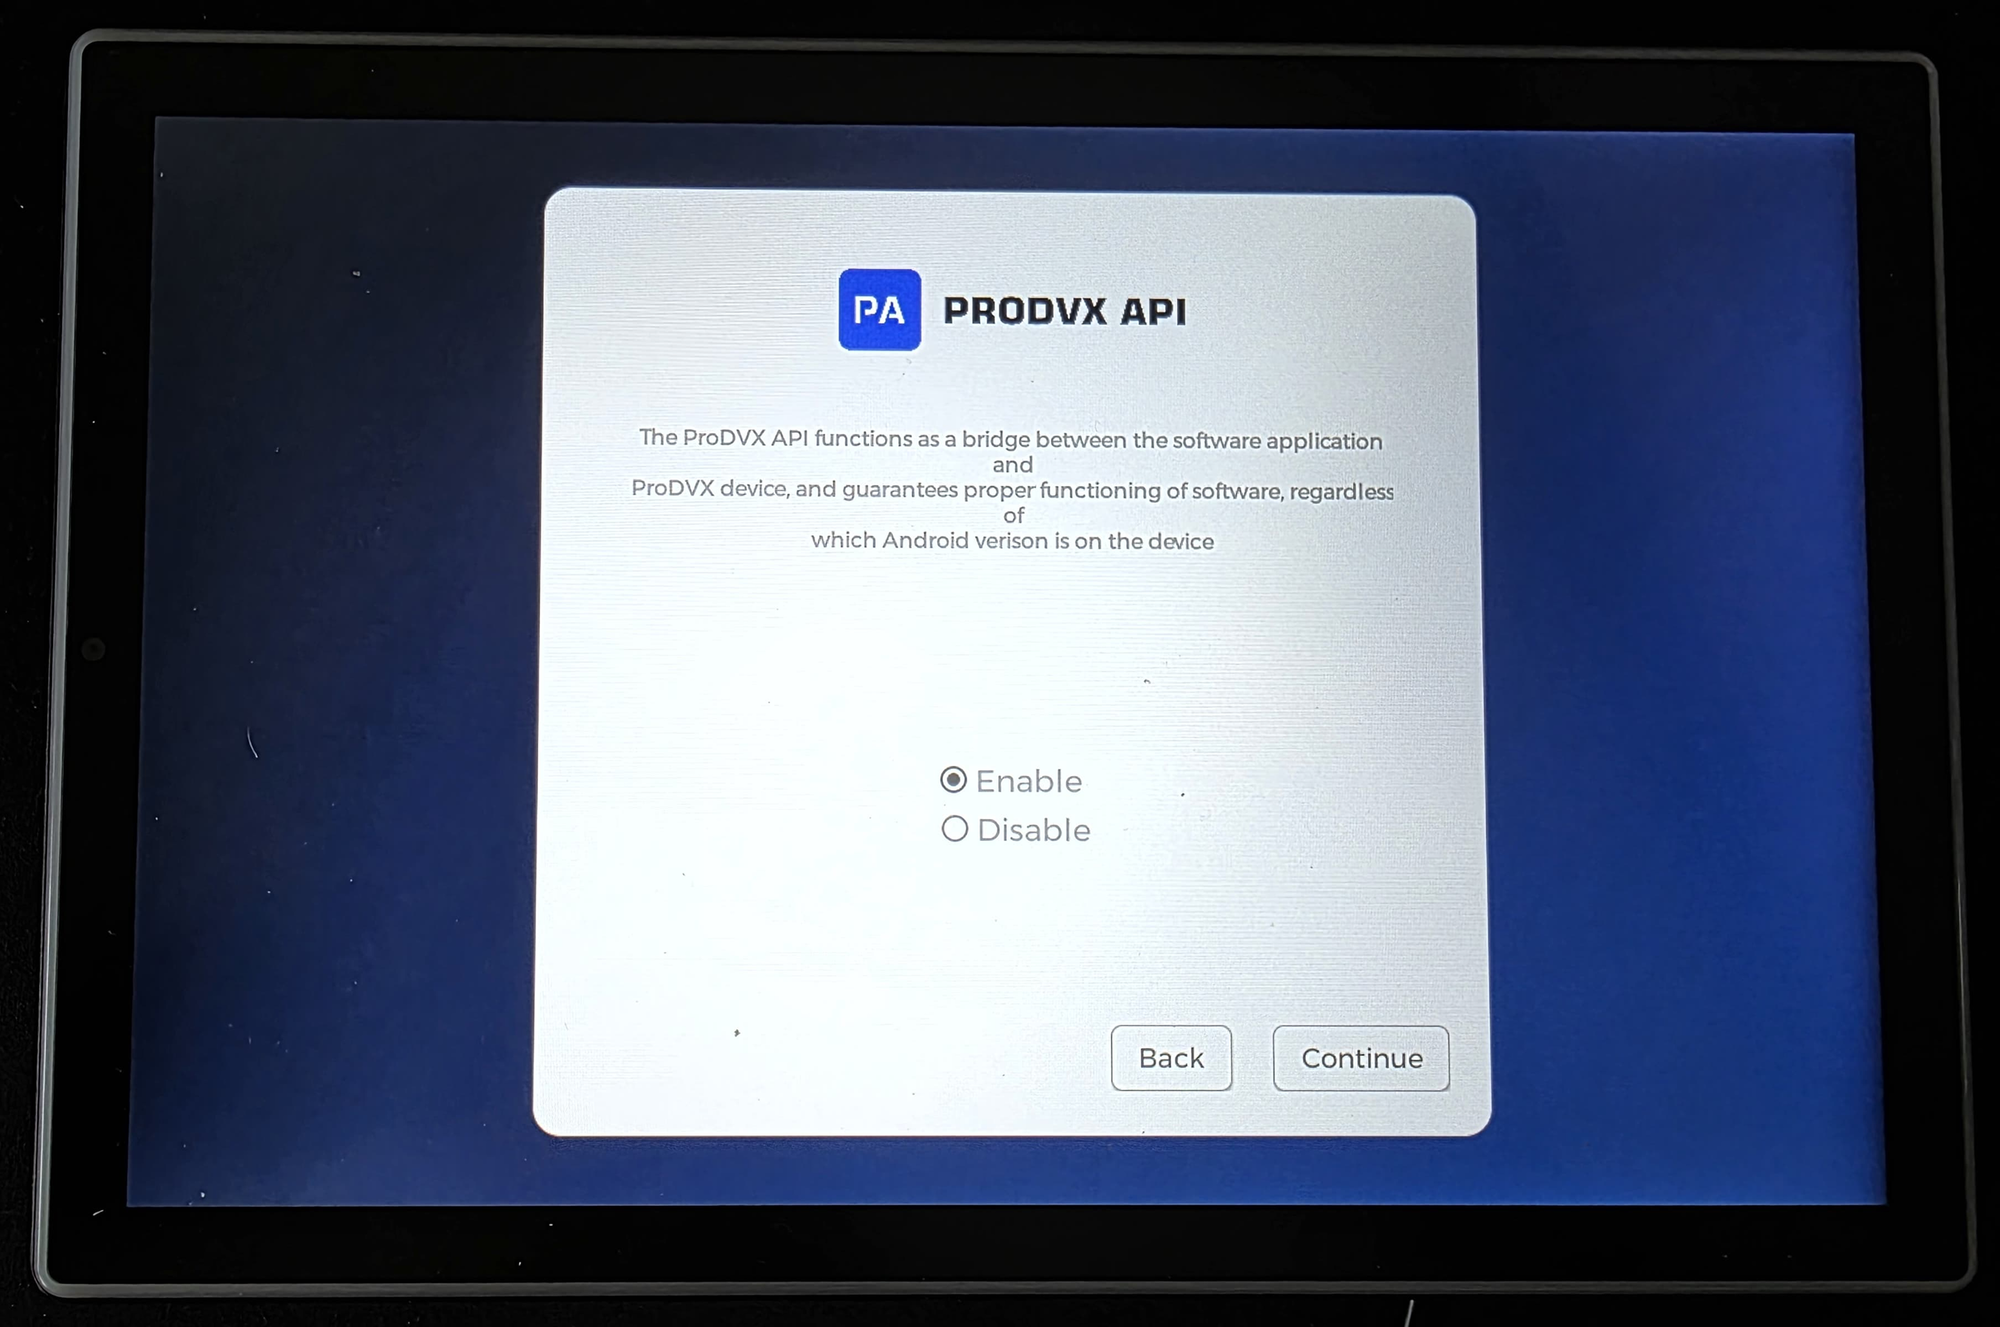
Enable the usage of the ProDVX API. This API is also responsible for the LED functionality.
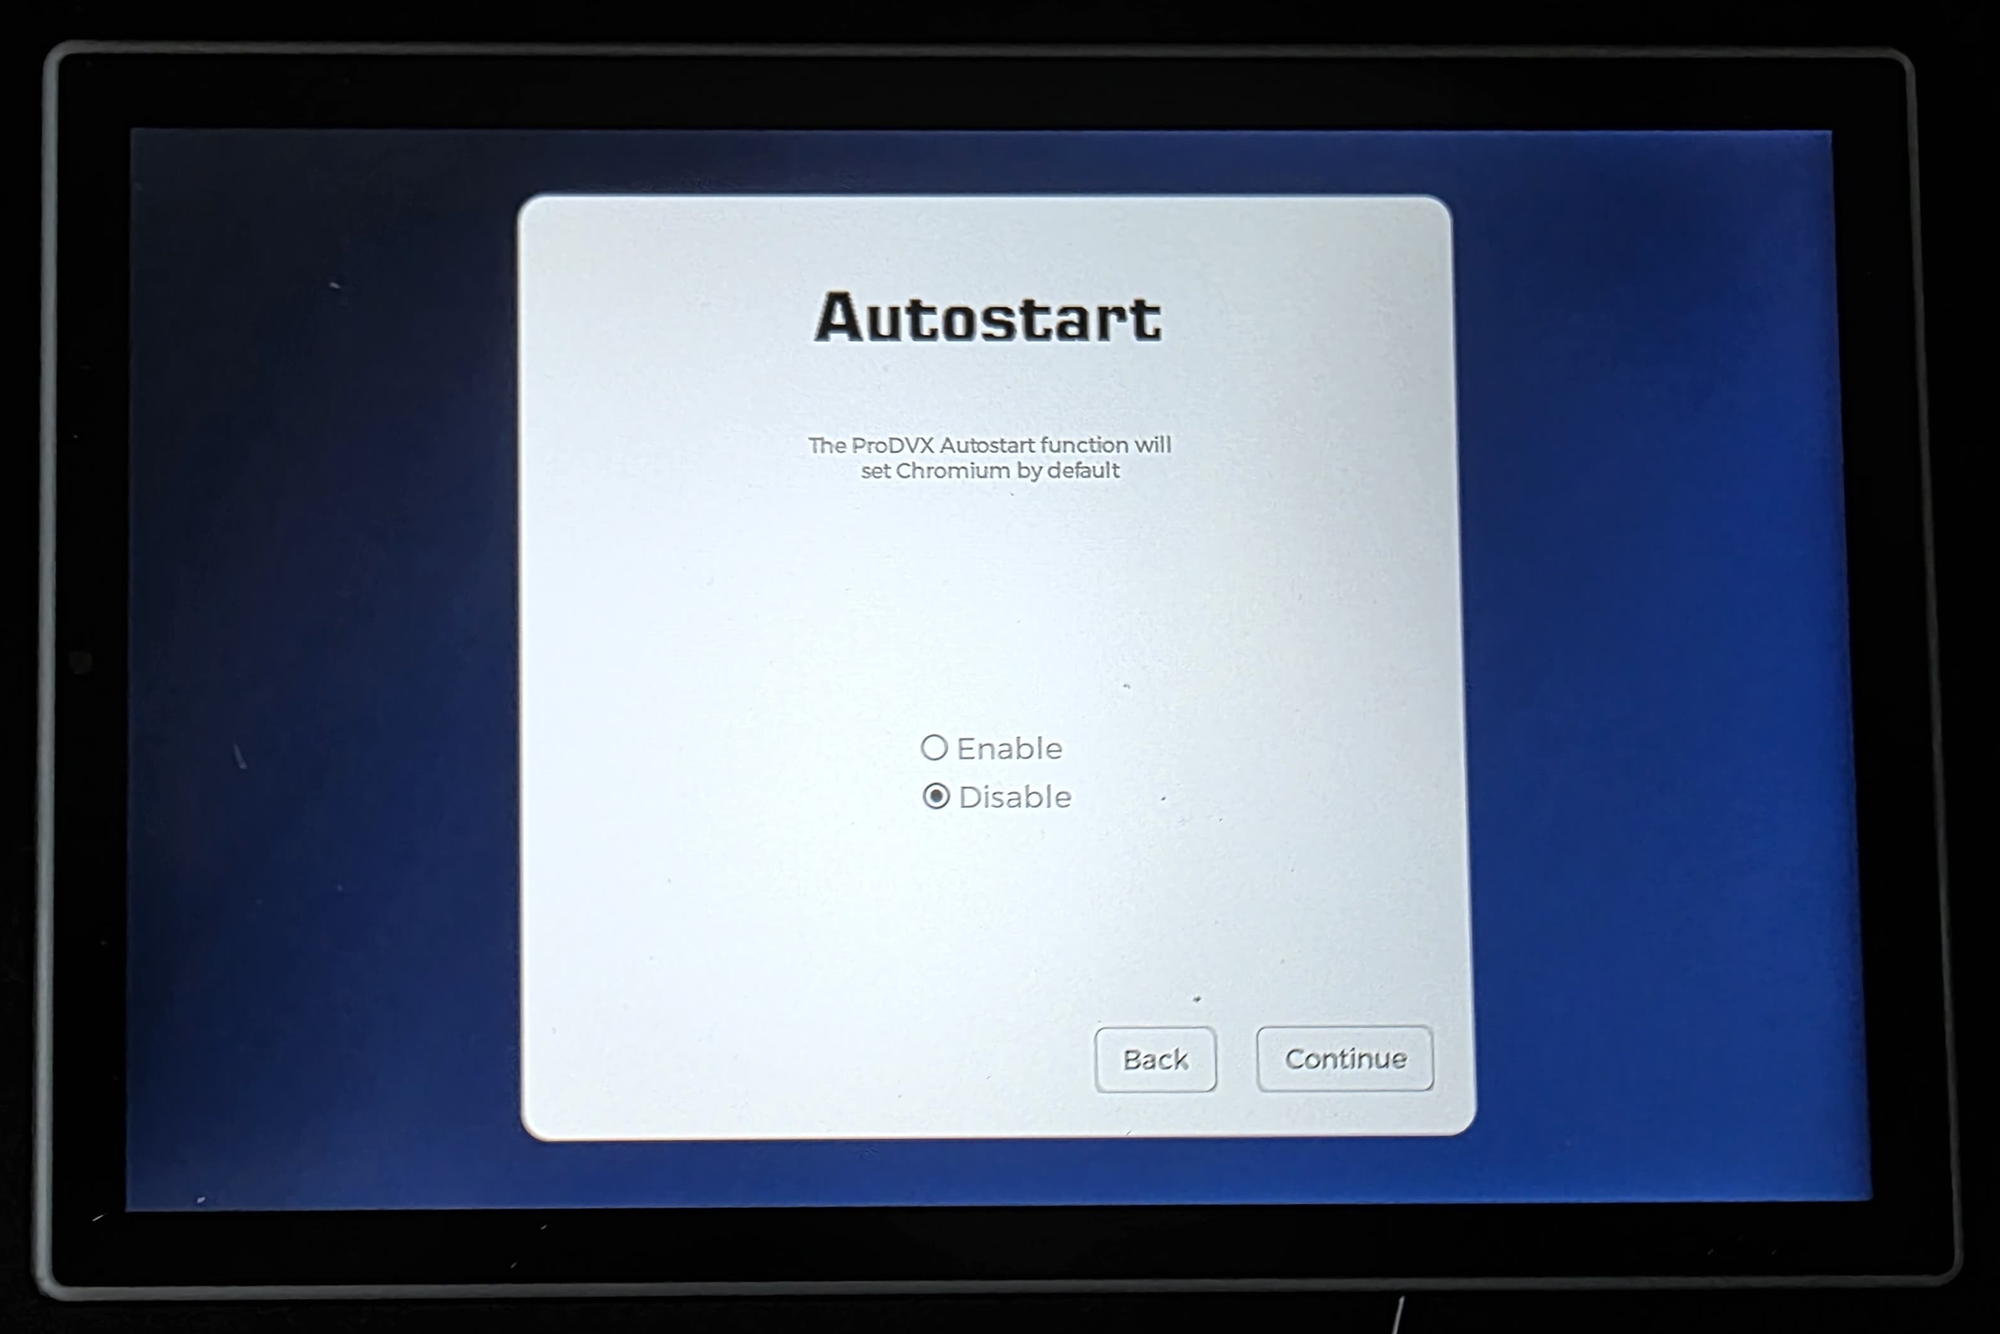
Disable the autostart functionality.
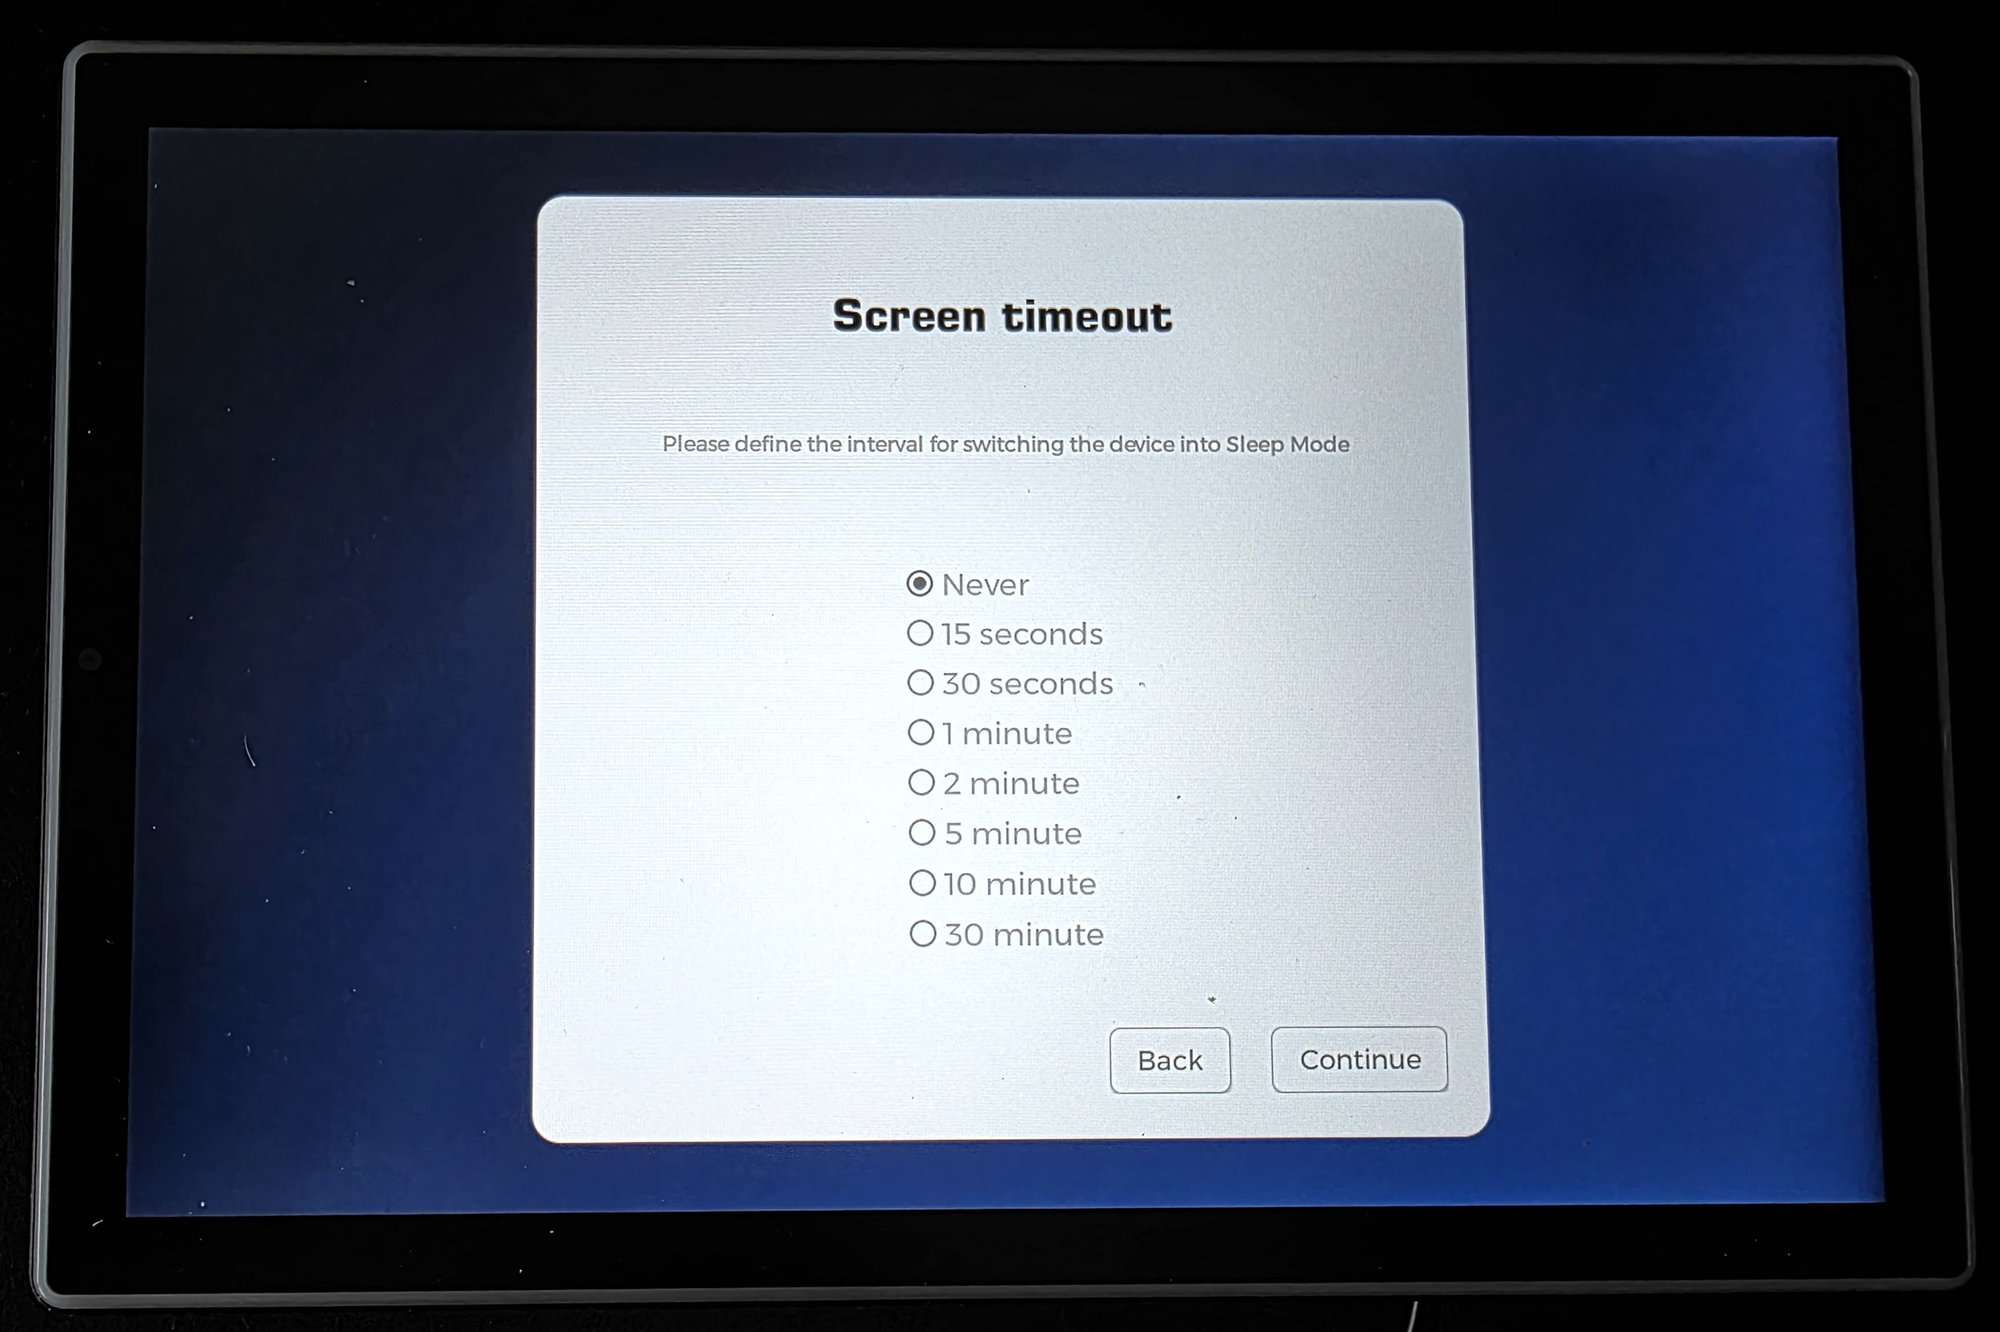
Set the screen timeout to Never :
Reboot the device:
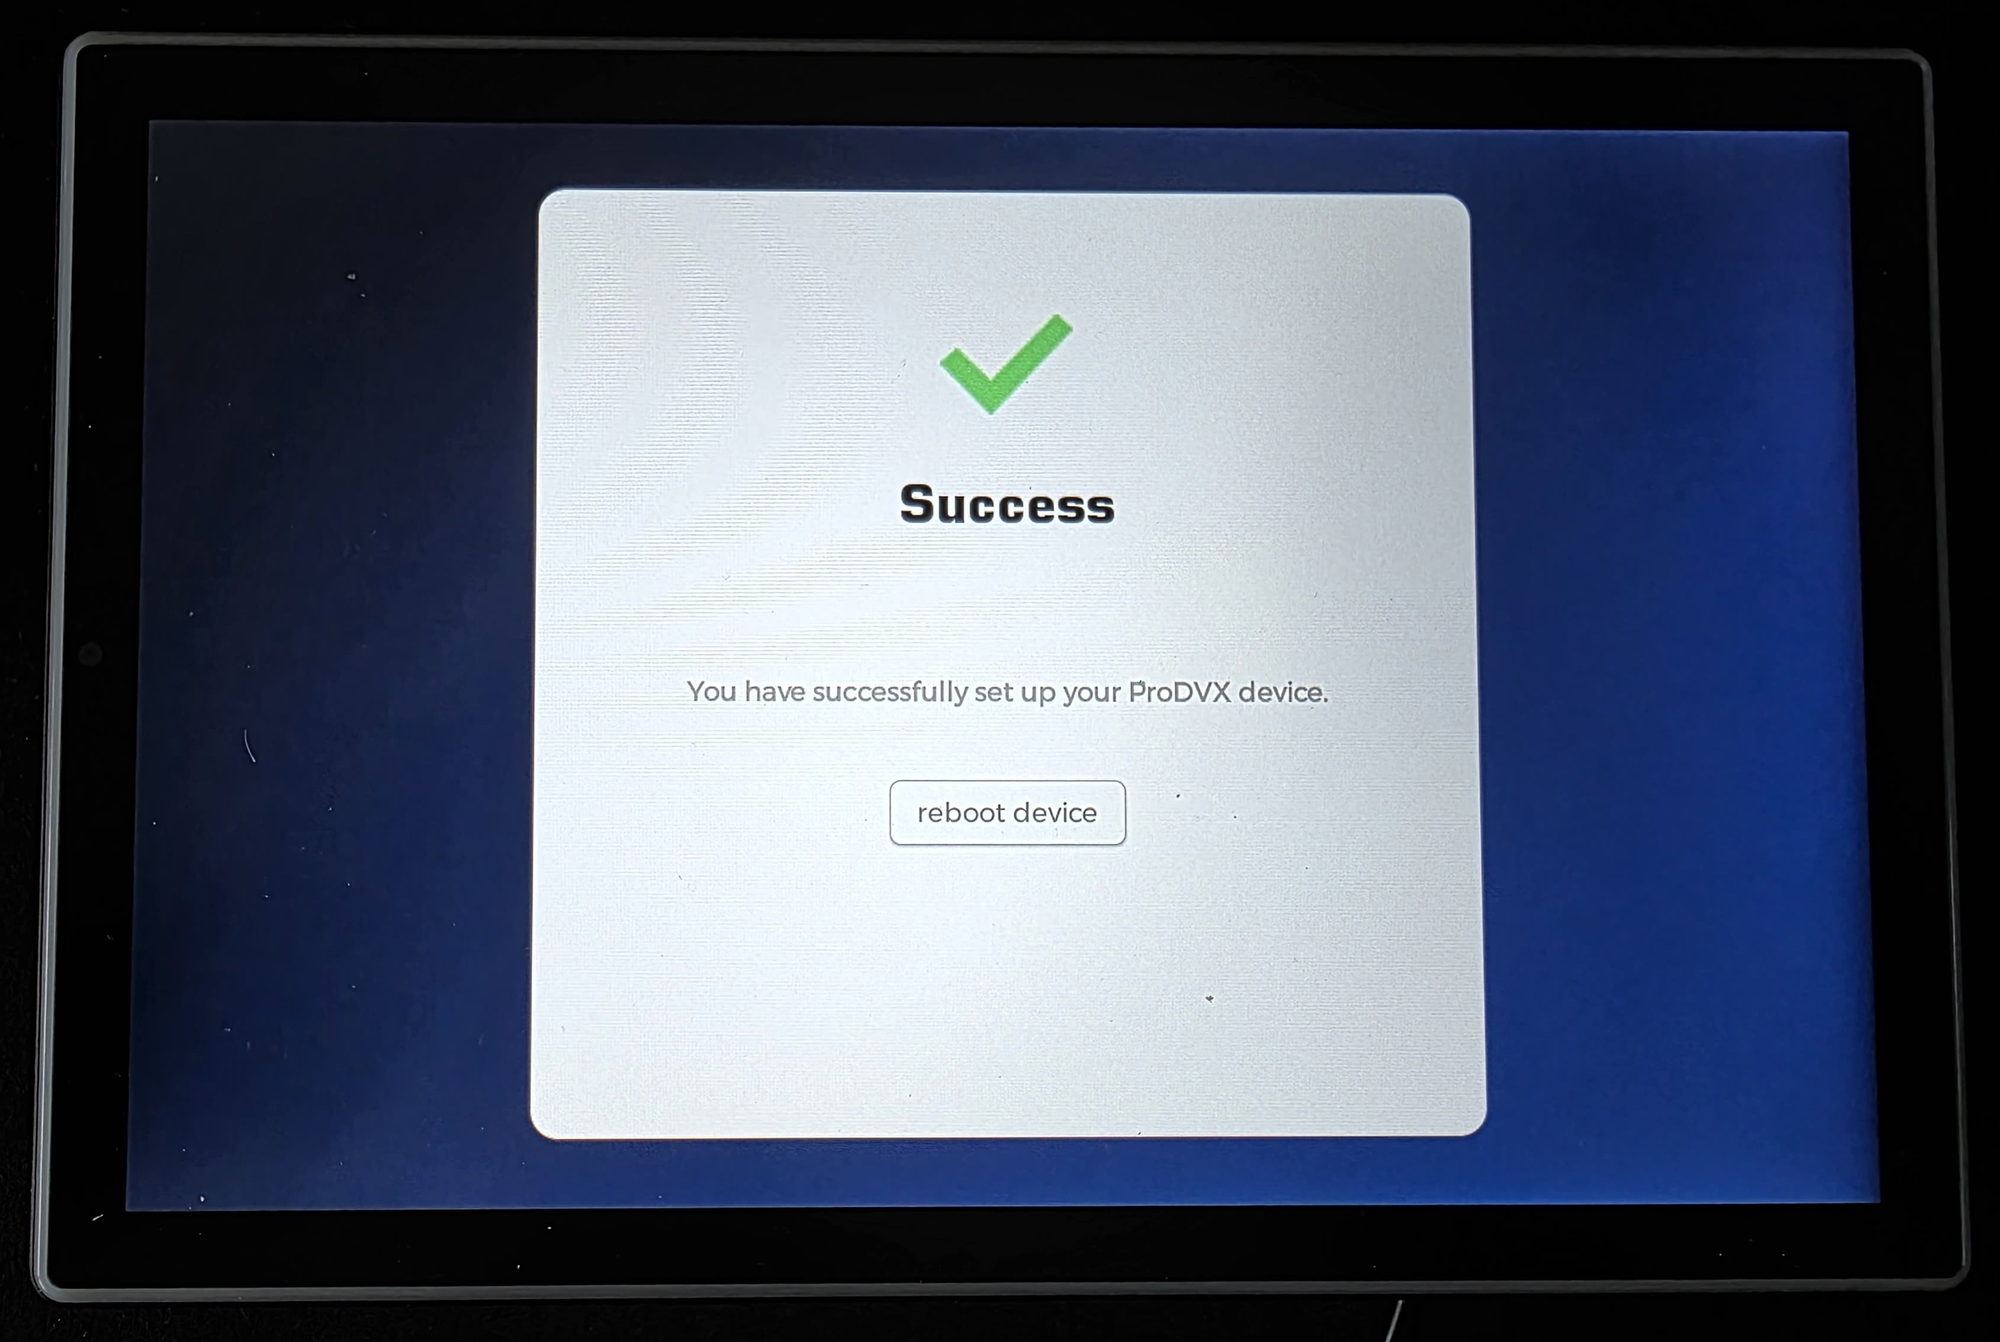
After the reboot, the device is supposed to start the ProMGR automatically and ask you to enter the configuration key. Wait 60 seconds. In case this is not happening, make a factory reset and do the config steps again.
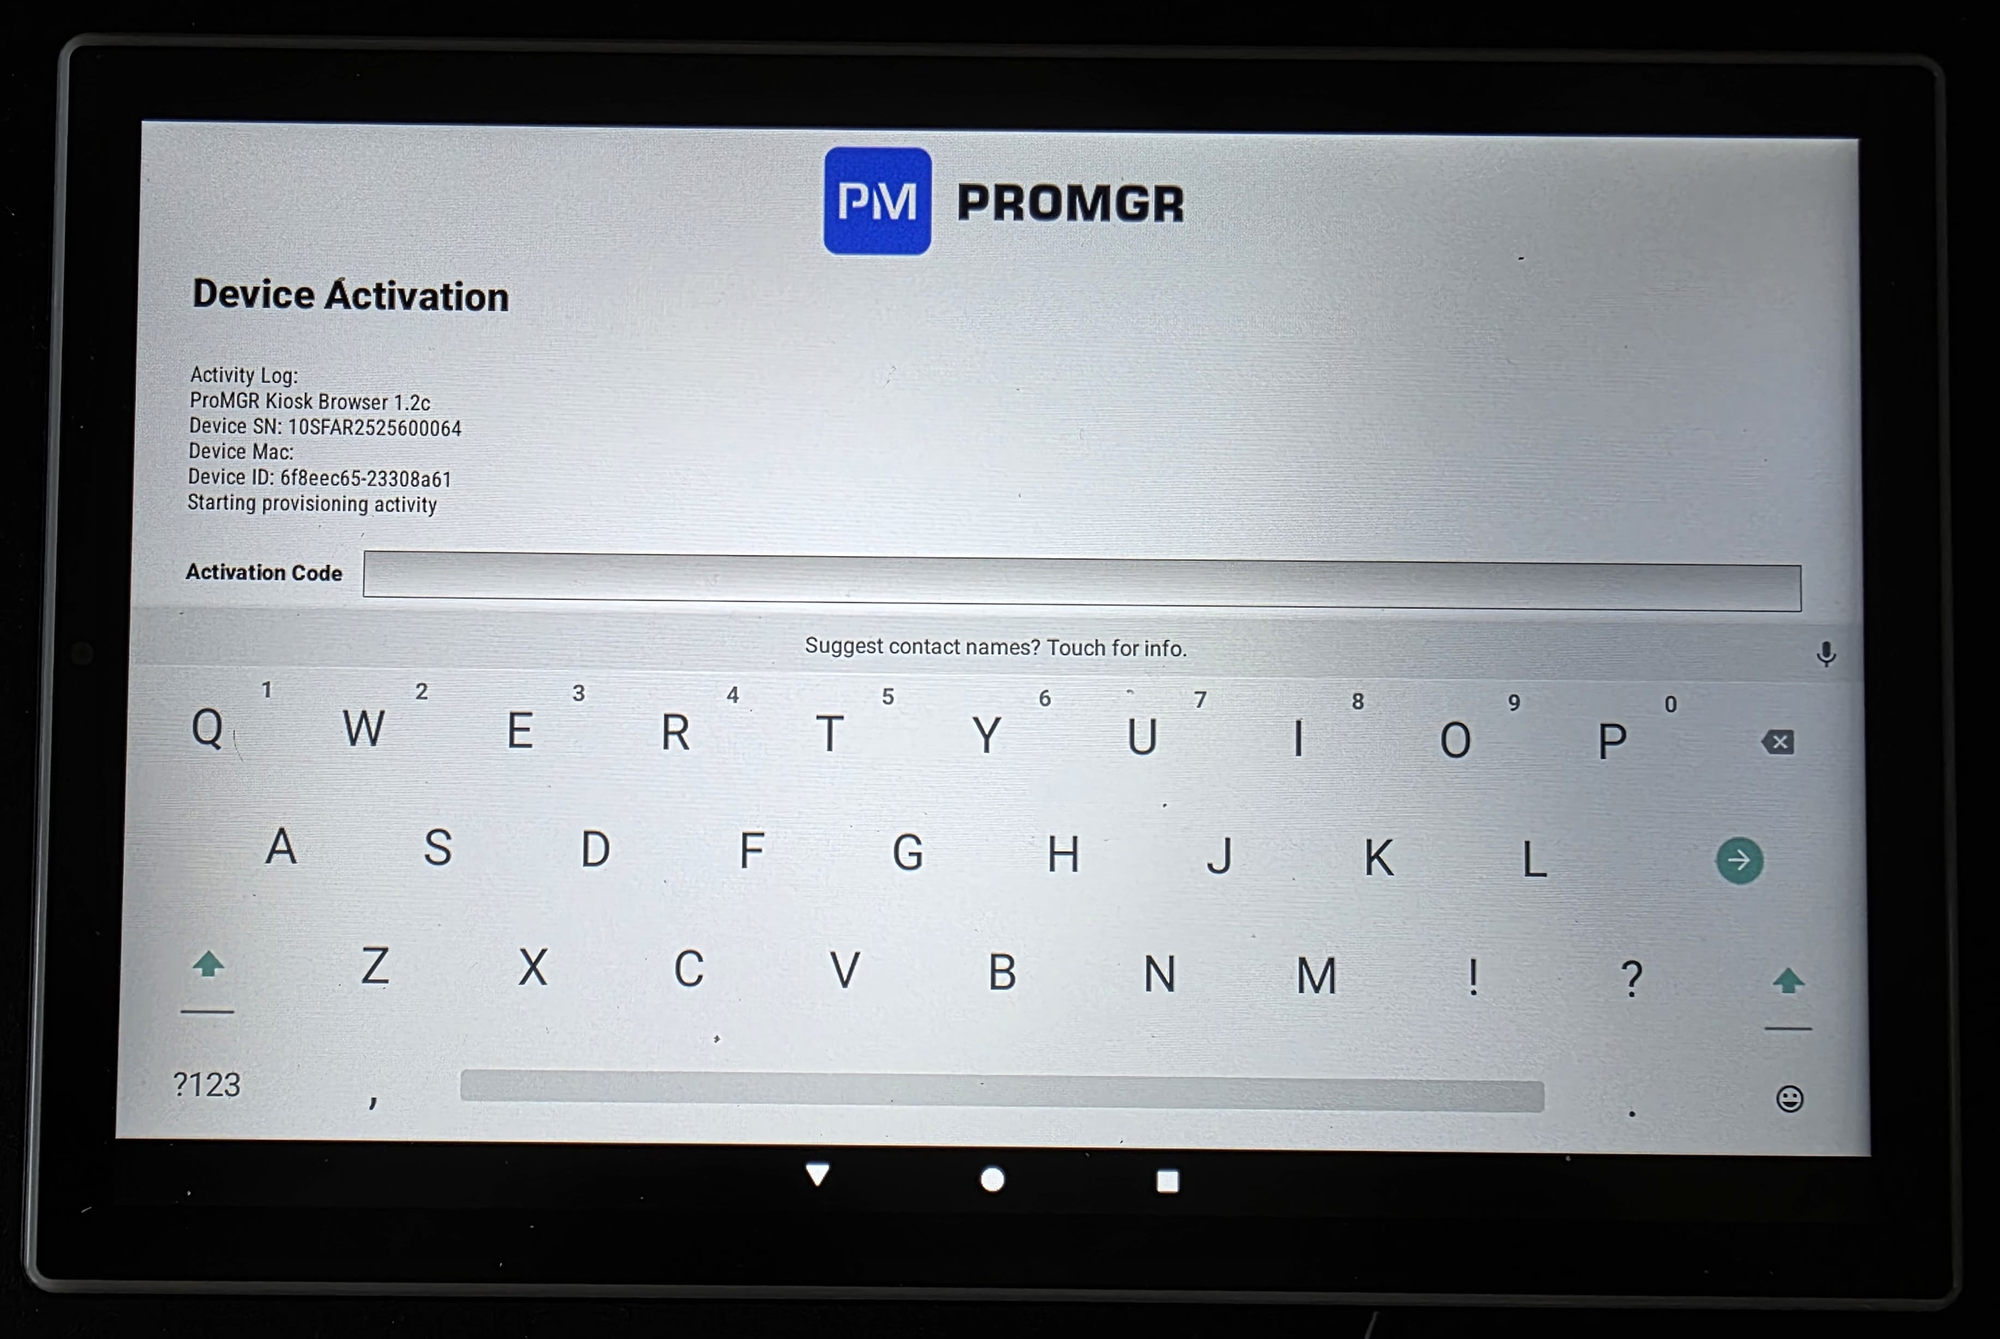
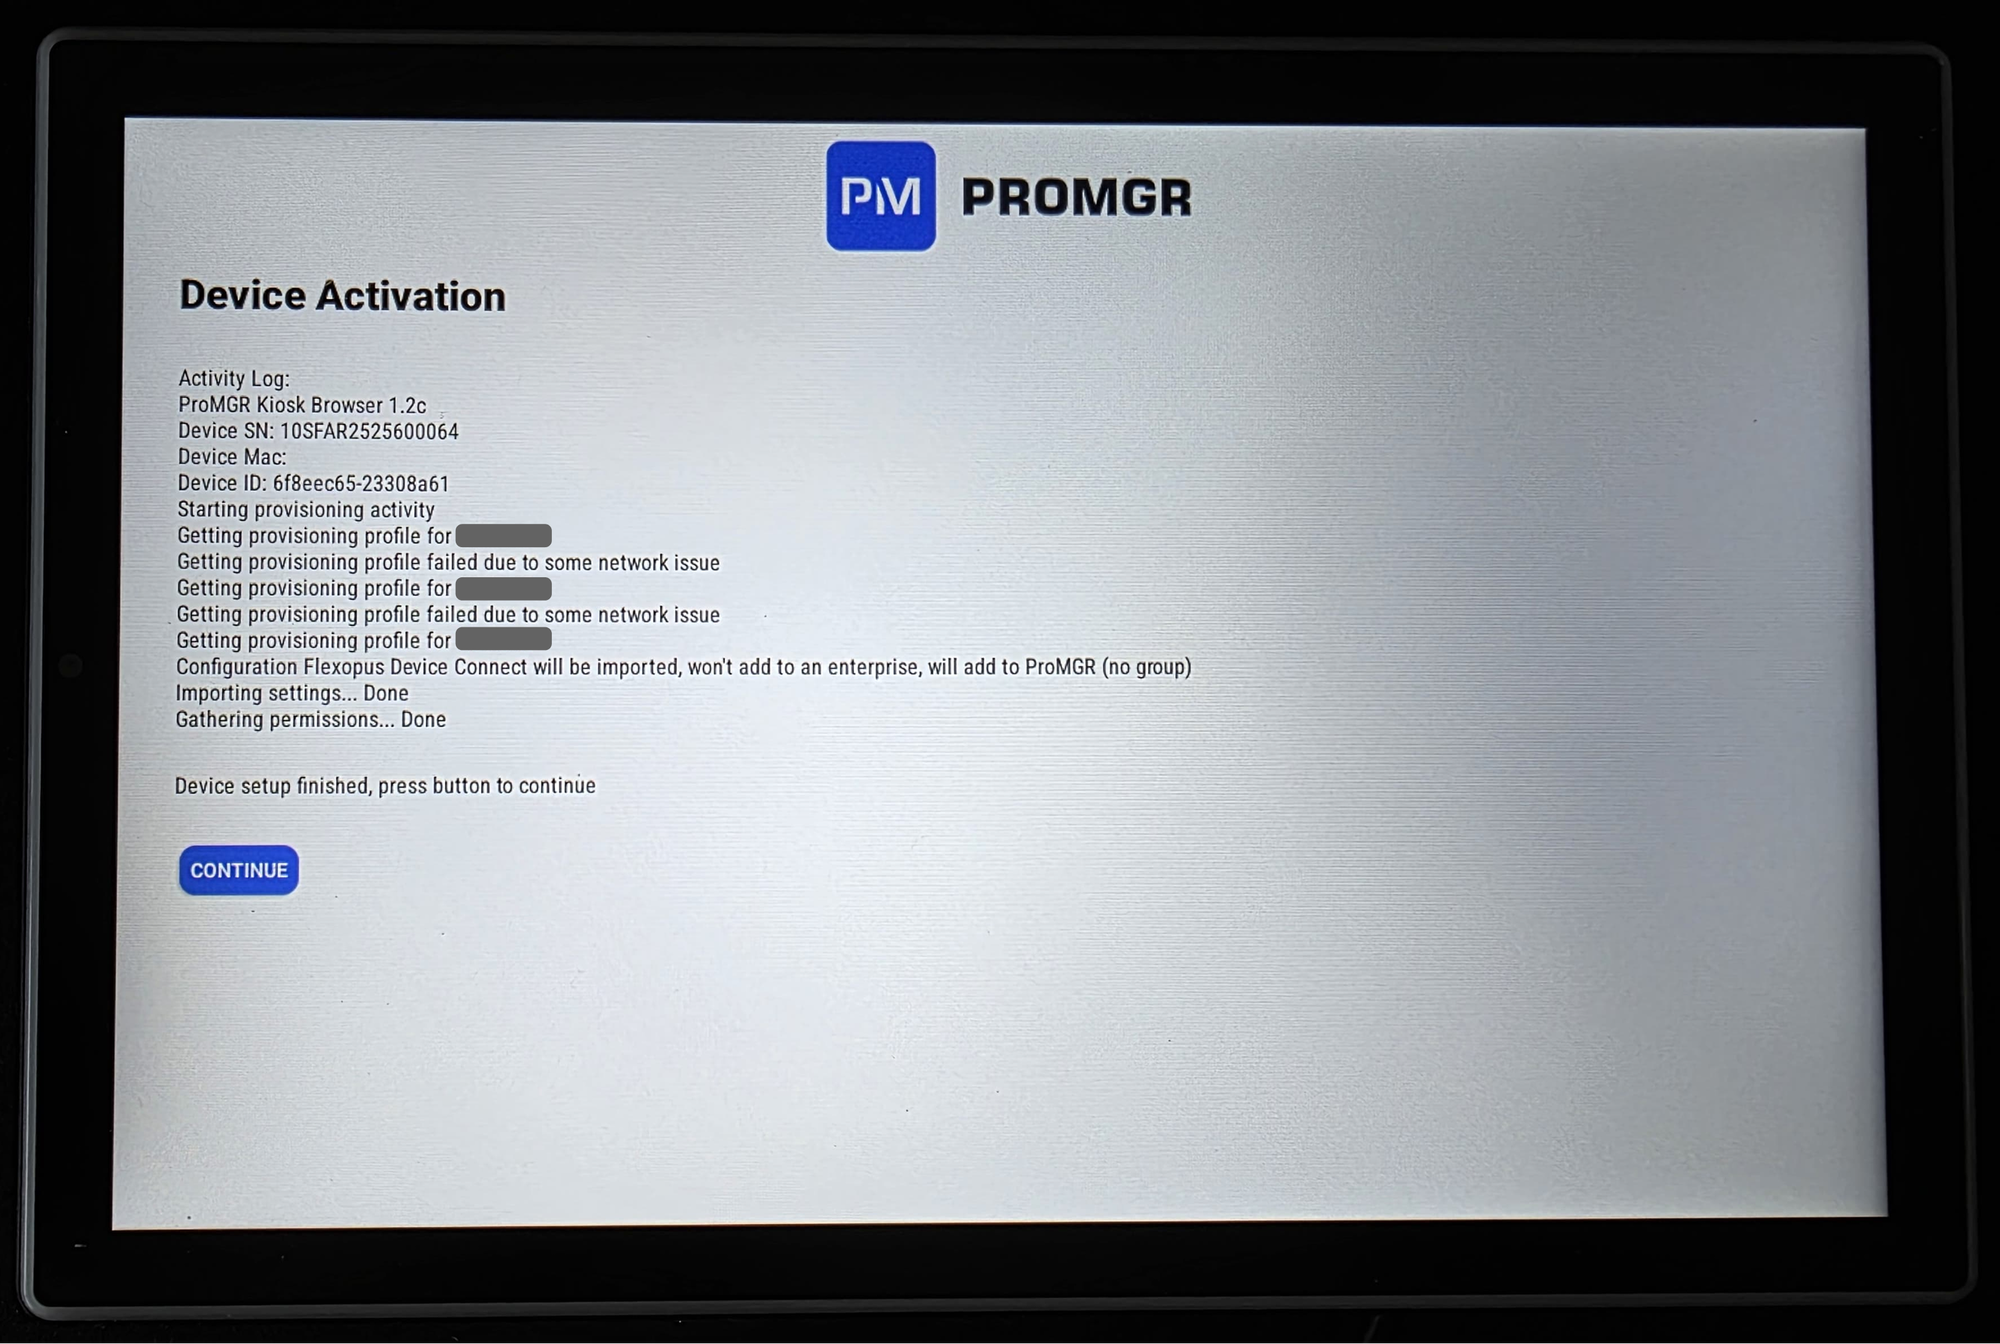
STEP 4 - Activate the ProMGR license and install Flexopus
Enter the provided ProMGR configuration key, which will activate the license and install the Flexopus Device Connect APK. The configuration key is a 6-digit code, which you received from Flexopus directly or from our distributor.
Demo configuration key: UQCDQA
Demo kiosk PIN: 1234
Demo admin password: 1234
The connected displays with the demo configuration key will show, that a license is required.
(Optional) In case you have no Ethernet connection, no PoE connection, and you forgot to connect to the WiFi in the first step, then you can still connect here to your WiFi. Press the display 7 times and enter the KIOSK PIN. You should be able to select the WiFi and enter the WiFi code. Then go back to the ProMGR. By going back, the ProMGR application will be automatically in KIOSK mode again.
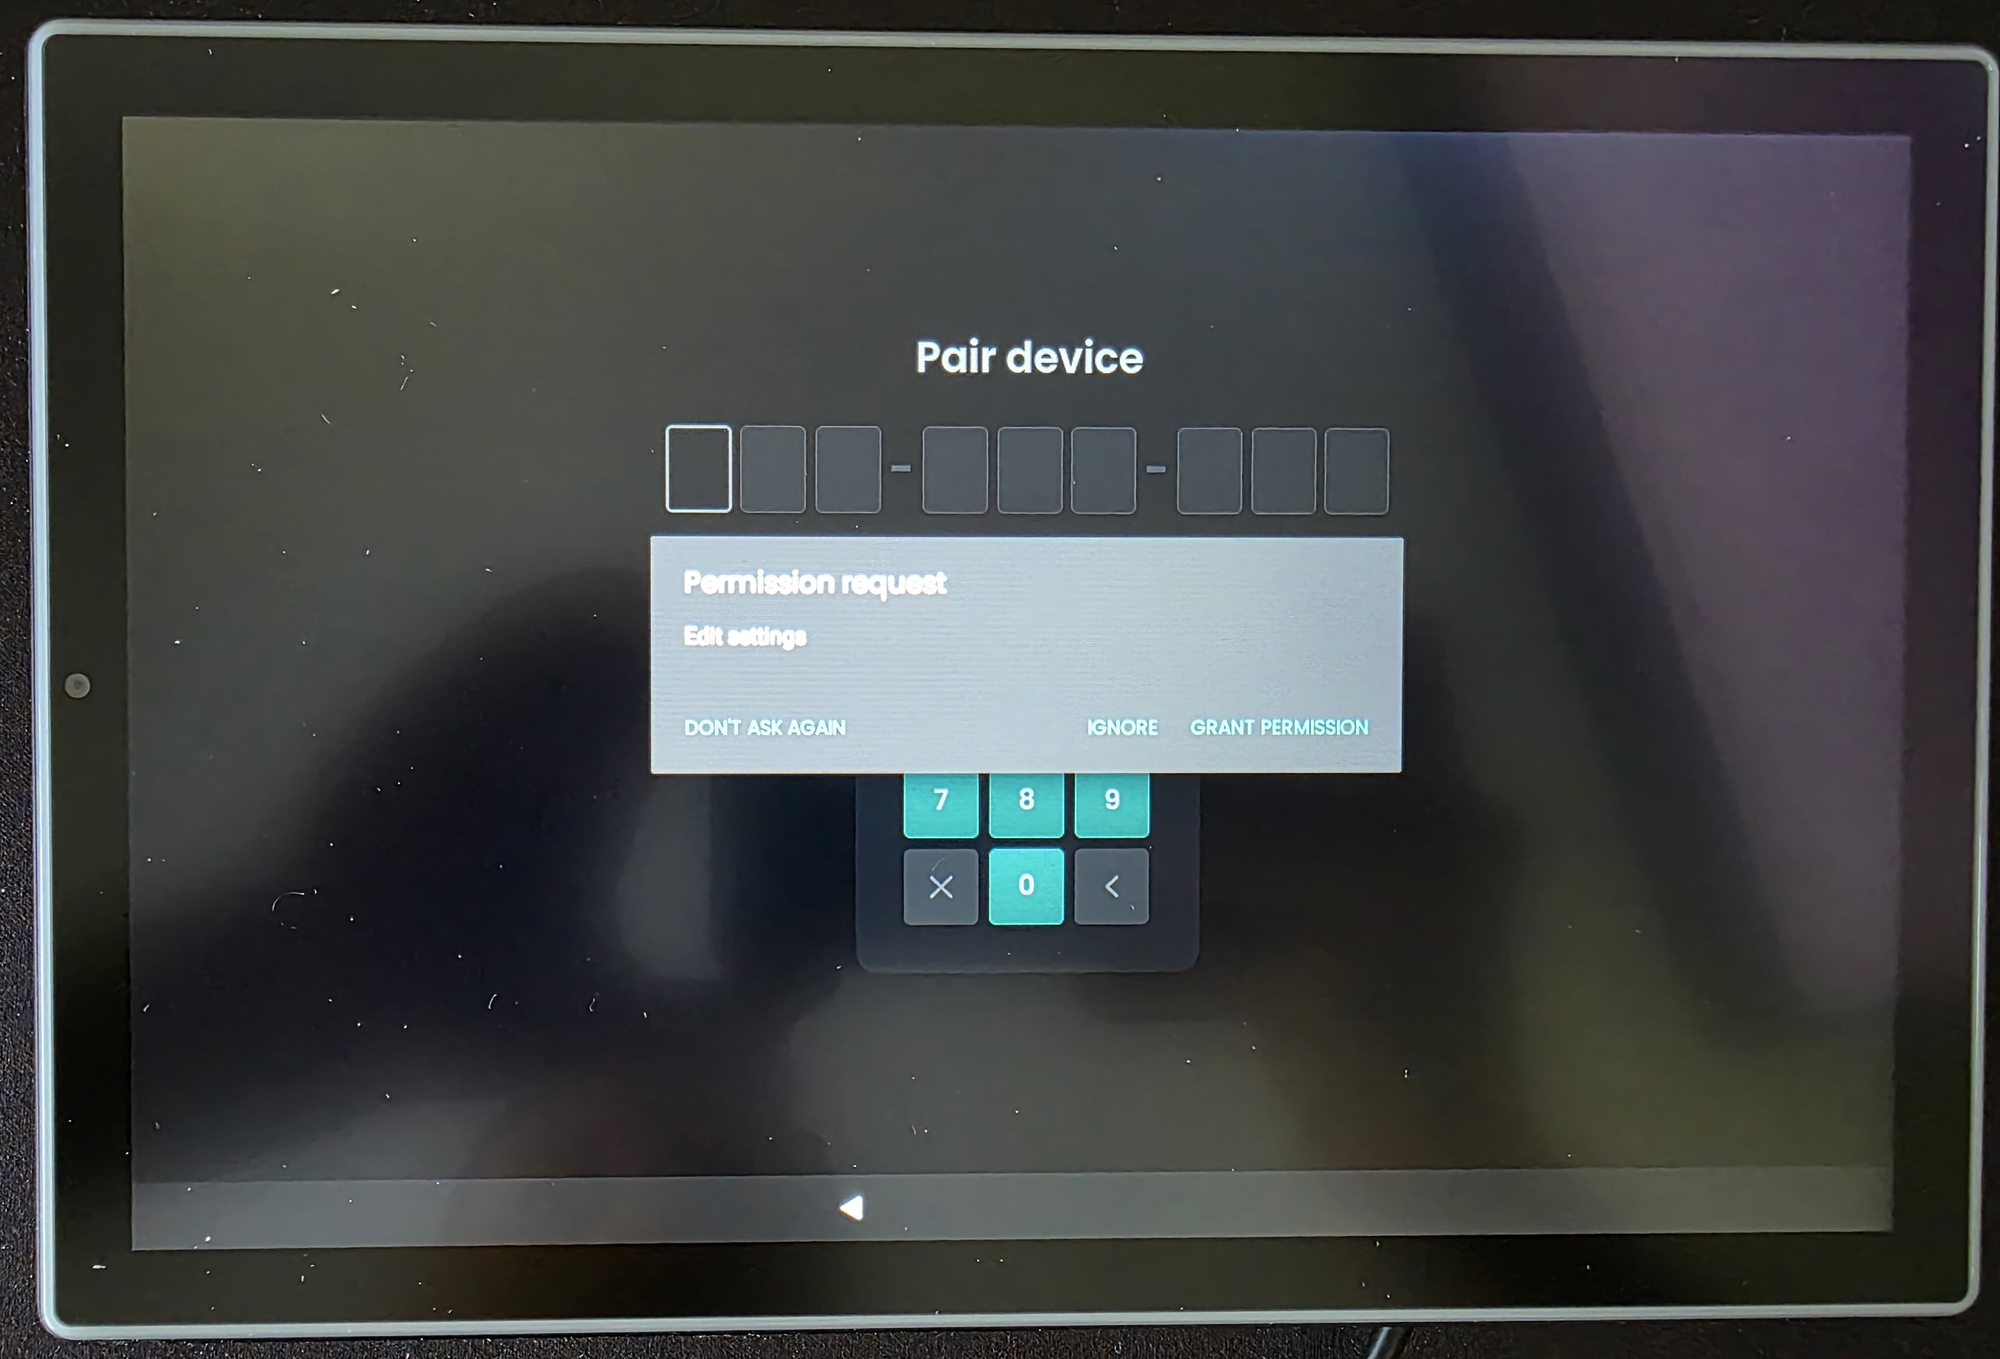
After a successful configuration, the Flexopus device connect application will open. In case the application is asking for permission, just press IGNORE. The permissions are not required. In the newest Flexopus Device Connect APK, the permission requests will be removed, since they are not necessary.
STEP 5 - Connect Flexopus
Follow the instruction steps in this article:
Difference between the ProMGR KIOSK and ProMGR CLOUD?
To install Flexopus on the displays, you don't need the ProMGR Cloud subscription. It's enough to use the free KIOSK solution. Upgrading to a cloud solution, you could:
- Use the ProMGR portal.
See the number of licenses and manage them. - Use the remote device management and monitoring.
See which displays are active and in use. - Automatically install the Android OS firmware updates.
Otherwise you need to do it manually. Updates between main Android versions are not automatically done. Only the minor updates within a major Android version. Applies only to AOSP Androids. The GMS-verified Android displays update themselves automatically.
The ProMGR cloud subscription offers some benefits; however, it's not required for the setup. It offers benefits mostly for the long-term maintenance of the displays compared to the KIOSK licence.
Now, let's see the CLOUD benefits compared to the KIOSK subscription plan:
- ProMGR portal.
Yes, you can see the number of licenses and manage them, but is it really necessary? You get a license per display. You don't need to manage them manually. We create a mass license key for your company and assign the number of licenses to it. You don't need to manage it. You can get the mass license key at any time you need. - Remote device management and monitoring
There is no real need to manage or to monitor the devices after they are configured. In theory, you can delete the pairing code of the displays in Flexopus at any time. - Automatically install the Android OS firmware updates.
This is the only real benefit, which could save you some time; however, an annual firmware update should be enough, and you can do that with a USB stick. (After plugging in, the OS will be updated automatically.)
So overall the ProMGR cloud subscription has some benefits, but it's not necessary. You can order it on demand from our distributor.
Do you need help?