Akamai SAML SSO
Introduction
Connect Flexopus with Akamai via a SAML2 for Single Sign-On (SSO). With the integration, you can manage through Akamai which users should have access to Flexopus and force them to use their Akamai credentials for the login. Based on a SAML2 settings in Flexopus you can let the user profiles be created after the first successful SAML2 SSO login attempt to avoid a manual user creation process at Flexopus.
Setup Instruction Manual
Follow the step by step introduction manual to configure the integration. The manual also includes best practices and solutions for some commonly made errors during the configuration. Still, if you need help with the setup, feel free to reach out to our support team via support@flexopus.com.
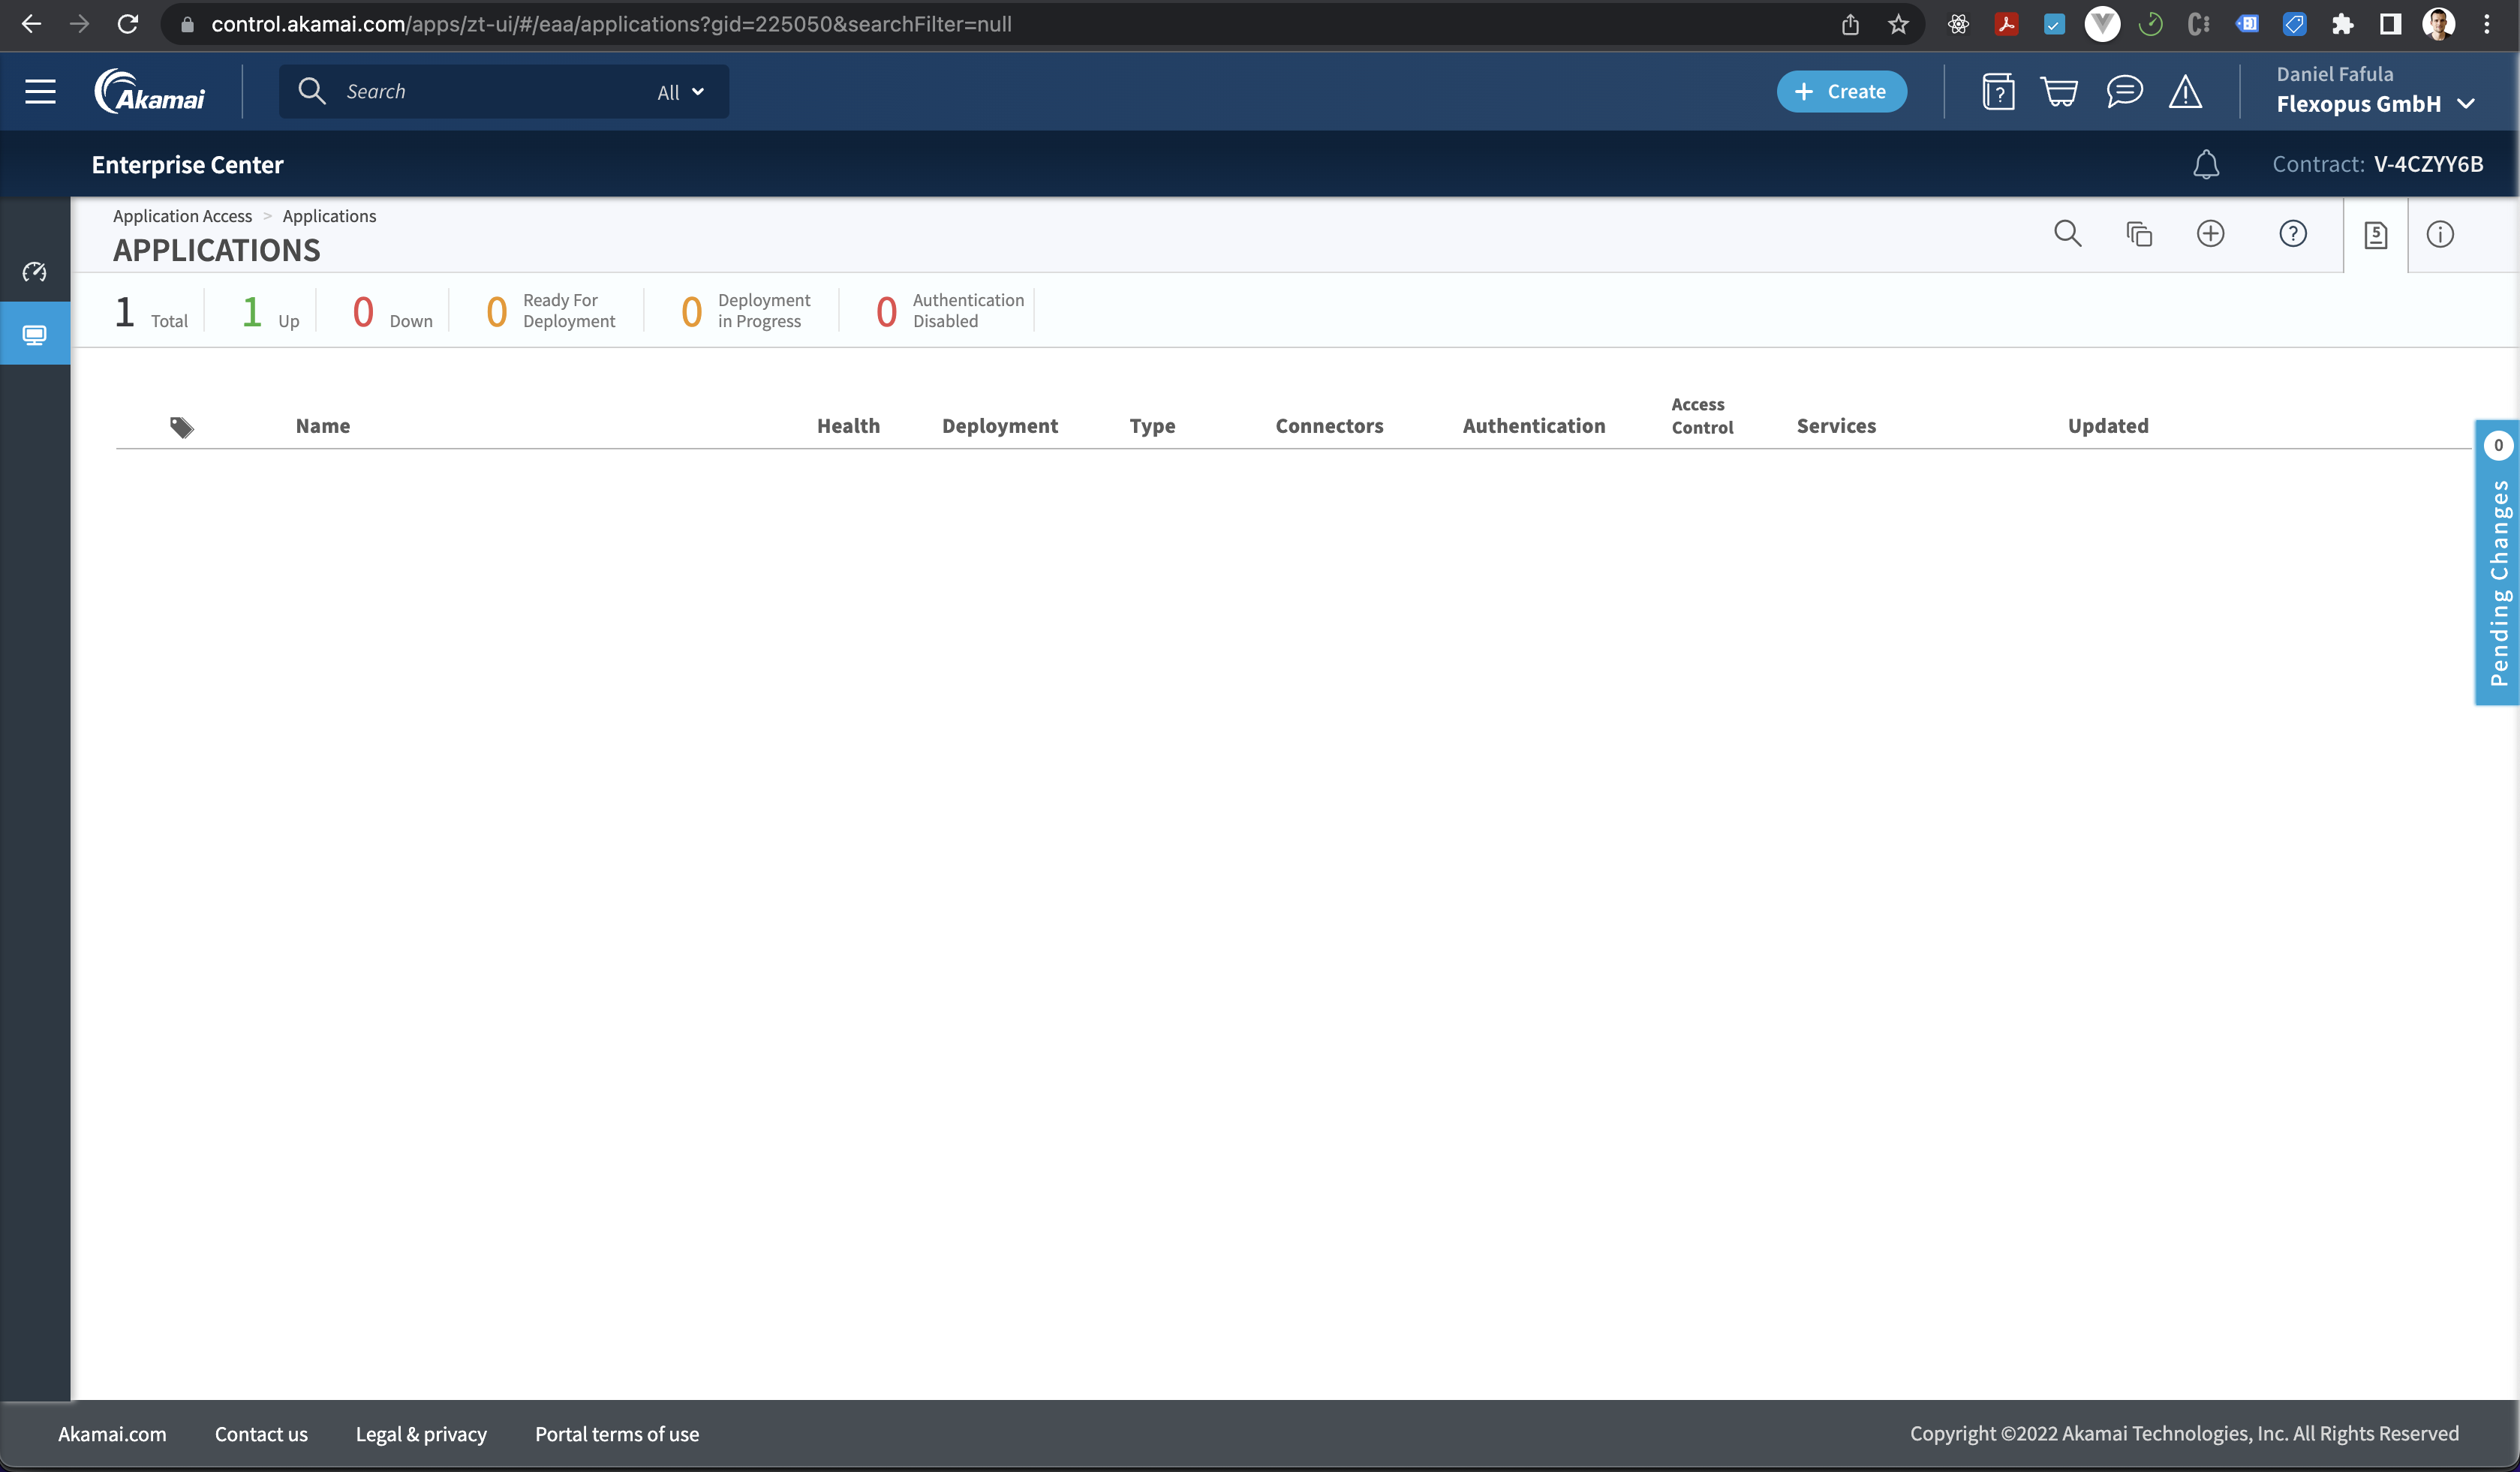
STEP 1 - Create SAML2 app
Go to your Akamai Dashboard and click on the Applications > Applications tab on the Add Applications button.
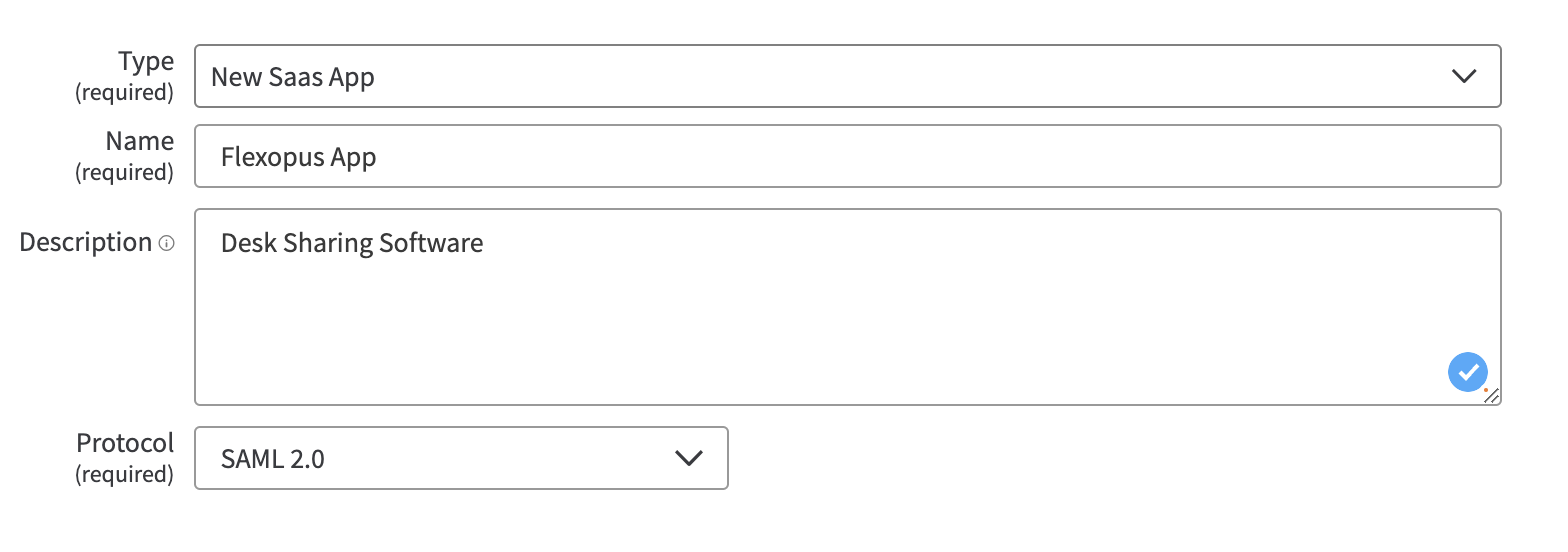
Enter the following parameters:
Type: New SaaS App
Name: Flexopus App
Description: Desk Sharing Software
Protocol: SAML 2.0
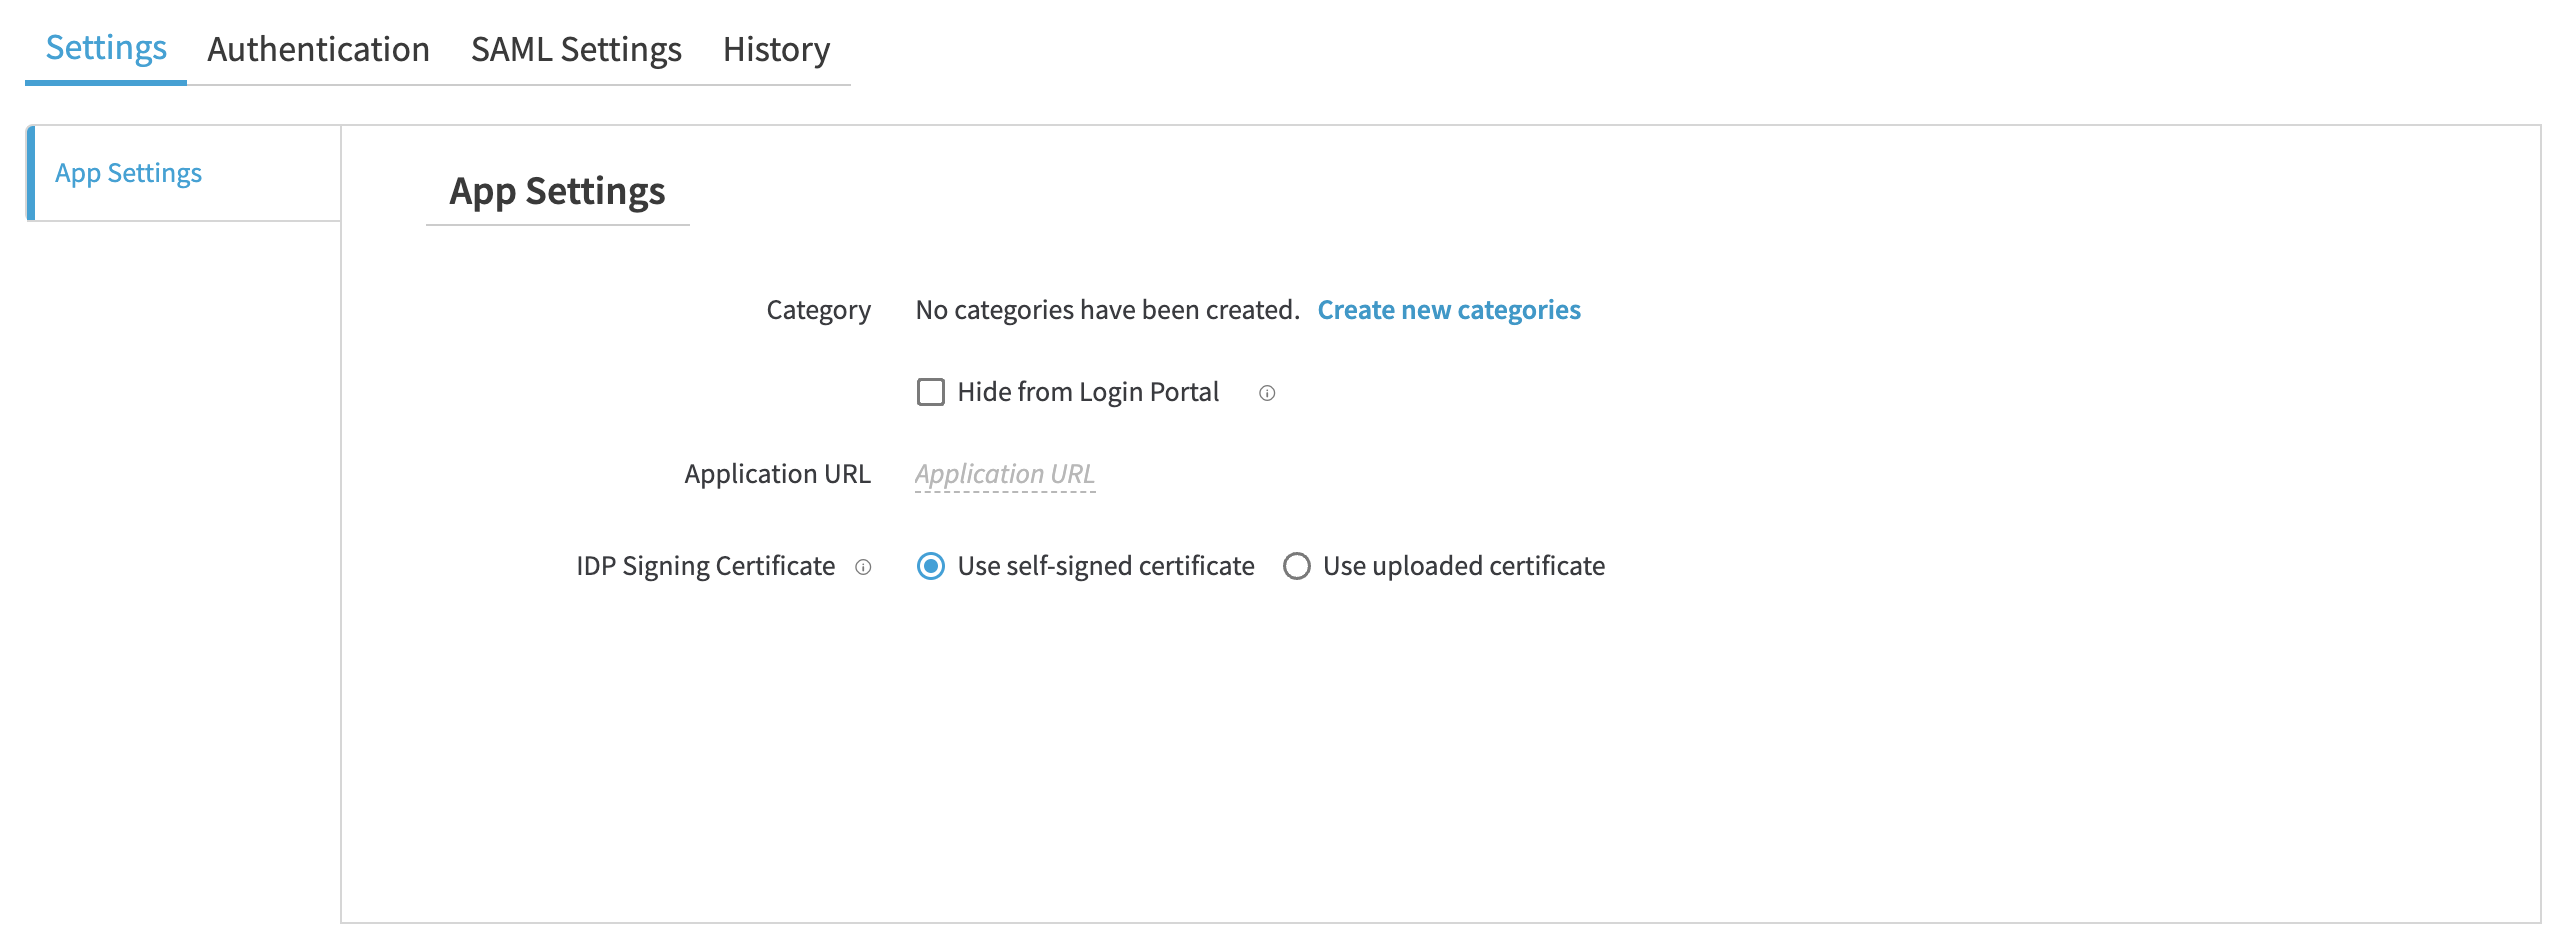
On this page, you need to enter the Application URL, which is basically the URL of the Flexopus application: https://{your-company}.flexopus.com
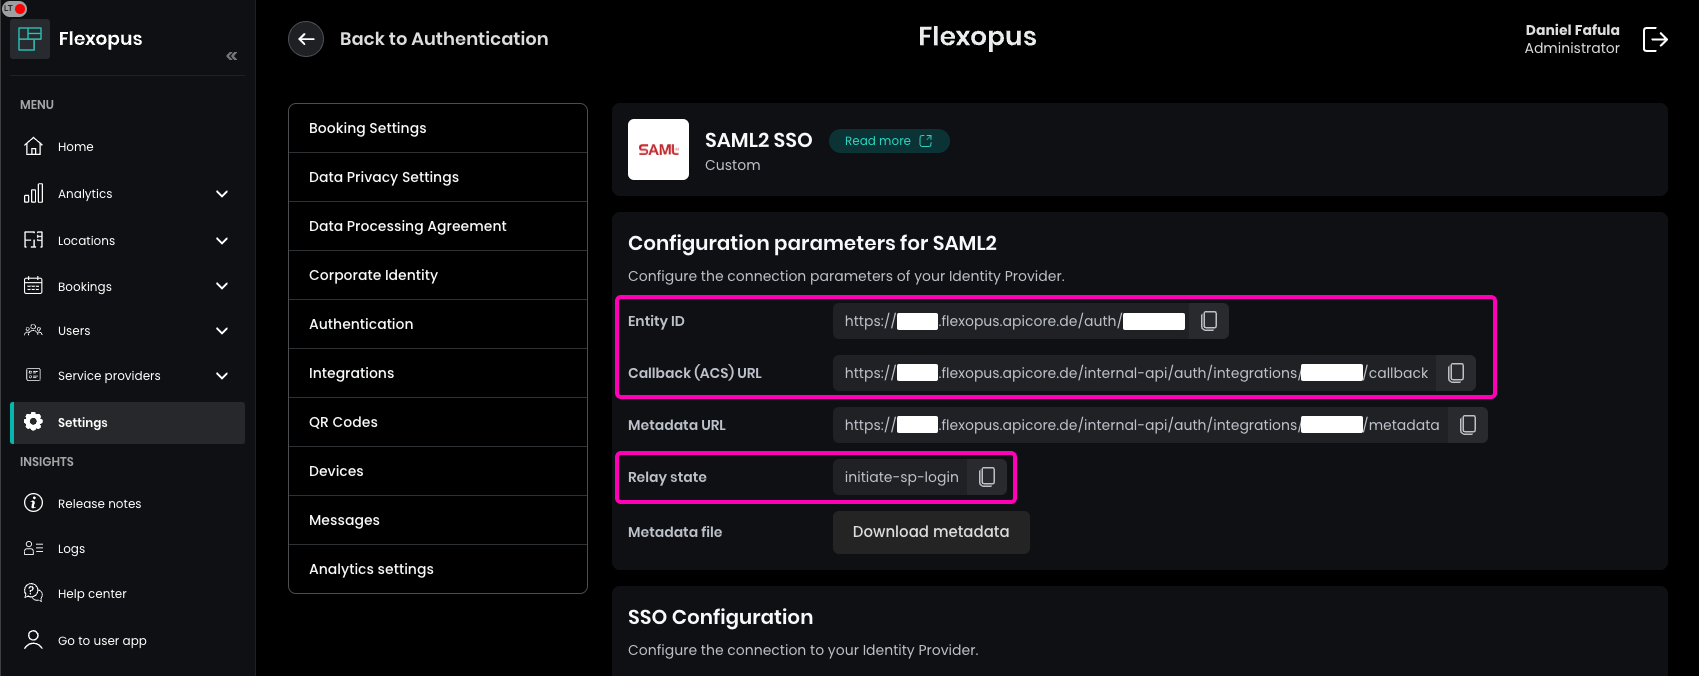
To find the necessary configuration parameters:
- Navigate in Flexopus as an administrator to
Dashboard > Settings > Authentication. - Click on the
Add providerbutton. - Select the
SAML2 SSOoption.
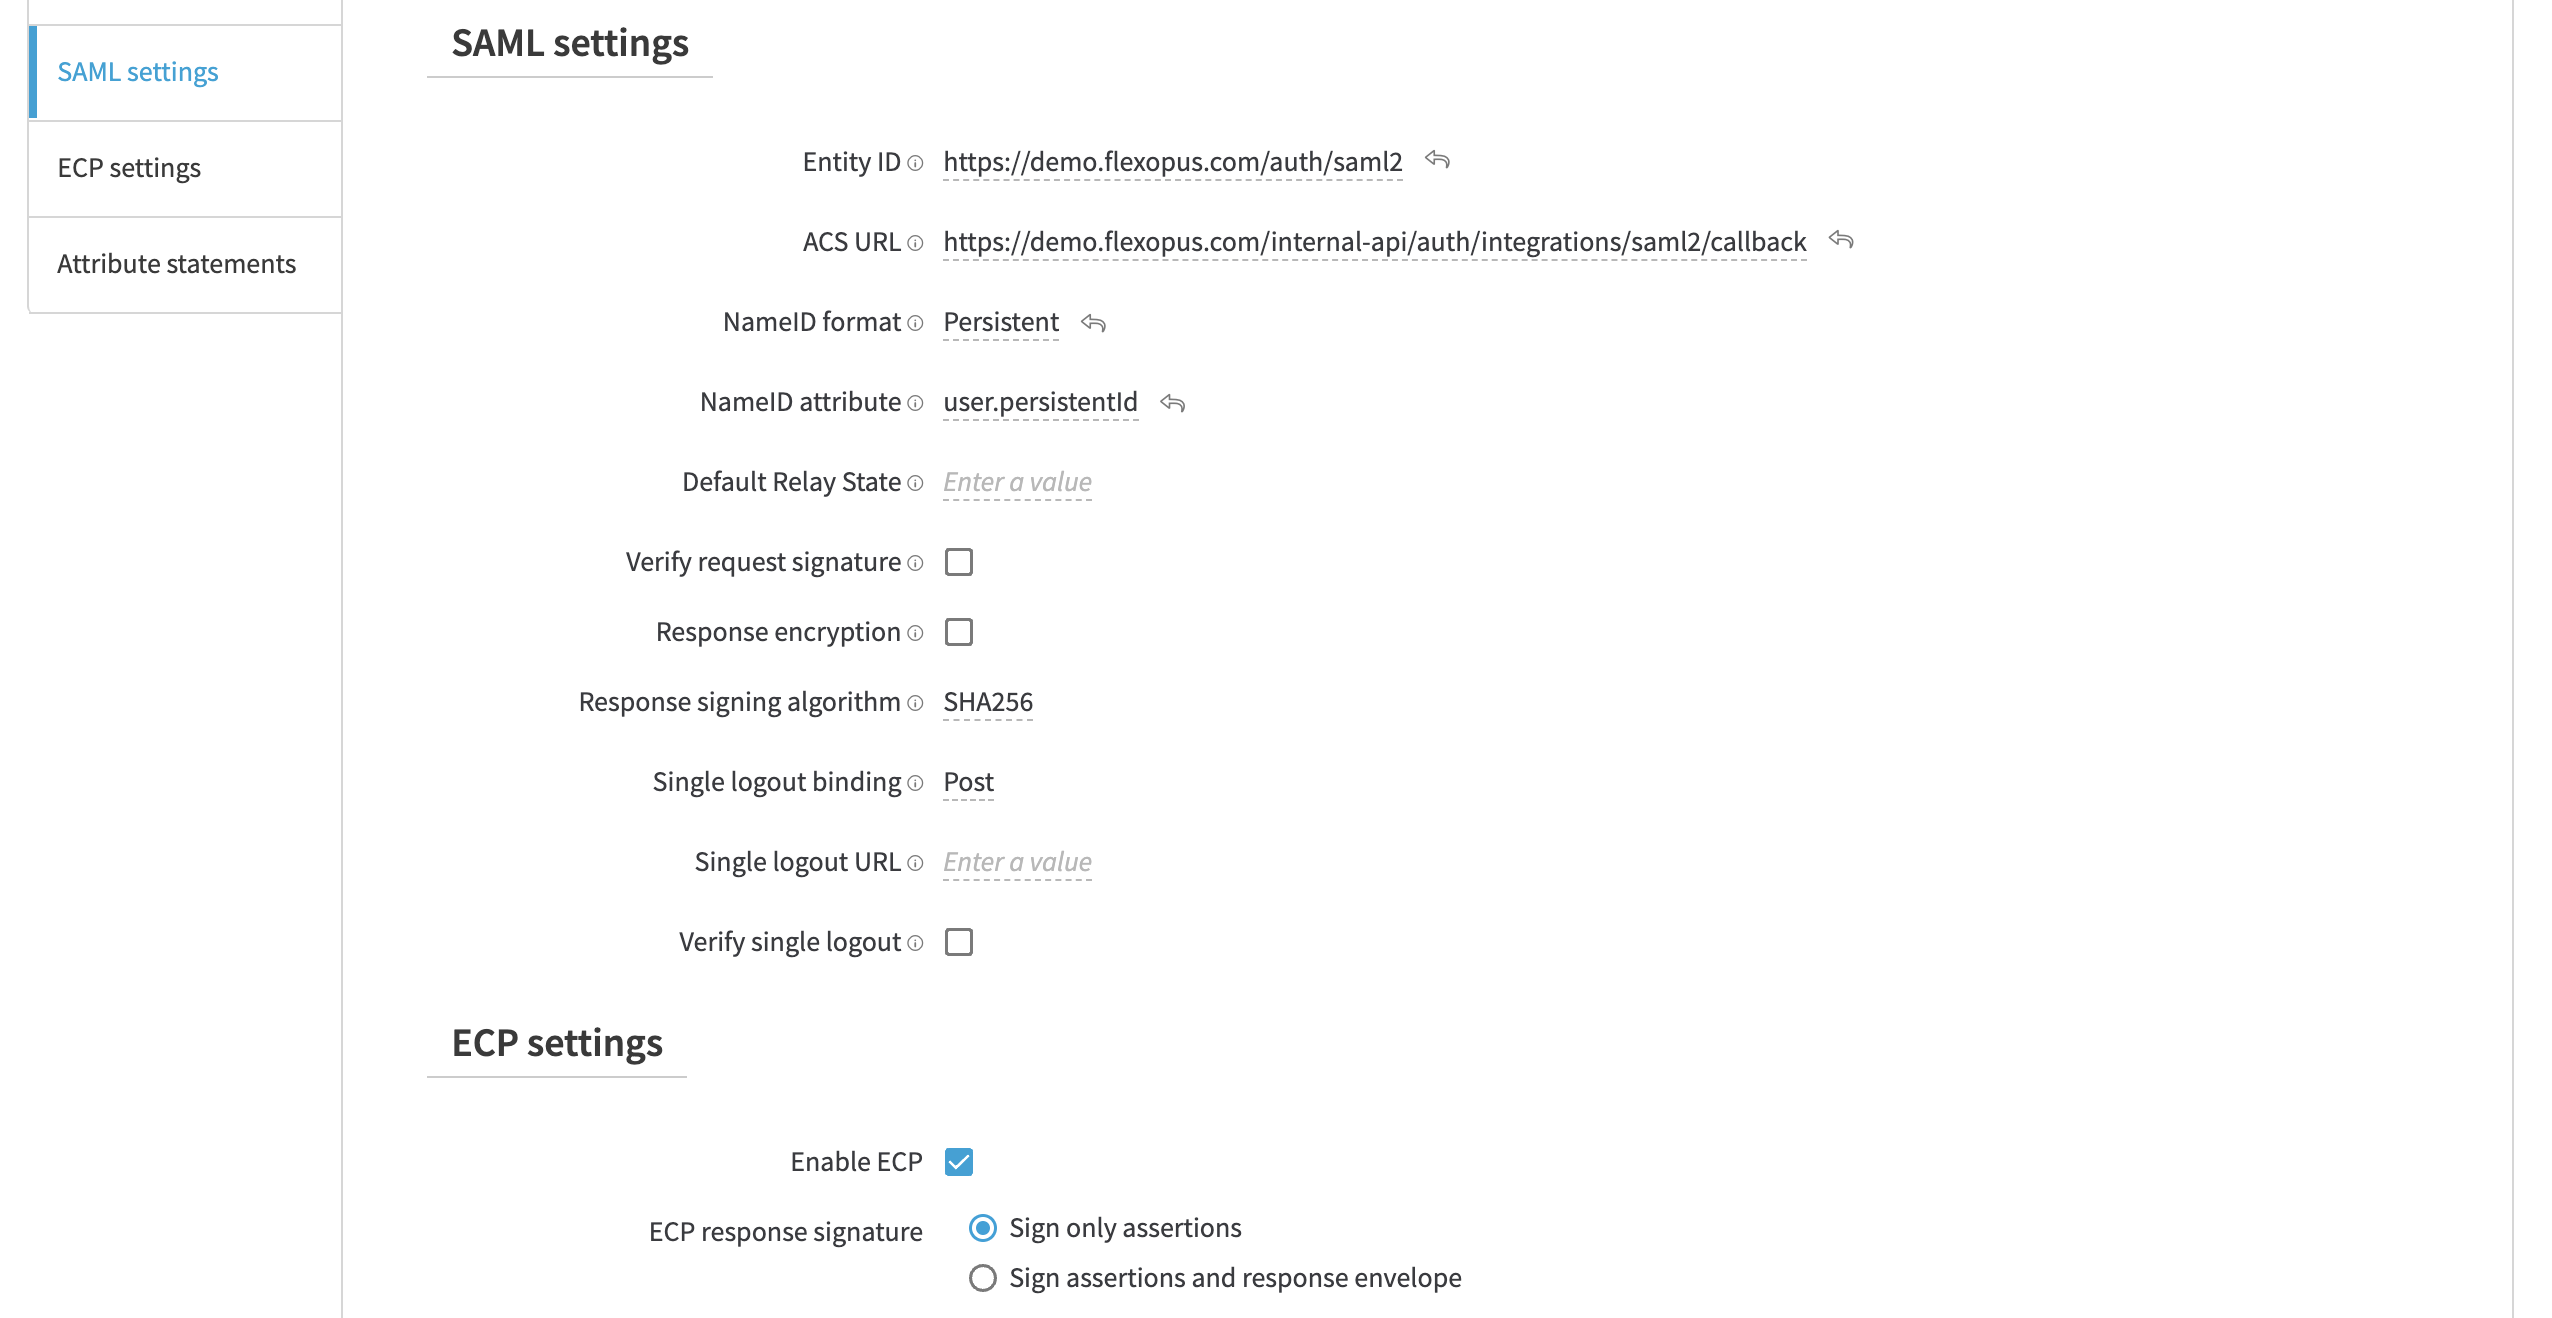
This will display the Entity ID, ACS URL, and Default Relay State needed to configure SAML settings.

Enter the following parameters:
Entity ID: Entity ID
ACS URL ID: Callback (ACS URL)
Default Relay State: initiate-sp-login
NameID format: Persistent
Name attribute: user.persistentId
Verify single logout: off
Enable ECP: On (Sign only assertions)
STEP 2 - Attribute mapping
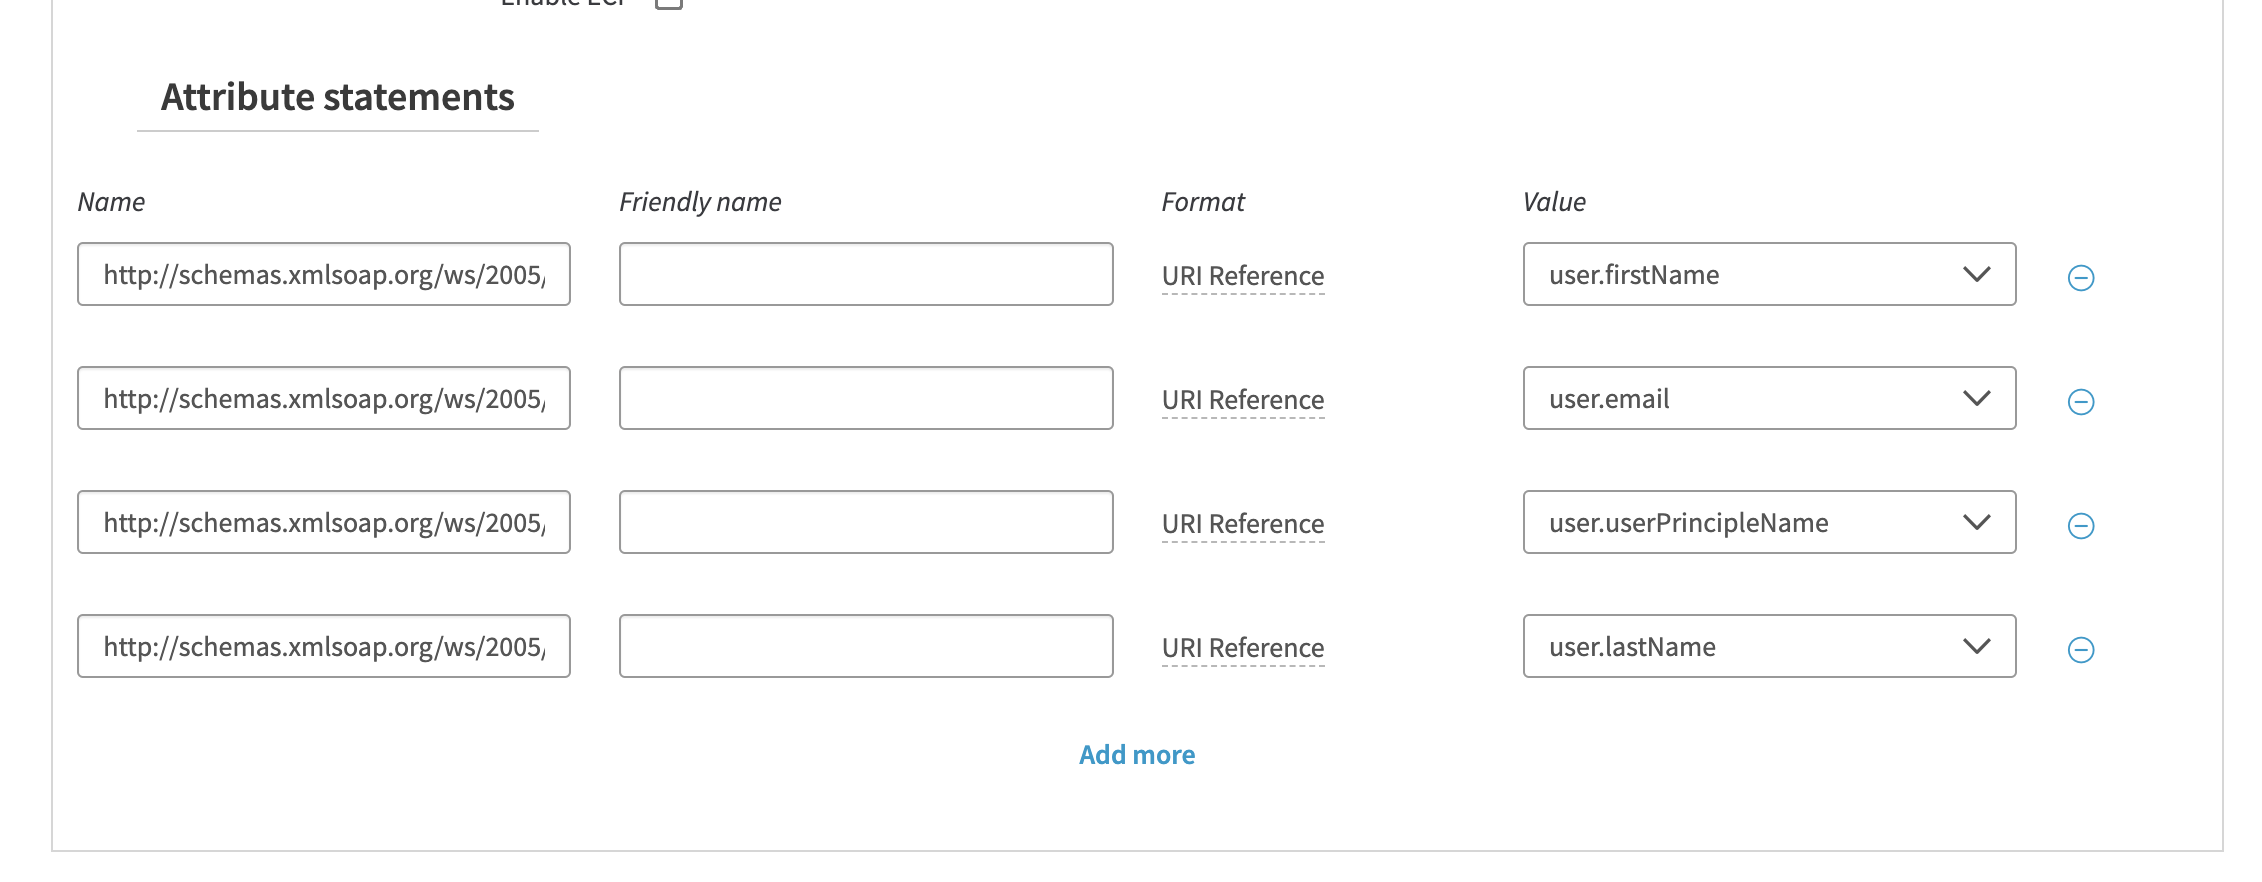
Configure the correct attribute mappings. You can leave the friendly name empty.
*Note that the department and the jobtitle is only an optional attribute for Flexopus. You can also leave it empty.
| Name | Name format | Value | Note |
|---|---|---|---|
| http://schemas.xmlsoap.org/ws/2005/05/identity/claims/givenname | URl Reference | user.firstName | required |
| http://schemas.xmlsoap.org/ws/2005/05/identity/claims/emailaddress | URl Reference | user.email | required |
| http://schemas.xmlsoap.org/ws/2005/05/identity/claims/upn | URl Reference | user.userPrincipleName | required |
| http://schemas.xmlsoap.org/ws/2005/05/identity/claims/surname | URl Reference | user.lastName | required |
| department | Basic | user.department | optional |
| jobtitle | Basic | user.title | optional |
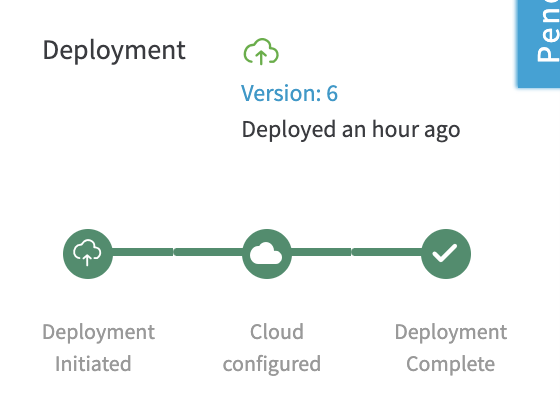
Save and deploy the app. Wait until the app is deployed. It takes time.
STEP 3 - Configure Flexopus
- On the
SAML Settingspage in Akamai, download theMetadata file. - In Flexopus, navigate to
Dashboard > Settings > Authentication. - Select the created
SAML2 Provider. - Enable the
SAML2 SSOand choose theMetadata fileoption instead of theMetadata URL. - Upload the downloaded
Metadata filefrom Akamai.
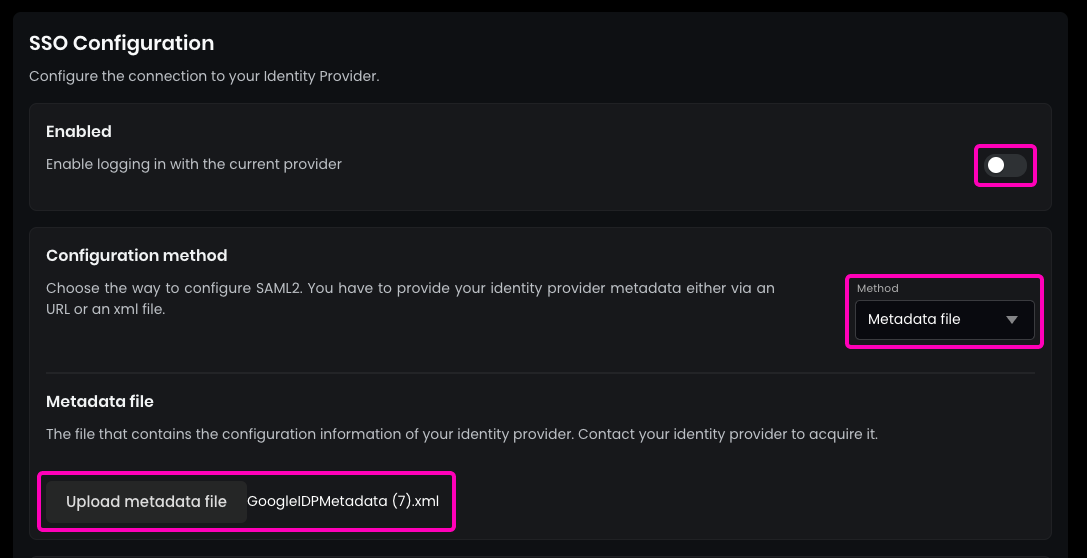
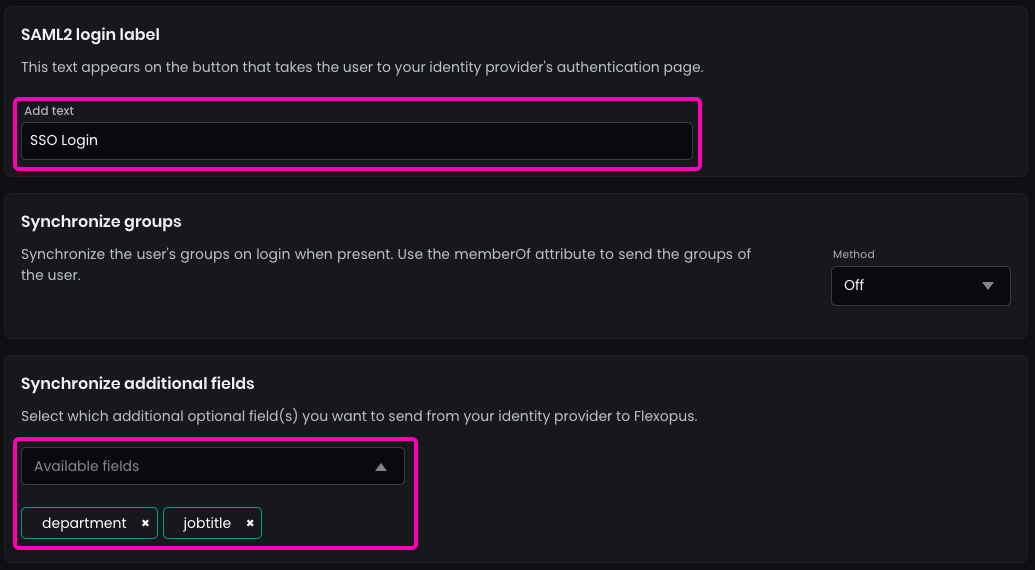
- Enter the name of the
SAML2 Login buttonto be displayed on the login page.Recommendation: "SSO Login" - (Optional)
Enable synchronizationfor fields configured in the SAML2 settings, such asjobtitleordepartment.
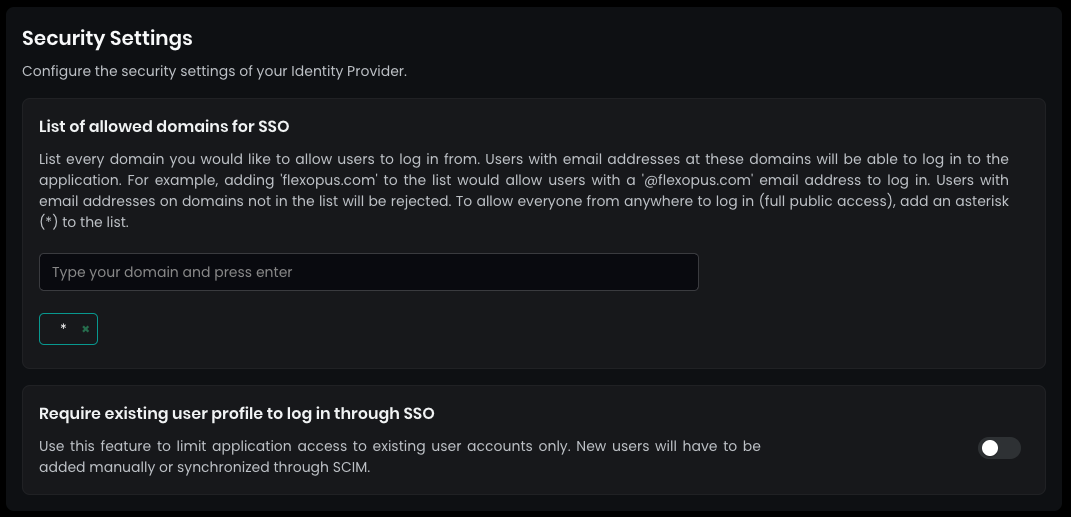
- In
Security settings, set theallowed domains for SSOto*(star) and pressENTER.This setting allows any user configured in yourAkamai directoryto log in. - By default, SAML2 SSO users are registered automatically after their first login attempt, which avoids the need for manual user profile creation before login.(Disabling this setting is not recommended).
Save your settings in the bottom.
STEP 4 - Configure who can log in
If you try to log in now into Flexopus, you will see an error message, since you did not configure who can or cannot log in from your Akamai user directory. Assign a test user to the application and test the connection at Flexopus.
Open the settings and decide which user or group can log in into the application. It's recommended enabling the login for the whole organization in case you don't have any reasonable limitations in place. In this case, you don't need to maintain the user's access for the login, and you can reduce the number of possible support cases regarding the login configuration.
STEP 5 - Test the configuration
Open Flexopus in a new incognito window and test the login. You should be able to log in with an existing or a new user, depending on how you configured the access rights in your Akamai and Flexopus.
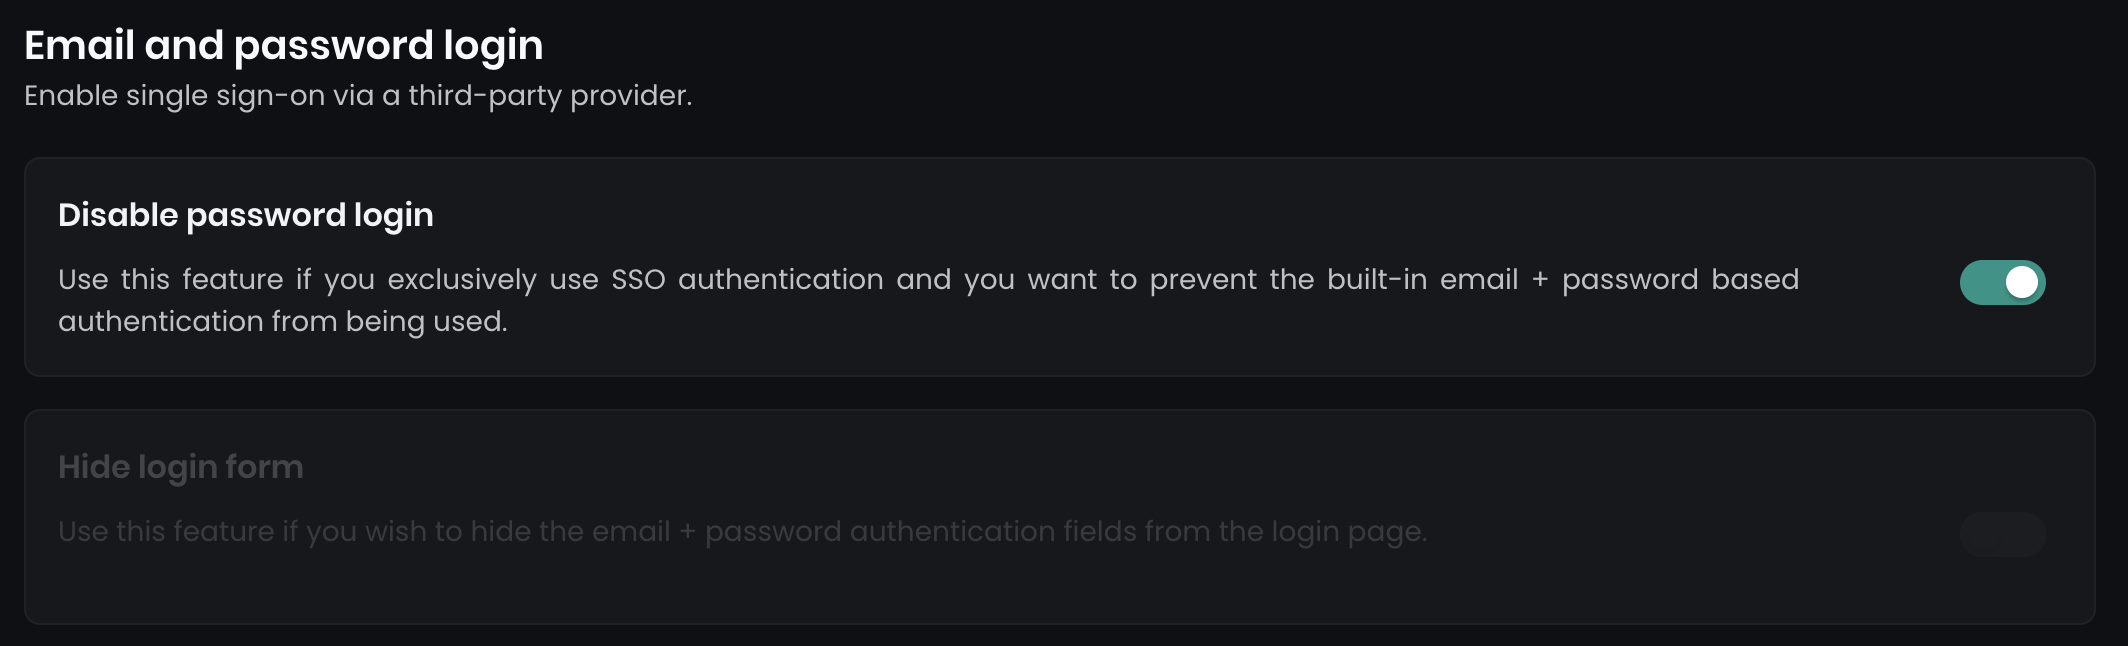
Once the SAML2 SSO configured successfully, you can optionally disable the E-Mail and Password login and enforce all users to user Single Sign-On. Navigate to Dashboard > Settings > Authentication. You can find two options here:
Trouble Shooting / FAQ
I got a 500 Error during the login.
In case you get a 500 error, you may misconfigure the URLs or the attributes. Check the settings based on the manual once again. If you can not find the issue, contact us via support@flexopus.com. We have server logs to see where the problem lies.
Can I change the UPN of the users?
As you may know, UPN stand for UNIQUE principal names. Unique attributes shall never change, especially the UPN of the user shall remain the same. It can be a number or anything else. External application are identifying users based on their UPN, if you change you may risk creating a new user within Flexopus. Still, you may have a reason to change the UPN. In this case, contact us via support@flexopus.com. We can assist you by deleting the UPNs and the External IDs of the user to allow you the change of the UPNs in your IdP.
Can I also synchronize the user profile pictures?
Unfortunately, the SAML2 SSO protocol is not supporting the synchronization of profile pictures.
I saw an attribute costcenters. What is it doing?
Indeed, we have an additional attribute, which is called costcenters. The feature is currently in a BETA testing phase. More information will follow.
Does Flexopus support Identity Provider (IdP) Initiated Single Sign-On login?
Yes and No. We provide a workaround for the IdP initiated logins. You need to configure the initiate-sp-login parameter for the RelayState. This will convert the IdP initiated login request into an SP initiated login. In this way, we can ensure a secure login process.
Reason: A classical IdP initiated login would enable a man in the middle attack for hackers. Through an SP initiated login, we can avoid that. This article explains the reasons in more details: https://www.identityserver.com/articles/the-dangers-of-saml-idp-initiated-sso
R0083