Azure Active Directory SCIM API
Introduction
You can integrate with Microsoft Azure Active Directory (Azure AD) via federated authentication or using SCIM (System for Cross-domain Identity Management), allowing users to log in to Flexopus using their existing Azure AD credentials.
Flexopus can be linked to an instance of Microsoft Azure Active Directory (Azure AD) via federated authentication. This is a process whereby the username and password of an account from a first directory system are provided in such a way that the same username and password can also be used in other systems.
What are the advantages of SCIM?
With the SCIM interface, you can better automate user administration between your Identity Provider (IdP) and us as Service Provider (SP). The following advantages result from this:
- Synchronize and deploy user groups
You can manage user groups externally in your IdP. Through SCIM, external groups, including members, can be sent to Flexopus. These groups are created in Flexopus as “read-only” groups and can only be managed externally by your IdP. The groups can then be used normally for the administration of the workstations. All changes in these groups are sent to Flexopus within 40 minutes. - Synchronize and provide user profiles
User profiles and the changed and associated attributes (name, job title, department, etc.) can be synchronized automatically. Every change in your IdP is usually sent to Flexopus within 40 minutes, so user profiles can be kept constantly up-to-date. In contrast to SAML2, the data exchange runs during the session time and not only during the login attempt. - User profiles before the first login
By combining the two benefits, you can basically create a group in your IdP. You can assign group to Flexopus. Through this assignment, the members of the group can also be sent to Flexopus before the first login.
Example: The newly hired employees can be sent to Flexopus before the first working day, so that the responsible colleagues can possibly manage local user groups in Flexopus. - Automatically archive and delete user profiles
The provided user profiles including group assignments can also be automatically deactivated / archived. Should a staff member lose access to the application. The IdP reports through SCIM to Flexopus that the employee no longer has access to the application. This can happen for several reasons: the Employee was dismissed, or the IT Administrator has intentionally or unintentionally revoked the authorization. Thus, the employee is archived in Flexopus. With an additional data protection setting, the archived users can then be automatically deleted from Flexopus after X days.
Setup Instruction Manual
STEP 1 - Configure the SCIM API
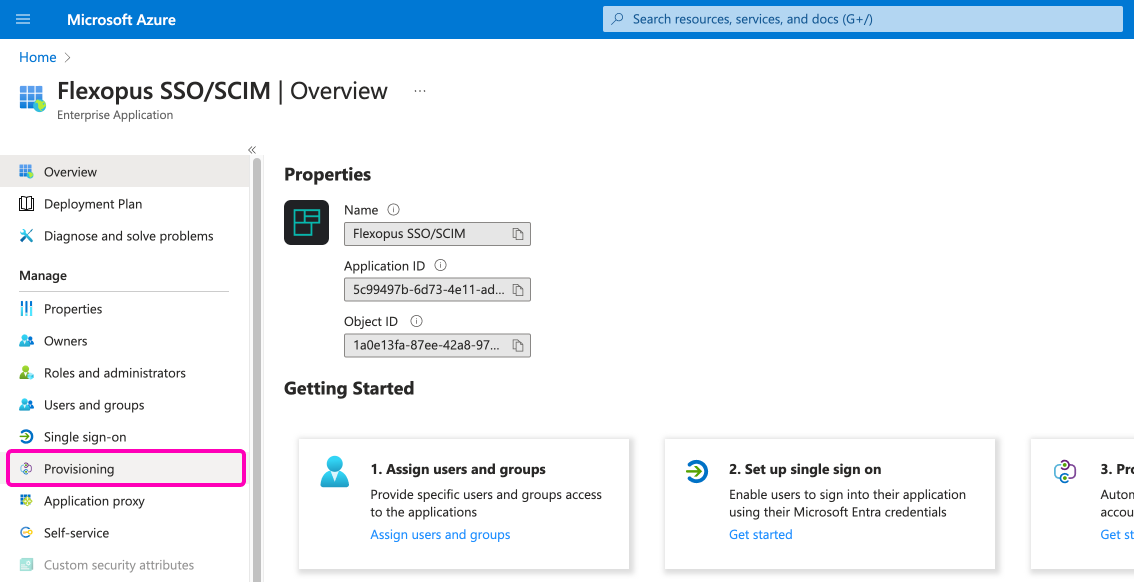
Go to your Azure Active Directory as an administrator. Visit the Enterprise Application page and select the Flexopus application that is used for the SAML2 SSO connection. We named it Flexopus SSO / SCIM in our example.
Visit the menu point Provisioning and click on the Get Started button.
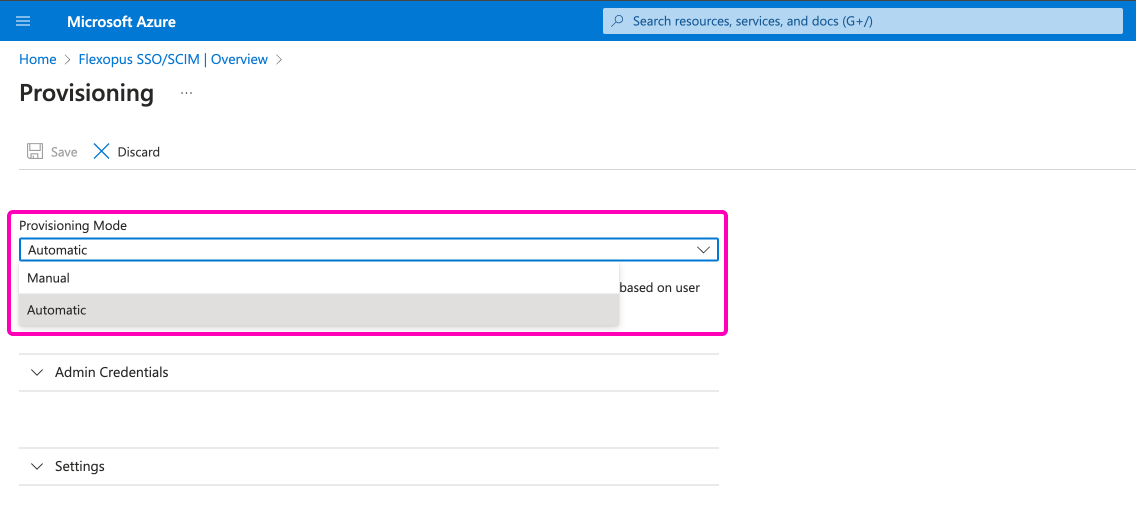
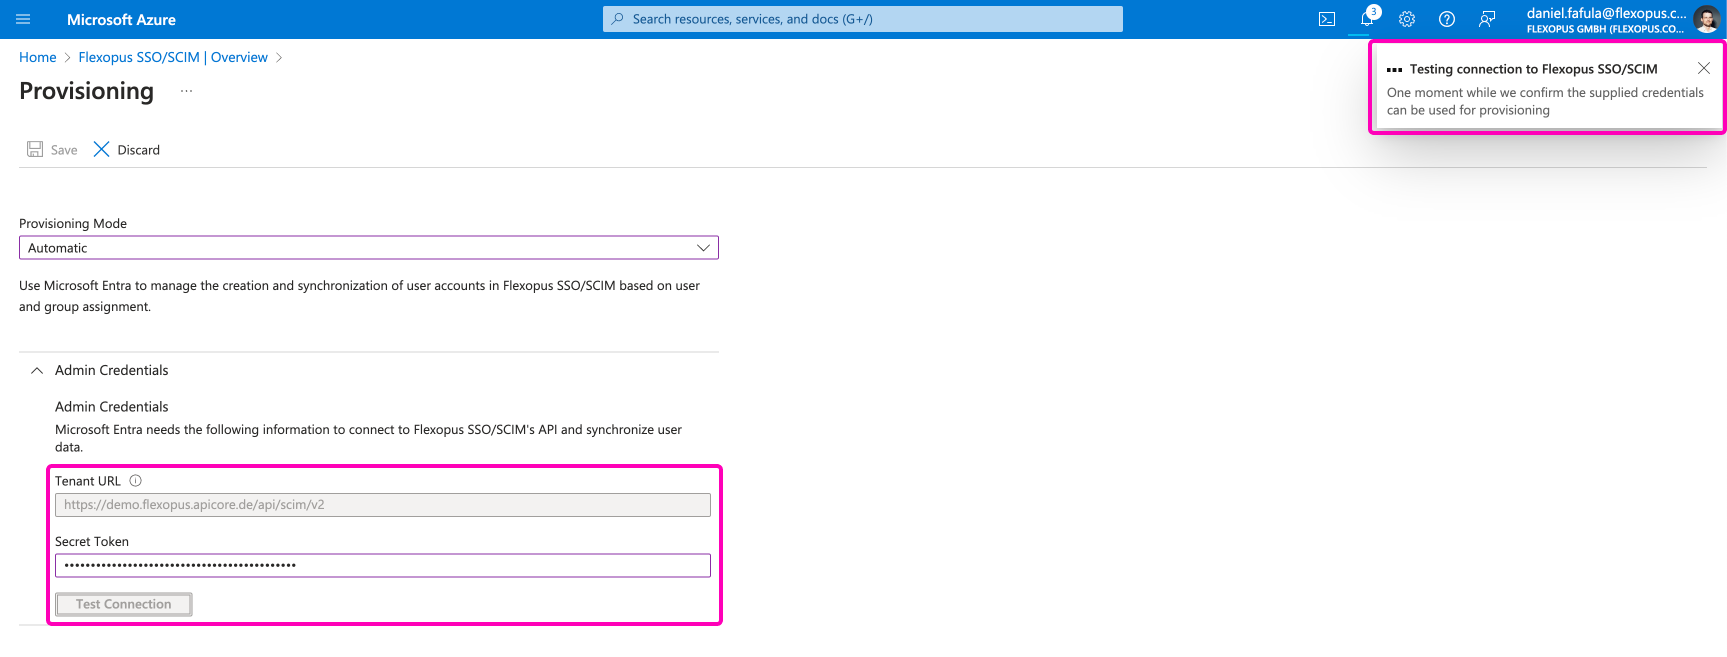
Instead of manual provisioning mode, select the Automatic option.
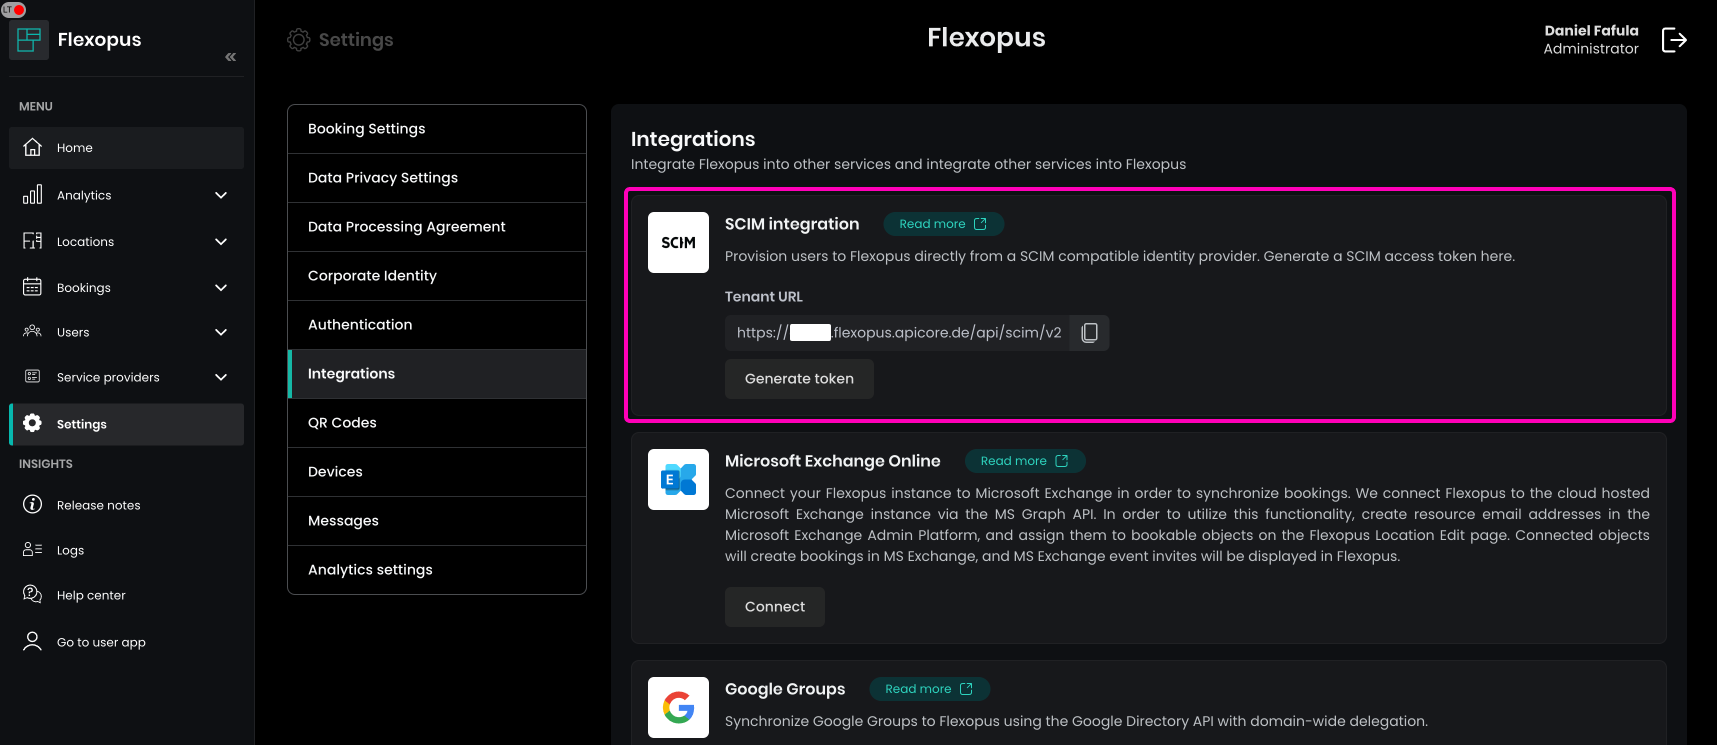
Go to your Flexopus Dashboard as an administrator and visit the page Dashboard Settings > Integrations. Here you can see the Tenant URL and you can generate the SCIM API token.
Take the Tenant URL and the Secret Token and paste them under the Admin Credentials section in the Active Directory. Then, click on the Test Connection button. You should receive a success message in the right top corner.
STEP 2 - Attribute mapping
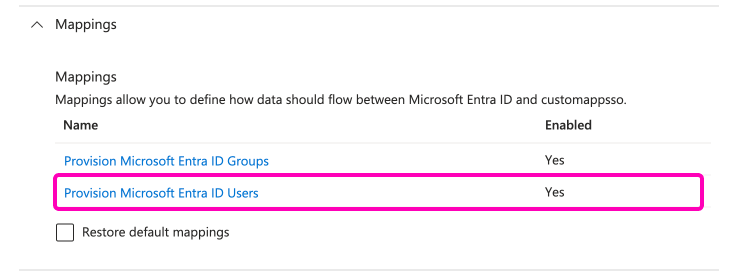
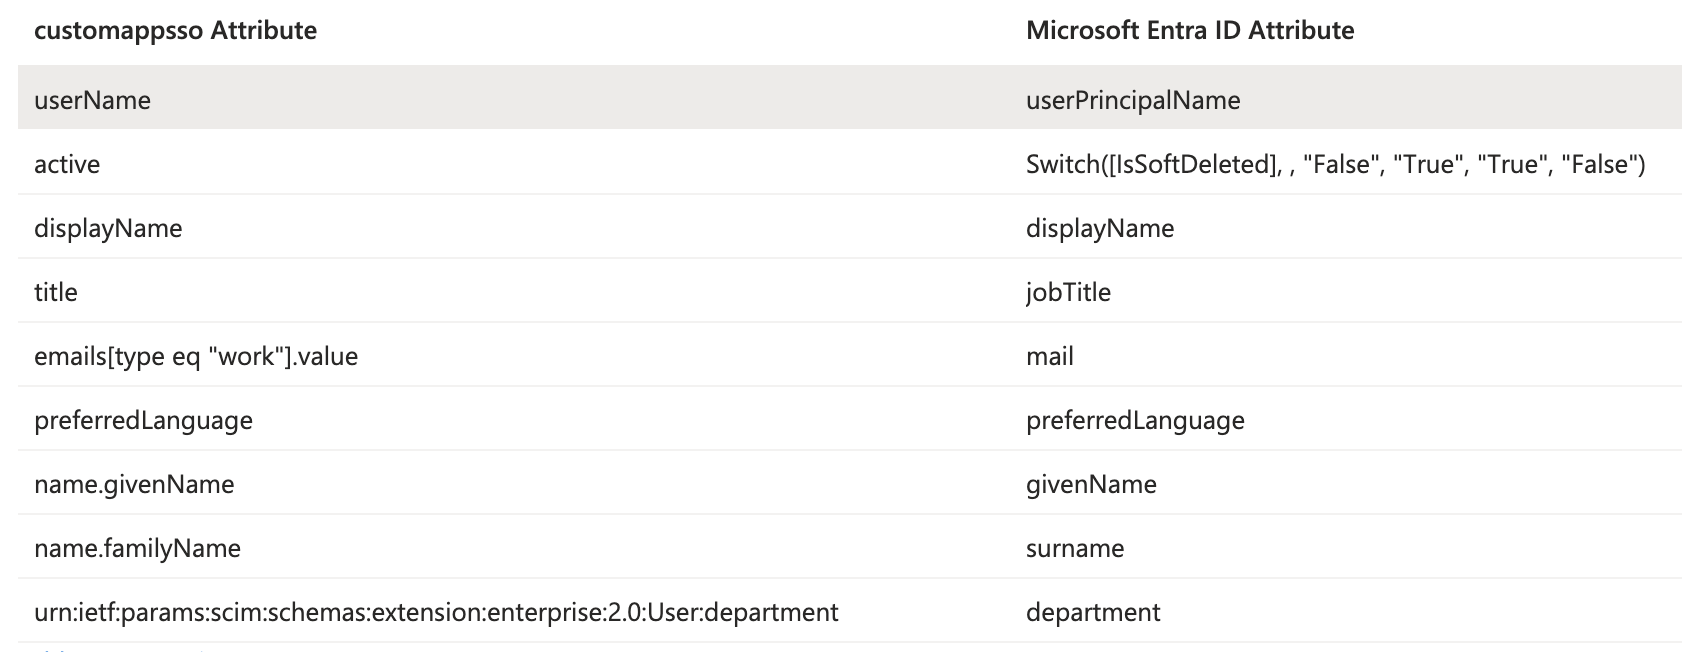
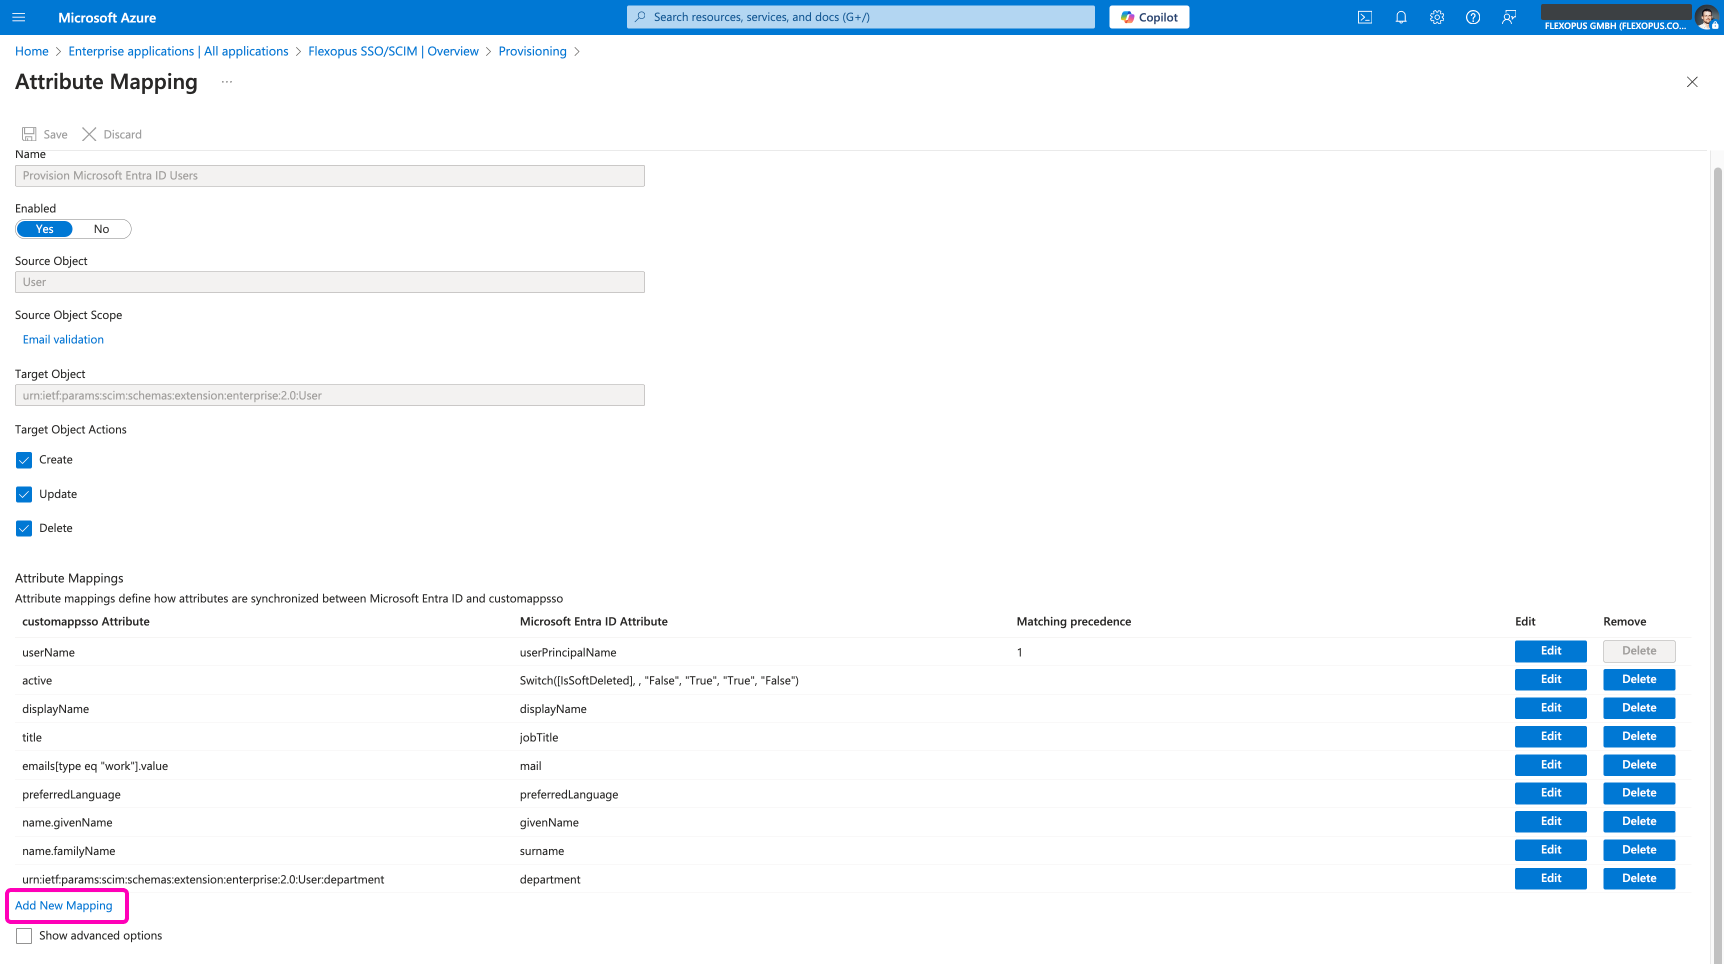
Set up the attribute mappings. Open the Mappings dropdown and select the Provision Microsoft Entra ID Users option:
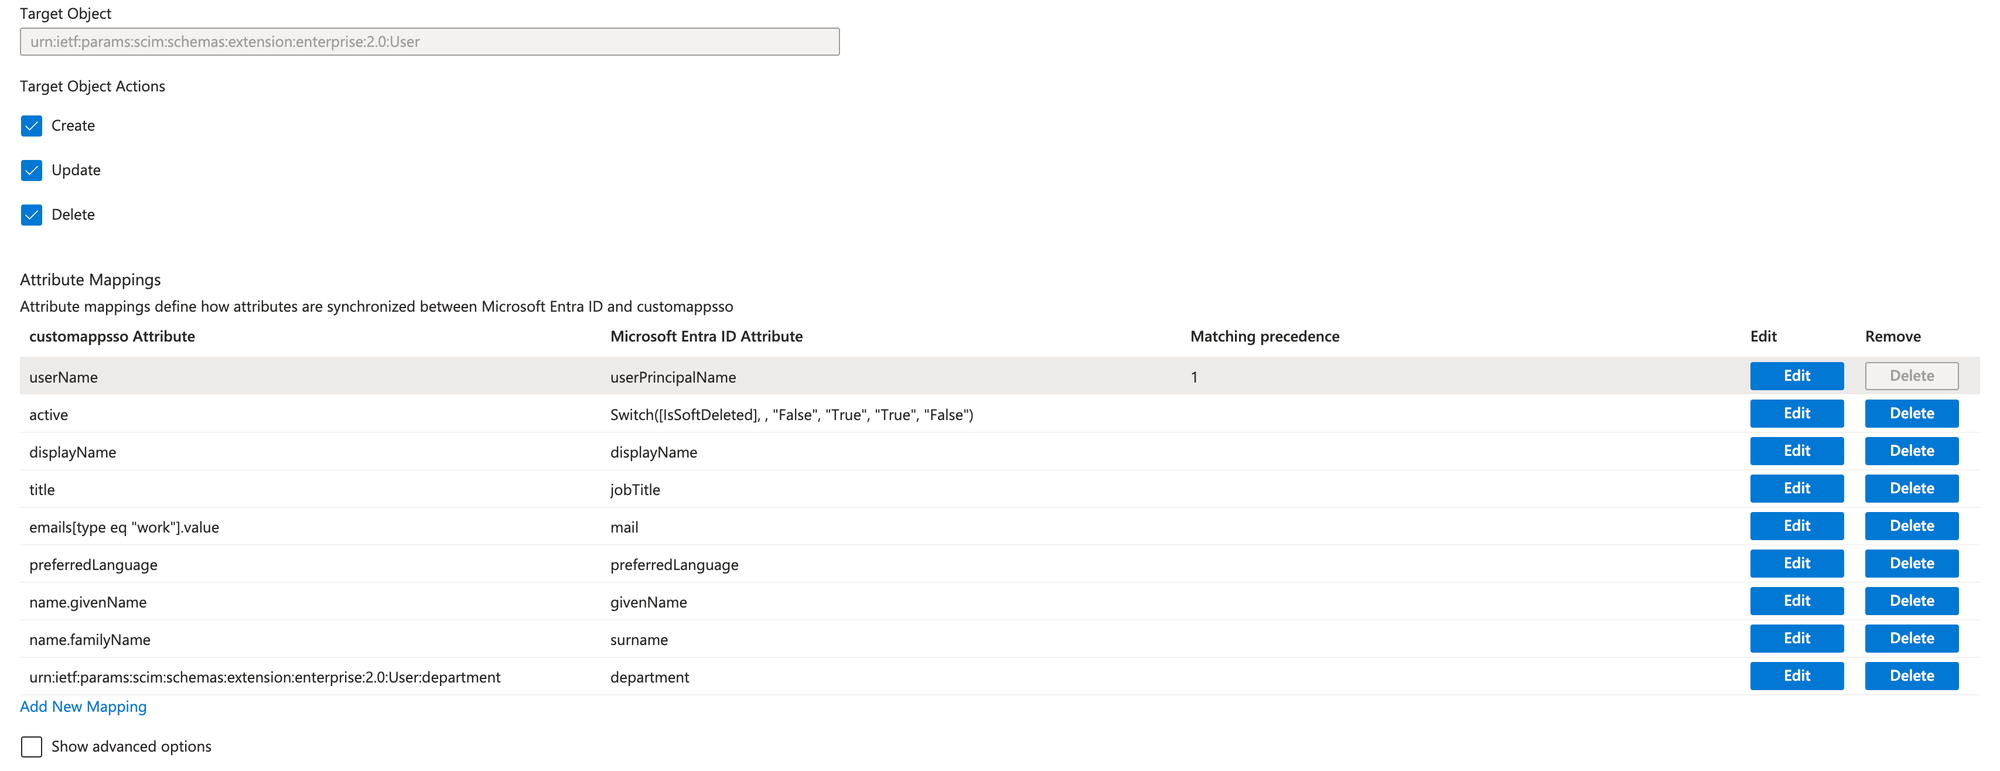
The default setting of the SCIM API is sending more data than we need. Delete the unnecessary fields as listed below. After editing the attributes, save your changes.
STEP 3 - Data validation
Next, you need to validate the user profiles that will be sent through this automated interface to Flexopus. Flexopus expects to receive user profiles with an email address, however in some cases there are user profiles in Active Directory, which do not have any email addresses, this synchronization of these profiles will fail. To avoid this to happen, the invalid user profiles need to be filtered.
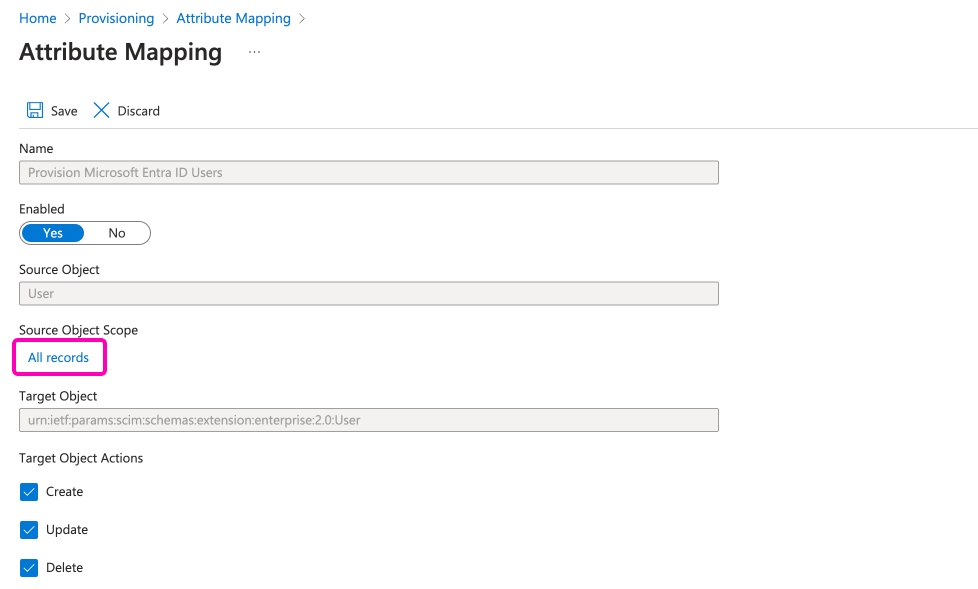
Select the option Source Object Scope > All record to create a scoping filter, then click on the Add new filter group option.
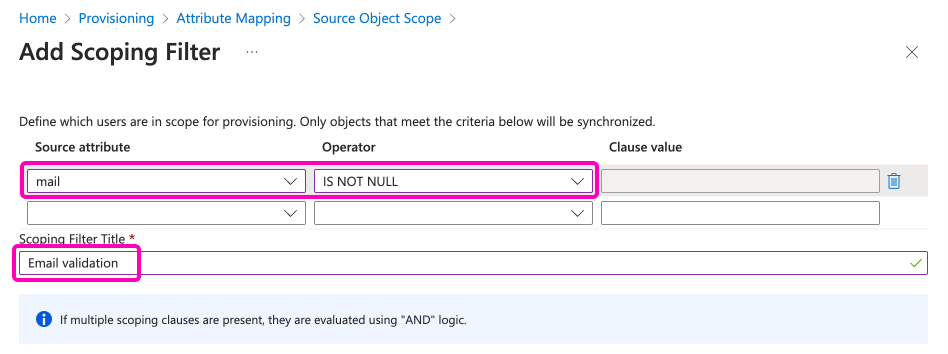
On this window, enter the following filter:
- Source attribute:
mail - Operator:
IS NOT NULL
Name the filter as: Email validation. Save the settings. (You have to save multiple times.)
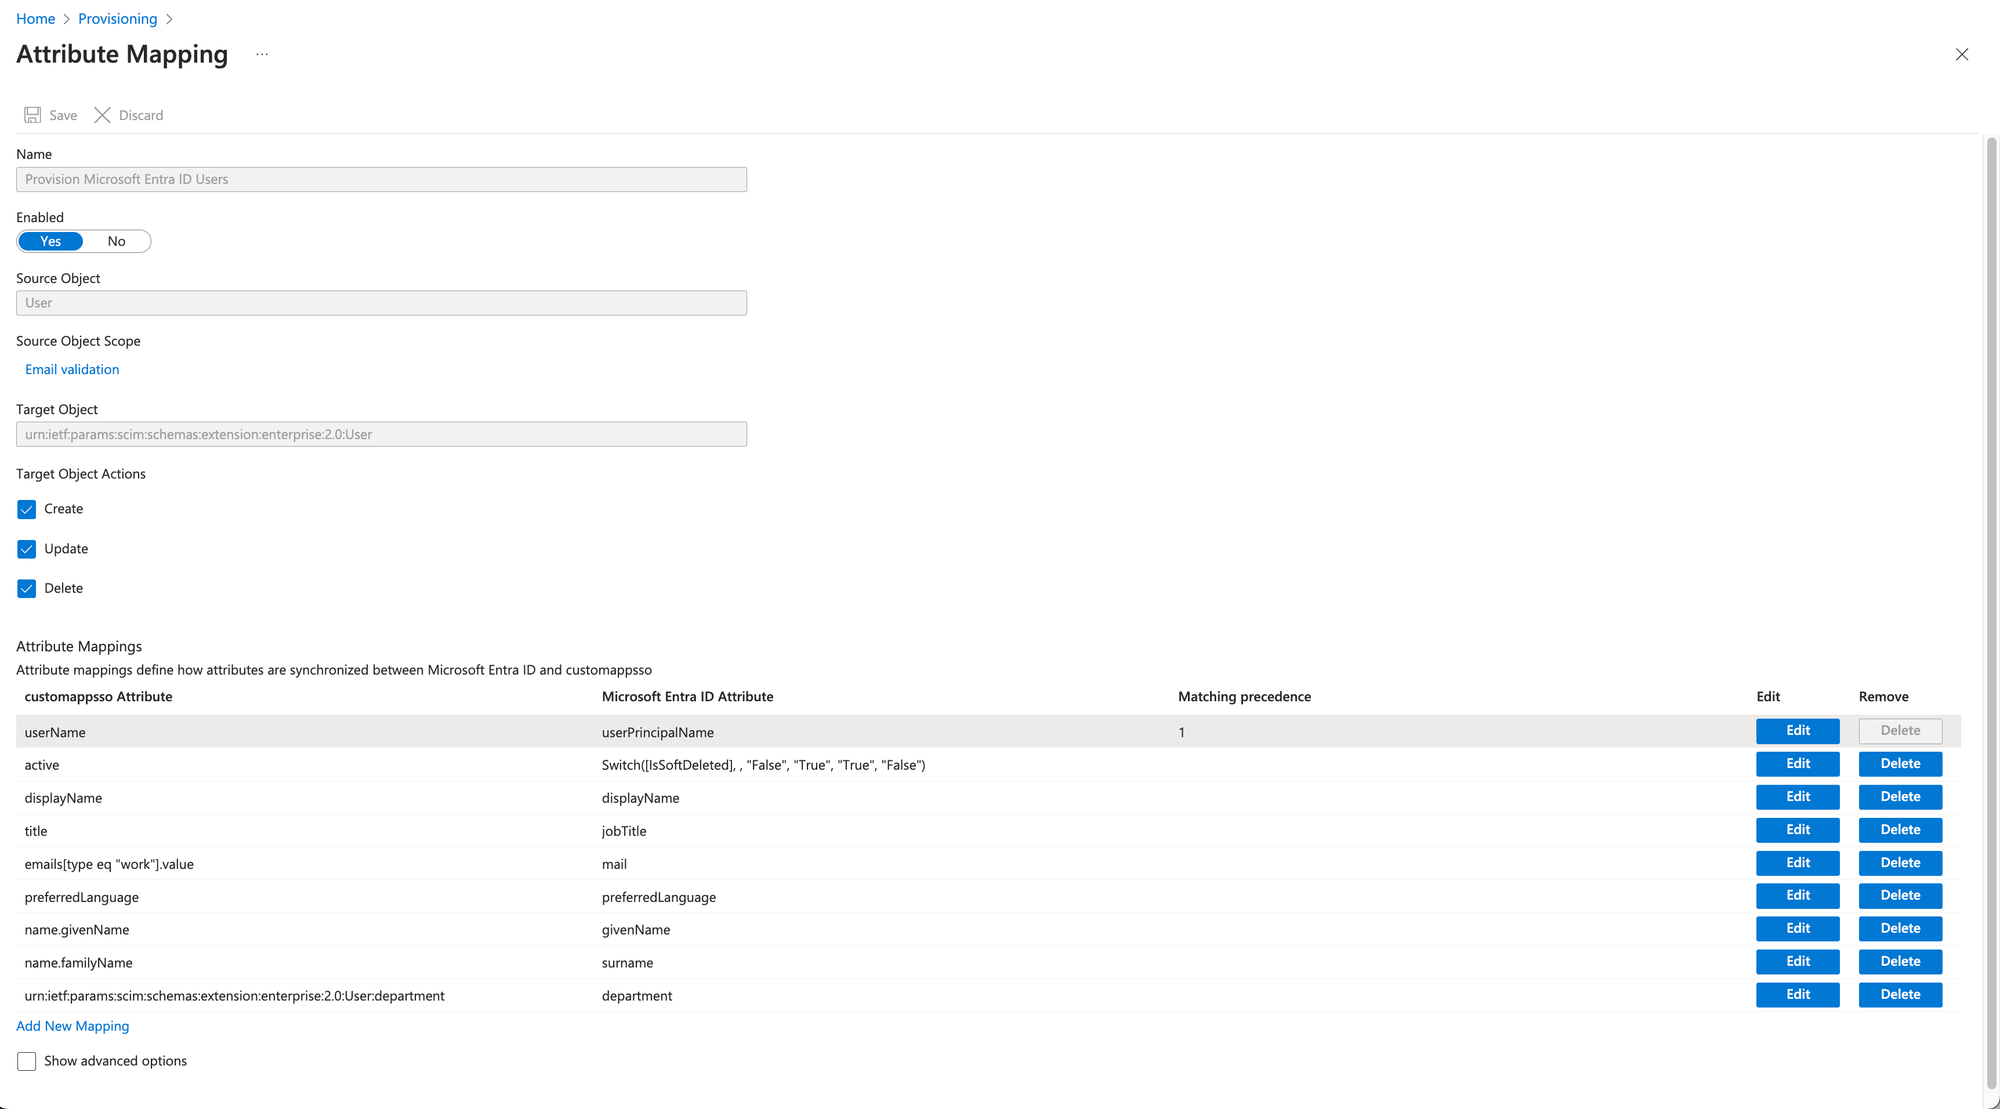
The final settings will look like this for the User settings:
STEP 4 - Notification email
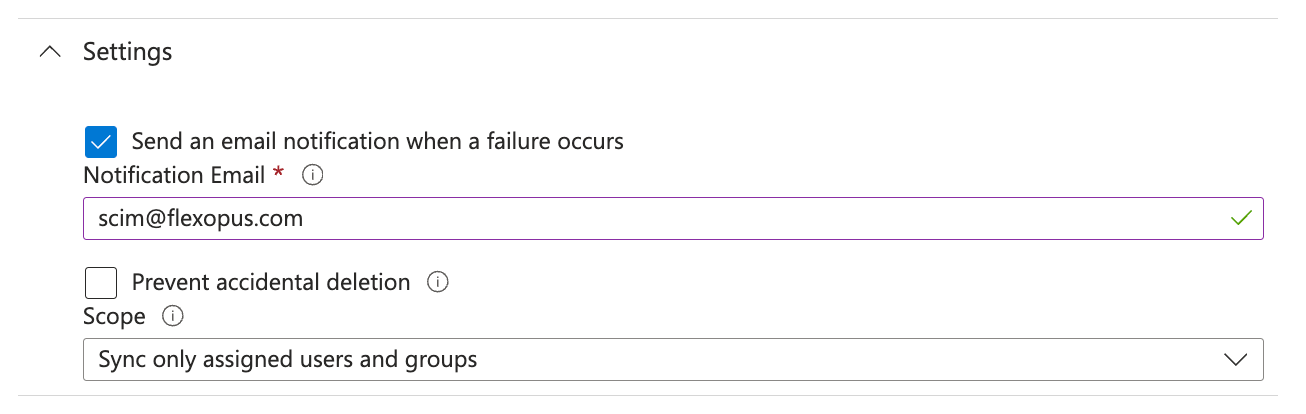
Go to the general provisioning settings and select the option Send an email notification when a failure occurs and enter scim@flexopus.com email address. Through this email address, we can be informed, if Microsoft is blocking your integration.
The SCIM API is an automated API causing many requests between Flexopus and Microsoft. In case your configuration changes (Flexopus is moved to another domain, etc.) the requests cannot be processed. In this case, Microsoft is blocking, stopping the integration. The only way to be notified about this block is this email address. Of course, you can also enter your internal IT email address to be informed about these notifications. Save the changes.
STEP 5 - Add groups
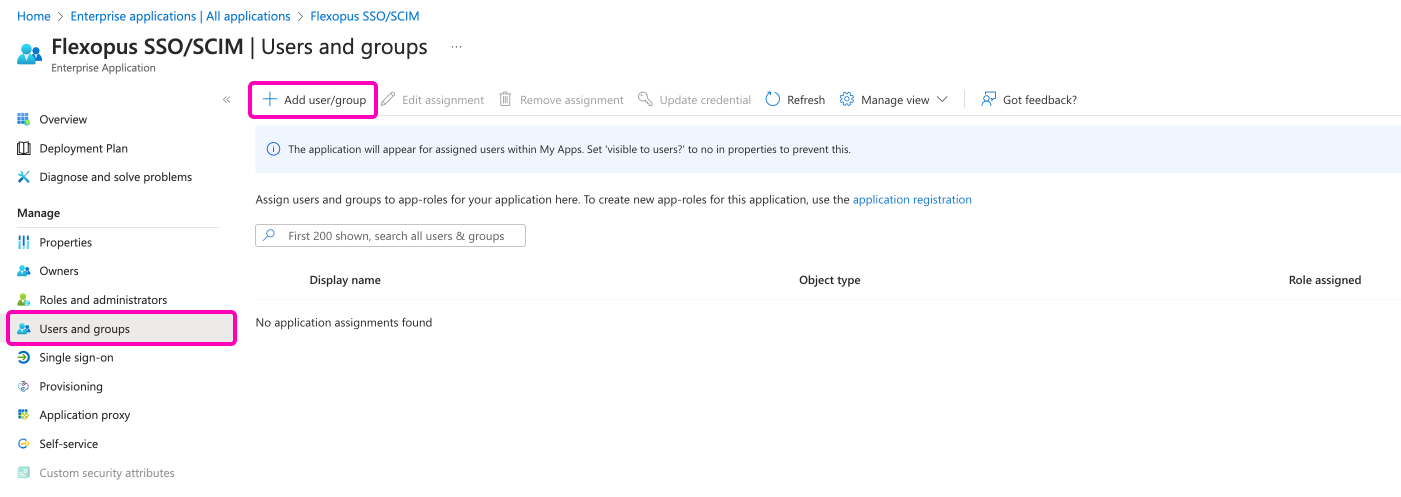
Before starting the provisioning, you need to configure which groups and users should be provisioned.
To assign groups and users, navigate to the Users and groups menu tab and click on the Add user/group button in the top. Remember the golden rule: Only the explicitly assigned groups and users will be provisioned. You may have more groups in your active directory, still only the selection will be used for this enterprise application.

STEP 6 - Start provisioning
Now, you configured all the necessary options for the SCIM API. Navigate to the main provisioning screen and click on the Start provisioning button.
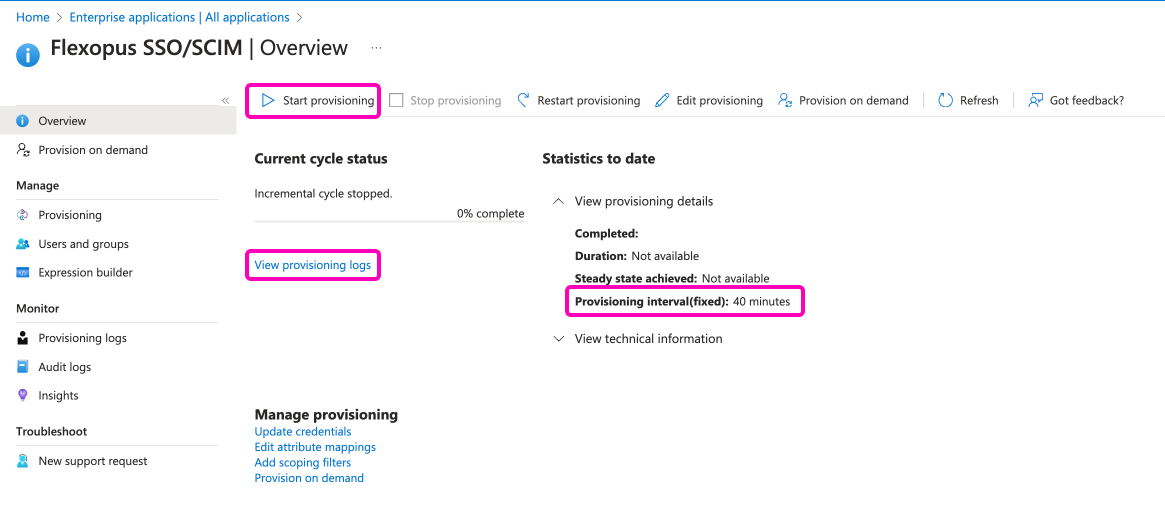
As you can see on the right side, the provisioning will be executed latest in 40 minutes, which means that you shouldn't expect an immediate change in Flexopus. To test if the provisioning started, you can check the logs in the View provisioning logs tab.
STEP 7 - Testing
Once you assigned a group and started the provisioning, you can expect the following changes in Flexopus. The groups will be provisioned with an external marking to Flexopus, which means that you cannot edit the groups locally in Flexopus. You cannot change the names, add users or delete user from the group. The single source of truth will be the group structure in your Active Directory.
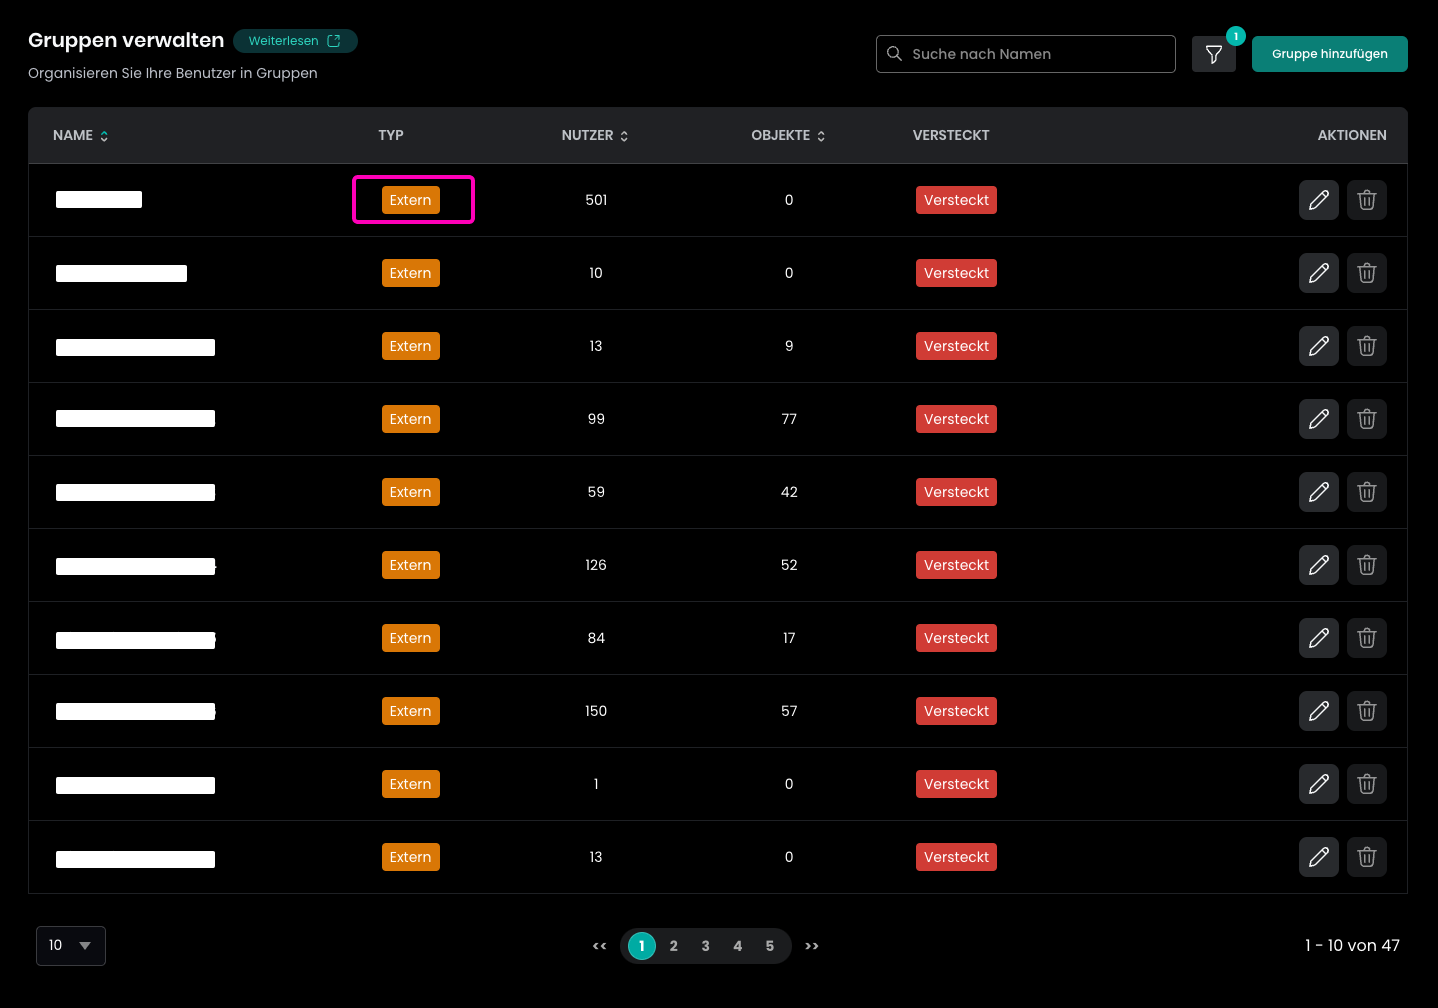
You can use the groups for access management within Flexopus similar to the other internal or system groups.
Learn more about groups here:

Additional attributes
Flexopus supports additional attributes that can be synchronized, such as the extension attributes or the cost centers.
Costcenter
TODO
ExtensionAttributes[1-10]
Flexopus supports up to ten additional attributes synchronized from external sources. They are called extensionAttribute1, extensionAttribute2, …, extensionAttribute10 in Flexopus.
Add the extension attributes to the SCIM provisioning as an attribute mapping by following these steps.
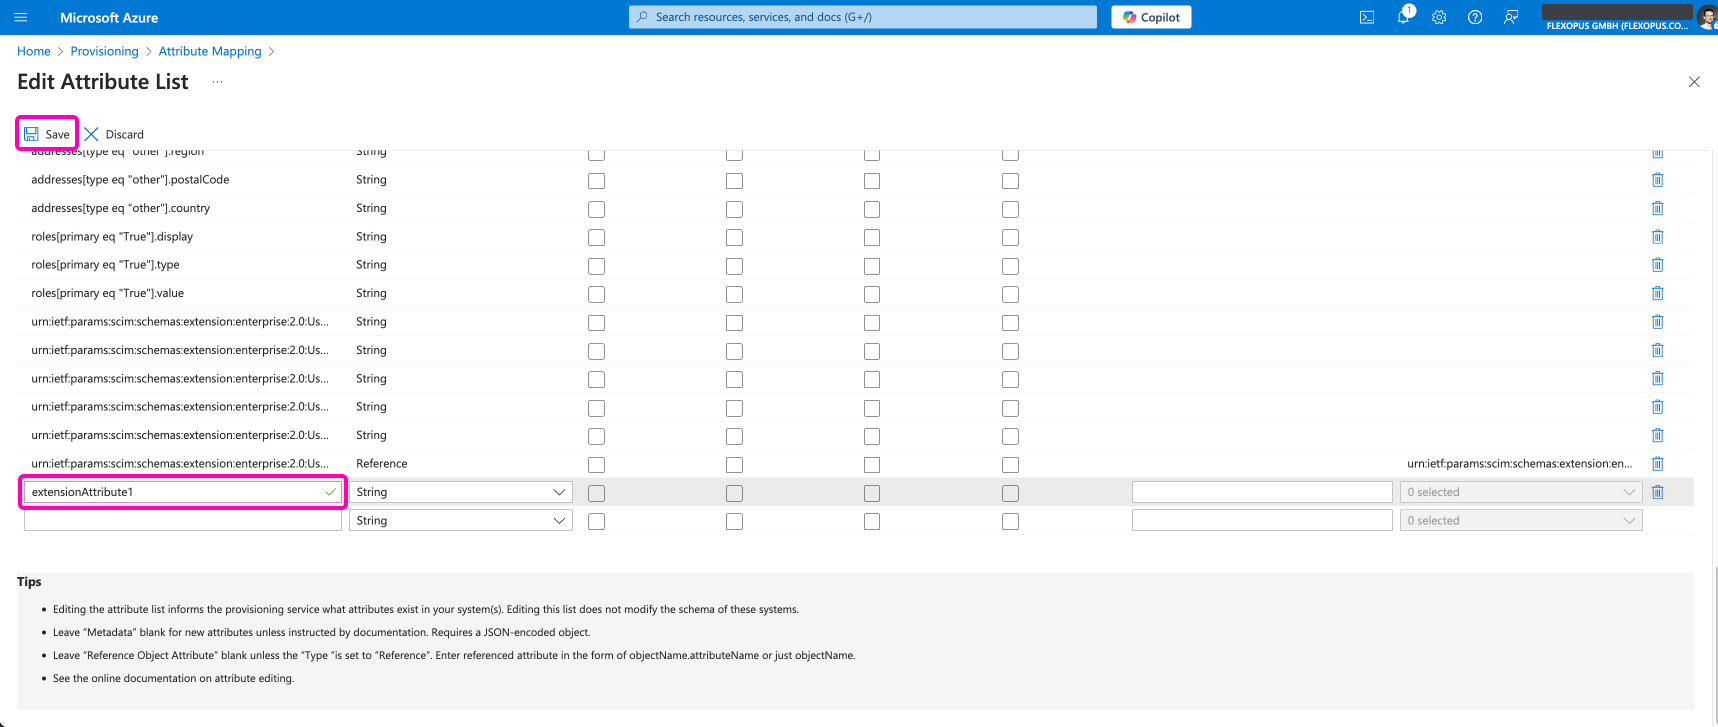
Click on the Show advanced options button in the SCIM User attribute mapping and select the option Edit attribute list for customappsso.

Flexopus expects the attributes under the name extenstionAttribute[1-10]. This needs to be added to the attribute mapping so that you later can select it as a target attribute.
After saving the new custom target attribute, go to the attribute mapping and add a new mapping.
Select which source attribute is supposed to be synchronized to this target attribute.
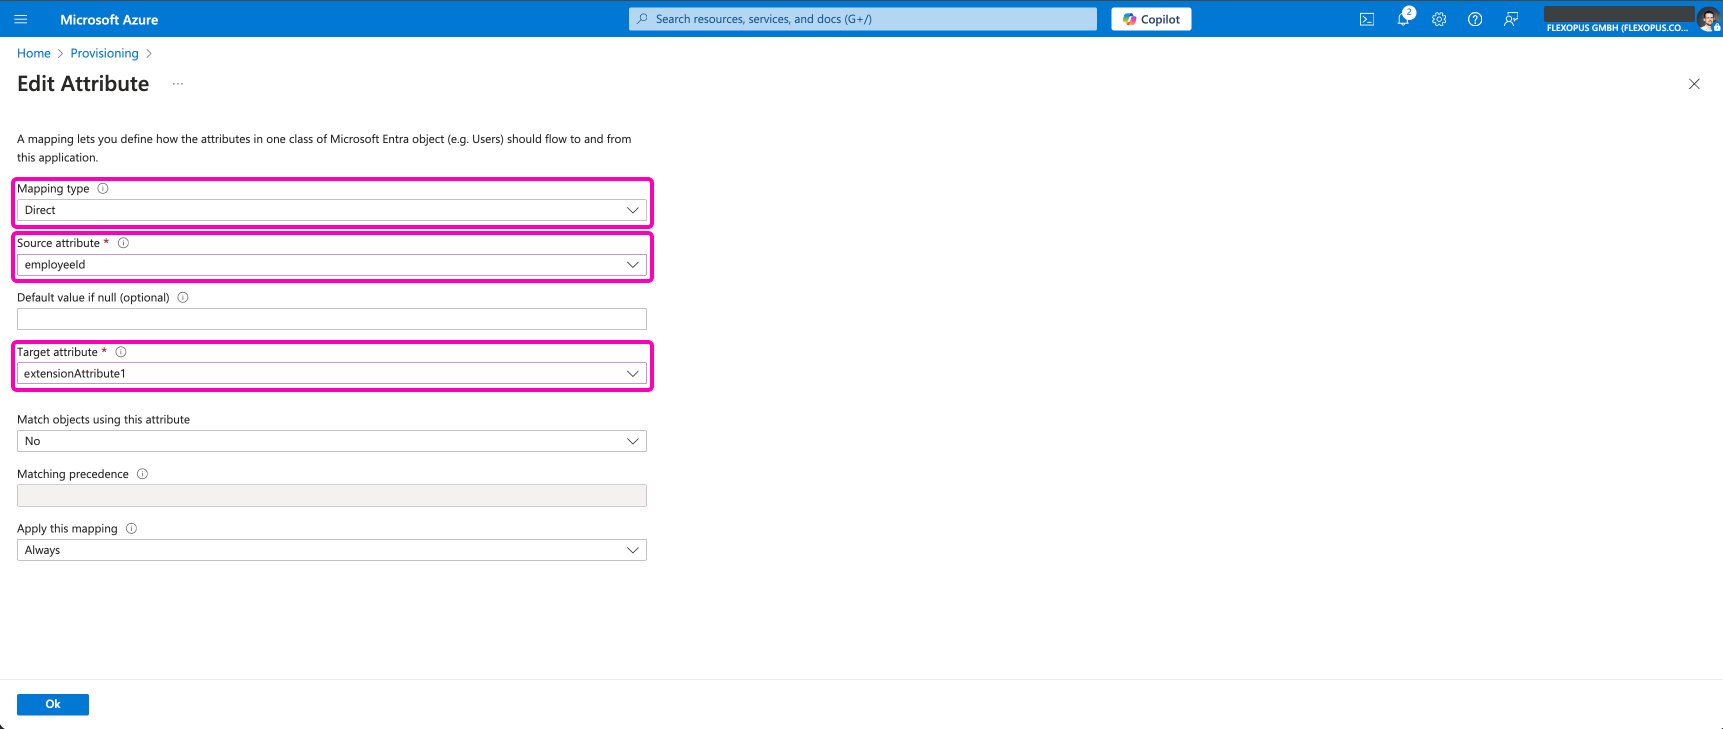
The information will be stored on the users' profile as a hidden field in Flexopus. The CSV exports and the REST API endpoints include this field, such as this endpoint: https://flexopus.com/api/docs/#endpoints-GETapi-v1-bookings
You can test the synchronization with an on demand provisioning.
Best practices using SCIM
The fact that you can synchronize groups from your Active Directory to Flexopus doesn't mean that you should manage all your groups through SCIM. We recommend syncing only a limited number of groups, that also have a reason to be synchronized. The Active Directory is usually the playground of the IT department to manage access to applications and services, and not necessary to manage desk assignment on the user level.
Manage and maintain groups in the Active Directory, which potentially can be used for other use cases as well. A group like AllCompanyUsers can be managed in Active Directory, but a group like DepartmenAWorkstationGroup2 could be managed in Flexopus directly.
Decide who should maintain the group for the desk assignment. Is it the responsibility of the IT department or is it the responsibility of the facility management, the departments, or the HR? The ones that are supposed to manage the groups shall have access to the group management. In most of the cases, the IT has access to the Active Directory and the others have no access. We should avoid creating support tickets for each change per group.
Suggestion - One external group
A basic solution is to synchronize only one group. Let's name this groups AllFlexopusUsers. This group contains the users who are supposed to have access to Flexopus.
Once you connected the AllFlexopusUsers group and started the provisioning, the group itself and all the users within the group will be synchronized to Flexopus, even if they did not log in into Flexopus yet.
This way we can provision all the users to Flexopus, and the Flexopus administrators can group them locally at Flexopus as they wish. You can grant permission to Flexopus administrators to create and manage other groups in Flexopus. This way, you as IT admin can outsource the management of the groups to the ones that are interested in the management of the groups. You have only one group to manage in the AD.
USE CASE - New employee starting (create through provisioning)
In case a new employee starts on the first day of the next month, we will need to allow the new employee to book the right resource from day one. Which means that the employee should have the correct groups for reservation before the first login. If we add the user as a part of the onboarding process to the AllFlexopusUsers group, the user profile will be created automatically at Flexopus. After the creation, the local Flexopus administrators can assign the user profile to the local groups.
USE CASE - Employee leaving (delete through provisioning)
In case an employee is leaving the organization, you usually delete the users profile from your Active Directory or at least remove from the AllFlexopusUsers group. Through the integration, we receive two requests:
- User deleted from group
AllFlexopusUsersgroup - User has no access to application
The second request will deactivate the user in Flexopus user directory and the user cannot log in. The SAML2 Single Sign On will not work, and the user is also set to a deactivated status in Flexopus. Learn in the deletion concept how to delete deactivated users automatically:
TODO - Deletion concept
How can I disable the SCIM Integration?
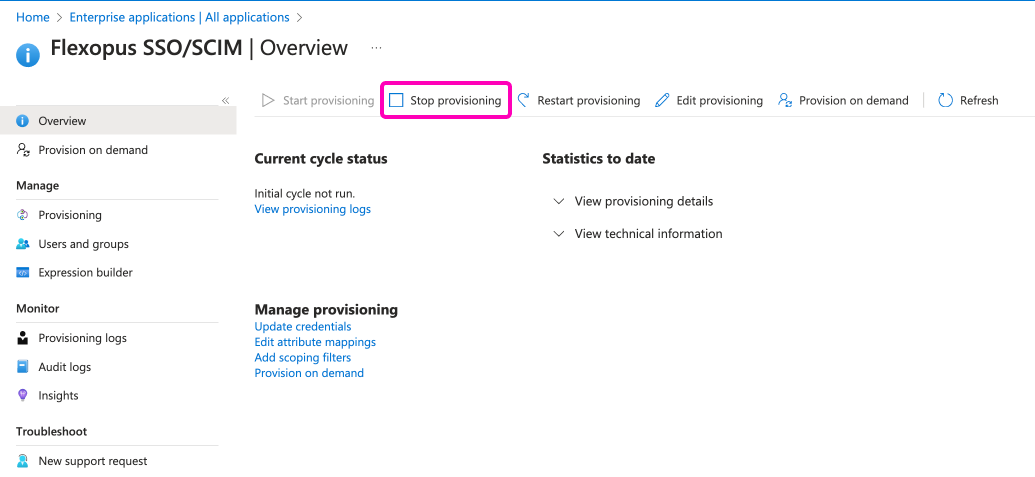
You can disable the SCIM integration by going to your Azure Active Directory, open the Flexopus SSO / SCIM enterprise application and click on the Stop provisioning button:
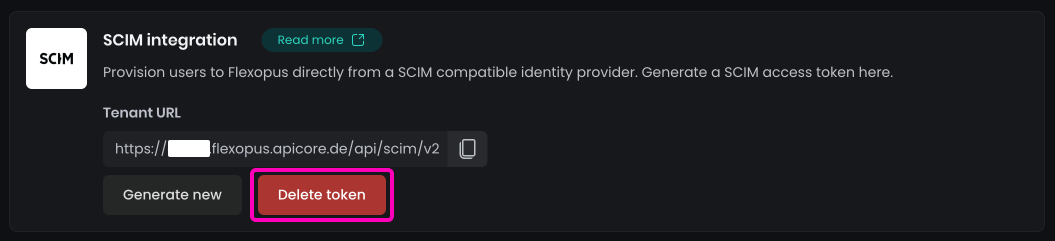
Then navigate to Flexopus as an administrator Dashboard > Settings > Integrations and click on the Delete token button.
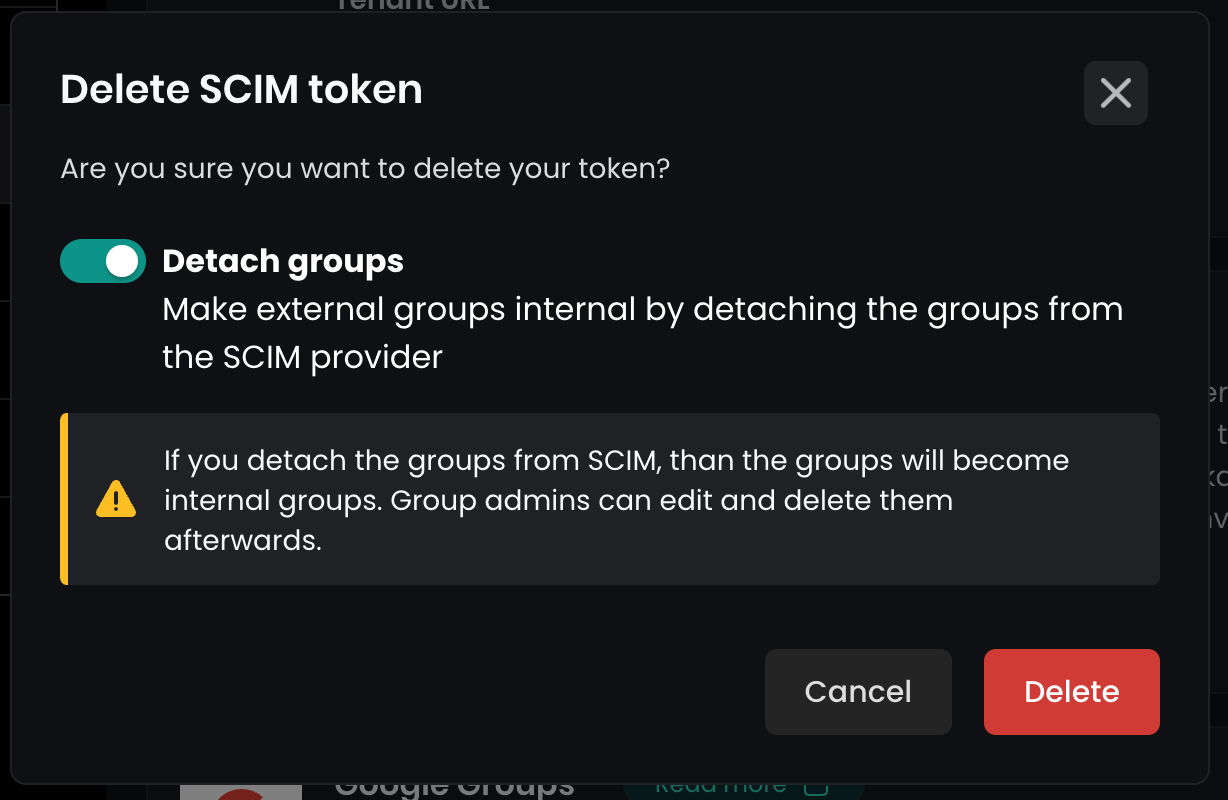
A popup will open asking you to detach the groups. Enable this option. This will make the current external read only groups to an internal group so that you can edit them later.
You are done. The SCIM integration is deleted.
Trouble Shooting / FAQ
What are nested groups, and why are you not supporting them?
Nested groups are groups that include other groups, that may include other groups. This could be theoretically an infinite data tree. Supporting such a data structure through an automated interface like SCIM is a challenging development task. We are planning to face this development challenge, however we are not there yet. Please try to use dynamic groups linked to nested groups for now.
Can I use SCIM without SAML2?
Yes, you can, but we do not recommend it. It can lead to many complex issues, since SCIM is writing important fields like: email, upn external id. In case you plan using SCIM without SAML2, reach out to us to validate your concept and reasons: support@flexopus.com
Can I generate a new SCIM token?
Yes, you can generate a new token at any time. Navigate to the admin dashboard and create a new token. A popup will ask you if you want to make the current external groups into an internal group.
What happens, if I cross-reference and reuse an already existing enterprise application and the SCIM configuration?
SCIM is using an own ID which for each user and SCIM remembers this ID. In case you linked SCIM with one application and change this link to another Flexopus application (demo → production switch), then it will silently start overriding the users. The SCIM_ID of a user in the old application is not the same in the new application. This will cause a user cross-referencing: User A with SCIM ID u10 will be able to log in in the new application with as User B u10. The only way to resolve this issue is to reset the application from a backup or reset the whole user base.
How can SCIM identify the existing users to avoid double entries?
A user has 4 types of identification fields that are used. The identification priority is: SCIM_ID, EXTERNAL_PROVIDER_ID, UPN, EMAIL. First SCIM checks if a user with the SCIM_IDexists, if not than it checks the EXTERNAL_PROVIDER_ID, which is a unique ID is set by the Identity Provider (IdP), in this case by Microsoft. If the EXTERNAL_PROVIDER_ID does not match with any existing user, then we check for the UPN and then for EMAIL. If none of the fields are matching, then we create a new user. This means that a double user creation is only possible, if the attribute matching is mixed up, or the fields that suppose to be unique are changing for any reason.