Google OAuth SSO

Introduction
You can activate an OAuth2.0 based Google Single Sign-On On in Flexopus. With this Single Sign-On configuration, you basically allow login for all users in the world who have a Google account, and you can restrict based on their domain settings which emails can or can not log in.
Read the article here.
During setup, we activate the interface for Google users in your cloud tenant and restrict logins to emails ending with @company.com. After setup, employees can authenticate directly with Google credentials.
Upon their first login, Flexopus creates a new user with their name and email in the backend. You can then assign special roles, such as Location Manager or Admin, or add them to user groups. Each subsequent login will verify authentication.
Configuration Manual
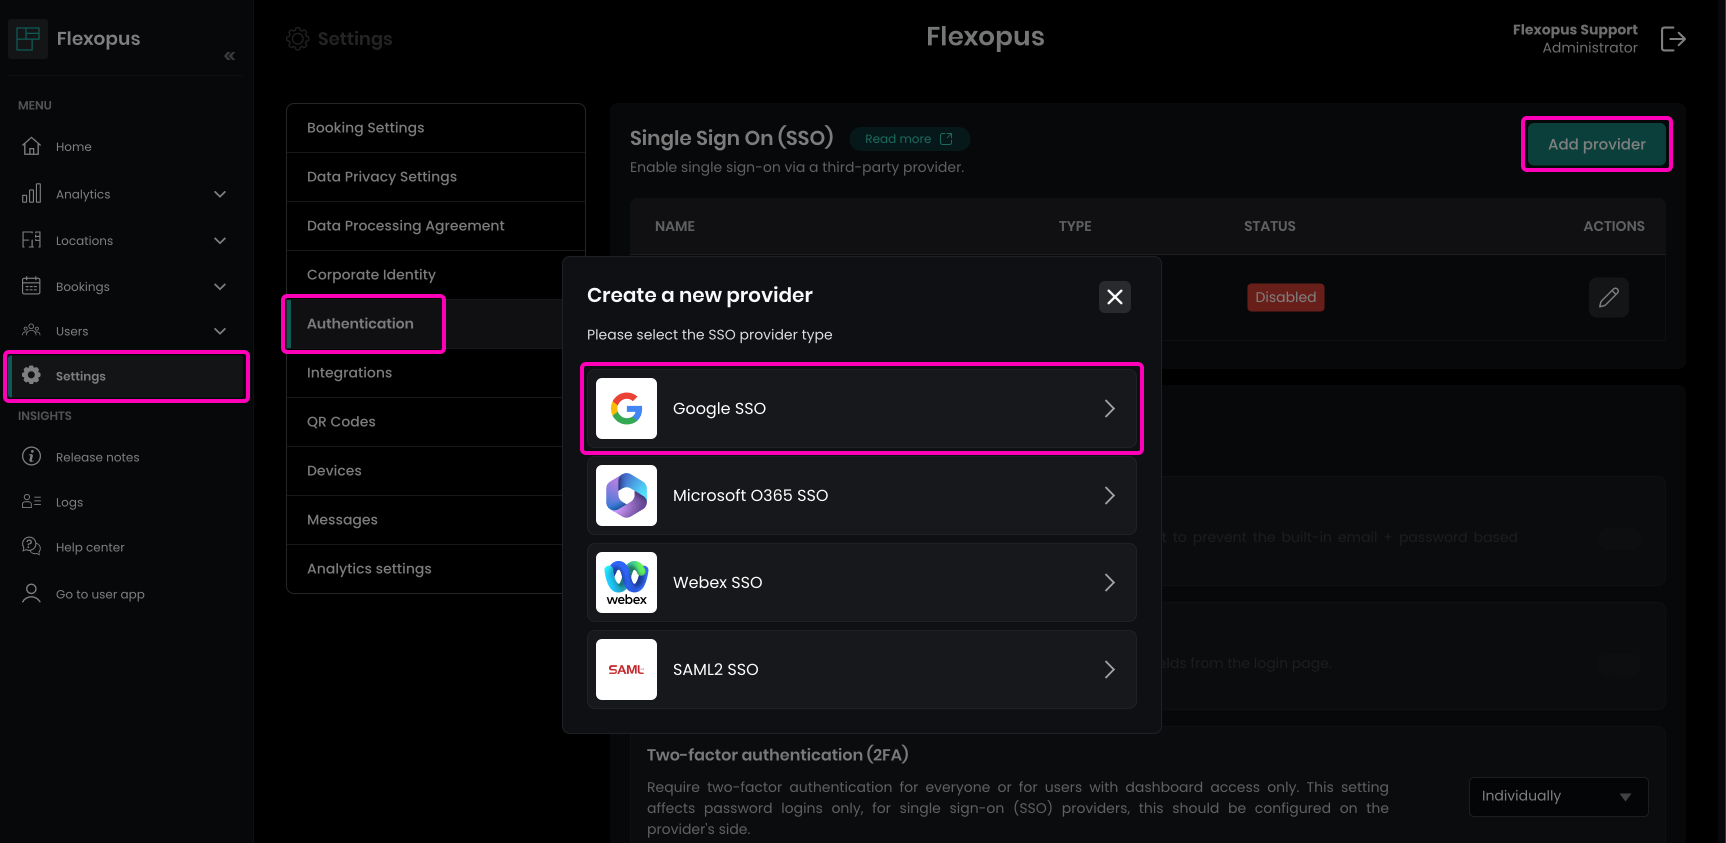
STEP 1 - Activate Google SSO
Navigate in Flexopus to Dashboard > Settings > Authentication and create a new provider. In the pop-up, select Google SSO.
Enable the integration and set the List of allowed domains for SSO to specify which domains can log in, such as: my-company.com, my-subcompany.de.
* as the allowed domain. However, this configuration is generally not recommended. It's better to specify precisely who can log in.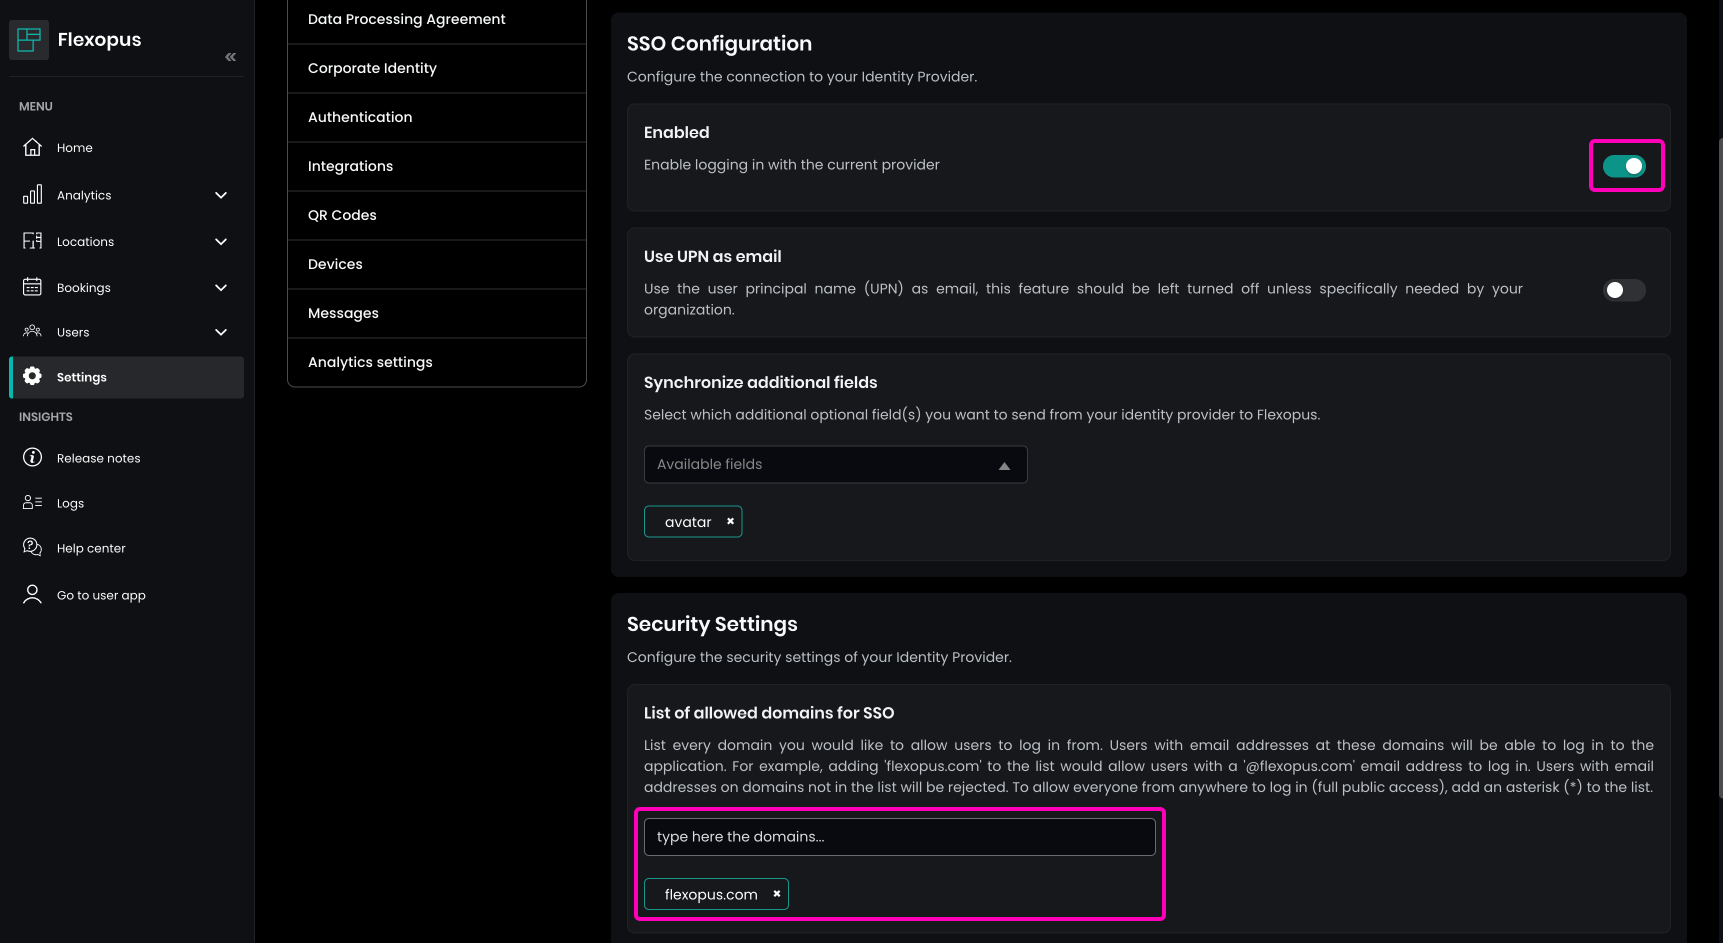
Optionally, you can use the Require existing user profile to log in through SSO setting to restrict login to only those users with pre-existing accounts in Flexopus. This limits access to manually added accounts only.
You can also decide on the Use UPN as email setting to select the Google attribute for UPN synchronization. This is an advanced setting and is typically fine on the default.
-png.png)
Save your changes.
STEP 2 - Test the configuration
Open Flexopus in a new incognito window and test the login:https://{your-company}.flexopus.com/ or in case you have a custom domain, then go to the custom domain.
You should be able to log in with an existing or a new user, depending on how you configured the access rights in your Azure Active Directory and Flexopus.
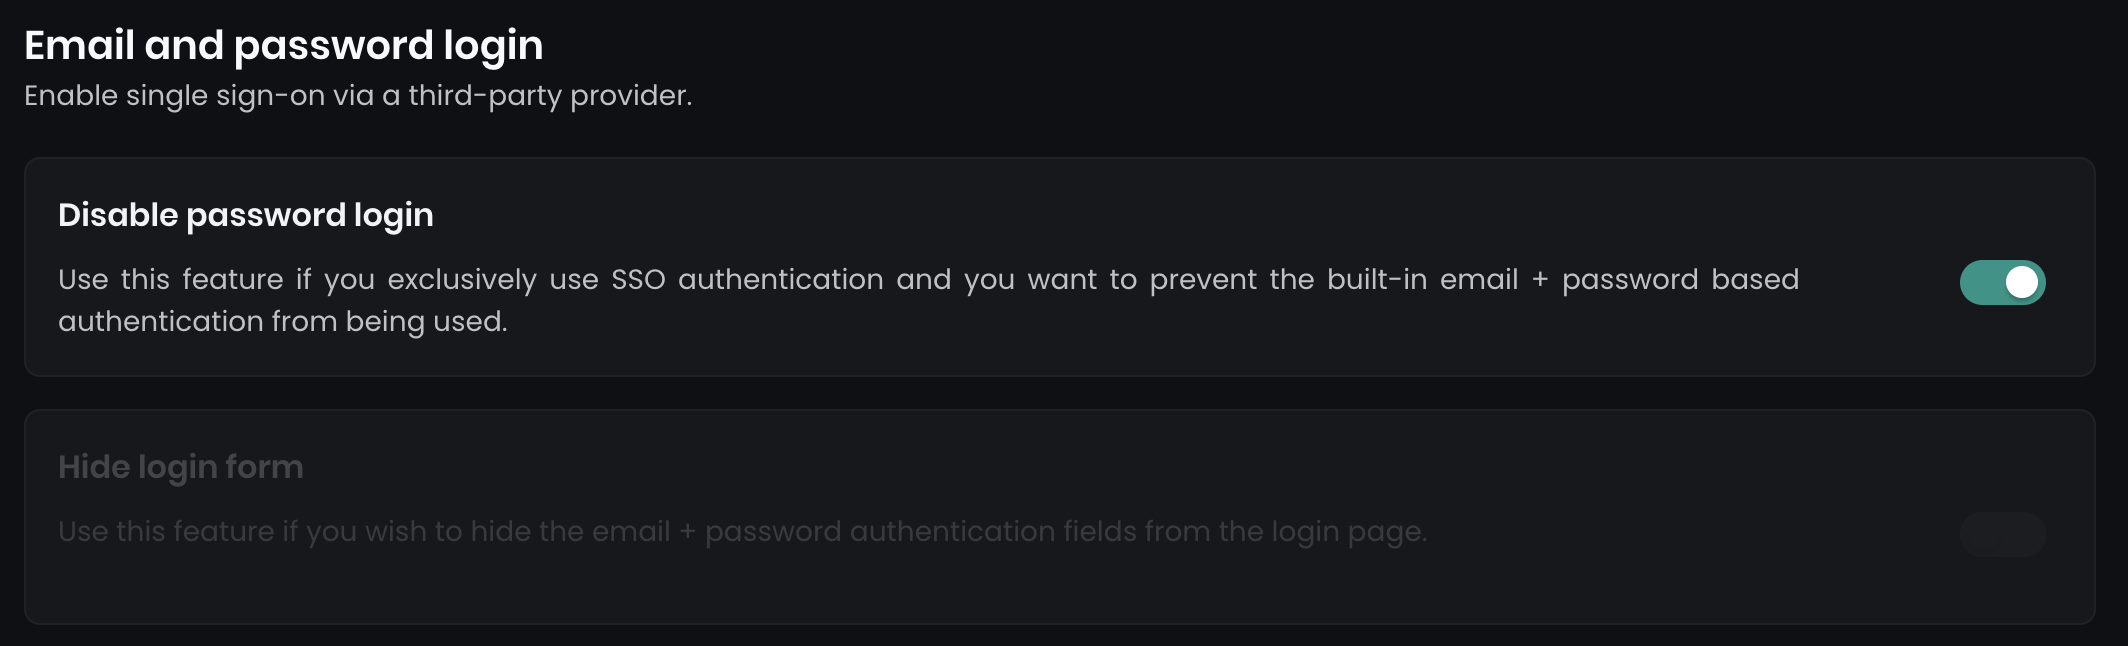
After successfully configuring Google SSO, you can optionally disable the email and password login, enforcing SSO for all users.
- Disable password login: This disables all email and password login forms.
- Hide login form: Hides the main login page form, while keeping a secondary form accessible at
../dashboard/auth/loginfor a backup admin user.
Navigate to Dashboard > Settings > Authentication to apply these options.