Home Assistant Integration
About Home Assistant
Home Assistant is one of the most popular open-source home automation platforms. It supports more than 2500 platforms, including proprietary solutions (Google Assistant, Google Cast, Apple HomeKit) as well as other well-known IoT protocols (MQTT, Z-Wave, ZigBee, Matter). In addition to the official integrations, there are many community integrations developed and tested by home automation enthusiasts.
Although the main focus of Home Assistant is to automate personal smart homes, we find it a suitable choice for smart office automation purposes. The power of the platform lies in connecting a broad spectrum of smart-home solutions, even brands that are specialized in office environments.
Home Assistant is a self-hosted platform; thus it requires some technical expertise to set up and operate. Please refer to the documentation at https://www.home-assistant.io/installation to explore the different setup options.
Example Integration
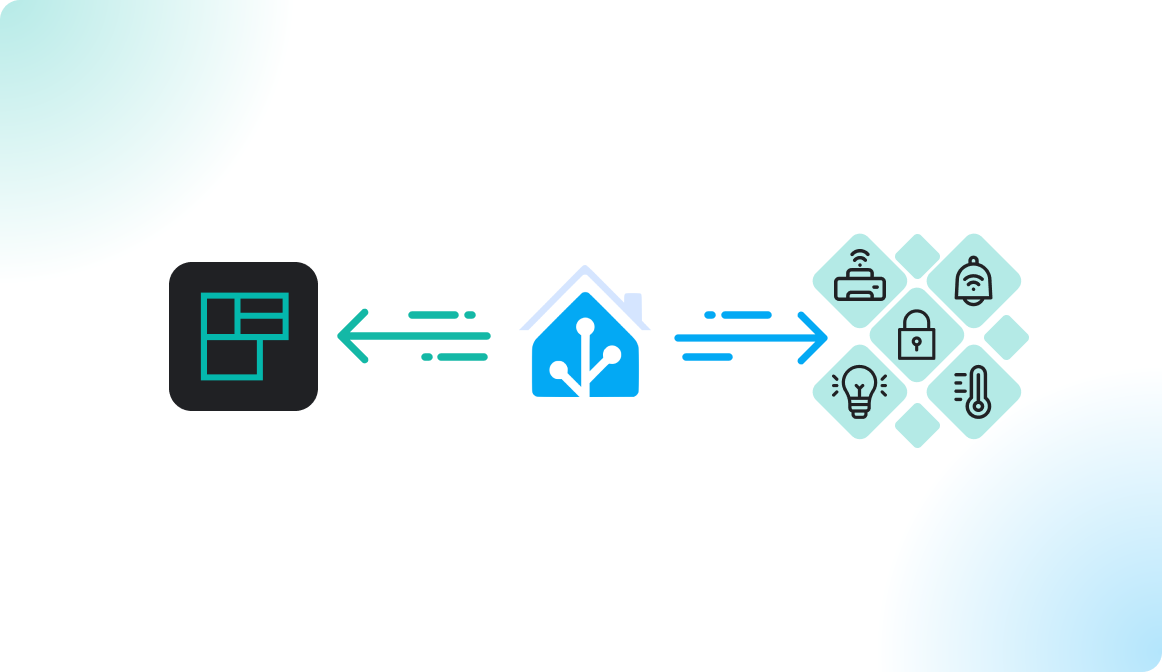
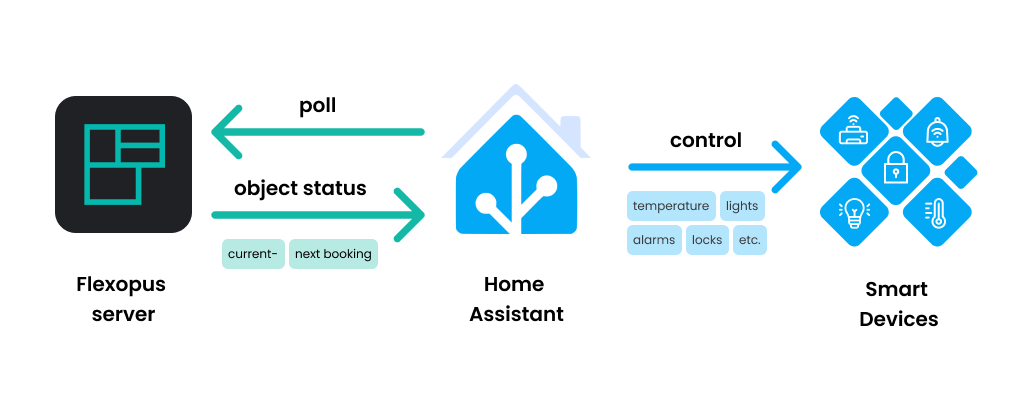
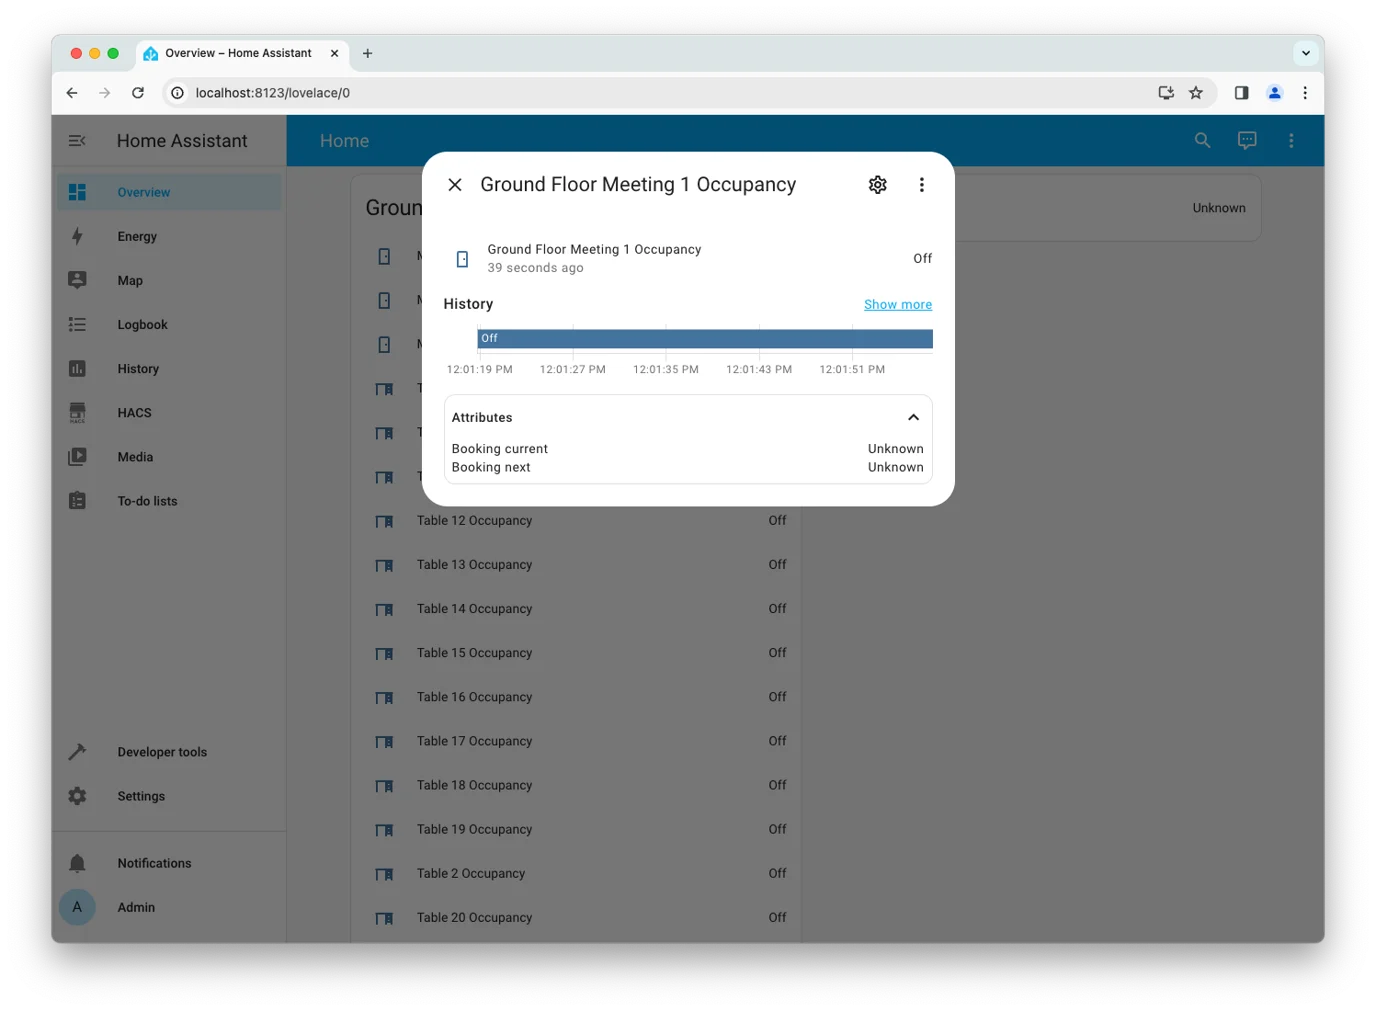
We have created the Flexopus integration to provide basic occupancy information about the status of bookable resources in your locations. Using this connector interface, your Home Assistant instance can connect to the Flexopus servers and poll them for information at a predefined interval. Our servers then reply with the current and expected occupancy status of the bookable resources.
Once you have this connection, you can automate your office however you like. Some example scenarios:
- Only turn a desk lamp or room ceiling light on if there is an active booking, or there is one coming up.
- Adjust room temperature with your smart thermostat based on the occupancy of the given area. You can save significant energy by not heating up or cooling down empty rooms.
- With configurable smart locks, you can restrict room access to the period of bookings.
- Set up occupancy indicators (e.g., colored LEDs) to mark the status of each desk, parking spot or even meeting room.
- Arm or disarm alarms automatically.
With such automations, you can use Flexopus to save energy and to facilitate the everyday booking process.
Installation manual
We assume you have a running Home Assistant instance. To get started, you can follow the guide at https://www.home-assistant.io/installation, or consult the community with any specific question.
The code of the integration is located on GitHub.
 flexopus
OPTION A - Install with HACS (recommended)
The Home Assistant Community Store (HACS, https://hacs.xyz) is the most convenient way of installing and updating custom integrations in Home Assistant.
To install HACS, head to https://www.hacs.xyz/docs/use/download/download/, and select the installation method that matches your Home Assistant installation. After installation, add it as an integration:
https://hacs.xyz/docs/configuration/basic.
Restart Home Assistant
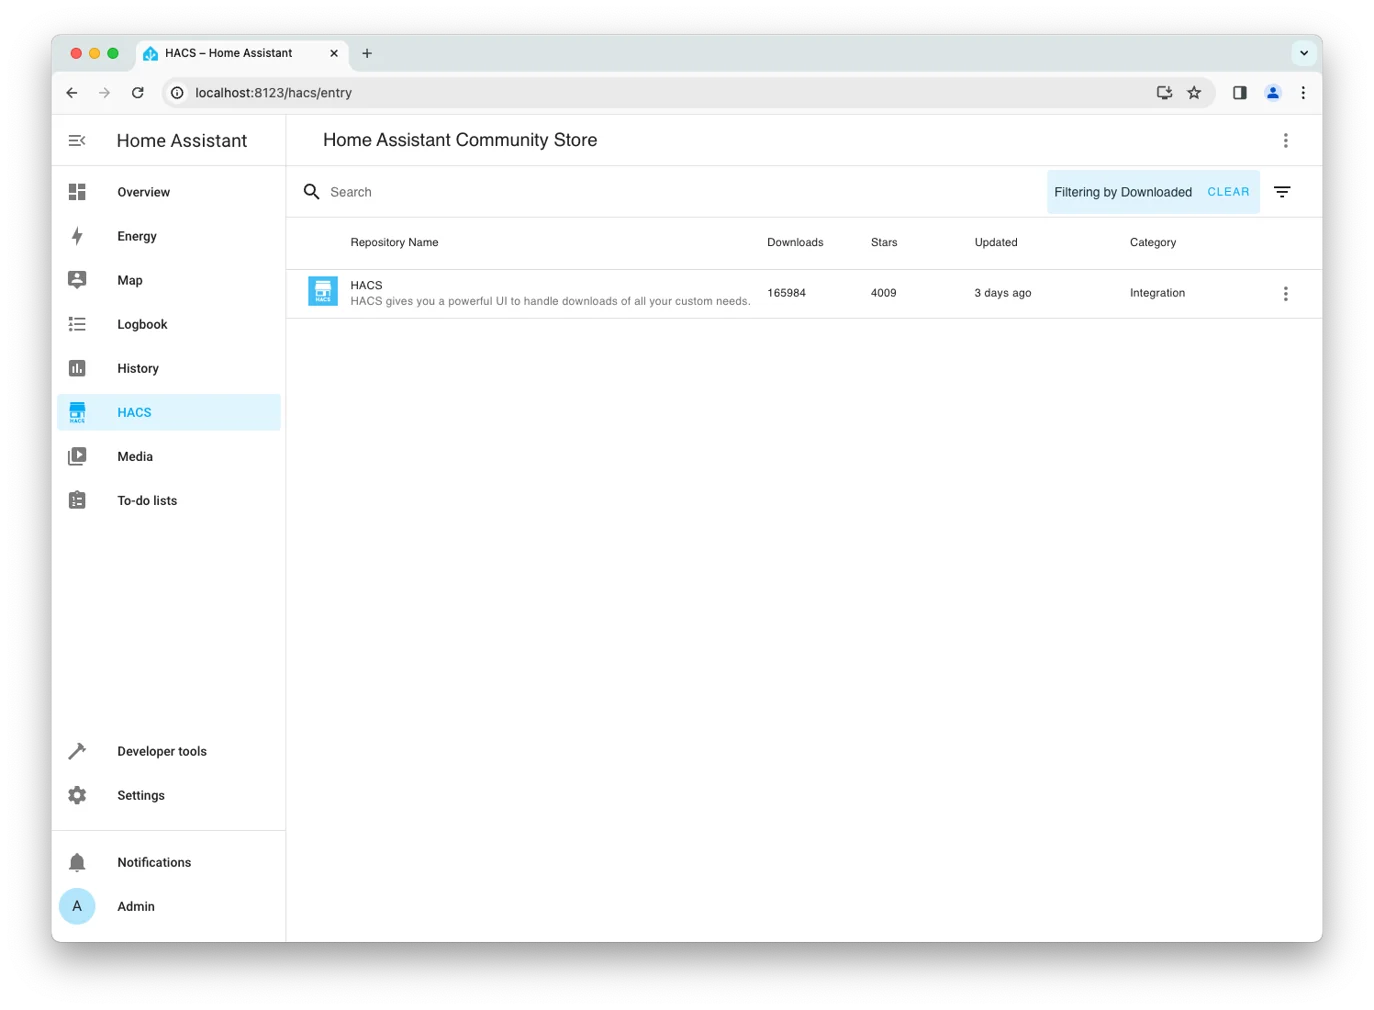
Once you have HACS installed, navigate to /hacs/entry
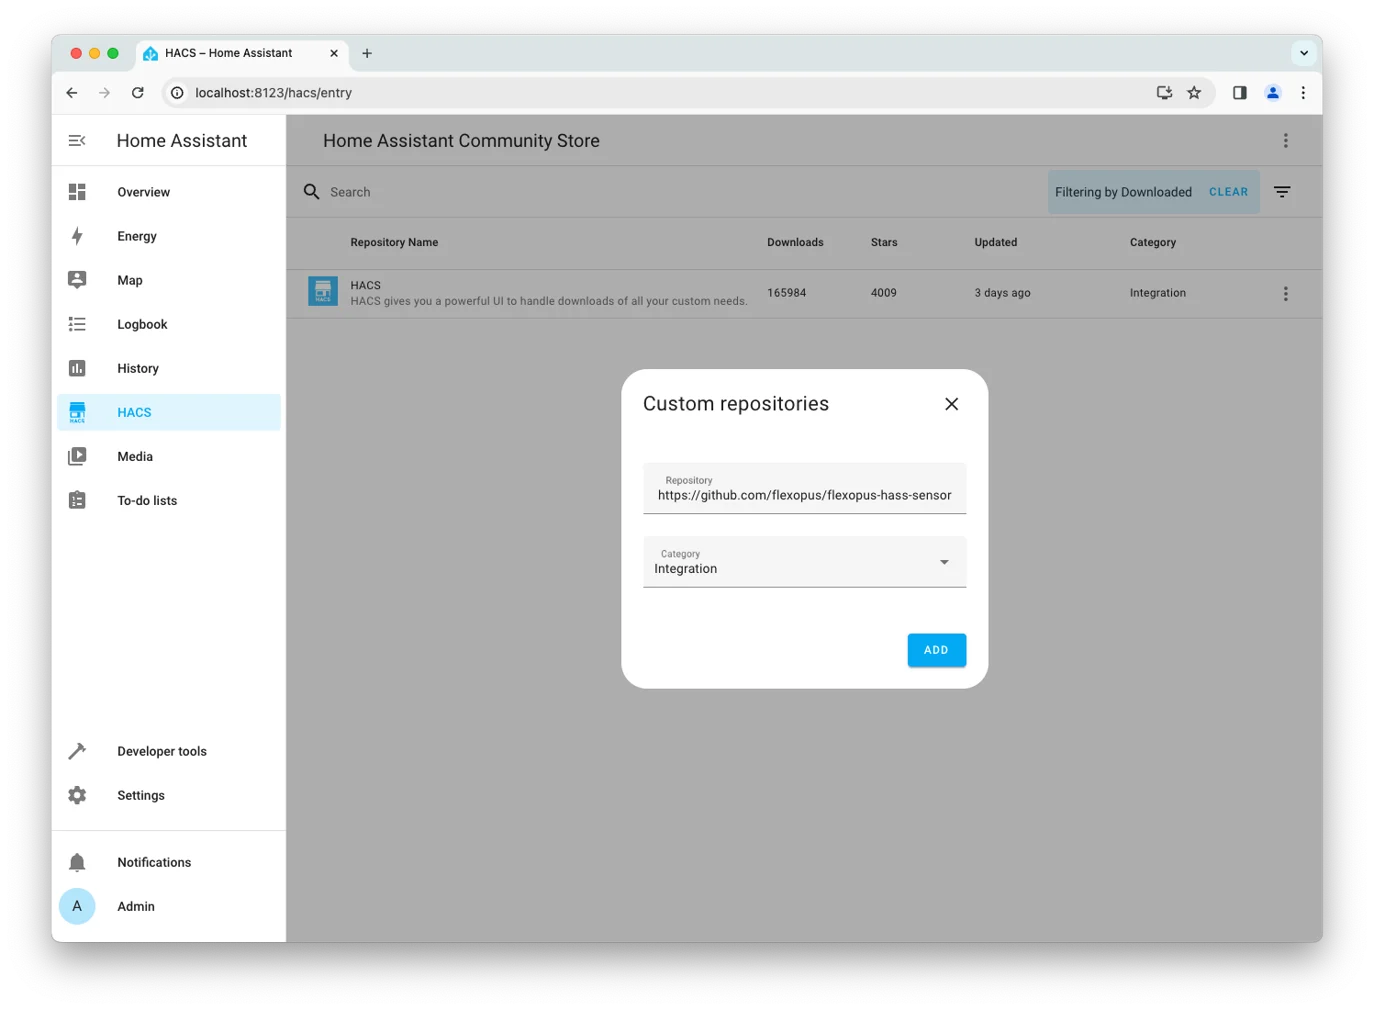
Click the three dots and select Custom repositories, and add the Flexopus GitHub repository (https://github.com/flexopus/flexopus-hass-sensor) as Integration
Once added, search for Flexopus in the list.
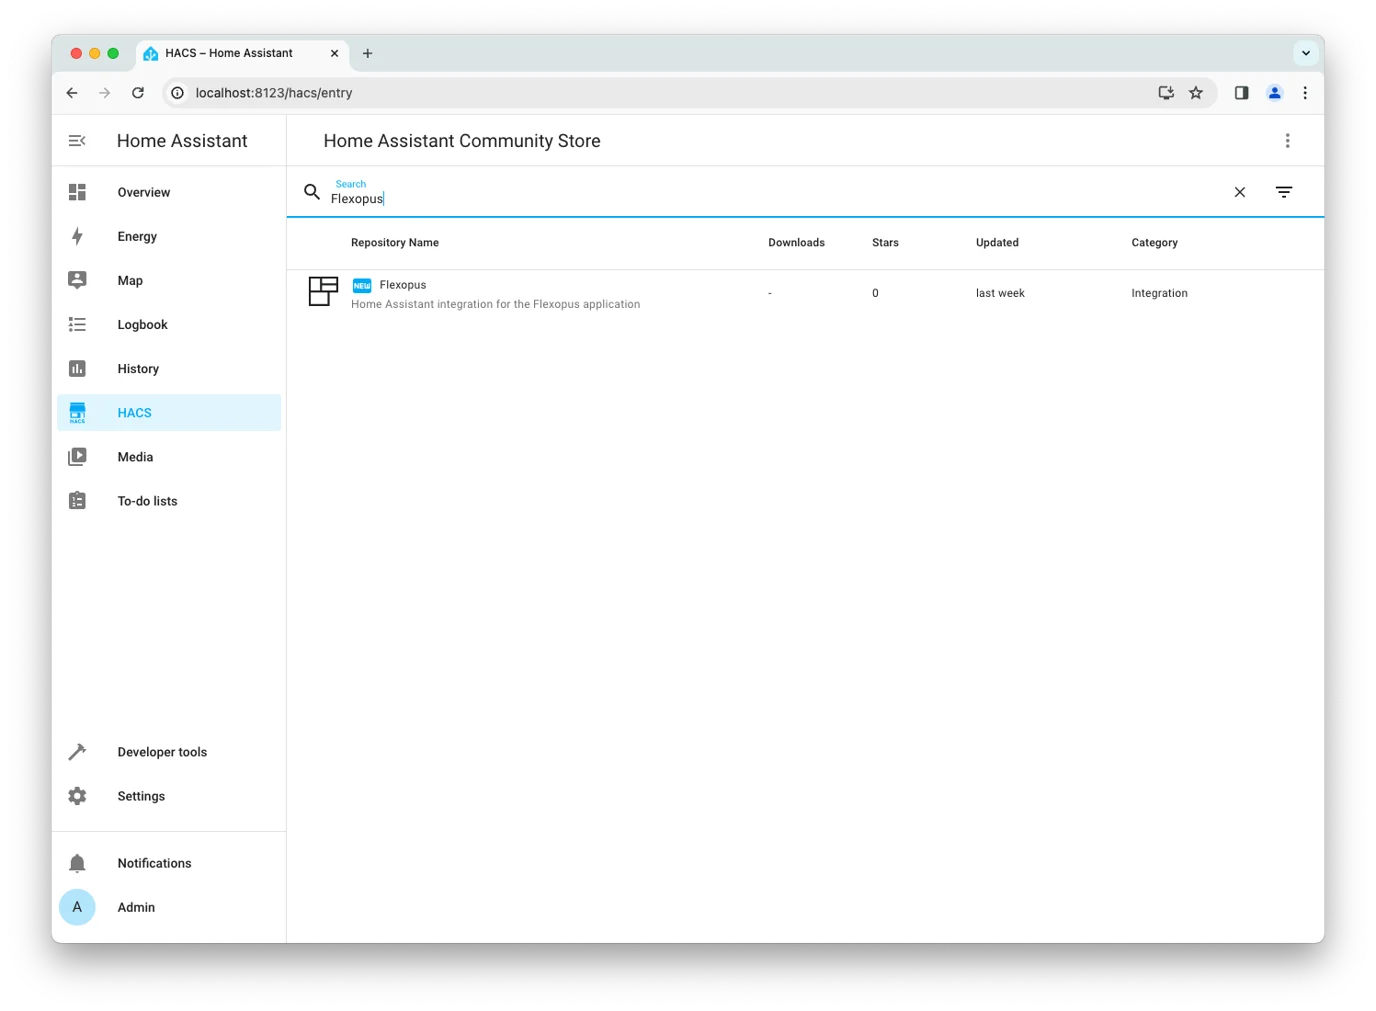
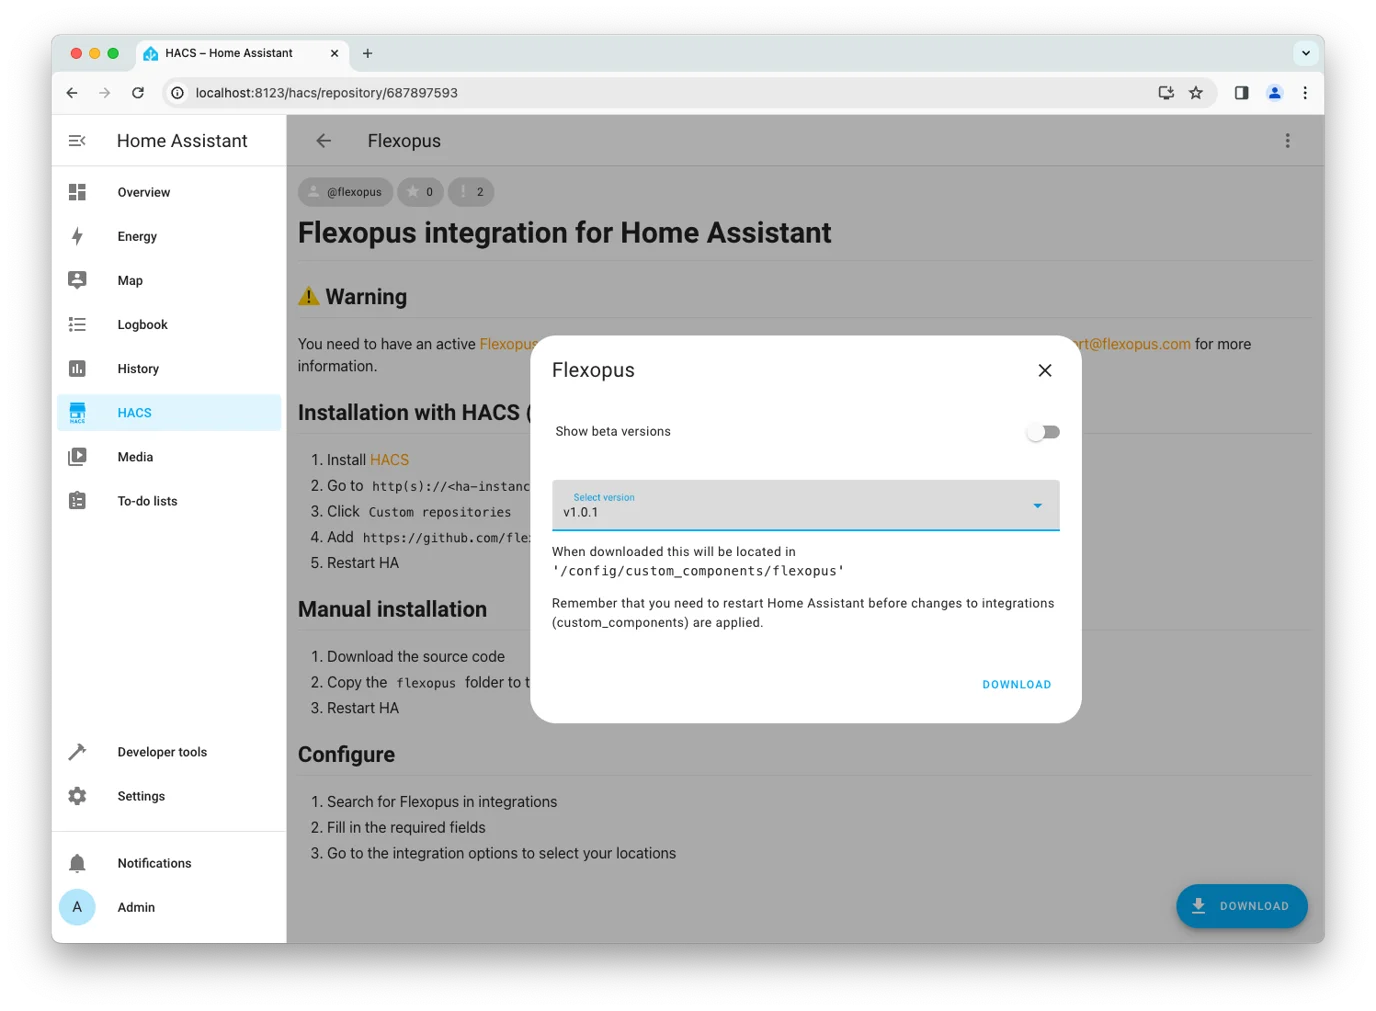
Select it from the list, click Download, select the latest version, and confirm the download.
OPTION B - Manual install
- Download the latest version of the code from the repository: https://github.com/flexopus/flexopus-hass-sensor/releases/latest
- Go to your Home Assistant
configdirectory, and create thecustom_componentsfolder, if it does not exist - Extract the code and copy the
custom_components/flexopusfolder to thecustom_componentsfolder of your installation. The resulting structure should be:
<home assistant root>
└─ config
   └─ custom_components
      ├─ flexopus
      └─ <other custom integration>
After completing the steps above, restart your Home Assistant.
Configuration manual
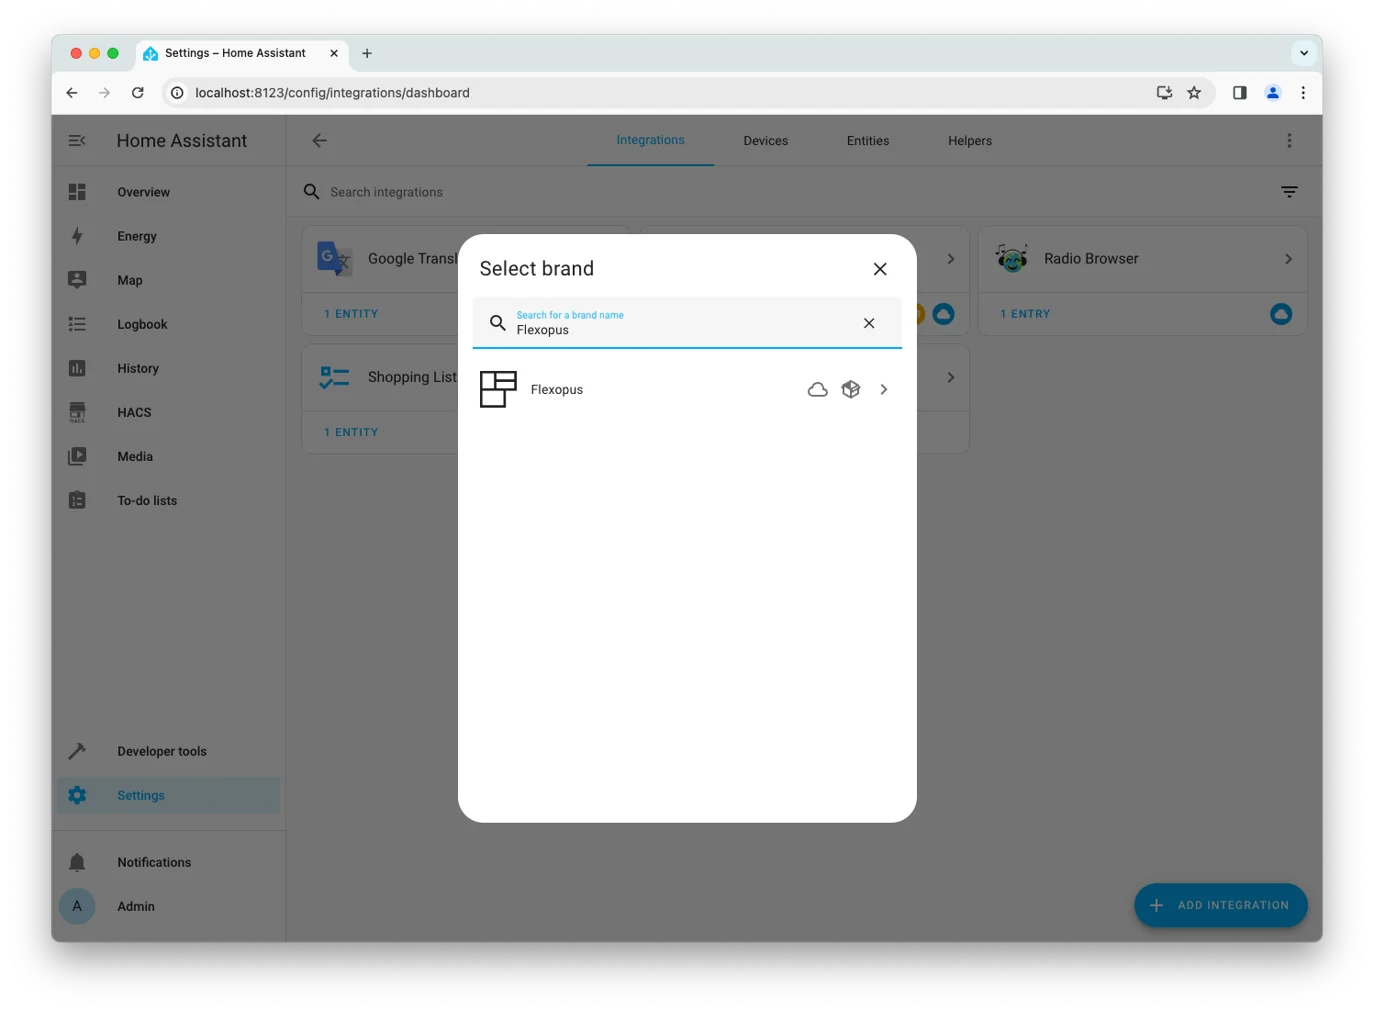
In Home Assistant, go to Settings > Integrations, click Add Integration, and search for “Flexopus”.
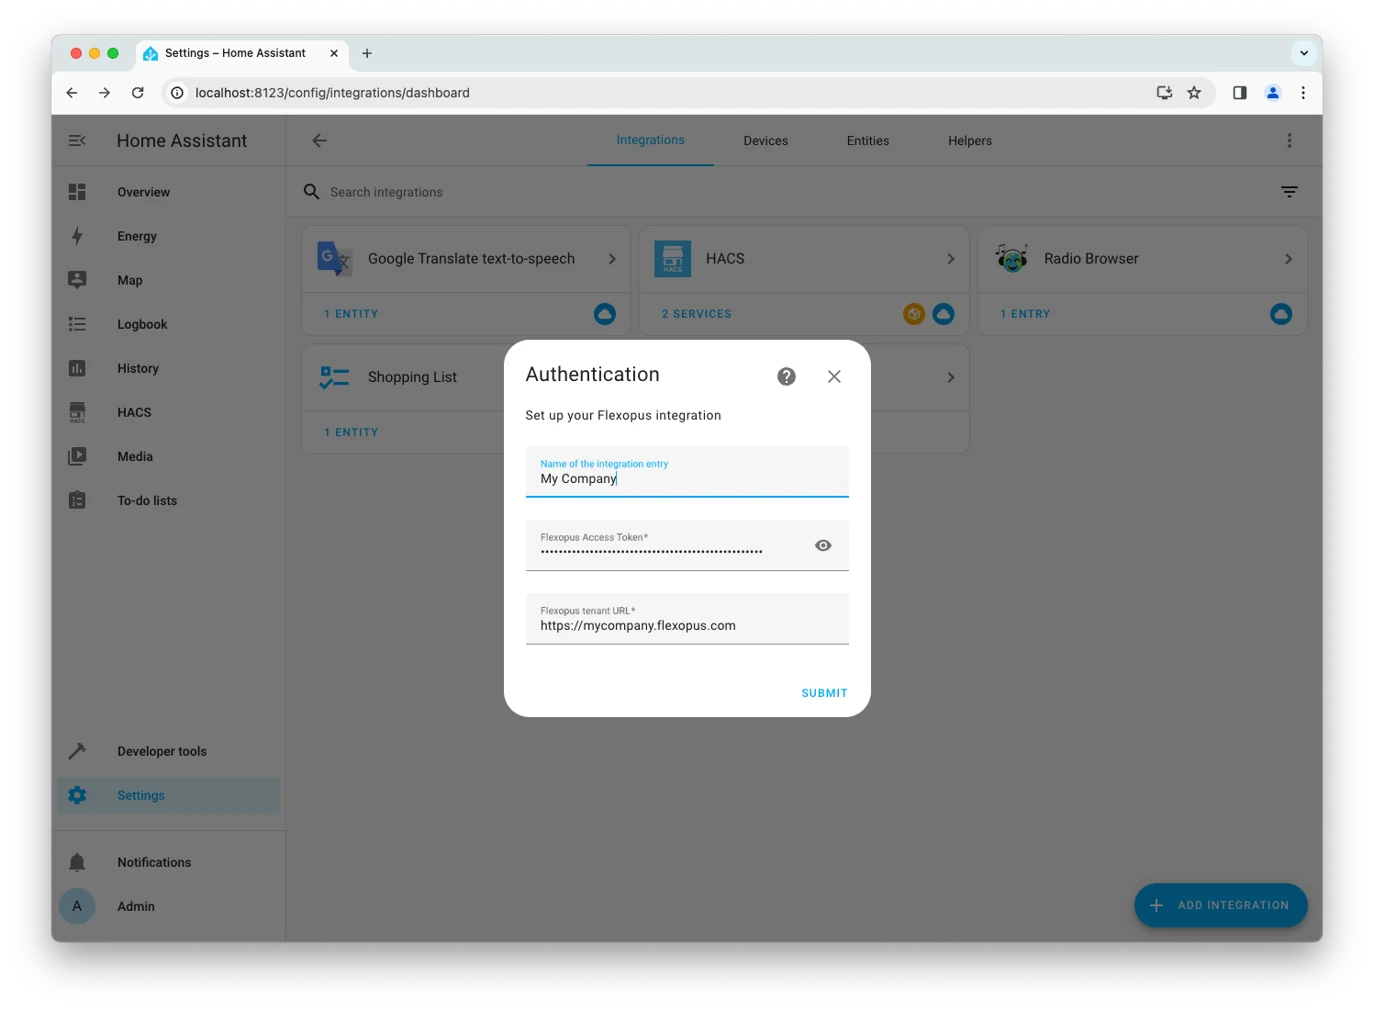
Enter the credentials:
Tenant URL
The domain you are using to access Flexopus
https://{your-flexopus-domain}.flexopus.com
Access token
In Flexopus, go to Dashboard > Settings > Integrations > Flexopus API as an administrator. Click Generate Token, then copy the token and paste it into your Home Assistant integration.

After authentication, Flexopus will appear on your Integrations page. Select it and click Configure on the new integration entry. Choose the locations you want to fetch, then click Submit.

The occupancy sensors for each bookable resource will be added to your Home Assistant.
Next steps
With the Flexopus integration configured, you’ll now receive updates from the selected locations. To set up automations based on Flexopus sensor changes:
- Go to
Settings > Automations & Scenesand clickCreate automation. - Configure your automation through the UI or switch to YAML mode.
Here’s a sample YAML configuration for automation:
alias: Meeting 1
description: "Turn on lights for meeting room 1 when booked"
trigger:
  platform: state
  entity_id: sensor.ground_floor_meeting_1_occupancy
action:
  service: |

      light.turn_off

  target:
    entity_id: light.light_1
To learn more about automations, read https://www.home-assistant.io/docs/automation/basics. If you have many automations that work the same way, we recommend configuring a template (a so-called blueprint) for it: https://www.home-assistant.io/docs/blueprint/tutorial.
The possibilities are endless, feel free to explore the Home Assistant documentation, or contact Flexopus Support in case of any doubt.