Webex OAuth SSO
Introduction
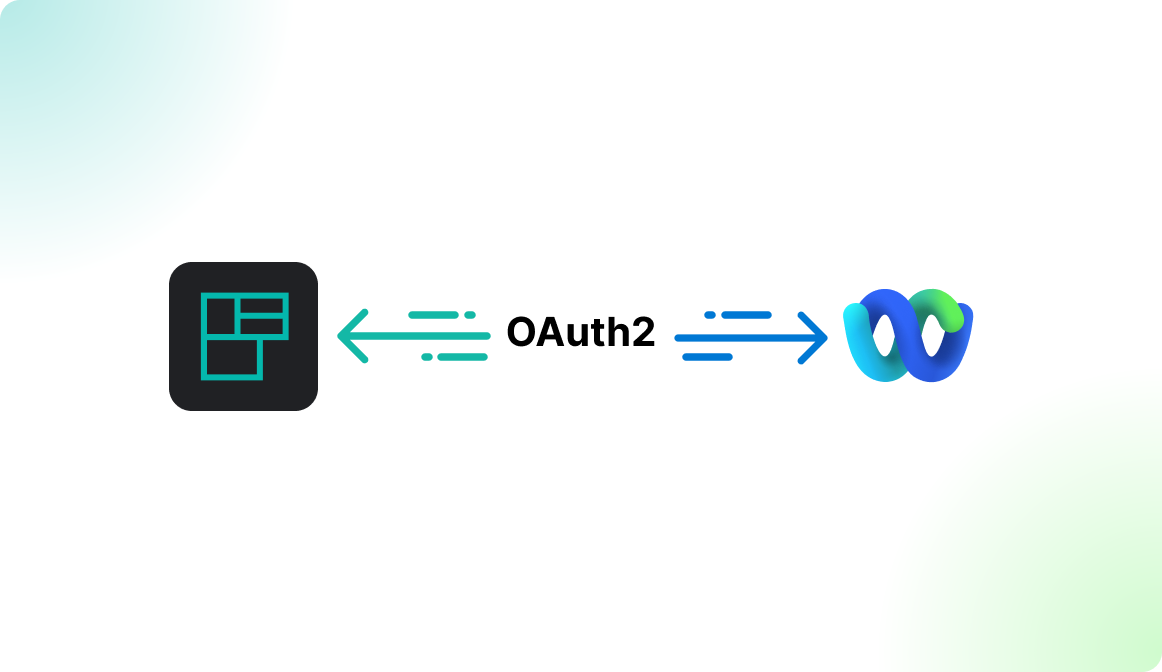
You can activate an OAuth2.0 based Webex Single Sign-On at Flexopus. With the Webex OAuth SSO, you basically allow login for all users in the world who have a Webex account, and you can restrict based on their domain settings which emails can or can not log in.
When setting up Flexopus with Webex for Single Sign-On (SSO):
- Activate Interface: Flexopus enables the Webex interface for your tenant, restricting logins to users with emails ending in
@company.com. - First Login: Upon first login with Webex credentials, a new Flexopus user is created with their name and email.
- Assign Rights: You can assign roles (e.g., Location Manager, Admin) or user groups to this new user in Flexopus.
- Subsequent Logins: Each login is authenticated to ensure access security.
This setup ensures seamless, domain-restricted access for your team.
Configuration Manual
STEP 1 - Activate Microsoft SSO
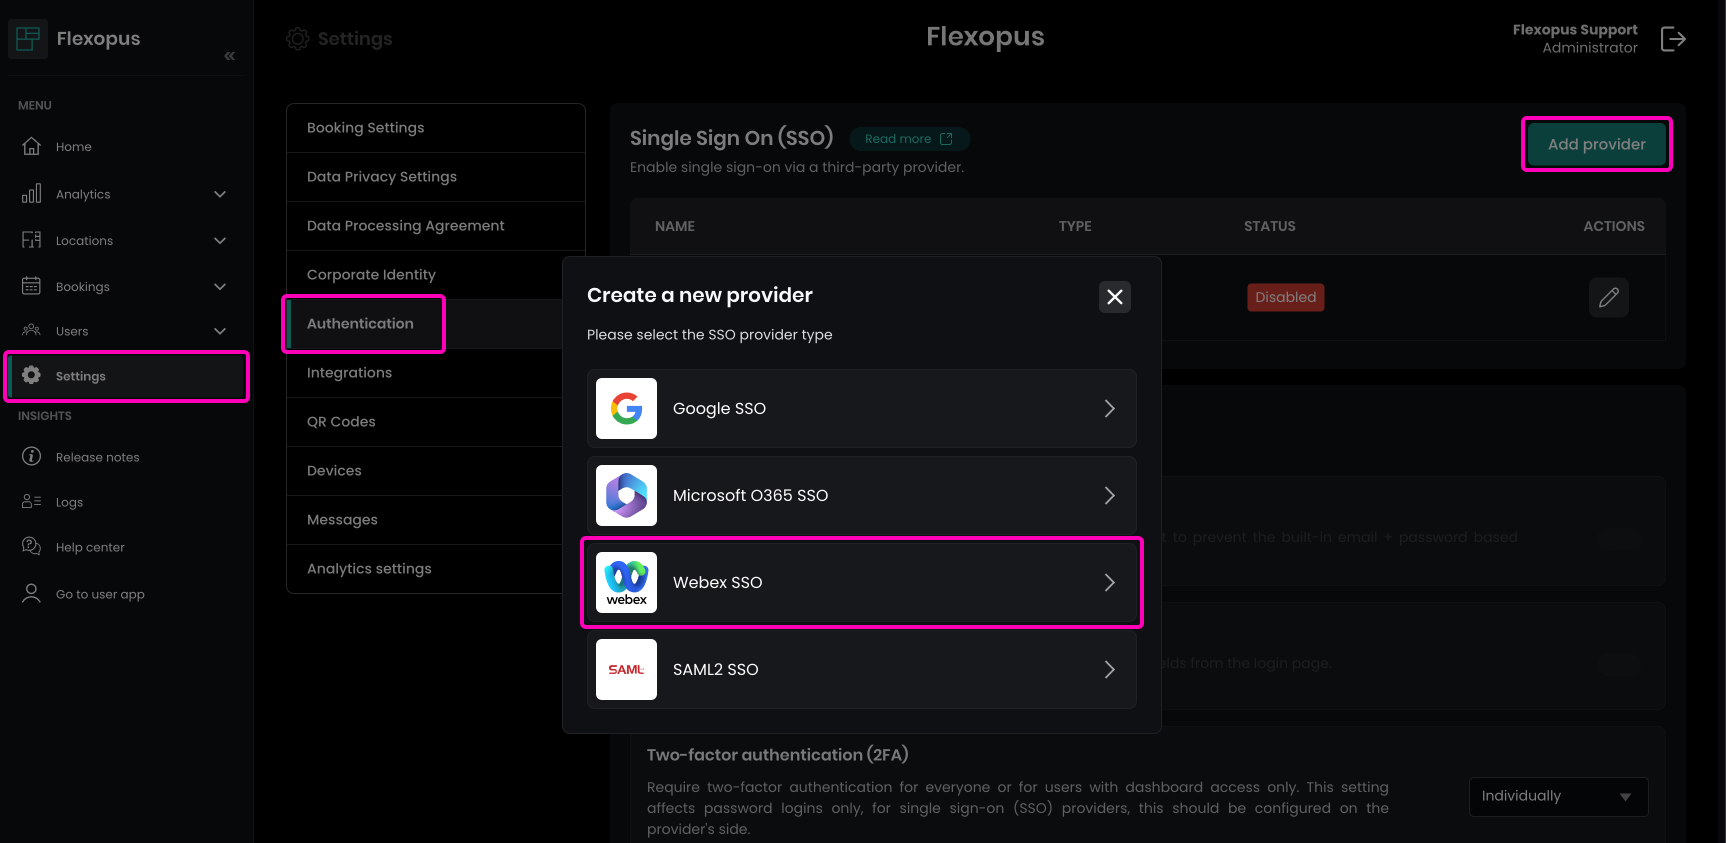
To configure Webex Single Sign-On in Flexopus:
- Go to
Dashboard > Settings > Authenticationin Flexopus. - Select
Create a new provider. - In the pop-up, choose the
Webex SSOoption.
This setup will initiate Webex SSO configuration for your Flexopus environment.
Enablethe Webex SSO integration.- Under
List of allowed domains for SSO, specify the domains that are permitted to log in, such asmy-company.comandmy-subcompany.de.
This will restrict access to users from these specific domains.
If you want to enable access for everyone, set a
*. However, this configuration is generally not recommended. It's better to specify who can or cannot log in.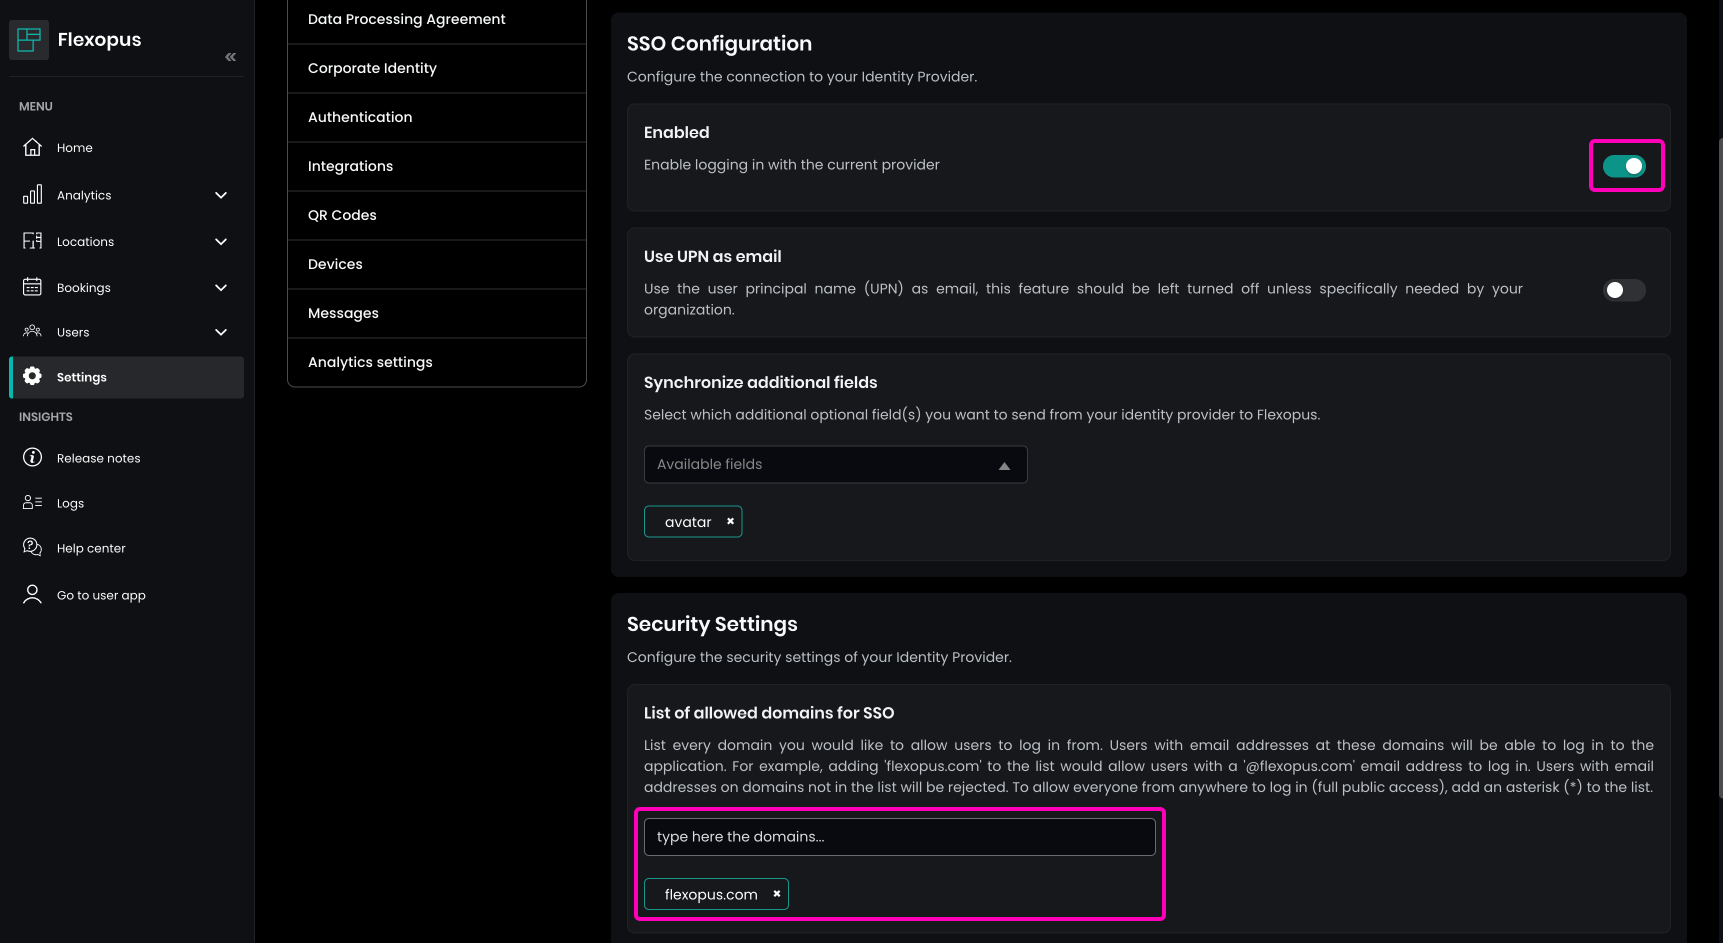
- Require existing user profile to log in through SSO: Activating this option restricts access to users with pre-existing accounts, requiring manual addition of new users.
- Use UPN as email: Decide which Microsoft attribute to synchronize as the UPN (User Principal Name). The default setting is recommended unless a specific configuration is needed.
-png.png)
Save your changes.
STEP 2 - Test the configuration
Open Flexopus in a new incognito window and test the login:https://{your-company}.flexopus.com/ or in case you have a custom domain, then go to the custom domain.
You should be able to log in with an existing or a new user, depending on how you configured the access rights in your Azure Active Directory and Flexopus.
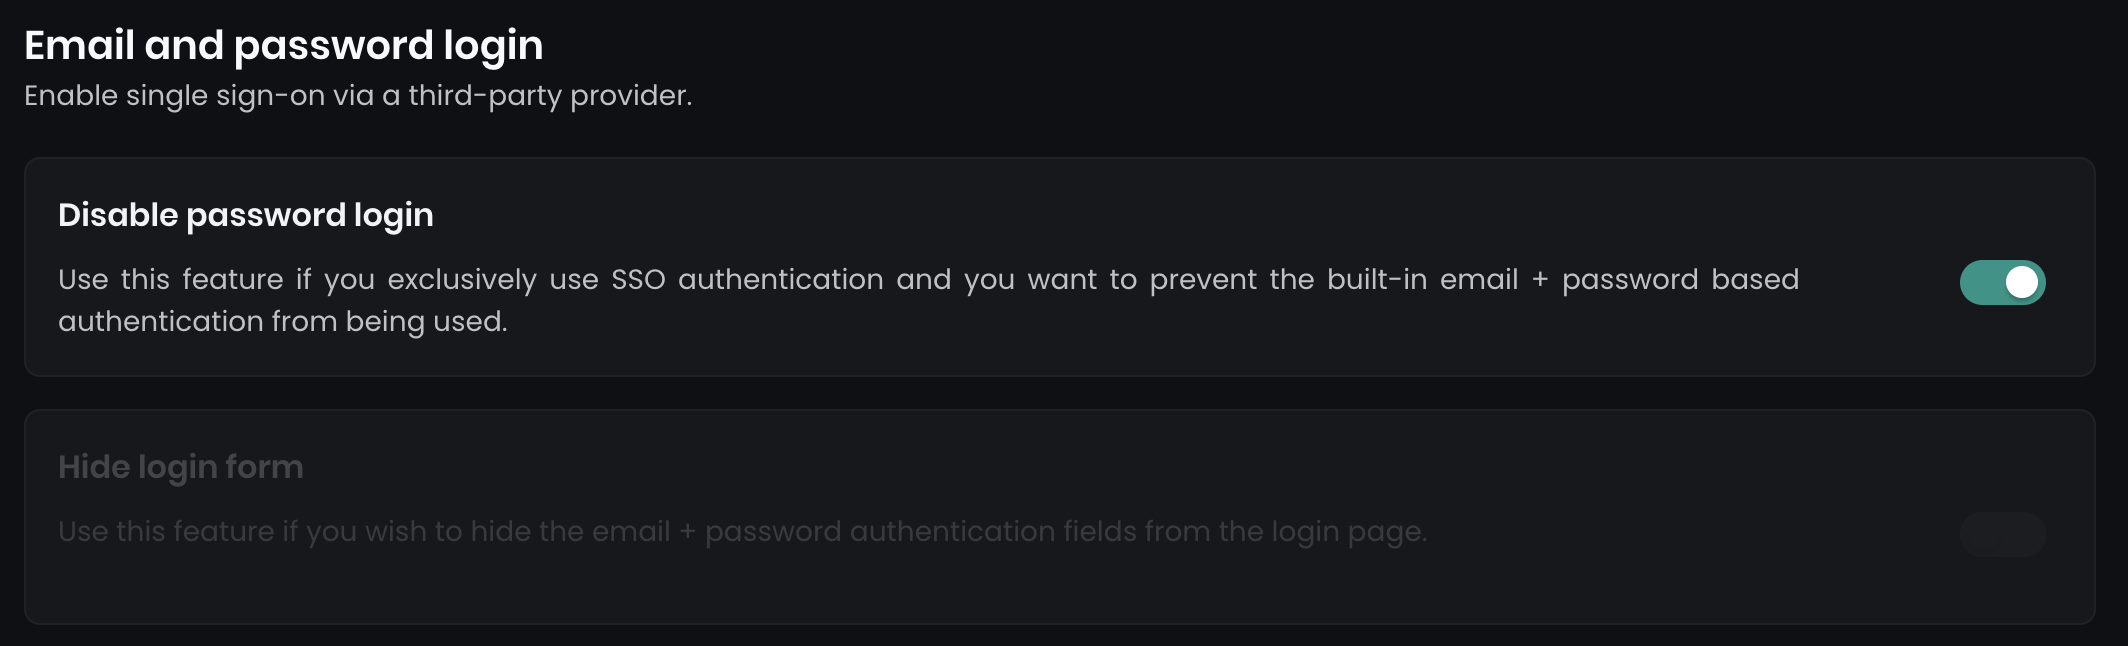
After configuring Webex SSO, you can enforce Single Sign-On by disabling other login methods:
- Disable password login: Disables all email and password login forms for users.
- Hide login form: Hides the main login form, but keeps a secondary login form accessible at
../dashboard/auth/loginfor a backup admin user.
Navigate to Dashboard > Settings > Authentication to enable these options.