Microsoft Exchange Online
Introduction
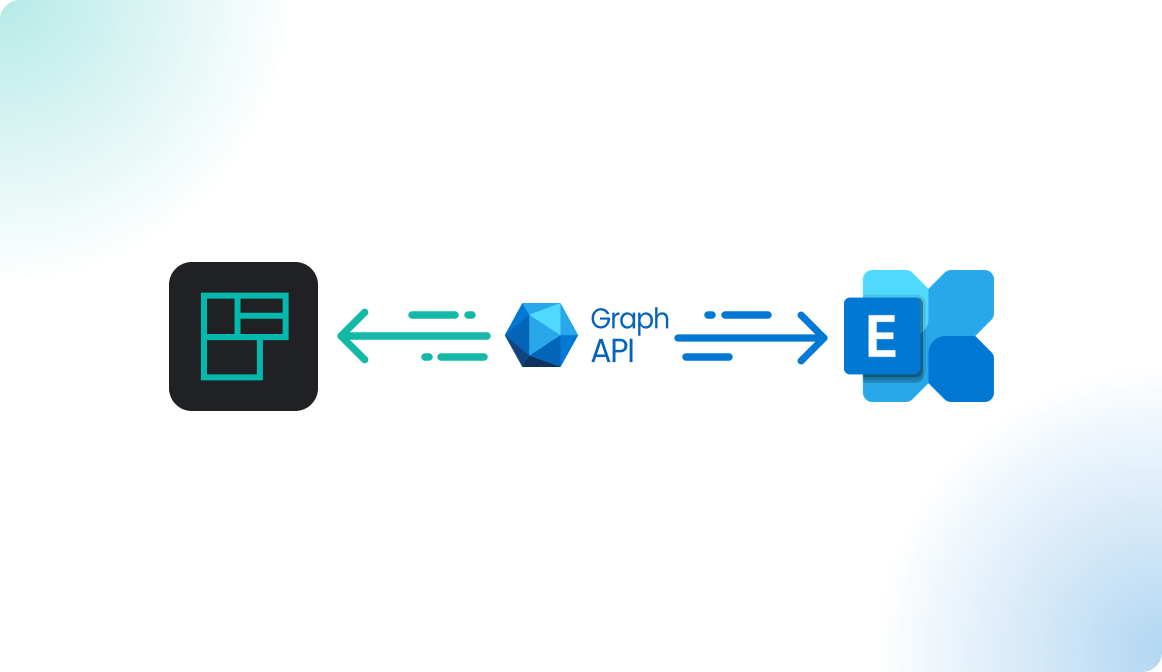
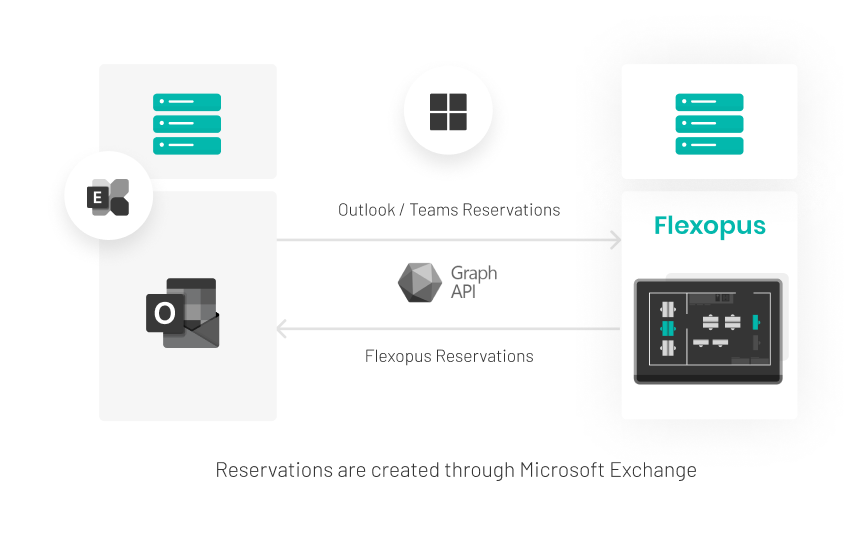
The Microsoft Graph Integration allows you to synchronize your Microsoft Exchange resource calendars with Flexopus for managing meeting rooms. This synchronization is bidirectional and occurs in real time using the Microsoft Graph API:
- Reservations made in Microsoft Outlook will be visible in Flexopus.
- Reservations created in Flexopus will be reflected in Microsoft Exchange, ensuring seamless integration between both systems.
Benefits of the integration
Once Microsoft Exchange Online is configured in Flexopus, you can enable the following features:
- See how booked the room
See in the office live plan who booked the room. - Room statistics & analytics
Smart analytics for the usage of meeting rooms. - Meeting Room Displays
Create reservations using a meeting room digital signage display. - Microsoft Outlook add-in
Room search with office plans integrated as an add-in within Outlook. See the tags, images, the floor plan, and the room availability. Or order catering service using the Outlook add-in. - Catering service
Order catering service for the rooms. - Event management
Create appointments using Flexopus.
These features enhance the functionality and management of meeting rooms within your organization.
Synchronized data
Flexopus manages the reservations for meeting rooms. Flexopus accesses the connected calendars for rooms and reads the event details: event name, event start, event end, participants, event description, event place, event online call link, private/not private flag. In the configuration, we explain how to restrict the access to selected calendars.
Use Cases
Depending on the needs of your organization, you can use the Exchange synchronization in multiple ways:
CASE A: Read-only sync
You can connect the meeting room calendars and synchronize the meeting room events. You can disable the meeting room booking in Flexopus. This way the users can see who booked the room at a selected time. The users keep booking the rooms in Outlook. You can analyze the room usage statistics in Flexopus.
Benefit: In Outlook, the users often cannot see who booked the room.
CASE B: Read-only sync + displays
Additionally to CASE A, you can install meeting room displays in front of your meeting rooms and enable the booking of these rooms on-site. This way the users can walk by a room and reserve it within a few seconds.
Benefit: By standing in front of the room, the employees cannot book the room easily. They are required to open a laptop or a business phone to create a booking using Outlook. With the room display, they can book it with two touches.
CASE C: Room booking or event booking
You can allow the internal users to book the rooms with the simple room booking module: select “only” the from time and to time to book a room.
Or you can activate the event management module and allow the users to see the room availability in the room overview and book an available time slot. The event can be created with attendees and event details.
Benefit: The event management overview offers a better overview of the favorite rooms for employees.
CASE D: Allow externals to book the rooms.
In case you have external users, you can enable the simple room booking feature for them. External users without an O365 user can book the rooms via Flexopus. The room calendar will be booked.
Benefit: Externals need to have an O365 account in Microsoft to book the rooms. With Flexopus they can book without an O365 license.
CASE E: Catering service
Additionally to CASE A and CASE B, you can enable the catering service module in Flexopus and let the users book catering and facility services for the room bookings. If service orders are linked to the events and they are moving, if the user moves the event. You can also install the Flexopus Outlook add-in to create, edit, and delete the service orders directly in Outlook.
Benefit: Connect the events of the users with catering and facility service orders.
How are the bookings synchronized “bidirectionally”?
Once the interface is configured, users will have the following booking options:
- Reserve meeting rooms through Flexopus.
- See reservations reflected in Microsoft Outlook.
- Manage event details directly in Microsoft Outlook.
Direction: Microsoft → Flexopus
Reservation Flow from Microsoft Outlook to Flexopus:
New Reservation in Microsoft Outlook
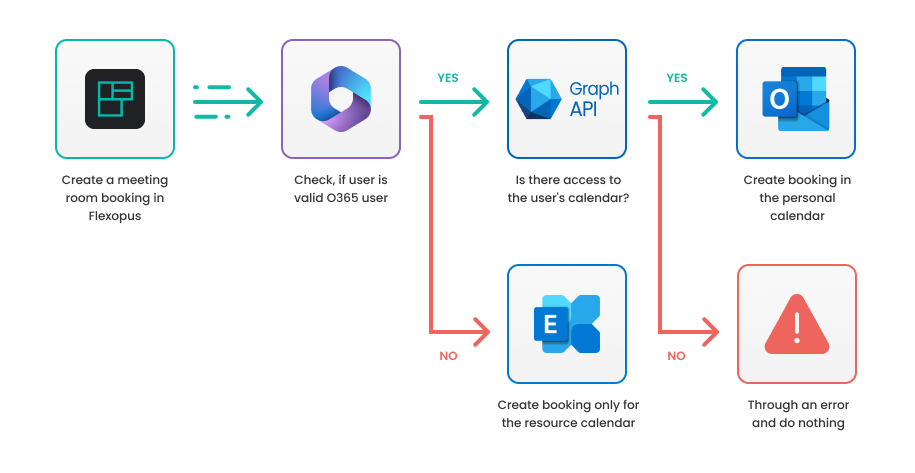
Users can create a new meeting room reservation in Outlook as usual. Once created, Microsoft sends the reservation to Flexopus via the Microsoft Graph API. The reservation will then appear on Flexopus's Live-Plan, allowing other users to see who booked the room and when. All appointment types are supported, including single and recurring appointments.
Edit Reservation in Microsoft Outlook
Any changes made to the reservation in Outlook (e.g., moving an appointment, selecting a different meeting room, or inviting multiple rooms) are synchronized to Flexopus via the Graph API. These updates will be reflected in Flexopus.
Canceling a Reservation in Microsoft Outlook
When a reservation is canceled, users can either cancel the entire event or just “uninvite” the meeting room in Outlook. Both scenarios are supported and synchronized in real time with Flexopus.
Direction: Flexopus → Microsoft
Reservation Flow from Flexopus to Microsoft Outlook:
Edit or delete reservation in Flexopus
The reservations are shown in Flexopus. Editing and deleting the reservation is possible in Flexopus.
New reservation in Flexopus
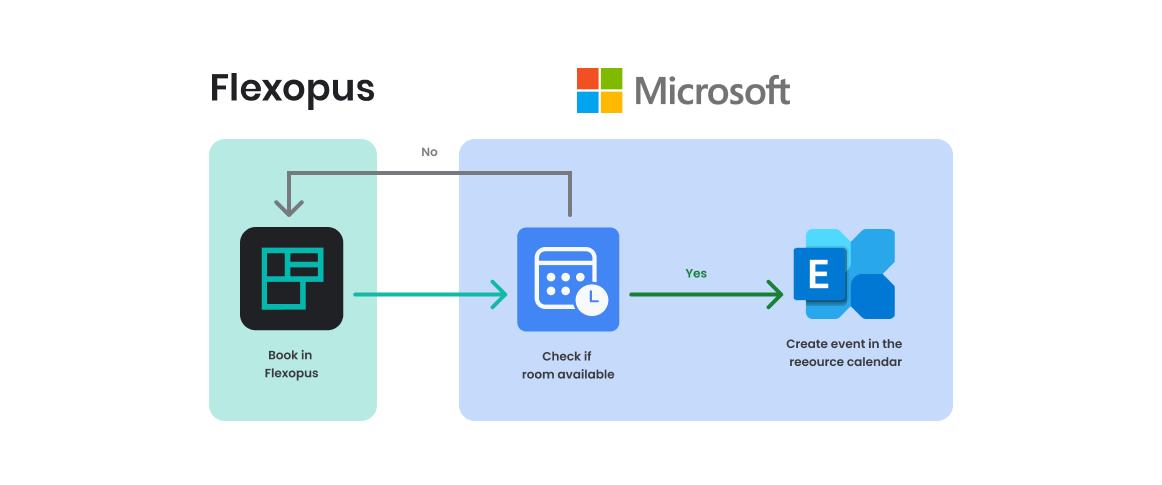
A new resource reservation can be made in Flexopus through the usual reservation workflow, or it can be made through a meeting room signage display. Each reservation needs to be accepted by Microsoft Exchange Online, since Microsoft is the “single source of truth” in this constellation; therefore, double reservations are not possible. After a successful reservation, the reservation initiated through Flexopus will be displayed in the Outlook calendar of the respective user. The calendar entry will be created by Microsoft. The user can edit the booking in the Outlook calendar as usual.
The user can manage the event details (appointment name, participants, description, video call, etc.) in Flexopus as well; however, this hardly depends on how you configured Flexopus.
Setup Instruction Manual
To activate the Microsoft Exchange Online integration, follow the instructions.
STEP 1 - Authorize Flexopus
To configure the Microsoft Graph integration in Flexopus:
- Navigate to the Flexopus admin panel.
- Go to
Dashboard > Settings > Integrations.
If the integration module is enabled, you'll see it on this page. If you do not see the setting, contact support@flexopus.com for assistance.

To connect Flexopus with Microsoft:
- Click the
Connectbutton on theIntegrationspage. - Ensure you are an admin of your Microsoft Organization.
- After verifying, click the
Connect and Authorizebutton to proceed.
This will enable the integration between Flexopus and Microsoft services.
An authorization page will open in Microsoft with the requested permissions to read data via the Microsoft Exchange interface:
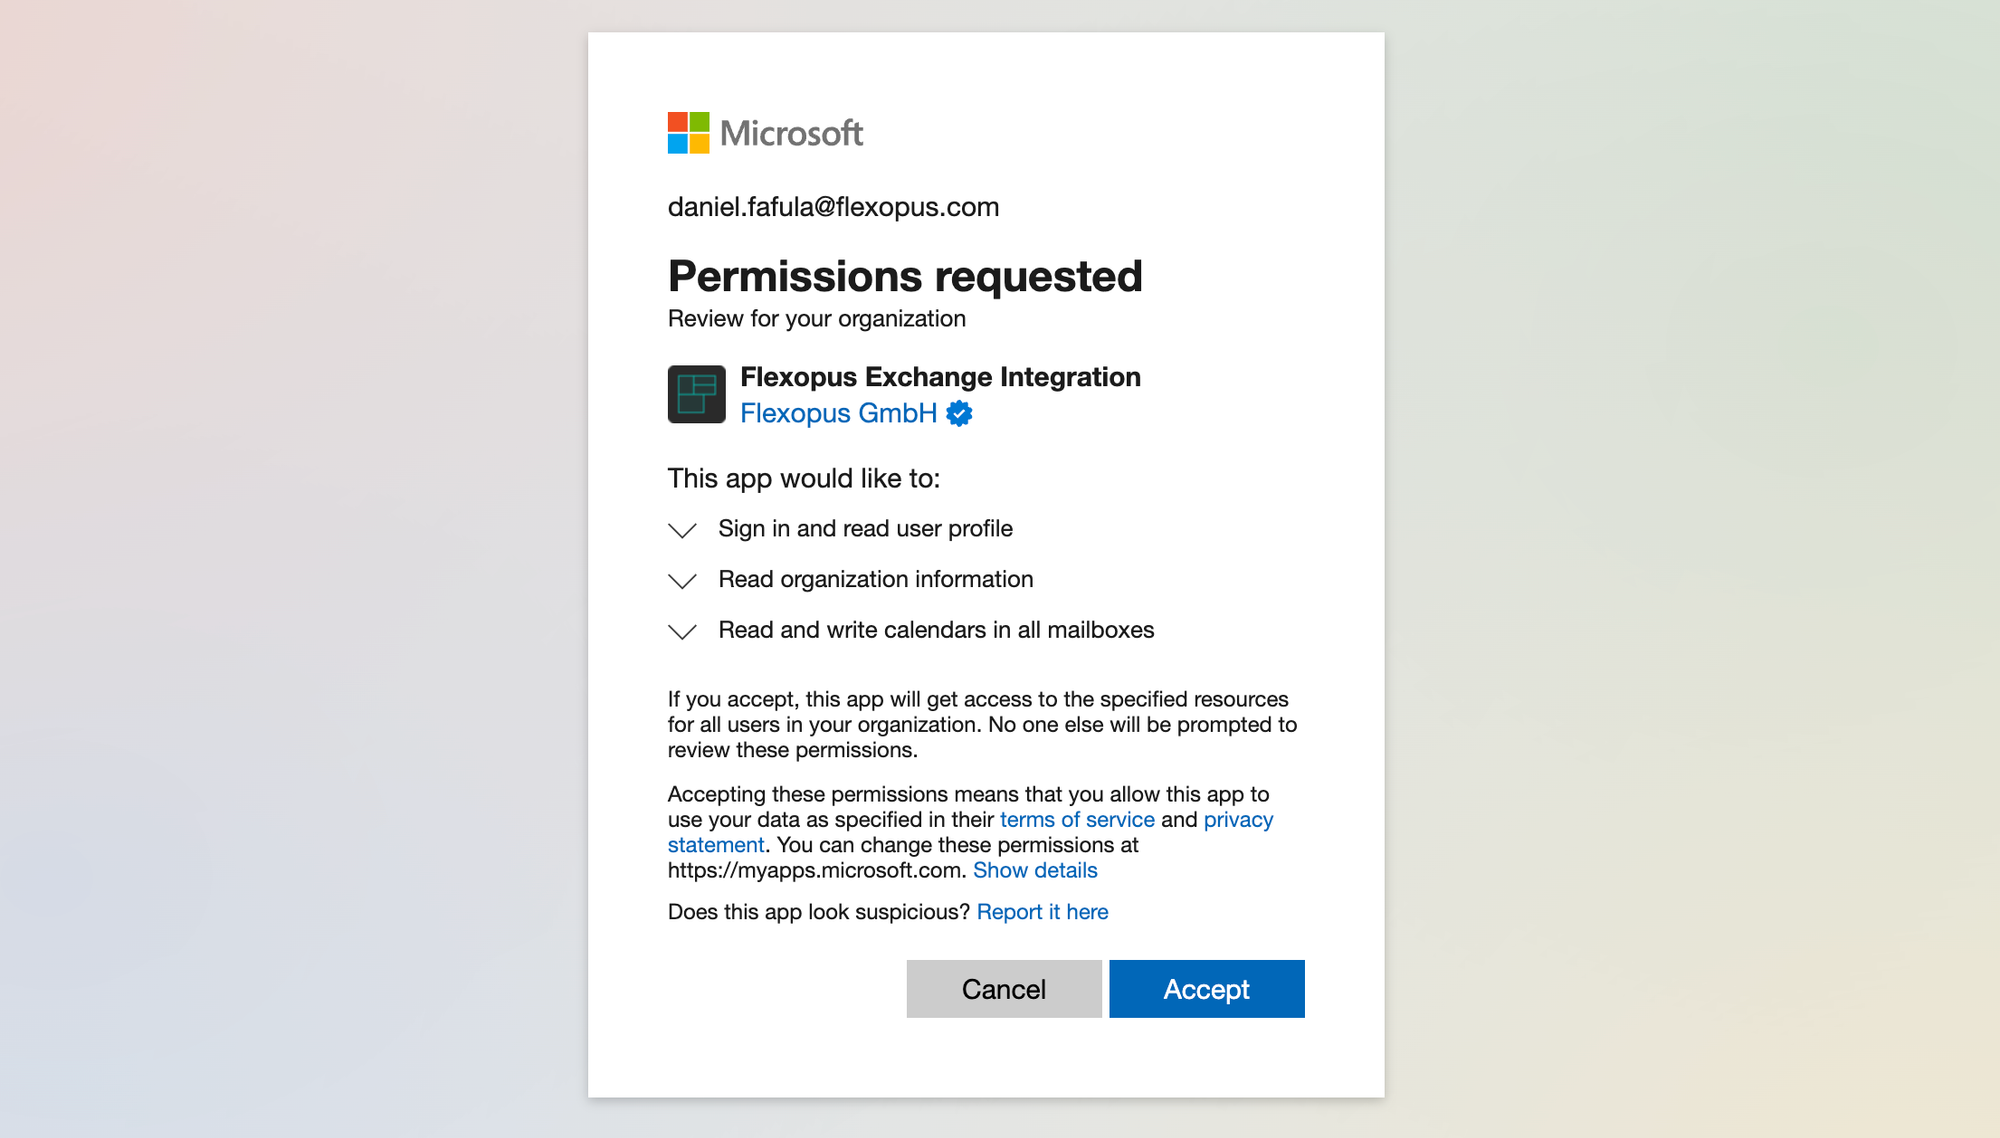
| Permission | Display name | Description | Link |
|---|---|---|---|
| User.Read (delegated) |
Sign-in and read user profile | Allows users to sign-in to the app, and allows the app to read the profile of signed-in users. It also allows the app to read basic company information of signed-in users. | link |
| Organization.Read.All (application) |
Read organization information | Allows the app to read the organization and related resources, without a signed-in user. Related resources include things like subscribed SKUs and tenant branding informatio | link |
| Calendars.ReadWrite (application) |
Read and write calendars in all mailboxes | Allows the app to create, read, update, and delete events of all calendars without a signed-in user. | link |
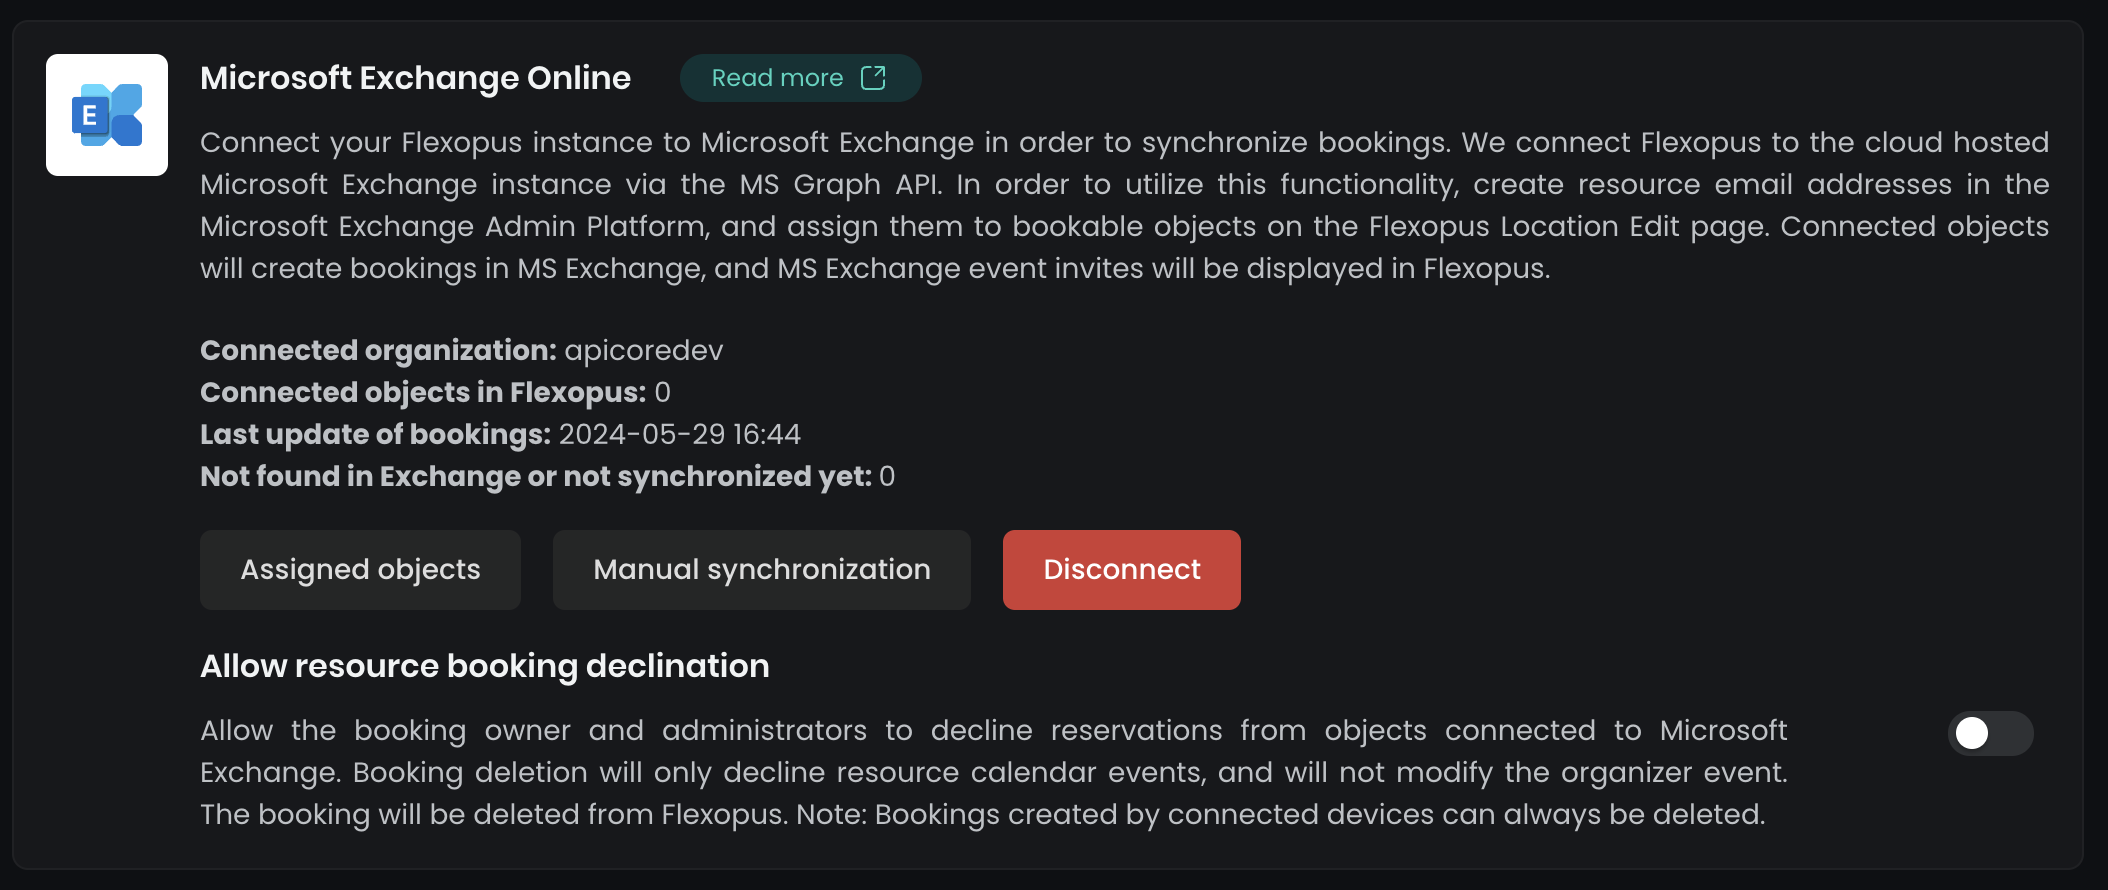
After you have accepted the permissions, the status of the integration is displayed:
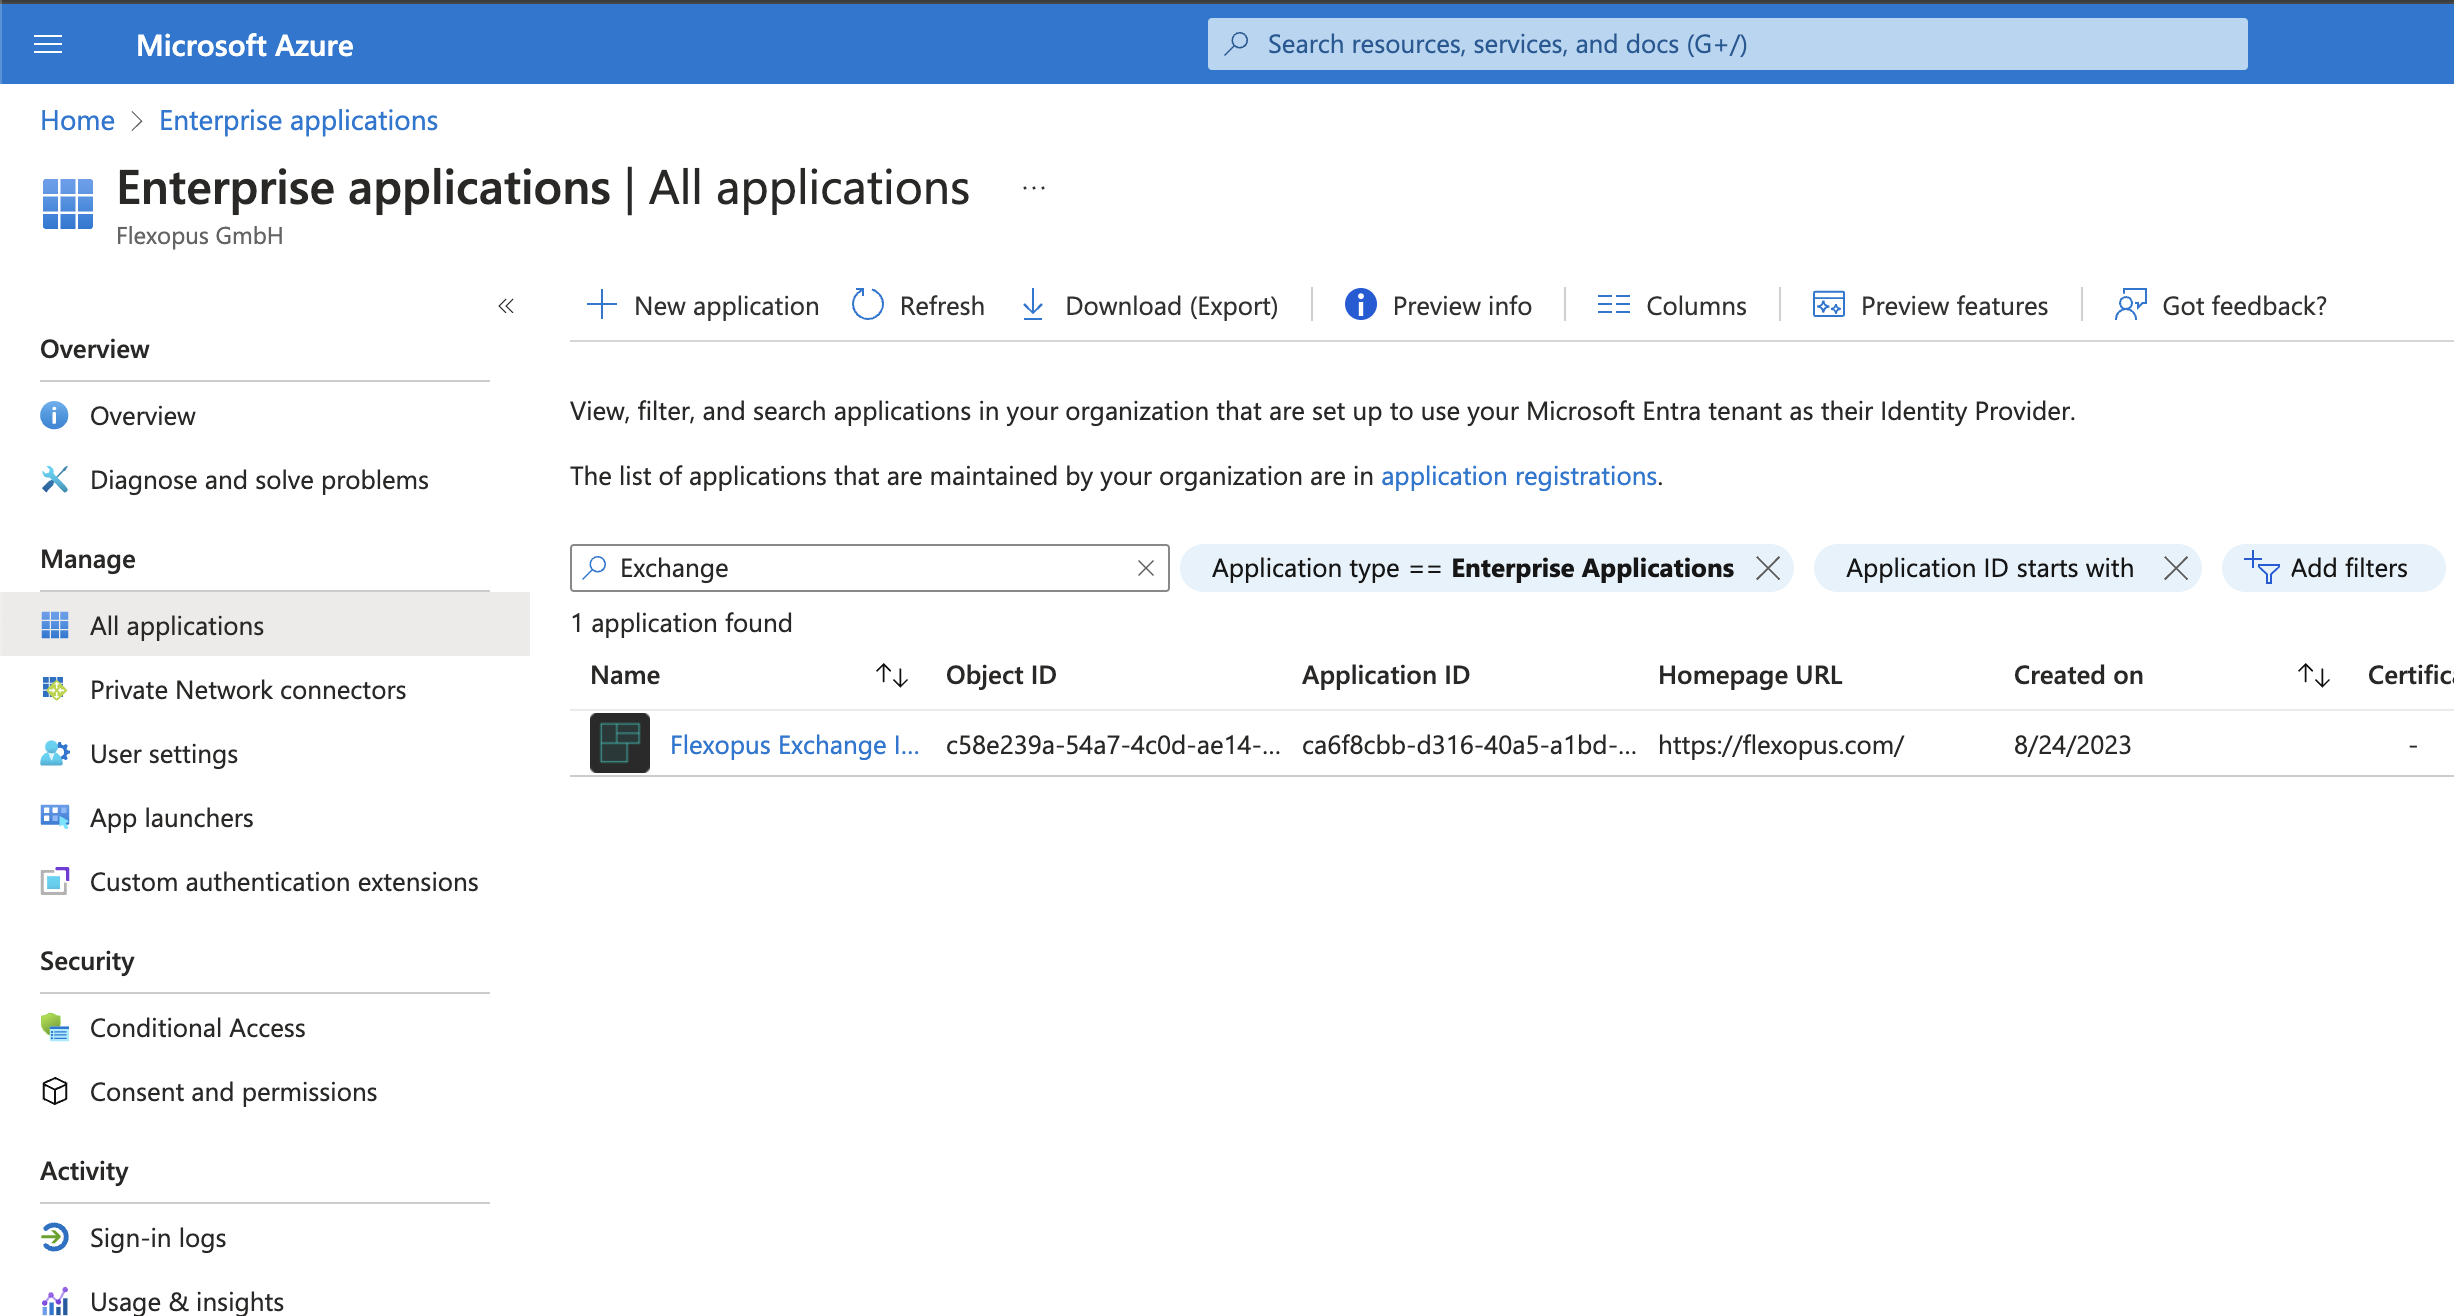
Furthermore, Microsoft will automatically create a new enterprise application in your Active Directory with the Flexopus Exchange Integration name here.
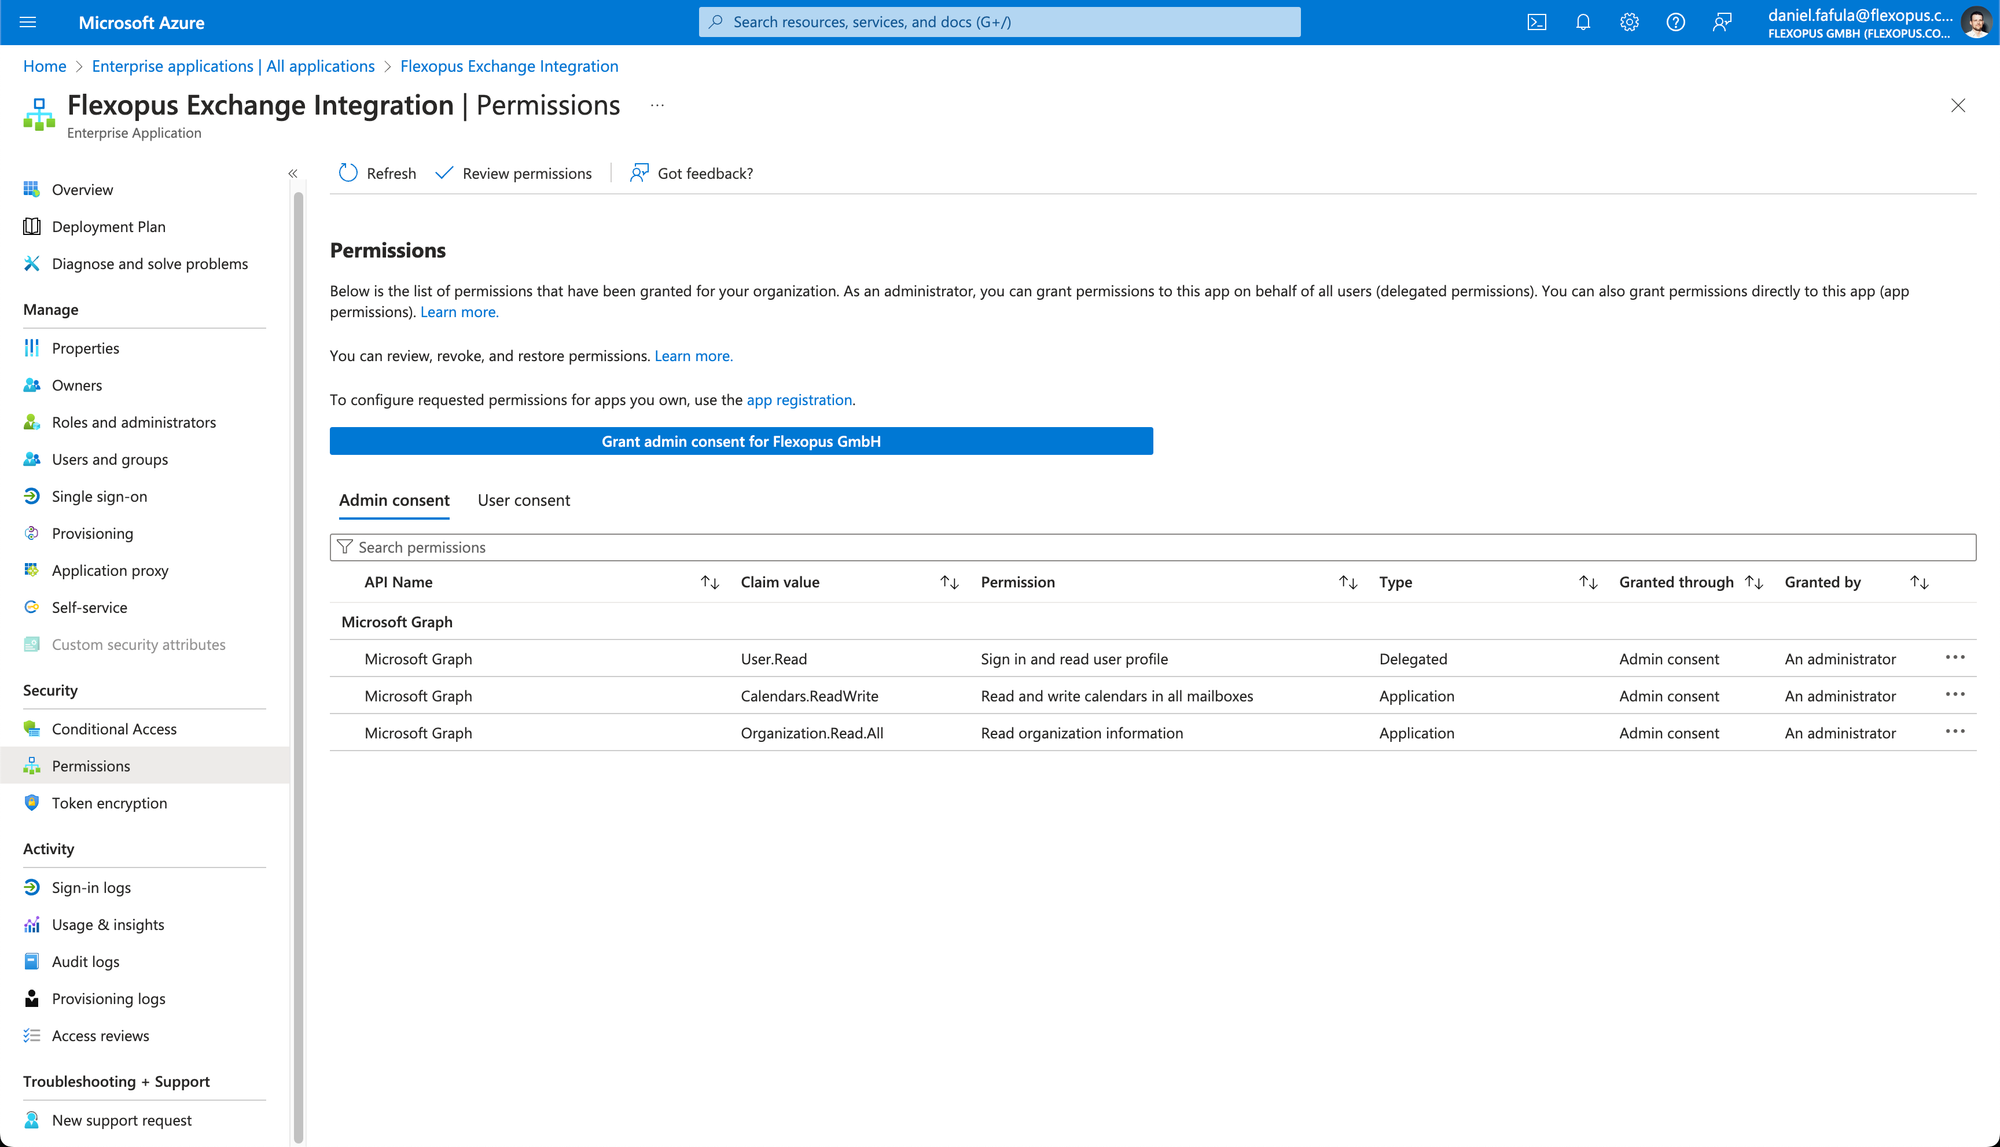
After setting up the integration, open the application and navigate to the Permissions tab. Here, you will be able to see the granted permissions that have been authorized for Flexopus. This allows you to review and manage the access permissions given during the integration process.
STEP 2 - (optional) Create access policy
By granting Flexopus the Calendars.ReadWrite delegated application permission rights, Flexopus can access all personal and resource mailboxes of your organization.
Resource mailboxes
The mailboxes of the meeting rooms need to be accessed for an obvious reason. The goal is to synchronize the reservations from Microsoft Exchange to Flexopus. To do so, we need to have access to the meeting room resource mailboxes.
Personal mailboxes
To create a reservation via Flexopus we need to have access to users' personal calendars.

Some customers wish to limit the access, since the application is only used by a part of the whole organization. To limit the application access to specific mailboxes, you can create a so-called application access policy via PowerShell. You can create a security group for it and add it to the access policy. You have 2 ways to add a security group to an access policy:
DenyAccess: This way, the access of the assigned calendars of the assigned security groups will be denied for the application.Restrict access: This way, the access of the assigned calendars of the assigned security groups will be allowed for the application.
To configure the application access policy, you will need
- a security group, and
- you will need to assign the security group to the application in the Microsoft PowerShell.
The easiest way to create security groups is to go to the Azure Active Directory and to create it manually:
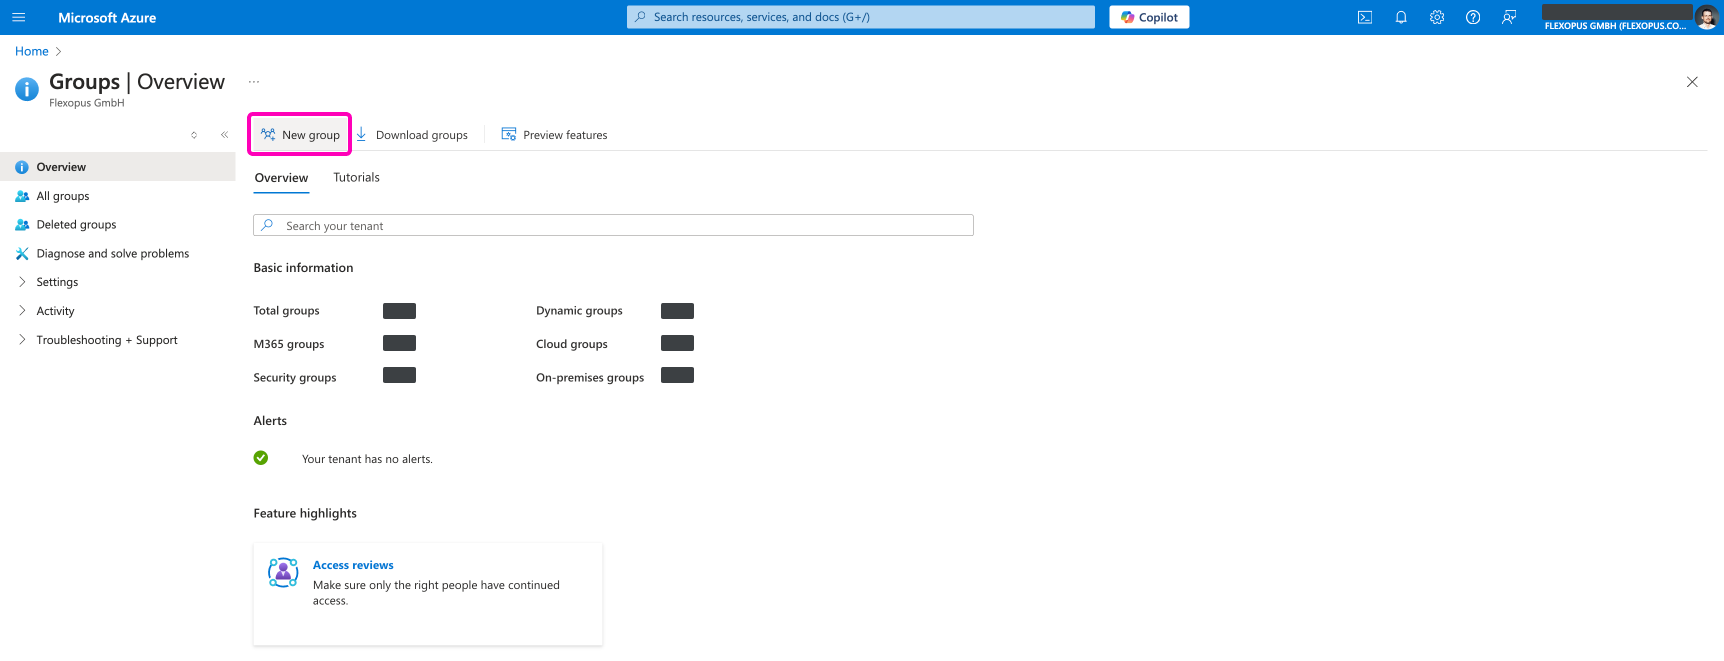

However, you can also create the group with the PowerShell using the following command and manage the group from there:
New-DistributionGroup -Name "Enter the name of new security group" -Alias "Enter the Alias" -Type security
As next login into the PowerShell with a user who is entitled to manage the security groups, the application permissions. There is no user interface provided by Microsoft to do this step. Follow the steps. Add the security group to the application to create an access policy:
New-ApplicationAccessPolicy -AccessRight RestrictAccess -AppId "Enter Token Provider AD App ID" -PolicyScopeGroupId "Enter Email Enabled Security Group Mailbox ID" -Description "Restricted Access Group Policy"
For more information, contact your IT administrators or read the corresponding articles of Microsoft:

STEP 3 - Connect mailboxes with Flexopus
Once the integration is active, you need to connect the meeting rooms one by one. Go to the Exchange Online Admin Panel and copy the Microsoft resource email address.
To link a meeting room to Microsoft Exchange in Flexopus:
- Go to the Flexopus location editor.
- Select the meeting room you want to link.
- Paste the
Microsoft Exchange Resource email addressinto theExternal connection email addressfield.
This will connect the meeting room with Microsoft Exchange for synchronization.
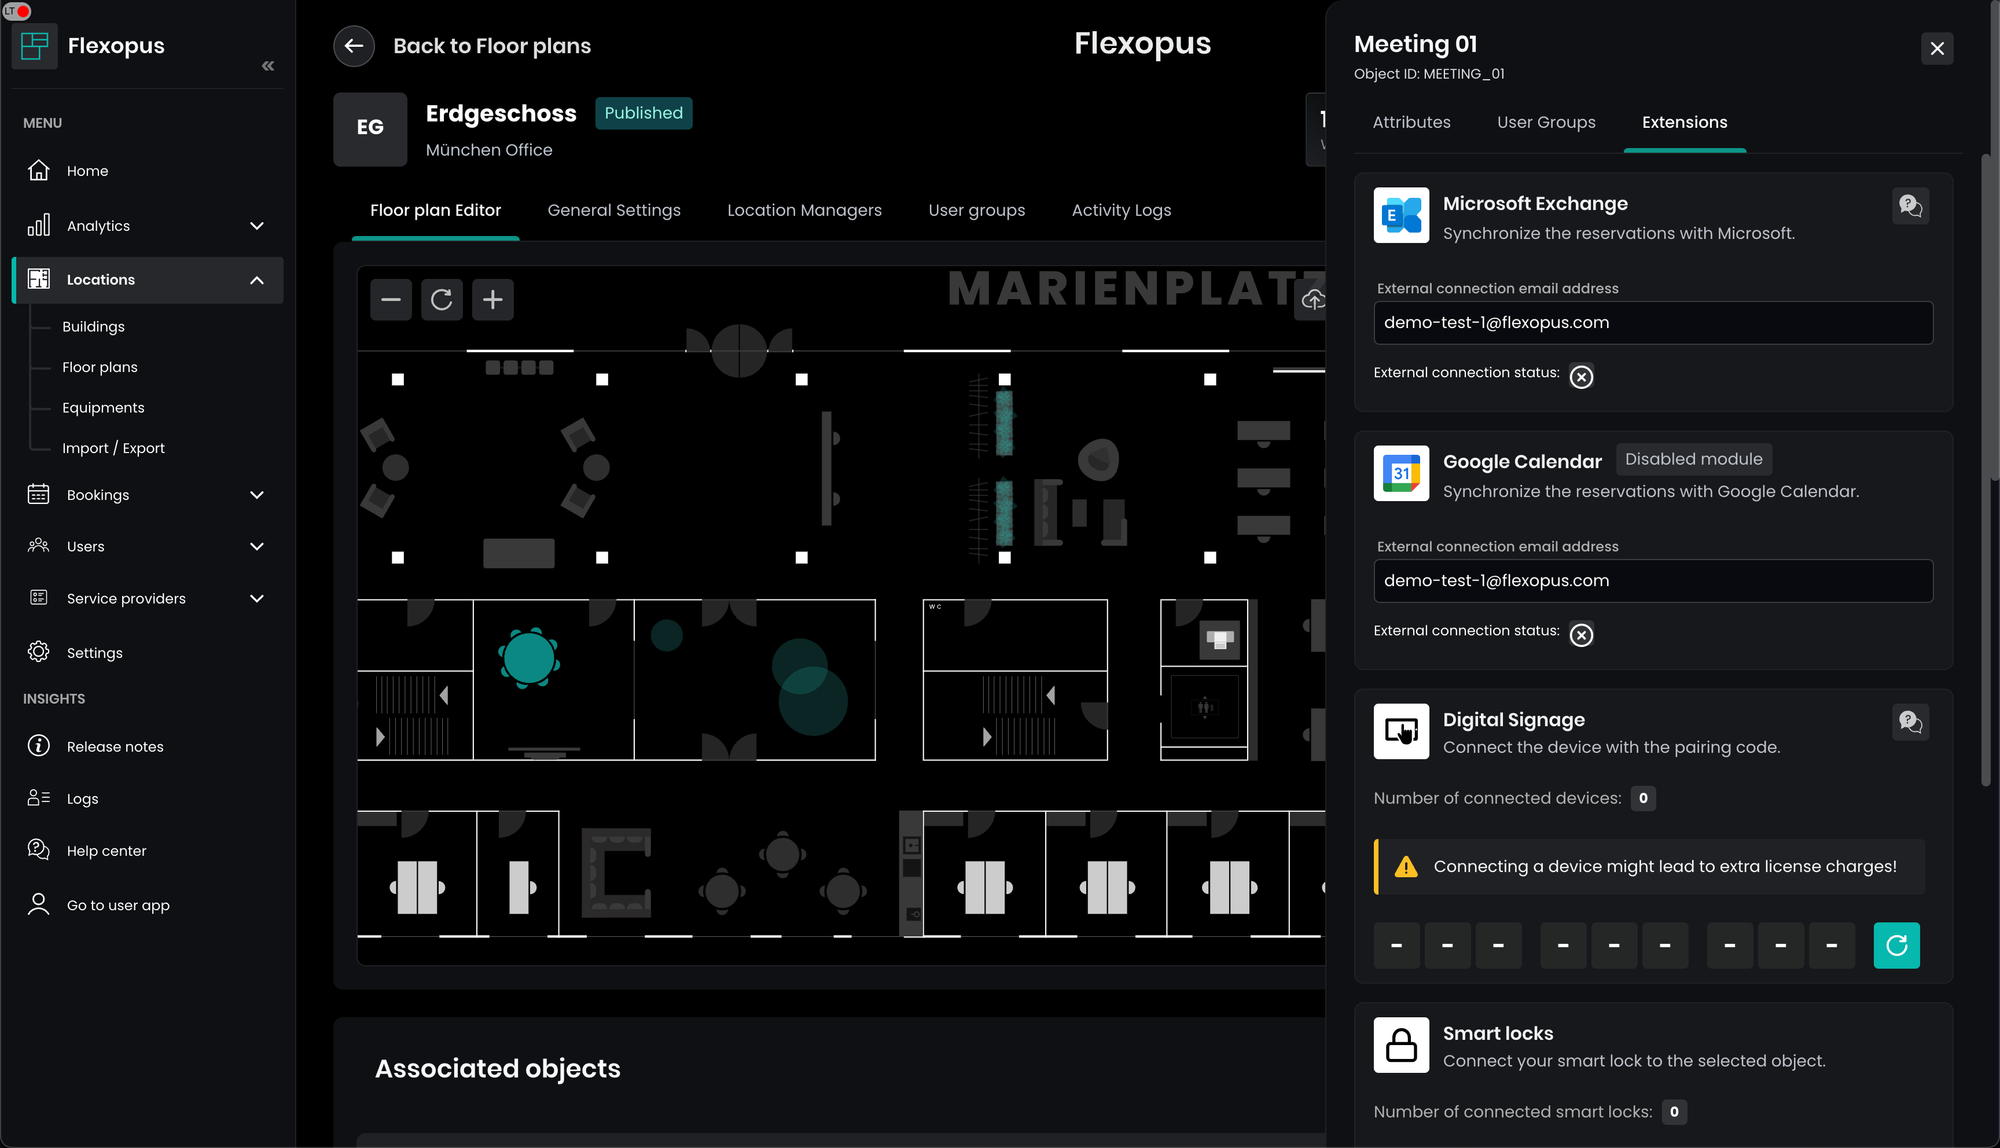
After saving, Flexopus will try to connect the meeting room to the resource calendar. Wait about 10 seconds and then refresh the page. If the email address is valid, a verified tick should be visible directly below the email address. If the validation is successful, then Flexopus will synchronize the reservation. This may take a few seconds.
After connecting the resource, you can see the changes in the integration overview:
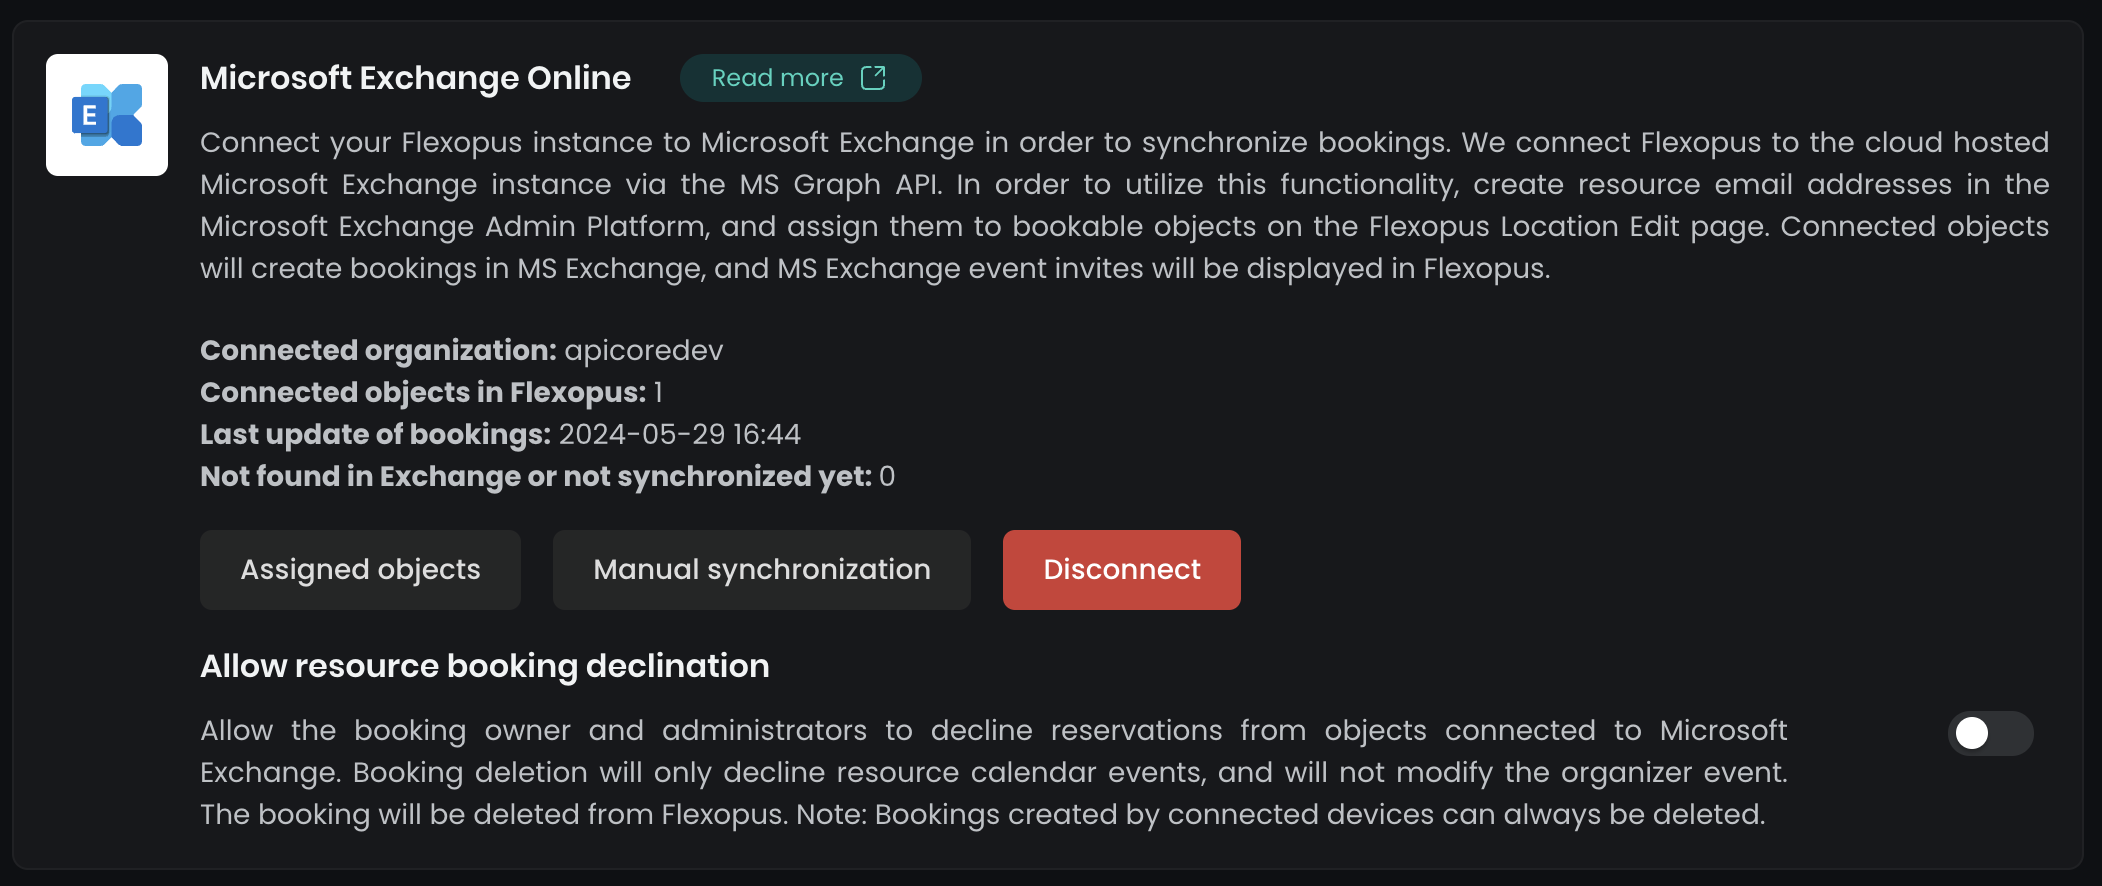
After the connection is established, you don't need to click on the manual synchronization button, the process will be triggered automatically. Still, you can request a reservation synchronization for all connected resources manually at any time.
External users
Users outside your Active Directory can book the meeting rooms through Flexopus or through the meeting room signage displays as well, if they have access to the room booking in Flexopus.
Book as external user
By default, users of your Active Directory can book the meeting room resources in their personal Outlook Calendar or via the Flexopus application. Most probably they manage the meeting room bookings in their Outlook Calendar. This is also the preferred way, if applicable.
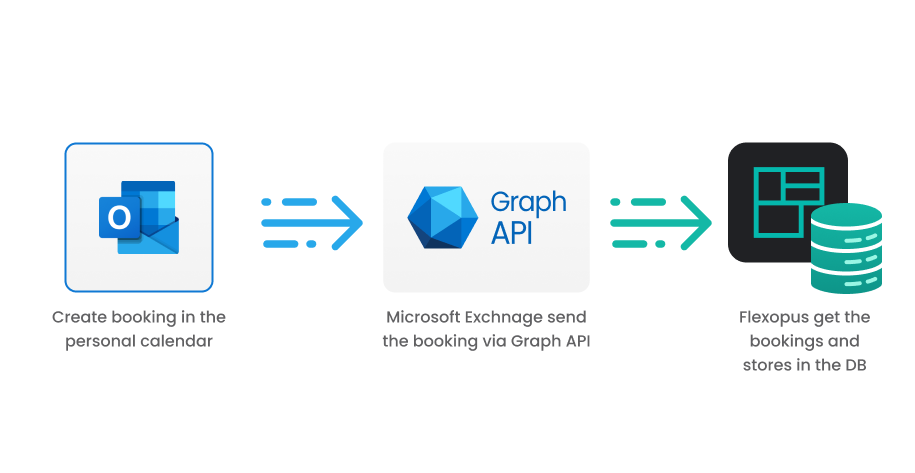
In case a user initiates a booking through Flexopus the following process will happen:
- The application sends a booking request to Microsoft via the Graph API.
- Microsoft checks if the user is a valid user in the Active Directory
- The room availability will be checked.
- The booking will be created in the user's personal calendar.
- The booking will be created in the resource calendar, linked to the event that is created in the personal calendar.
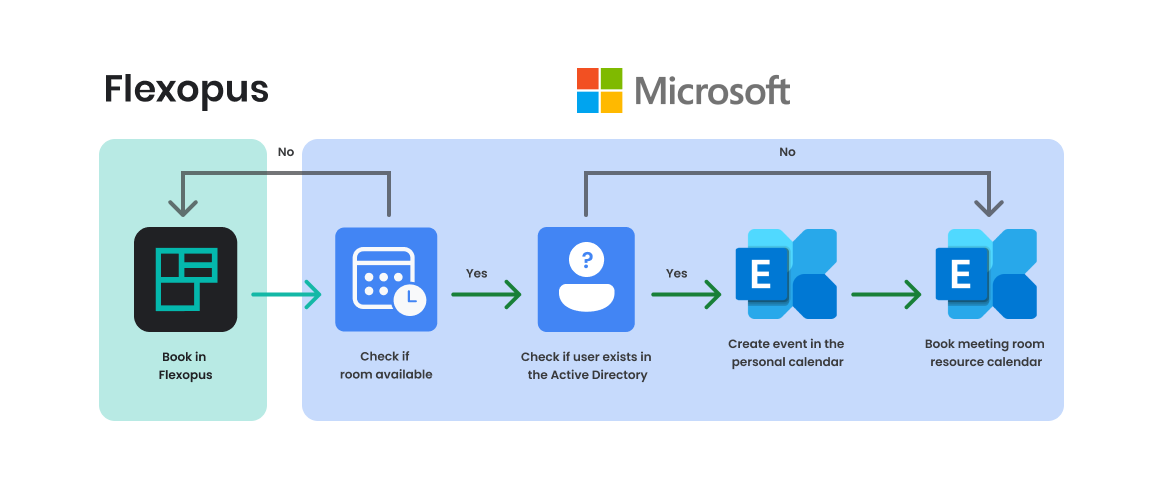
For Flexopus to execute the booking flow, it requires access to both the personal calendar of the user and the resource calendar of the meeting room.
However, if the user does not exist in your organization's Active Directory, Flexopus will not be able to access the personal calendar. In this case, Flexopus will still proceed to book the resource calendar of the meeting room, but there will be no event entry in the user’s non-existing personal calendar.
This scenario typically occurs when external users are granted booking rights in Flexopus. They can still book the meeting room, but will need to manually create the event invitation in their personal calendar.
Book on a display
The meeting room displays for digital signage can also be used for booking a meeting room resource on site.

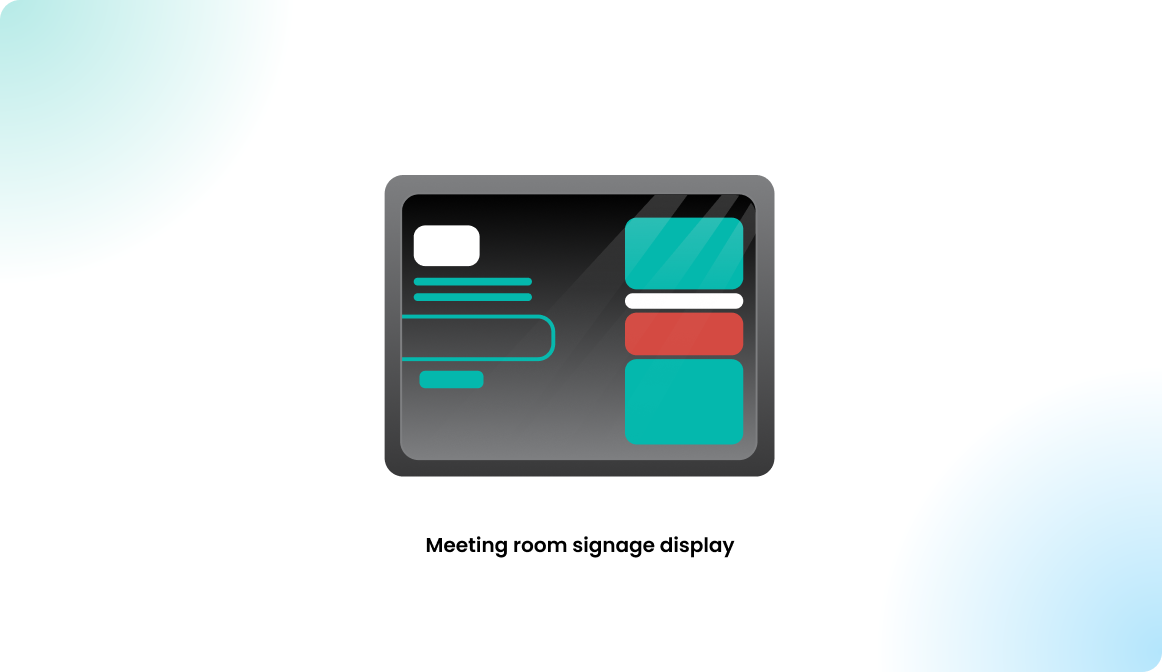
In this scenario, users can book a meeting room ad-hoc onsite without logging into the application. Flexopus will use a system user to book the resource calendar of the meeting room in Microsoft.
Since the meeting is not associated with an authenticated user, it can only be deleted or edited through the digital signage display or by an administrator in the Flexopus admin dashboard.
Allow resource booking declination
Since external users cannot access the resource booking in their personal calendar, they need the ability to create and delete reservations. By default, deletion of bookings is disabled. Optionally, you can allow owners of a booking and administrators to delete bookings of objects linked to Outlook Calendar.
Deleting a booking in Flexopus will only reject the booking in the resource calendar, without affecting the organizer’s personal appointment. The booking will also be deleted from Flexopus.
To enable this feature:
- Navigate in Flexopus as an administrator to
Dashboard > Settings > Integrations > Microsoft Exchange Integration. - Enable the
resource booking declinationoption.

How can I deactivate the interface?
To disconnect Flexopus from Microsoft:
- Click the
Disconnectbutton. This will stop Flexopus from receiving updates from Microsoft. - All externally managed bookings will be deleted from Flexopus.
- You can also manually delete the automatically created
enterprise applicationin your Azure Active Directory.
This will fully disconnect the integration between Flexopus and Microsoft.
Approval Process for Meeting Room Bookings
You can optionally assign meeting room delegates to manually review and manage booking requests. This is especially useful for high-demand or restricted-access rooms. The following steps will guide you through assigning specific users the authority to approve or decline bookings, helping ensure all requests are properly reviewed and authorized.
- Open the Microsoft 365 admin center or click here.
- Navigate to the bottom-left corner, click Show all, and then select Exchange.
- On the Exchange Admin Center, locate Recipients in the left menu and select Resources.
- Double-click the room you want to configure, then go to the Booking Delegates tab.
- Under Booking requests, enable the option Select delegates who can accept or decline booking requests. Click the + (plus) icon to add a delegate.
- Click Save and repeat these steps for any additional rooms you need to configure.
Trouble Shooting / FAQ
{"code"}:"ErrorAccessDenied","message":"Access to OData is disabled: [RAPO] : Blocked by tenant configuration AppOn...
If you encounter an error message in the reservation workflow, it is likely that access to the necessary permissions for the Flexopus integration is being blocked. This may be due to custom policies configured in PowerShell.
Flexopus requires access to both the personal calendar of the user and the resource calendar to create meeting bookings.
To resolve this, ensure that you have granted Flexopus the required access rights for these calendars.
What are resource mailboxes, and how are they configured?
Here is the Microsoft documentation on setting up resource mailboxes: https://docs.microsoft.com/en-us/exchange/recipients-in-exchange-online/manage-resource-mailboxes
Can I connect my On Premise Microsoft Exchange Version?
Yes. Visit the Exchange On-Premise instruction manual.
Can I connect multiple Exchange Online accounts?
No, it's not possible currently.

