SAML2 for a Custom Provider

Which Identity Providers are supported for SAML2?
Flexopus implemented the standard SAML2 Single Sign-On protocol, which is supposed to work with any Identity Provider that follows the SAML2 standard. Flexopus acts as a Service Provider. Therefore, you can try to connect your Identity Provider, even if we do not provide a specific step by step description on how to configure your specific Identity Provider.
Still, we created for the most commonly used Identity Providers a step-by-step instruction manual:

SAML2 Instruction Manual
STEP 1 - Metadata parameters
- Navigate in Flexopus to
Dashboard > Settings > Authenticationas an administrator. - Click on the
Add providerbutton. - Select the
SAML2 SSOoption.

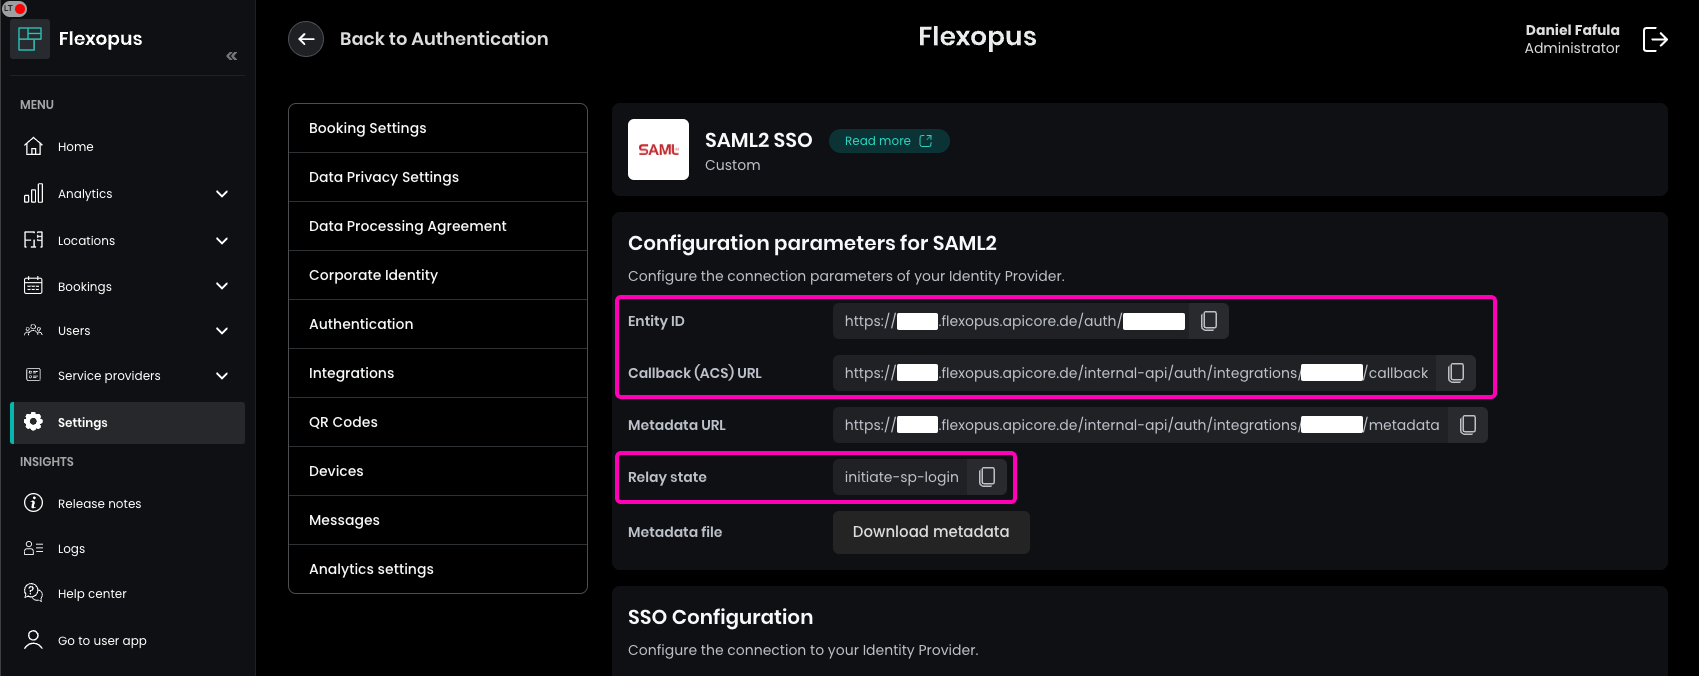
In this section, you'll find the following configuration parameters, which are required for setting up your Identity Provider: : Entity ID, Callback (ACS) URL, Relay State, Metadata URL, Metadata File. These details will assist in configuring your Identity Provider accurately with Flexopus.
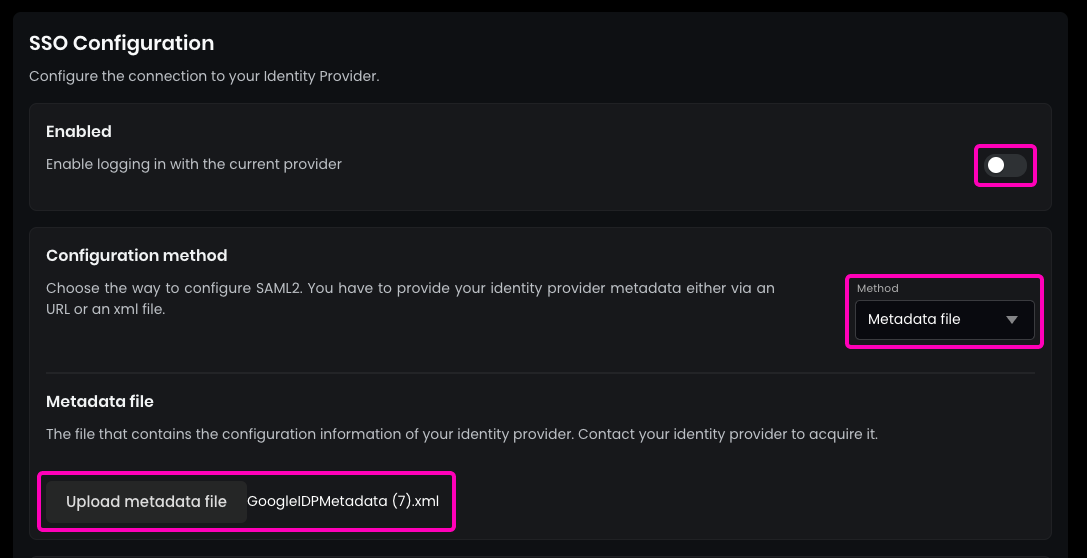
To complete the configuration in Flexopus, enter the Metadata URL or upload the Metadata File from your Identity Provider. Once configured, enable the SAML2 SSO.
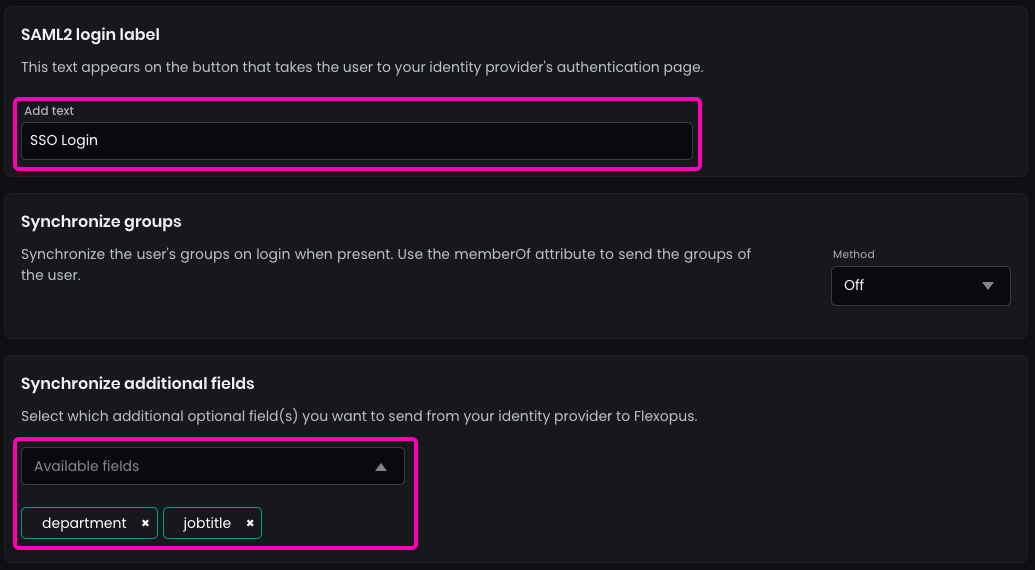
Enter the name for the SAML2 Login button, which will display on the login page. Recommendation: Use “SSO Login.”
(Optional) Enable synchronization for any additional fields configured in the SAML2 settings, such as jobtitle, department, costcenter, or extensionAttributes.
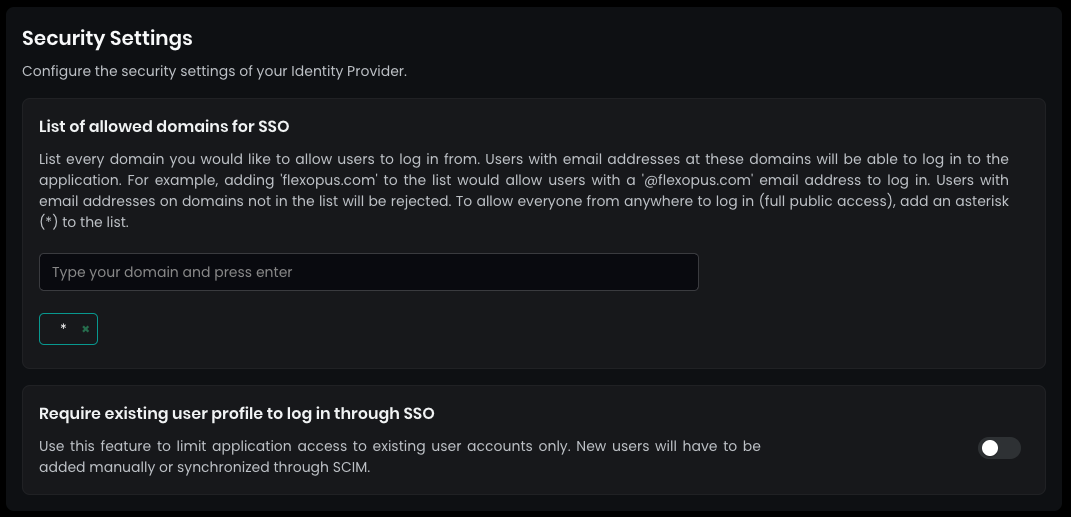
In the security settings, set the allowed domains for SSO to * (star) and press ENTER. This setting allows any user configured in your Active Directory to log in.
By default, SAML2 SSO users are automatically registered after their first login attempt. This eliminates the need for manual profile creation beforehand. You can disable this setting if necessary, though it is generally not recommended.
SAVE your settings at the bottom.
STEP 2 - Configure your Identity Provider
Use the configuration parameters provided by Flexopus to set up the integration in your Identity Provider. The following parameters are provided for a successful connection: Entity ID, Callback (ACS) URL, Relay State, Metadata URL, Metadata File
Ensure these details are entered correctly to complete the integration.
STEP 3 - Signatures
Signing the assertions sent to the Flexopus server is mandatory. Please note that an invalid signature will always result in an error. Therefore, make sure that:
- your IdP signs the assertions and not the whole message.
- your server signs the messages with a key that corresponds to the certificate in your identity provider metadata (IdP) that you upload to Flexopus.
Encryption of assertions sent to Flexopus is optional. If you want to encrypt them, please consider using our certificate in the metadata of our service provider.
STEP 4 - Attribute mappings
Configure which attributes should be synchronized between your Identity Provider and Flexopus. Use the parameters below for mapping, with a recommendation to use urn: mappings:
Required attributes are:first_name, last_name or combined name attribute and email
Optional attributes are:jobtitle, department, costcenter, memberOf, extensionAttribute[1-10]
This setup allows flexibility to decide on attribute specifics based on your organizational needs.
'email' => [
    'http://schemas.xmlsoap.org/ws/2005/05/identity/claims/emailaddress',
    'urn:oid:0.9.2342.19200300.100.1.3',
    'http://schemas.xmlsoap.org/claims/EmailAddress',
    'urn:oid:1.2.840.113549.1.9.1',
],
'name' => [
    'http://schemas.xmlsoap.org/ws/2005/05/identity/claims/name',
    'urn:oid:2.16.840.1.113730.3.1.241',
    'http://schemas.xmlsoap.org/claims/CommonName',
    'urn:oid:2.5.4.3',
],
'first_name' => [
    'http://schemas.xmlsoap.org/ws/2005/05/identity/claims/givenname',
    'urn:oid:2.5.4.42',
],
'last_name' => [
    'http://schemas.xmlsoap.org/ws/2005/05/identity/claims/surname',
    'urn:oid:2.5.4.4',
],
'upn' => [
    'http://schemas.xmlsoap.org/ws/2005/05/identity/claims/upn',
    'urn:oid:0.9.2342.19200300.100.1.1',
    'http://schemas.xmlsoap.org/claims/UPN',
    'upn',
],
'department' => [
    'department',
    'urn:oid:2.5.4.11',
],
'jobtitle' => [
    'jobtitle',
    'urn:oid:2.5.4.12',
],
'costcenter' => [
    'costcenter',
],
'memberOf' => [
    'memberOf',
],
'extensionAttribute1' => [
    'extensionAttribute1',
],
'extensionAttribute2' => [
    'extensionAttribute2',
],
'extensionAttribute3' => [
    'extensionAttribute3',
],
'extensionAttribute4' => [
    'extensionAttribute4',
],
'extensionAttribute5' => [
    'extensionAttribute5',
],
'extensionAttribute6' => [
    'extensionAttribute6',
],
'extensionAttribute7' => [
    'extensionAttribute7',
],
'extensionAttribute8' => [
    'extensionAttribute8',
],
'extensionAttribute9' => [
    'extensionAttribute9',
],
'extensionAttribute10' => [
    'extensionAttribute10',
],
Our server requires that the type of the NameID is PERSISTENT.
STEP 5 - Configure who can log in
Once you configured Flexopus and your identity provider, you need to configure who is supposed to log in Flexopus. That's the entire point of the SAML2 Single Sign-On configuration. You grant access for your users to use SSO. In most of the identity providers you can allow all users, or you can provide access based on user groups. Grant access for your users. Then test the connection.
Open Flexopus in a new incognito window and test the login. You should be able to log in with an existing or a new user, depending on how you configured the access right.
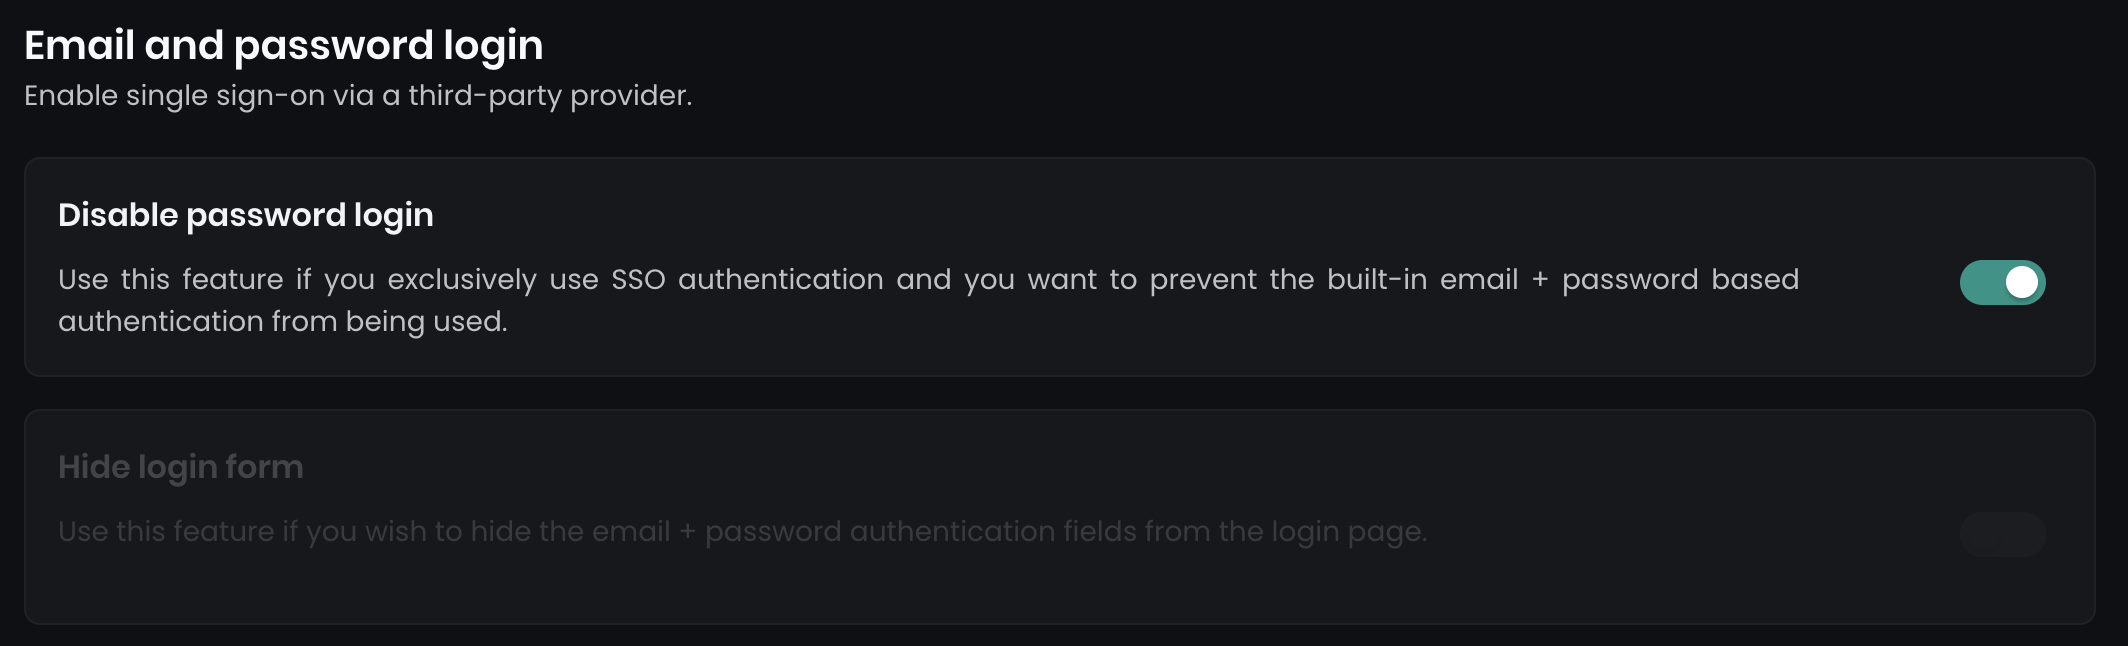
To enforce Single Sign-On (SSO) and disable email/password logins, navigate to Dashboard > Settings > Authentication. Here, you’ll find two options:
Disable password login
This option disables all email and password login forms.Hide login form
This hides the main login form on the primary login page, while a secondary login form (../dashboard/auth/login) remains available as a backup for admin access.
Trouble Shooting / FAQ
Duplicate user was created!
This can happen, if the UPN changed over the time. Contact us for support: support@flexopus.com
One user can log in in the user profiles of others!
This can happen, if you mixed up the UPNs. of the users in your Google Workspace Directory over the time. Contact us for support: support@flexopus.com