Flexopus SAML2 certificate rotation
Overview
The Flexopus SAML2 certificate will be renewed on 17 December 2026 at 10:00 CET, as the previous one will expire. The new certificate is already in place and available. Please observe the following timeline for the certificate rotation:
- The new certificate is already in place and Flexopus already accepts assertions encrypted with the new certificate.
- Flexopus currently signs requests using the old certificate and will continue to do so until 10:00 CET on 17 December 2026.
- Flexopus will stop signing requests using the old certificate on 17 December 2026 at 10:00 CET, when it will start signing requests using the new certificate.
- Flexopus will keep accepting assertions encrypted with the old certificate until the expiry of the old certificate on 21 December 2026 at 15:19:46 CET.
Impact
There is a high chance that this process will be completely automatic for you, and you have nothing to change. You have nothing to do, if any one of the following three statements is true for your setup:
- Either your identity provider automatically reads metadata from our metadata URL (not the metadata file which you uploaded manually),
- OR signature verification for Flexopus authentication requests and assertion encryption towards the Flexopus service provider is not enabled in your identity provider. (Example: In case you followed our latest Microsoft Entra ID SAML2 guide step-by-step to set up SAML2, you did not enable these features, so you have nothing to do.),
- OR you are not using SAML2, but rather OAuth 2.0 for Single Sign-On. The OAuth 2.0 configuration are not affected by this certificate rotation.
If neither of the above is true, you will have to add our new certificate manually.
In case you are not sure which category your setup falls in, please see our per provider guidelines at the bottom of this page.
Changing the certificate manually
In case you are affected, you have to change the certificate manually.
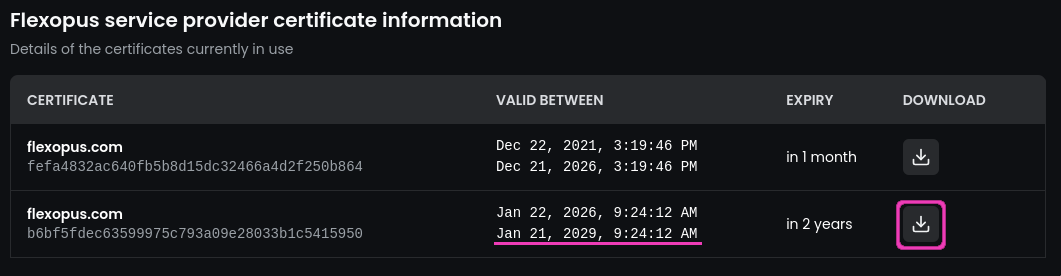
To set up the new certificate in your identity provider, you have to download it first. To do so, visit the Flexopus administrator area, and navigate to Global Settings → Authentication → Your SAML2 SSO configuration. On the SAML2 configuration page, you can see all certificates, and you can download the new Flexopus certificate that is valid until 2029. See the screenshot below.
Please add this certificate to your identity provider. There are two possibilities here:
CASE A: If your identity provider accepts multiple certificates
- Add the new certificate as the primary certificate and keep the old certificate as a secondary certificate.
- This ensures that logging in will work throughout the transition period.
- You can complete this any time until the deadline on 17 December 2026 at 10:00 CET, and you have nothing else to do after that.
CASE B: If your identity provider accepts only one certificate
- Make sure to change the certificate to the new as close to 10:00 CET on 17 December 2026 as possible.
- In this case you can not change the certificate seamlessly and there will be a short amount of time when your users can not log in. (The time between you changing the certificates and the deadline)
- In case your identity provider supports automatically updating the metadata from a metadata URL, we highly recommend switching to that configuration option if possible for you. This way you can avoid the gap in your login processes.
Please remember, that Flexopus will stop signing requests with the old certificate on 17 December at 10:00 CET, when it will start signing requests with the new certificate.
Information for different identity providers
For the sake of simplicity, we offer guides below for the most commonly used identity providers:
- Microsoft ADFS
- Microsoft Entra ID (Azure Active Directory)
- Google Workspace
- Keycloak
Microsoft ADFS
You have to add the certificate manually.
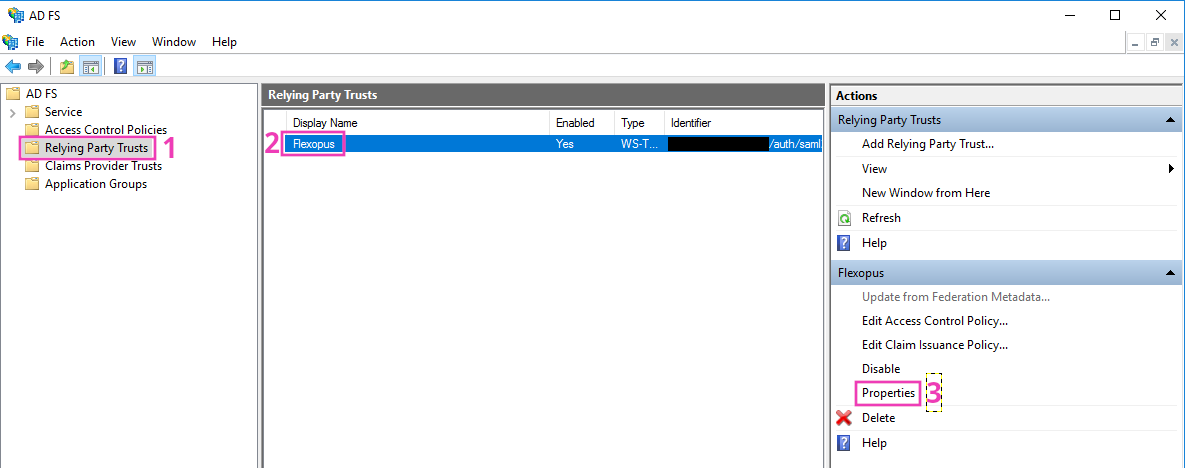
- Go to your
Microsoft AD FS management consoleas anAD FS administrator. - Select the
Relying Party Trustsfolder. - Select your Flexopus configuration. Click
Propertiesin theActionssidebar.
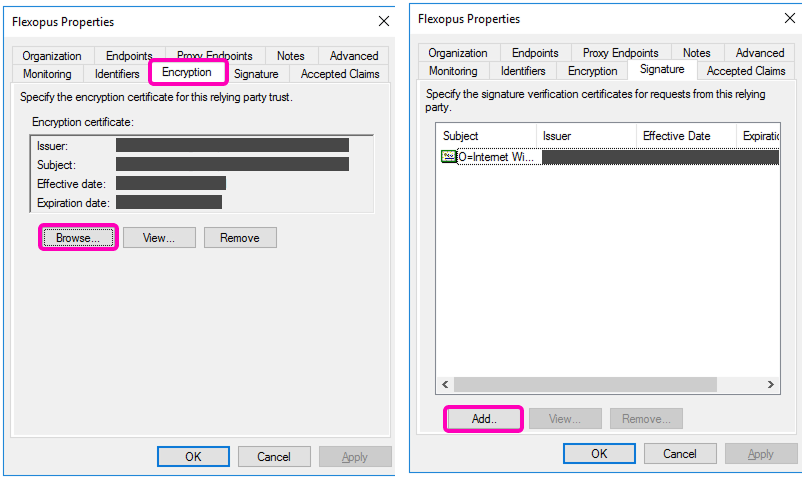
- In the Properties window, select the
Encryptiontab. - Press
Browse...and select the downloaded new Flexopus certificate. - Still in the Properties windows, select the
Signaturetab. - Press
Add..and select the downloaded new Flexopus certificate. - Save the changes by pressing
Apply...at the bottom right of the Properties window and then pressingOK.
Microsoft Entra ID (Azure Active Directory)
If you followed our latest guide step-by-step, you do not have signature verification enabled, and you do not have authentication request and assertion encryption enabled towards Flexopus. This means that you have nothing to do.
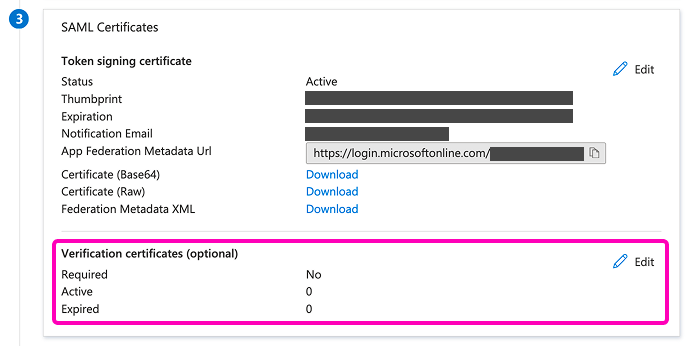
To make sure this is the case, you can go to your Microsoft Entra ID administrator panel and check the following:
- In the
SAML Certificatesbox,Verification certificates (optional)is set up like in the screenshot below. This means thatRequiredis set toNo.- If this is the case, you have nothing to do.
- If this is not the case, you enabled signature verification, and you have to add the new Flexopus certificate to this list.
- In the
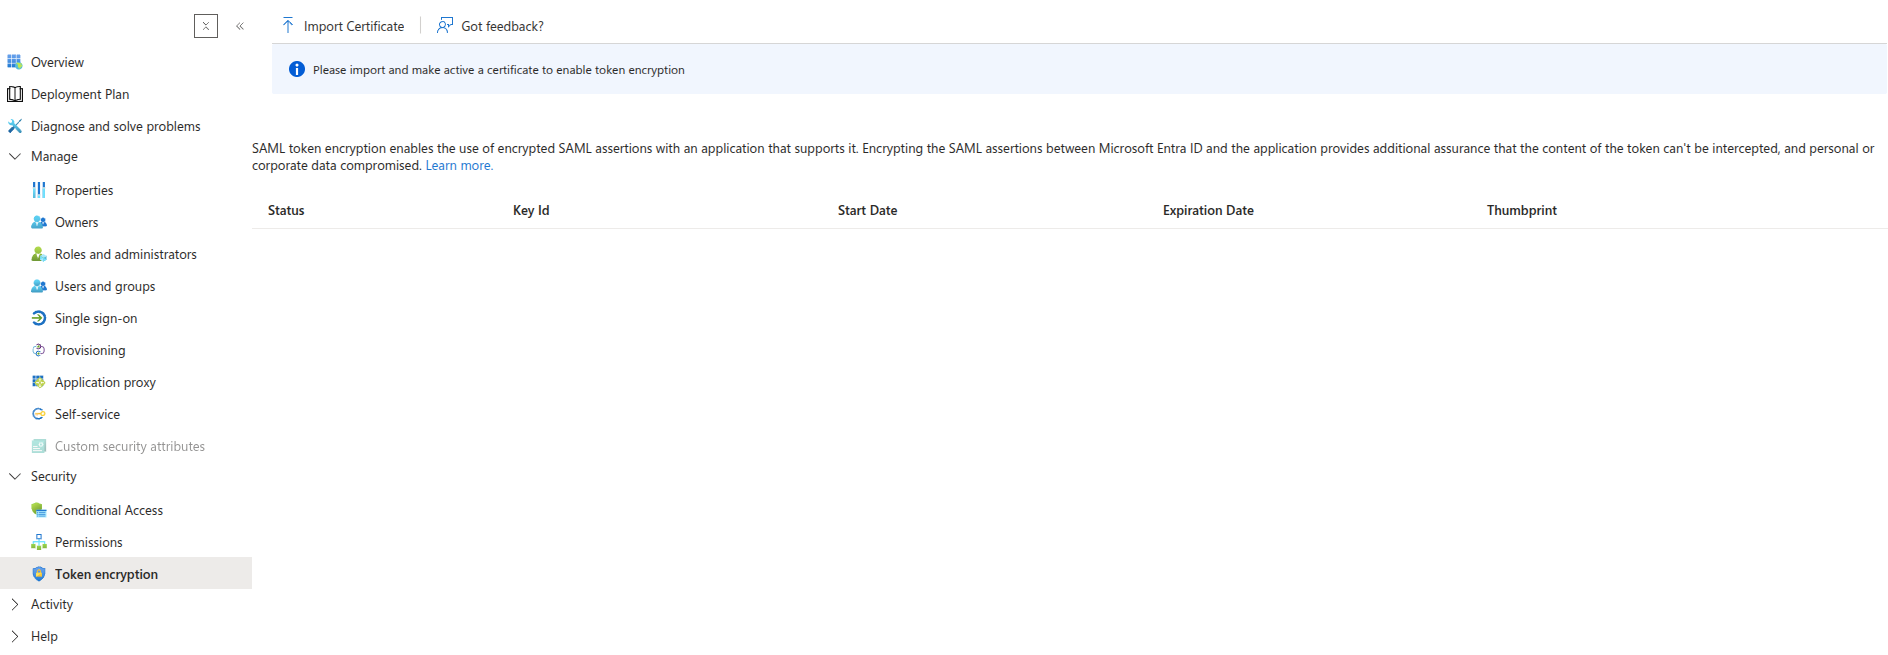
Token encryptionmenu, there are no certificates.- If this is the case, you have nothing to do.
- If this is not the case, you have enabled authentication request and assertion encryption towards Flexopus, and you have to add the new Flexopus certificate in this menu. Important: Set the new certificate as the Active certificate.
Google Workspace
If you followed our latest guide step-by-step, you do not have signature verification enabled, and you do not have authentication request and assertion encryption enabled towards Flexopus. This means that you have nothing to do.
Keycloak
If you followed our latest guide step-by-step, you have the Flexopus metadata URL configured in your Keycloak, which will make the certificate rotation automatic. This means that you have nothing to do.
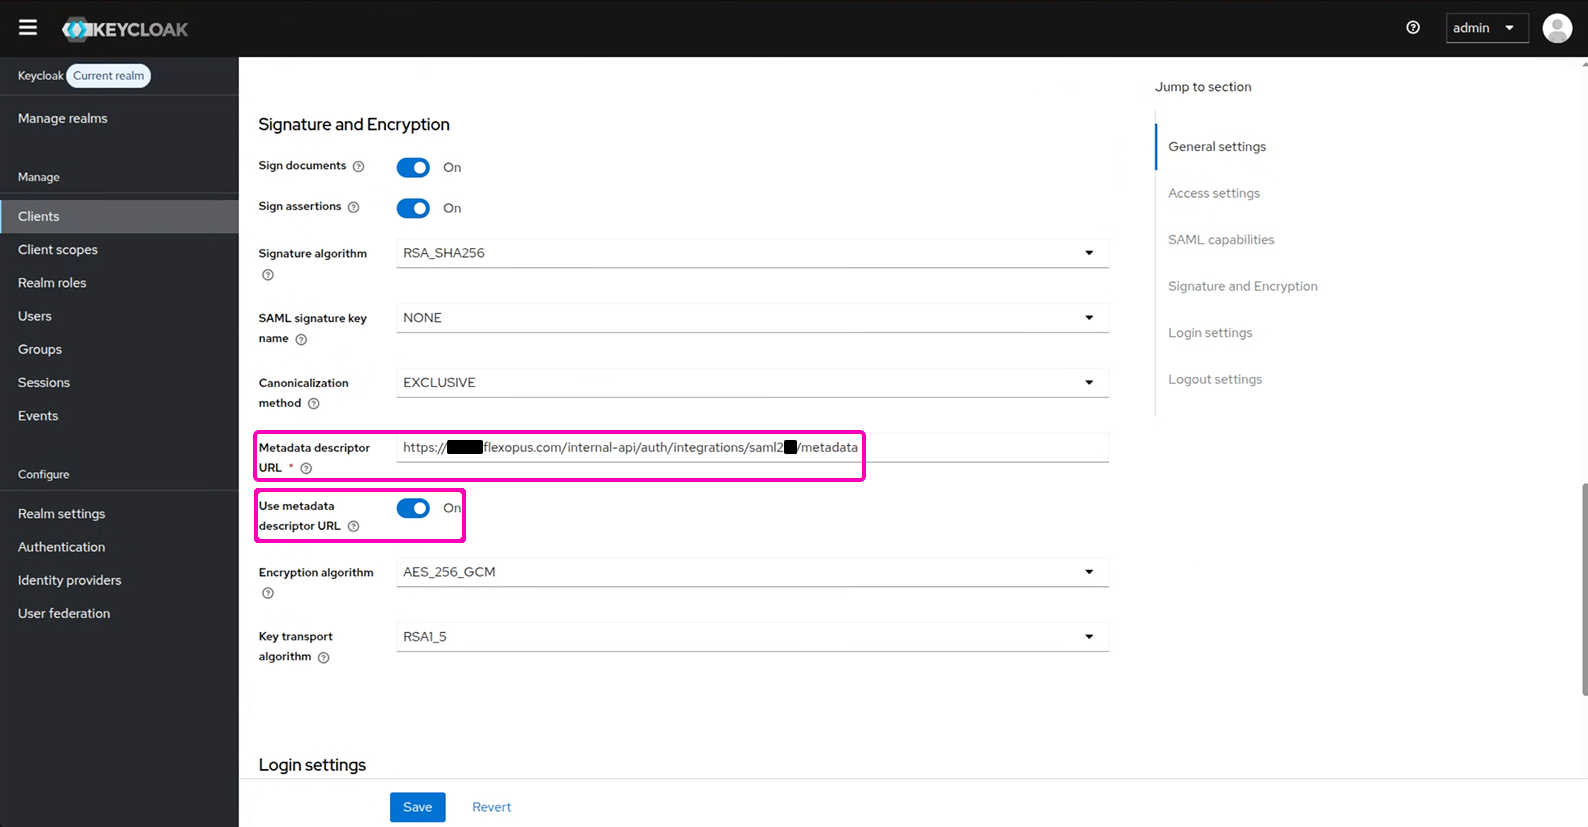
To make sure this is the case, you can go to your Keycloak administrator panel and check the following:
- Go to
Clientsand select your configured Flexopus client. - Make sure in the
Signature and Encryptionsection that theMetadata descriptor URLis configured with the metadata URL from your Flexopus administrator dashboard. Also make sure that theUse metadata descriptor URLtoggle is set toOn- If this is the case, you have nothing to do.
- If this is not the case, we strongly recommend setting the
Metadata descriptor URLup, as that is the only way to ensure a seamless certificate rotation with no gap in the SAML2 login abilities. You can consultStep 1of our Keycloak SAML2 SSO guide on how to set this up.