Meeting Room Signage Display
Introduction
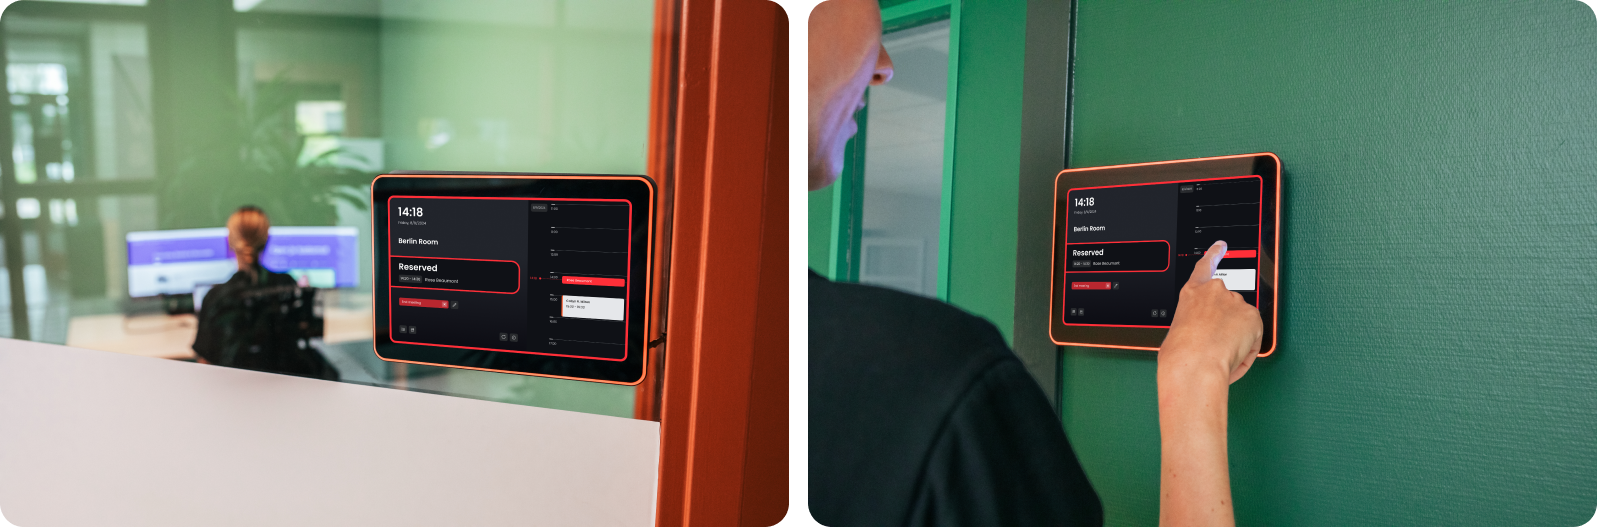
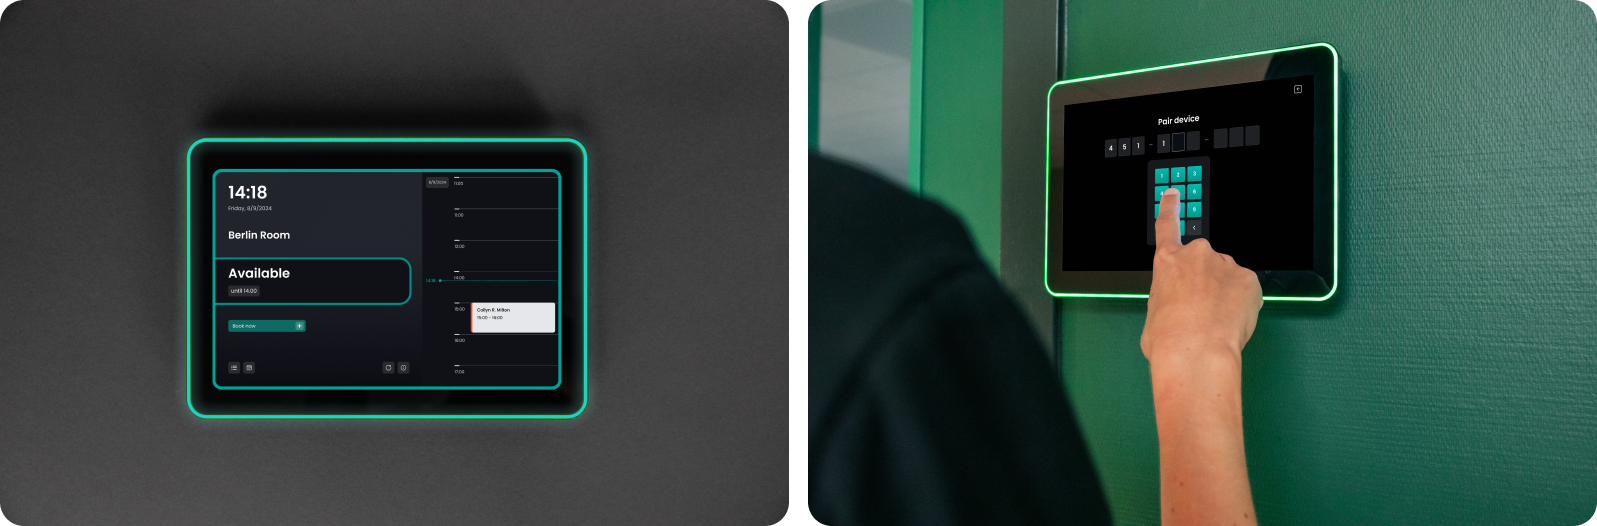
The Meeting room signage display is your digital door sign for Flexopus. Whether it is a meeting room, a silent box, or a private office, everyone who passes by can check the availability of the room.
The main features of the display are:
- Indicate the availability of the room with appealing colored status lights*
- Check the room schedule for the day or the following days
- Check-in for your reserved meeting once you arrive, without opening Flexopus on your phone
- Create an anonym, ad-hoc booking, if the room is available
*Appropriate hardware is required. See Supported hardware for display devices.
KIOSK mode options
To pair a device as a display, ensure that Flexopus is installed and running on the device. For Android devices, you can find the Flexopus Connect application in the PlayStore:

Or you can find the latest available APK on GitHub: latest Flexopus Device Connect Android APK.
However, it's not enough to install the application. You also need to make sure that the application is running in a kiosk mode. This you can do in three ways:
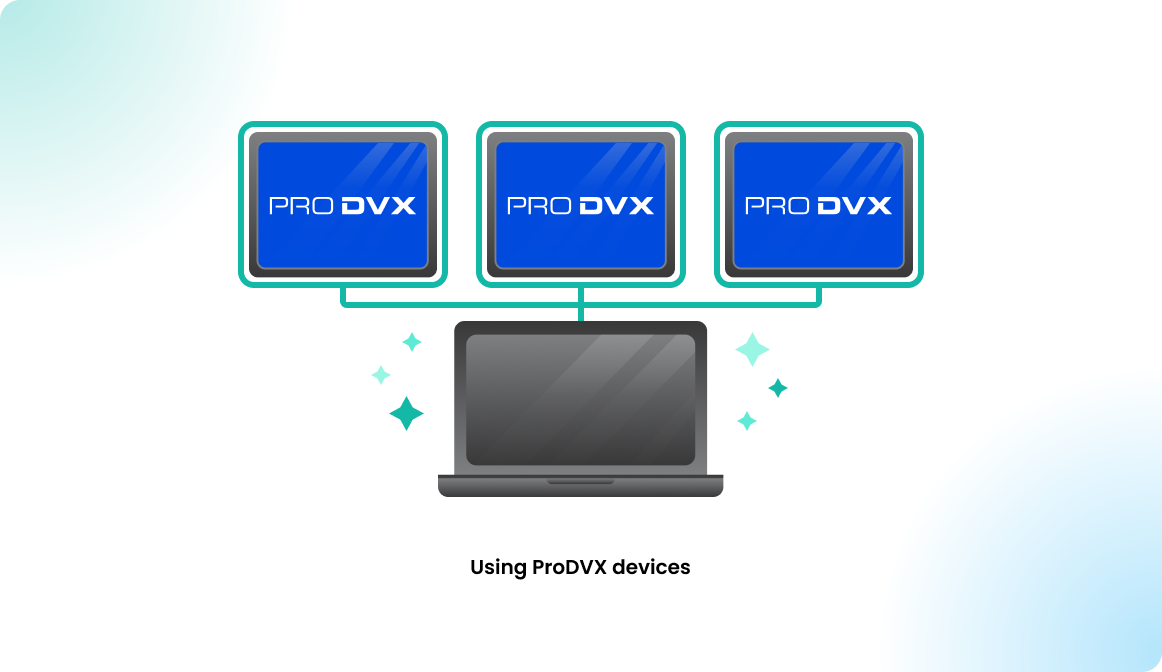
OPTION A: ProMGR for ProDVX devices
By default, we recommend using ProDVX devices for meeting room signage. The manufacturer provides an in-house solution to install the displays. The solution is called ProMGR. You can set up the displays in a kiosk mode using ProMGR:
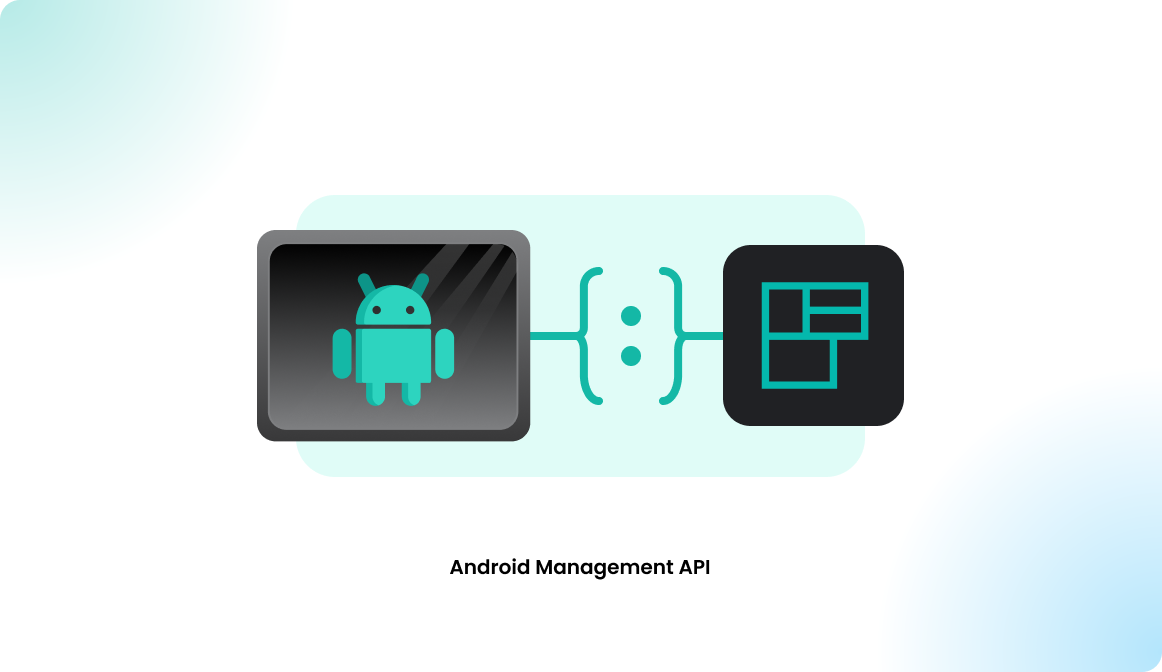
OPTION B: Android Management API
This option works only for GMS (Google Managed Services) certified Android devices, such as the APPC-10SLBe. Put the device itself with the OS into a kiosk mode. This is a free solution provided by Google:
OPTION C: Third-party application
Install an application that puts the application into a kiosk mode. You are welcome to explore other, third-party solutions to put our app in kiosk mode (e.g., Fully Single App Kiosk). Note that these applications may cost extra.

We recommend installing the Flexopus Device Connect application with ProMGR or using the Google Management API.
Configuration manual
This guide assumes that your device is already running Flexopus in device mode, with the Pairing Code screen displayed as the starting page.
STEP 1 - Select the meeting room
To pair the device with a meeting room, or any other bookable resource, you have to generate a 9-digit pairing code in the Flexopus application. As a first step, navigate to Admin dashboard > Locations > Floor plans to select the floor of the meeting room.
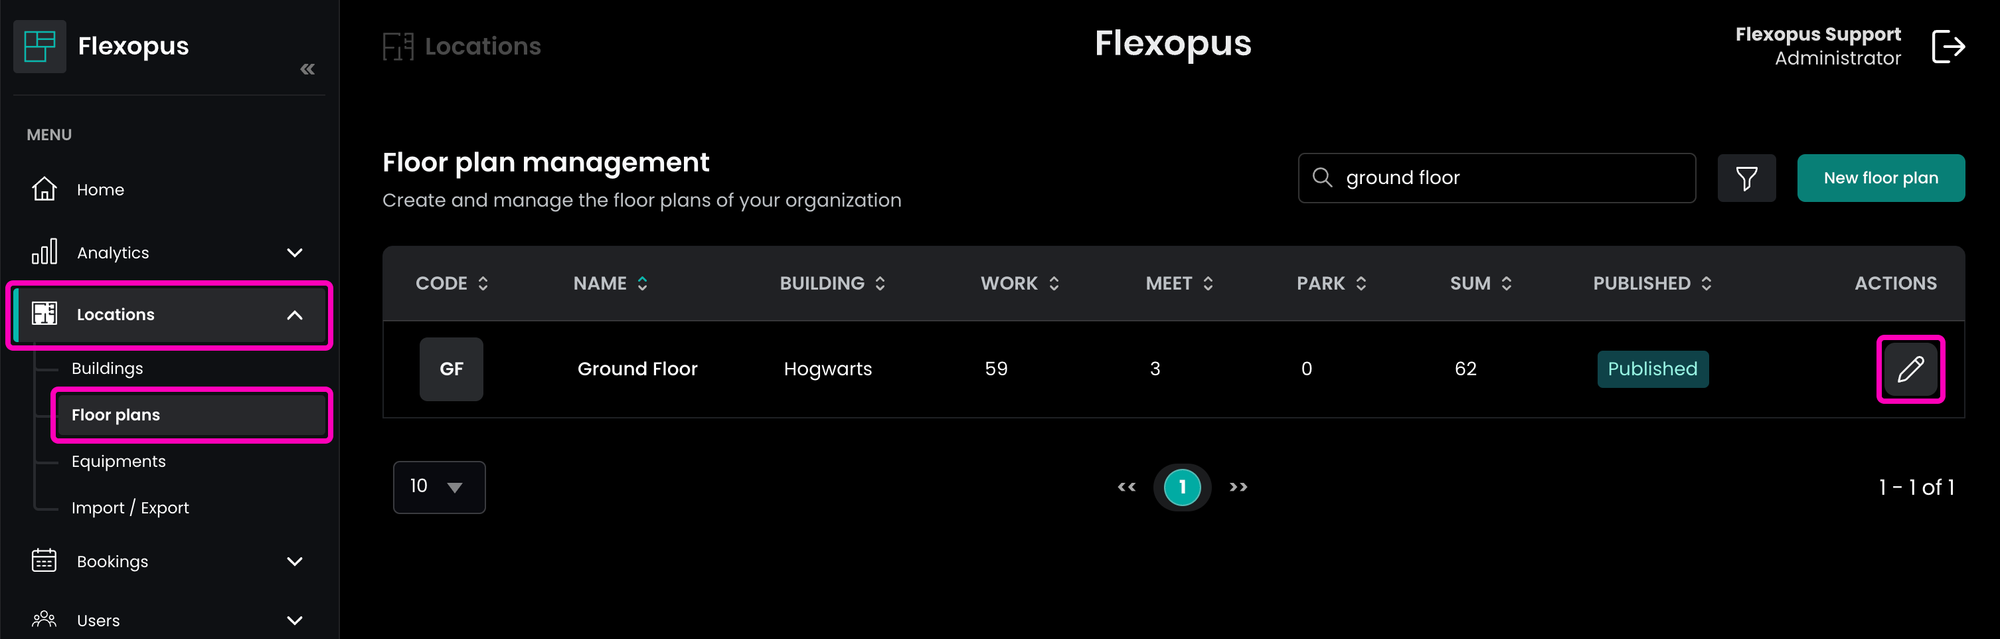
On the Floor plan Editor tab, locate the meeting room.
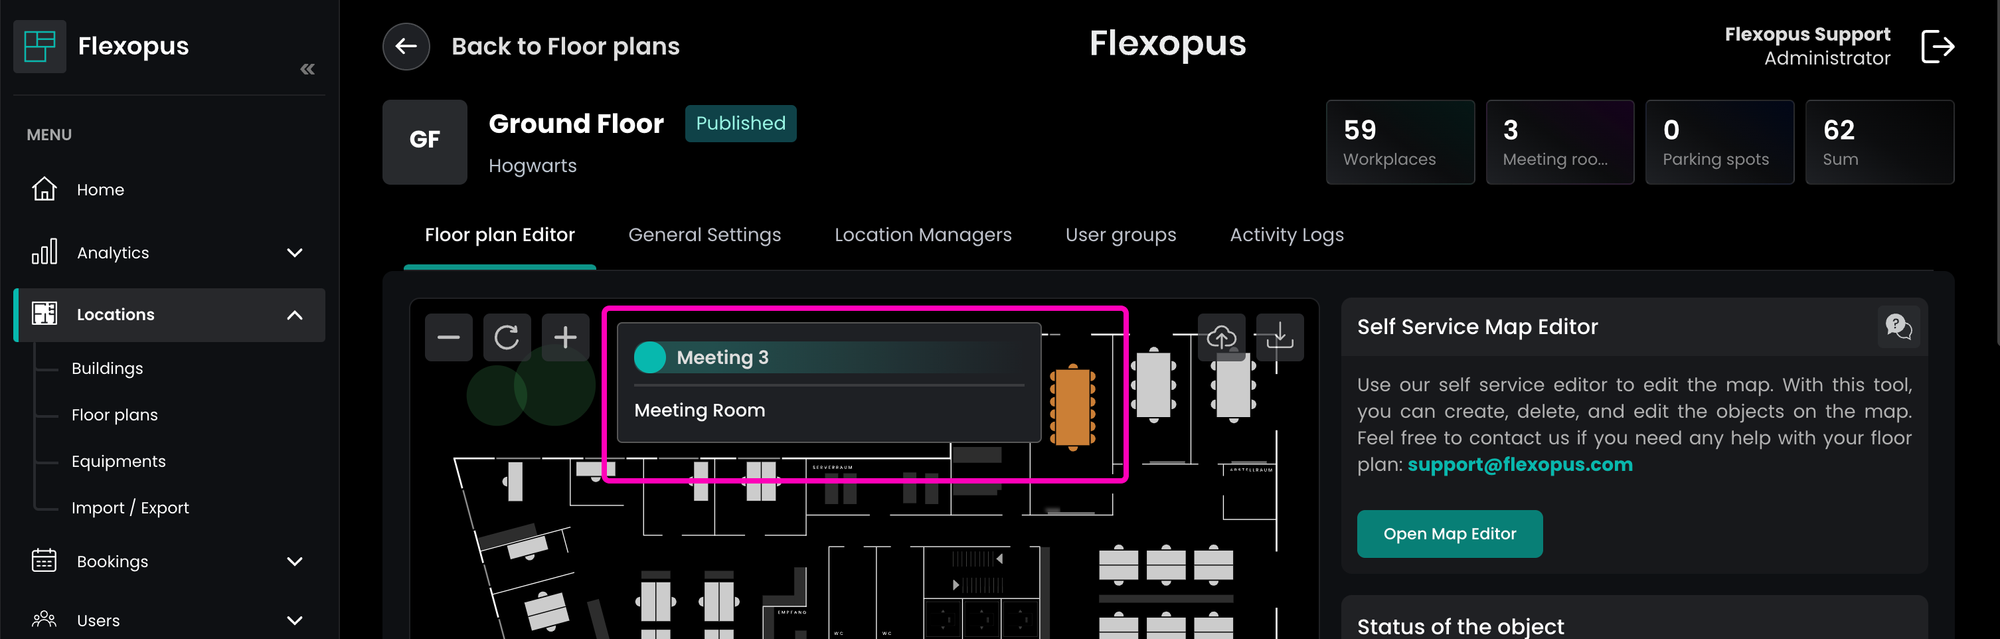
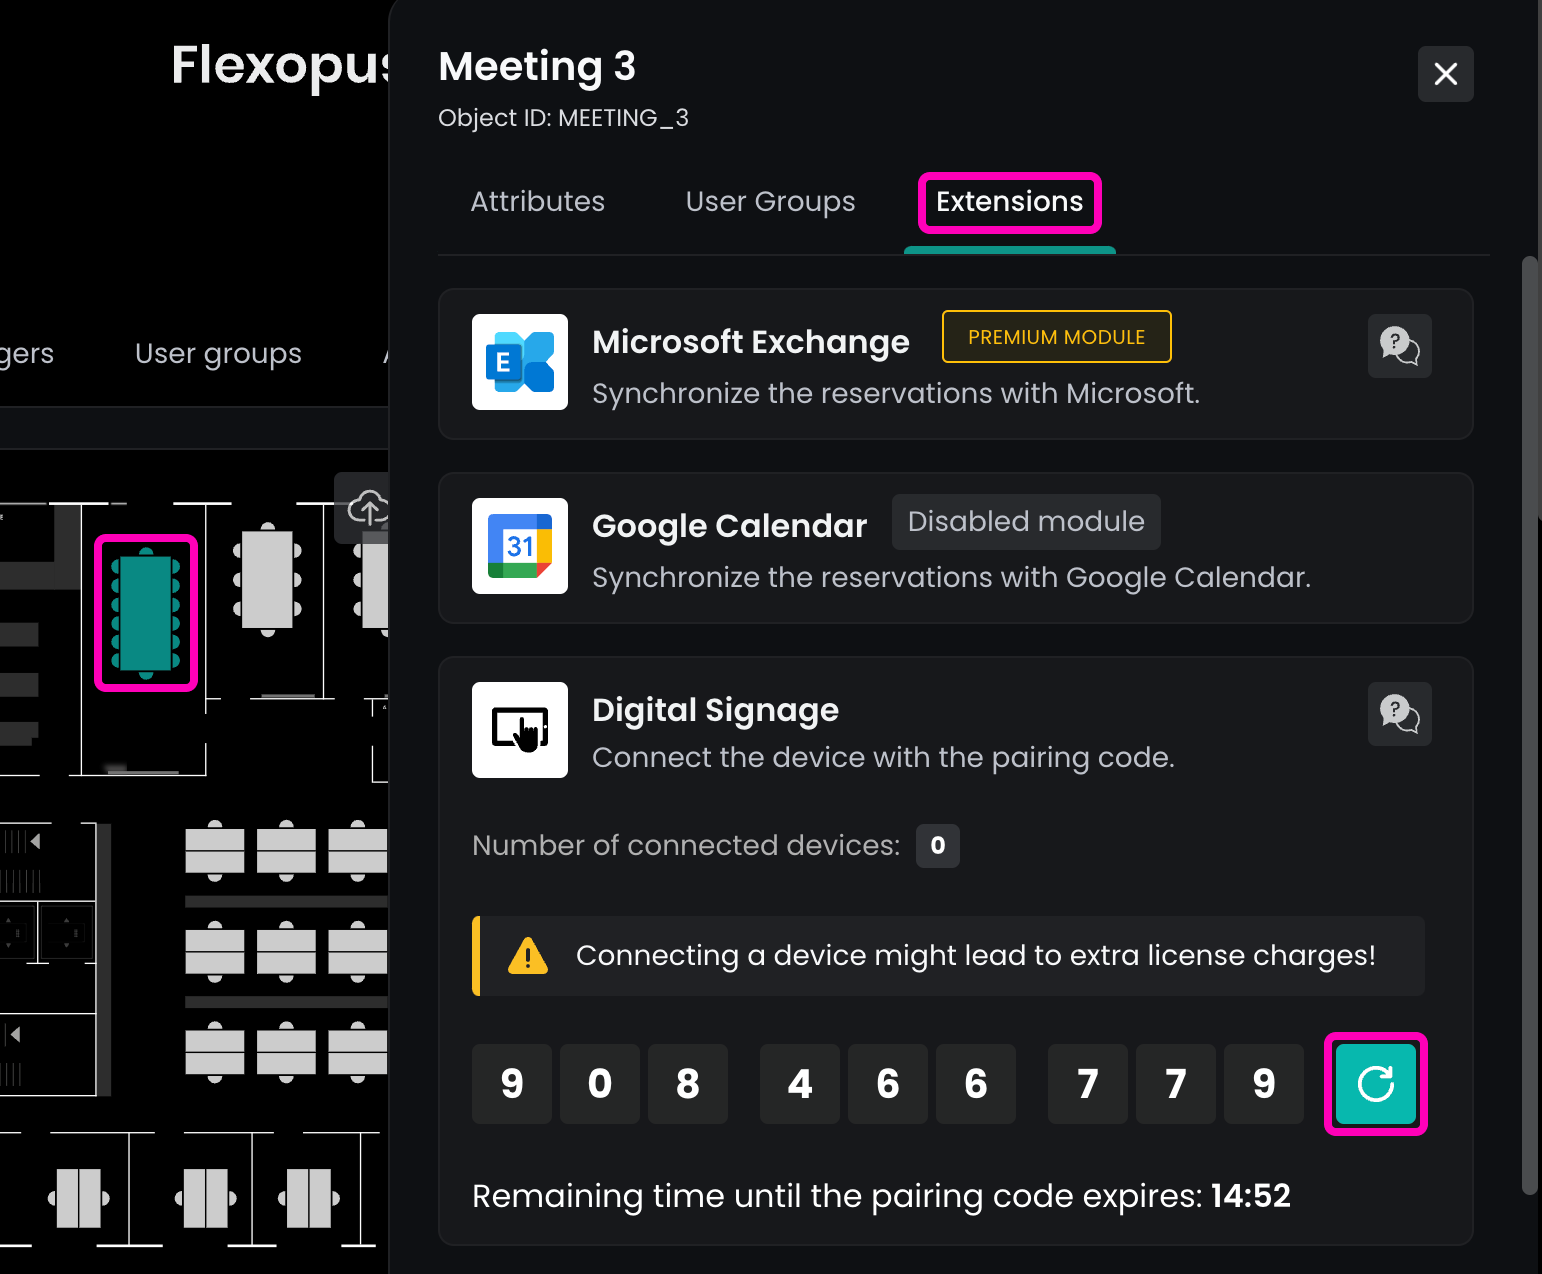
STEP 2 - Generate pairing code
Once you have selected the meeting room, switch to the Extensions tab on the opening panel. Click on the ↻ button to generate a new pairing code for the meeting room.
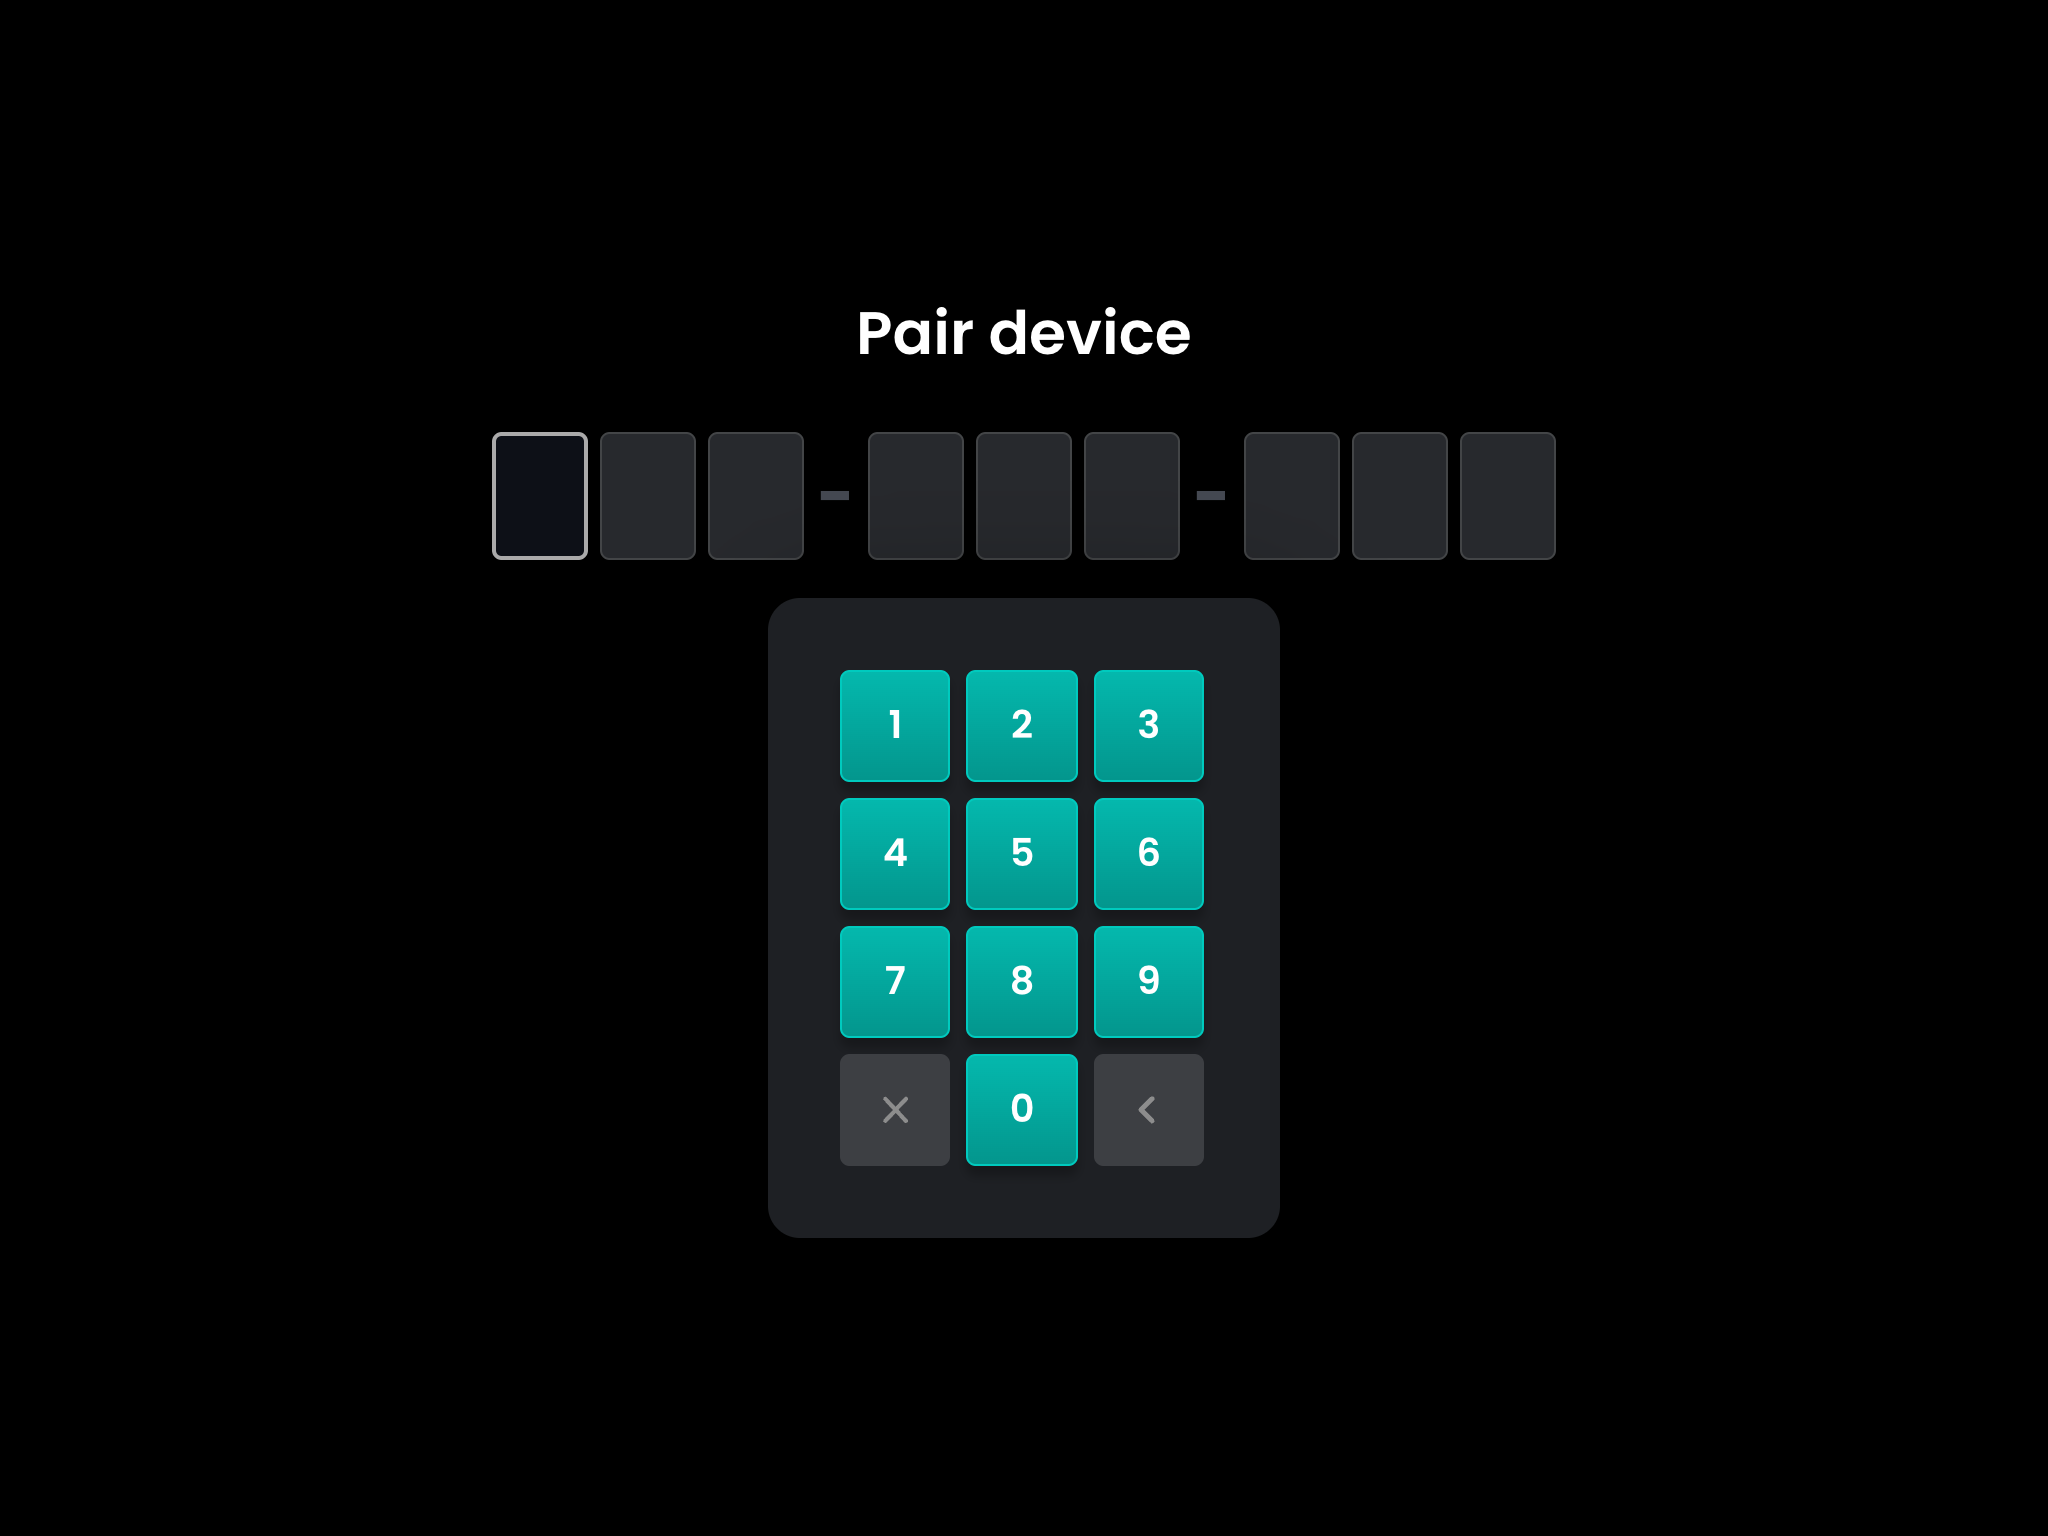
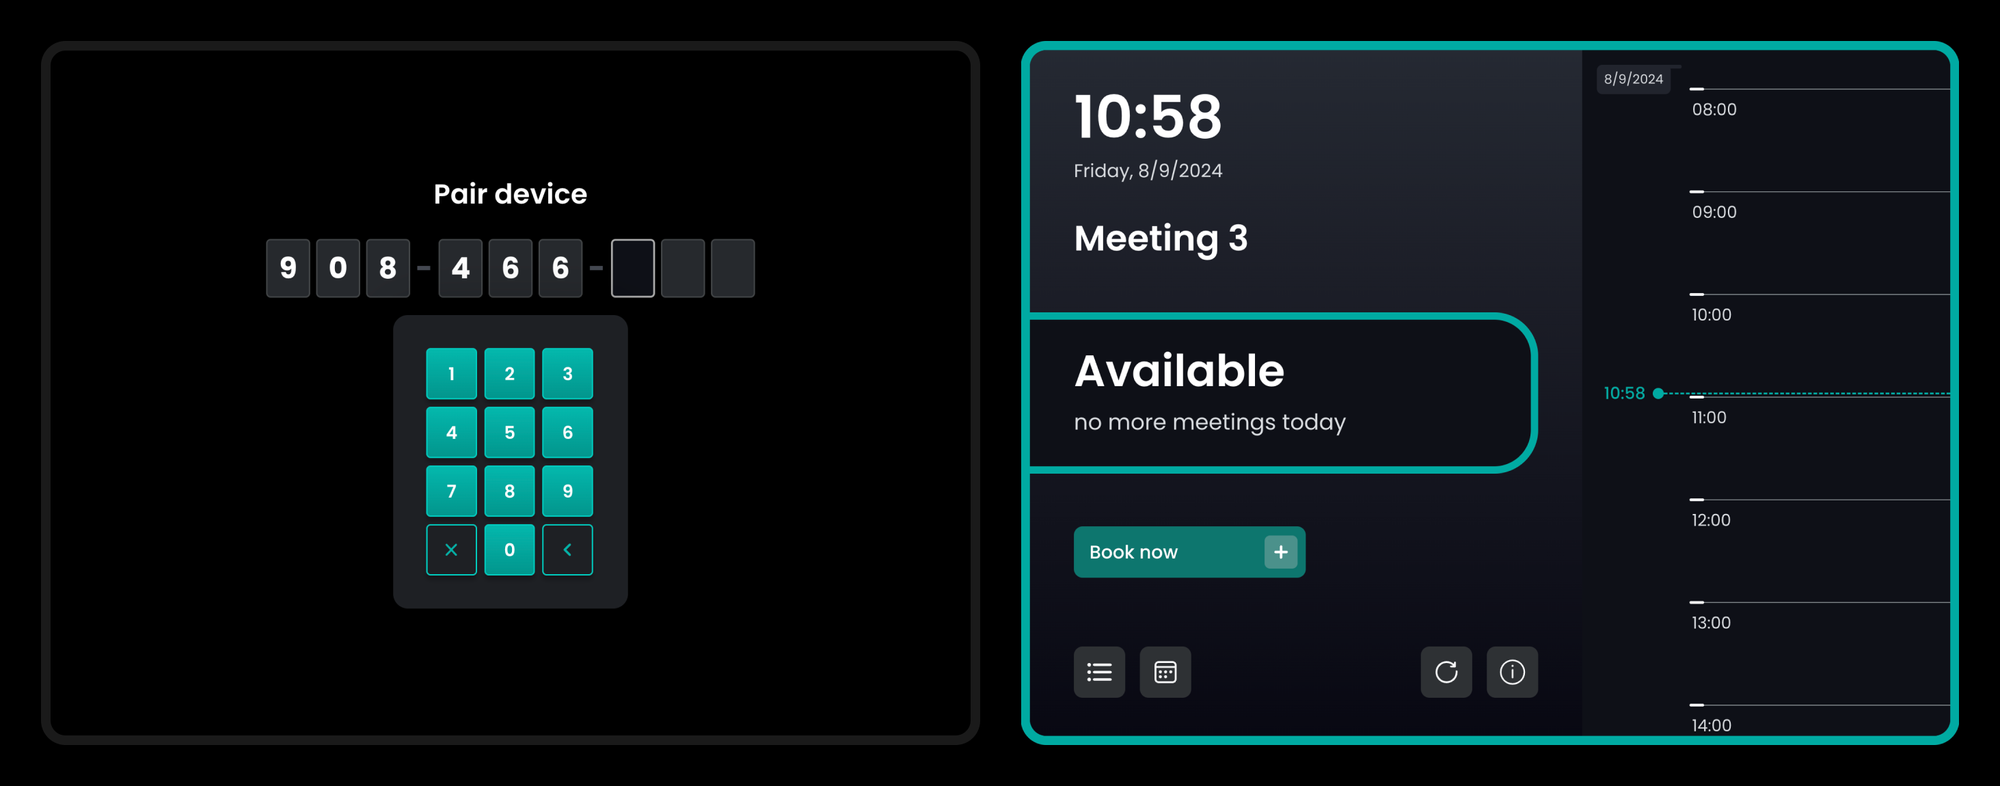
STEP 3 - Enter the pairing code
Head to your device, and enter the generated pairing code using the pin pad. Once you enter all the digits, it will validate the code, pair the device to your meeting room, and navigate to the Signage Display home screen.
After refreshing the page, you will see that the device appeared in the details of the meeting room in the Floor plan Editor page of the Admin Dashboard.

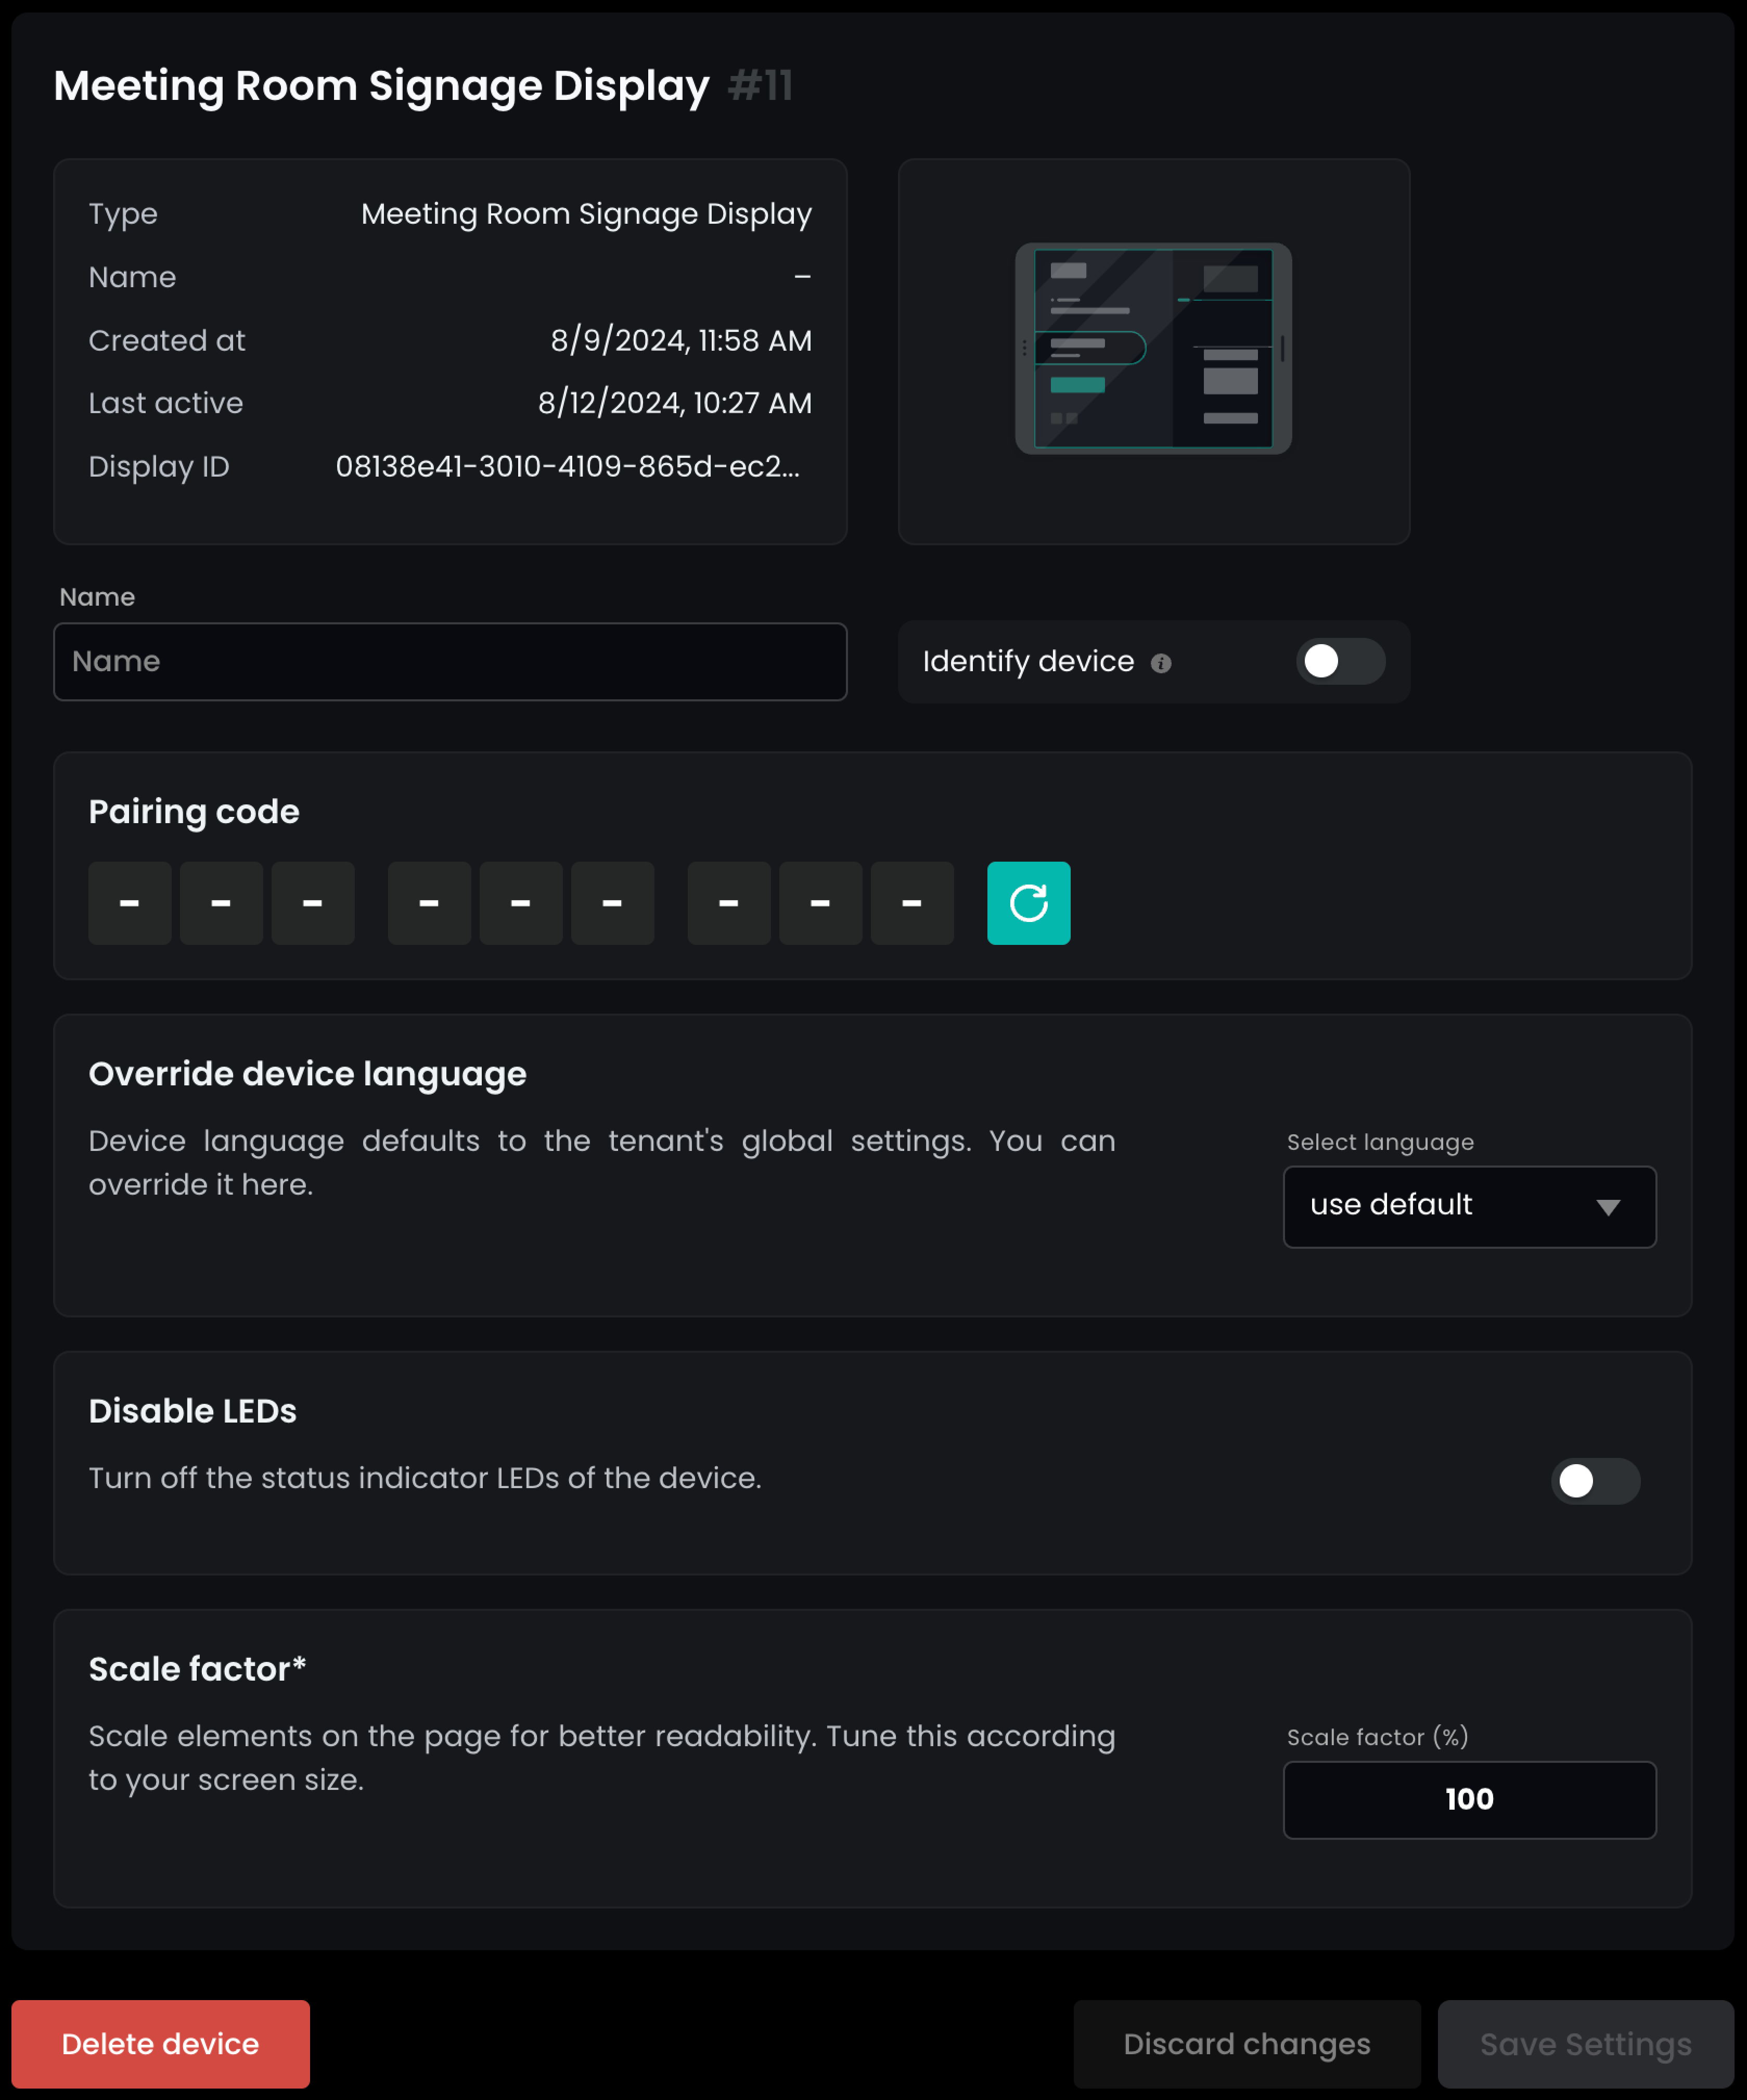
Modify device settings
Once you have configured the device, it will show up on the general device management page, which you can access by navigating to Settings > Devices in the Admin dashboard. Click on the pencil icon to modify the device settings.

On the appearing page, you can perform the following actions:
- Give the device a name, that will show up in the management list
- Identify device: a marking will appear on the device screen to help you identify which device you are modifying. Don't forget to turn identification off once you are done.
- Change language: devices will use the default language of your application, you can override this to any supported language
- Disable LEDs: supported devices may have LED lights that match the display status, you can turn them off for a specific device
- Scale factor: depending on your device's screen resolution, you may have to adjust the page scaling factor to make every element readable
Functions & features
Device states
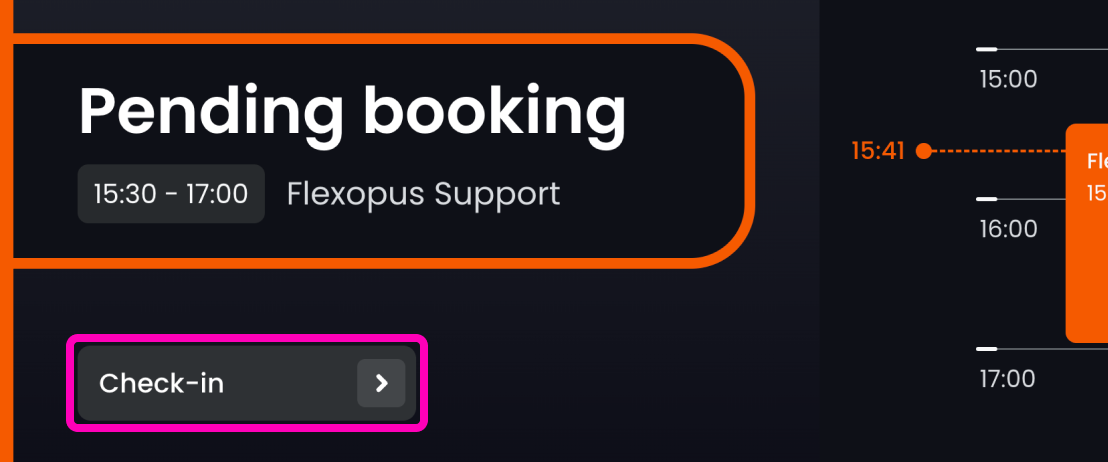
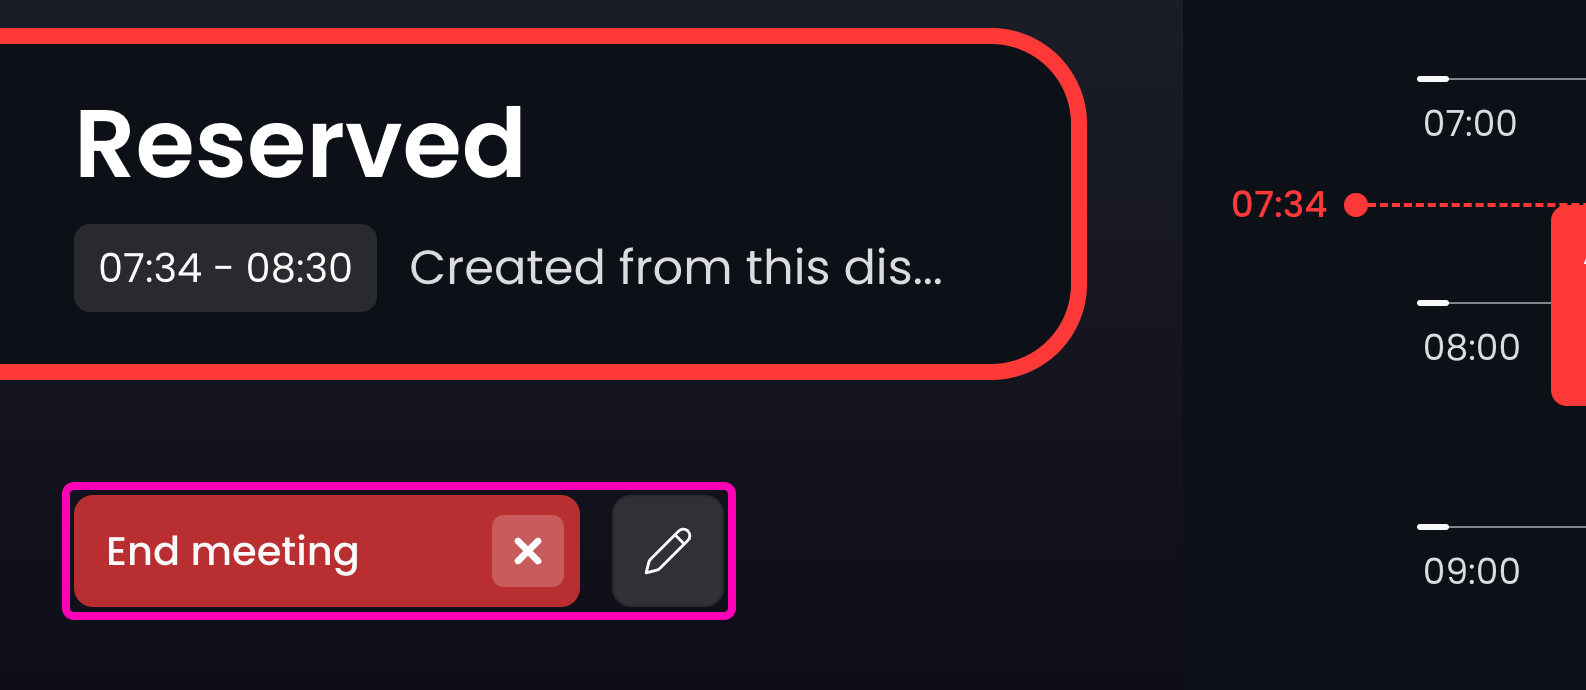
The device can have three states based on the occupancy of the room. Each state is displayed with different colors so that you can identify the status of the room at a glance. Supported devices will also change the LED light colors accordingly. The Available state means there are no active reservations, and the room is free to book. Once a booking starts, the display will switch to Pending booking state, indicating that no check-in has been performed yet. This state is only available if the Check in required feature is turned on. Once someone checks in for the booking, the display will show the Reserved state.

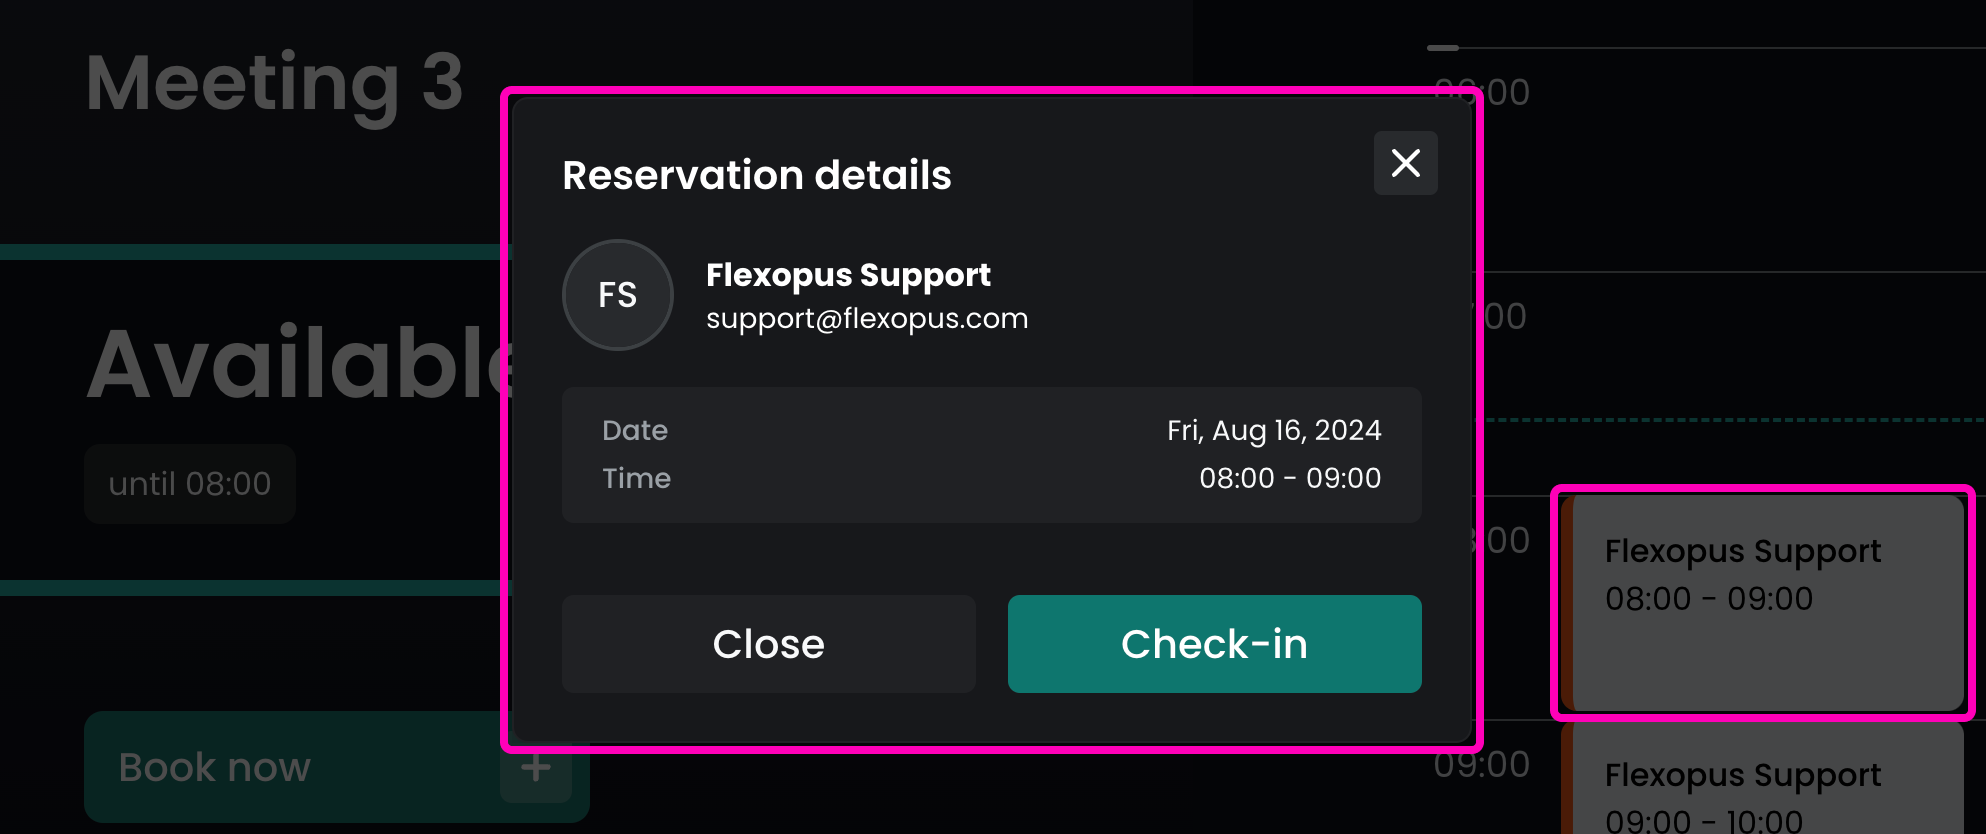
Check-in
If check-in functionality is enabled in your application settings, you can perform the check-in using the meeting room displays, just as you would with your mobile application. Once the meeting' start time has come, the device will enter Pending status, until the booking is checked in. To check in quickly, tap the Check-in button on the main screen. Once you check-in, you should see the message: Successful check-in.
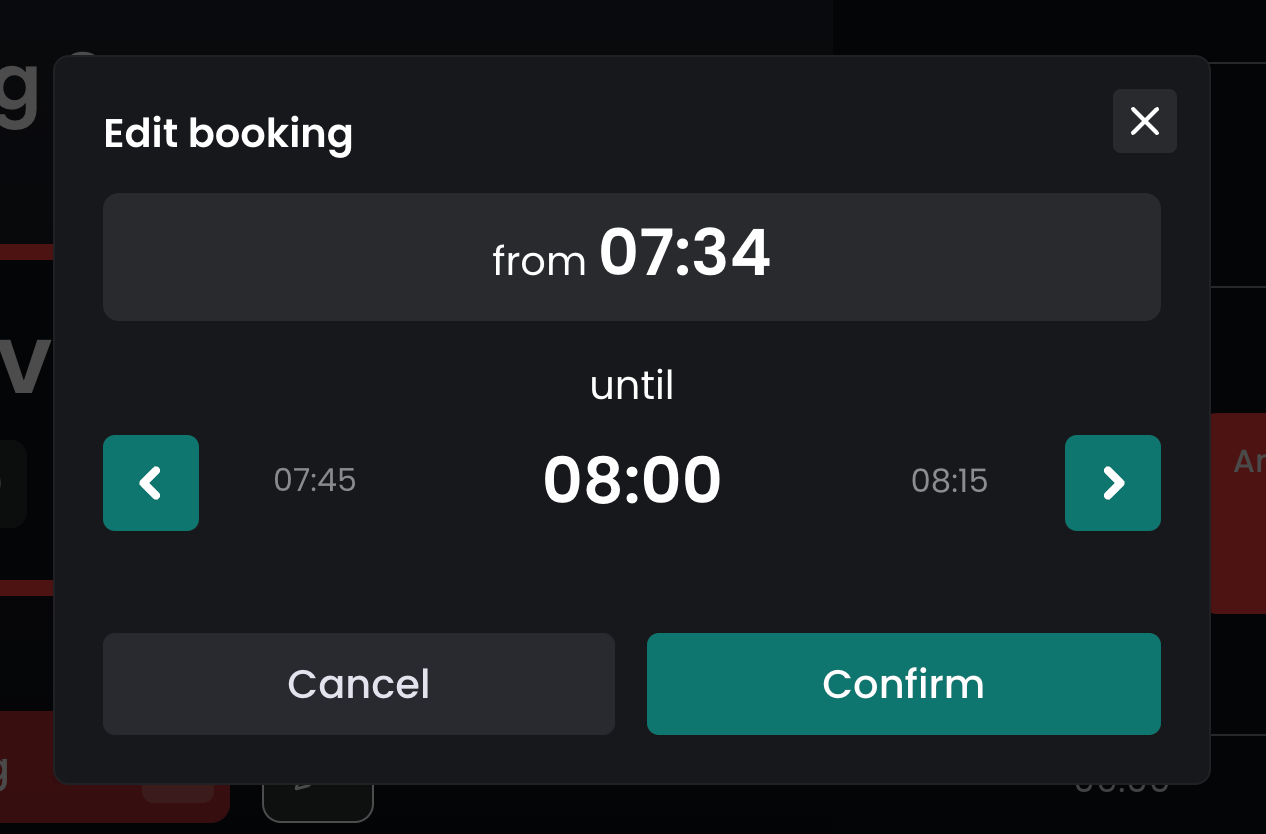
Ad-hoc booking
Whenever a display is available, you can make a quick, "ad-hoc" booking by clicking Book now on the left side of the home screen. You will be asked to select the end time of the meeting, and then confirm your selection. The created booking will be checked in automatically.
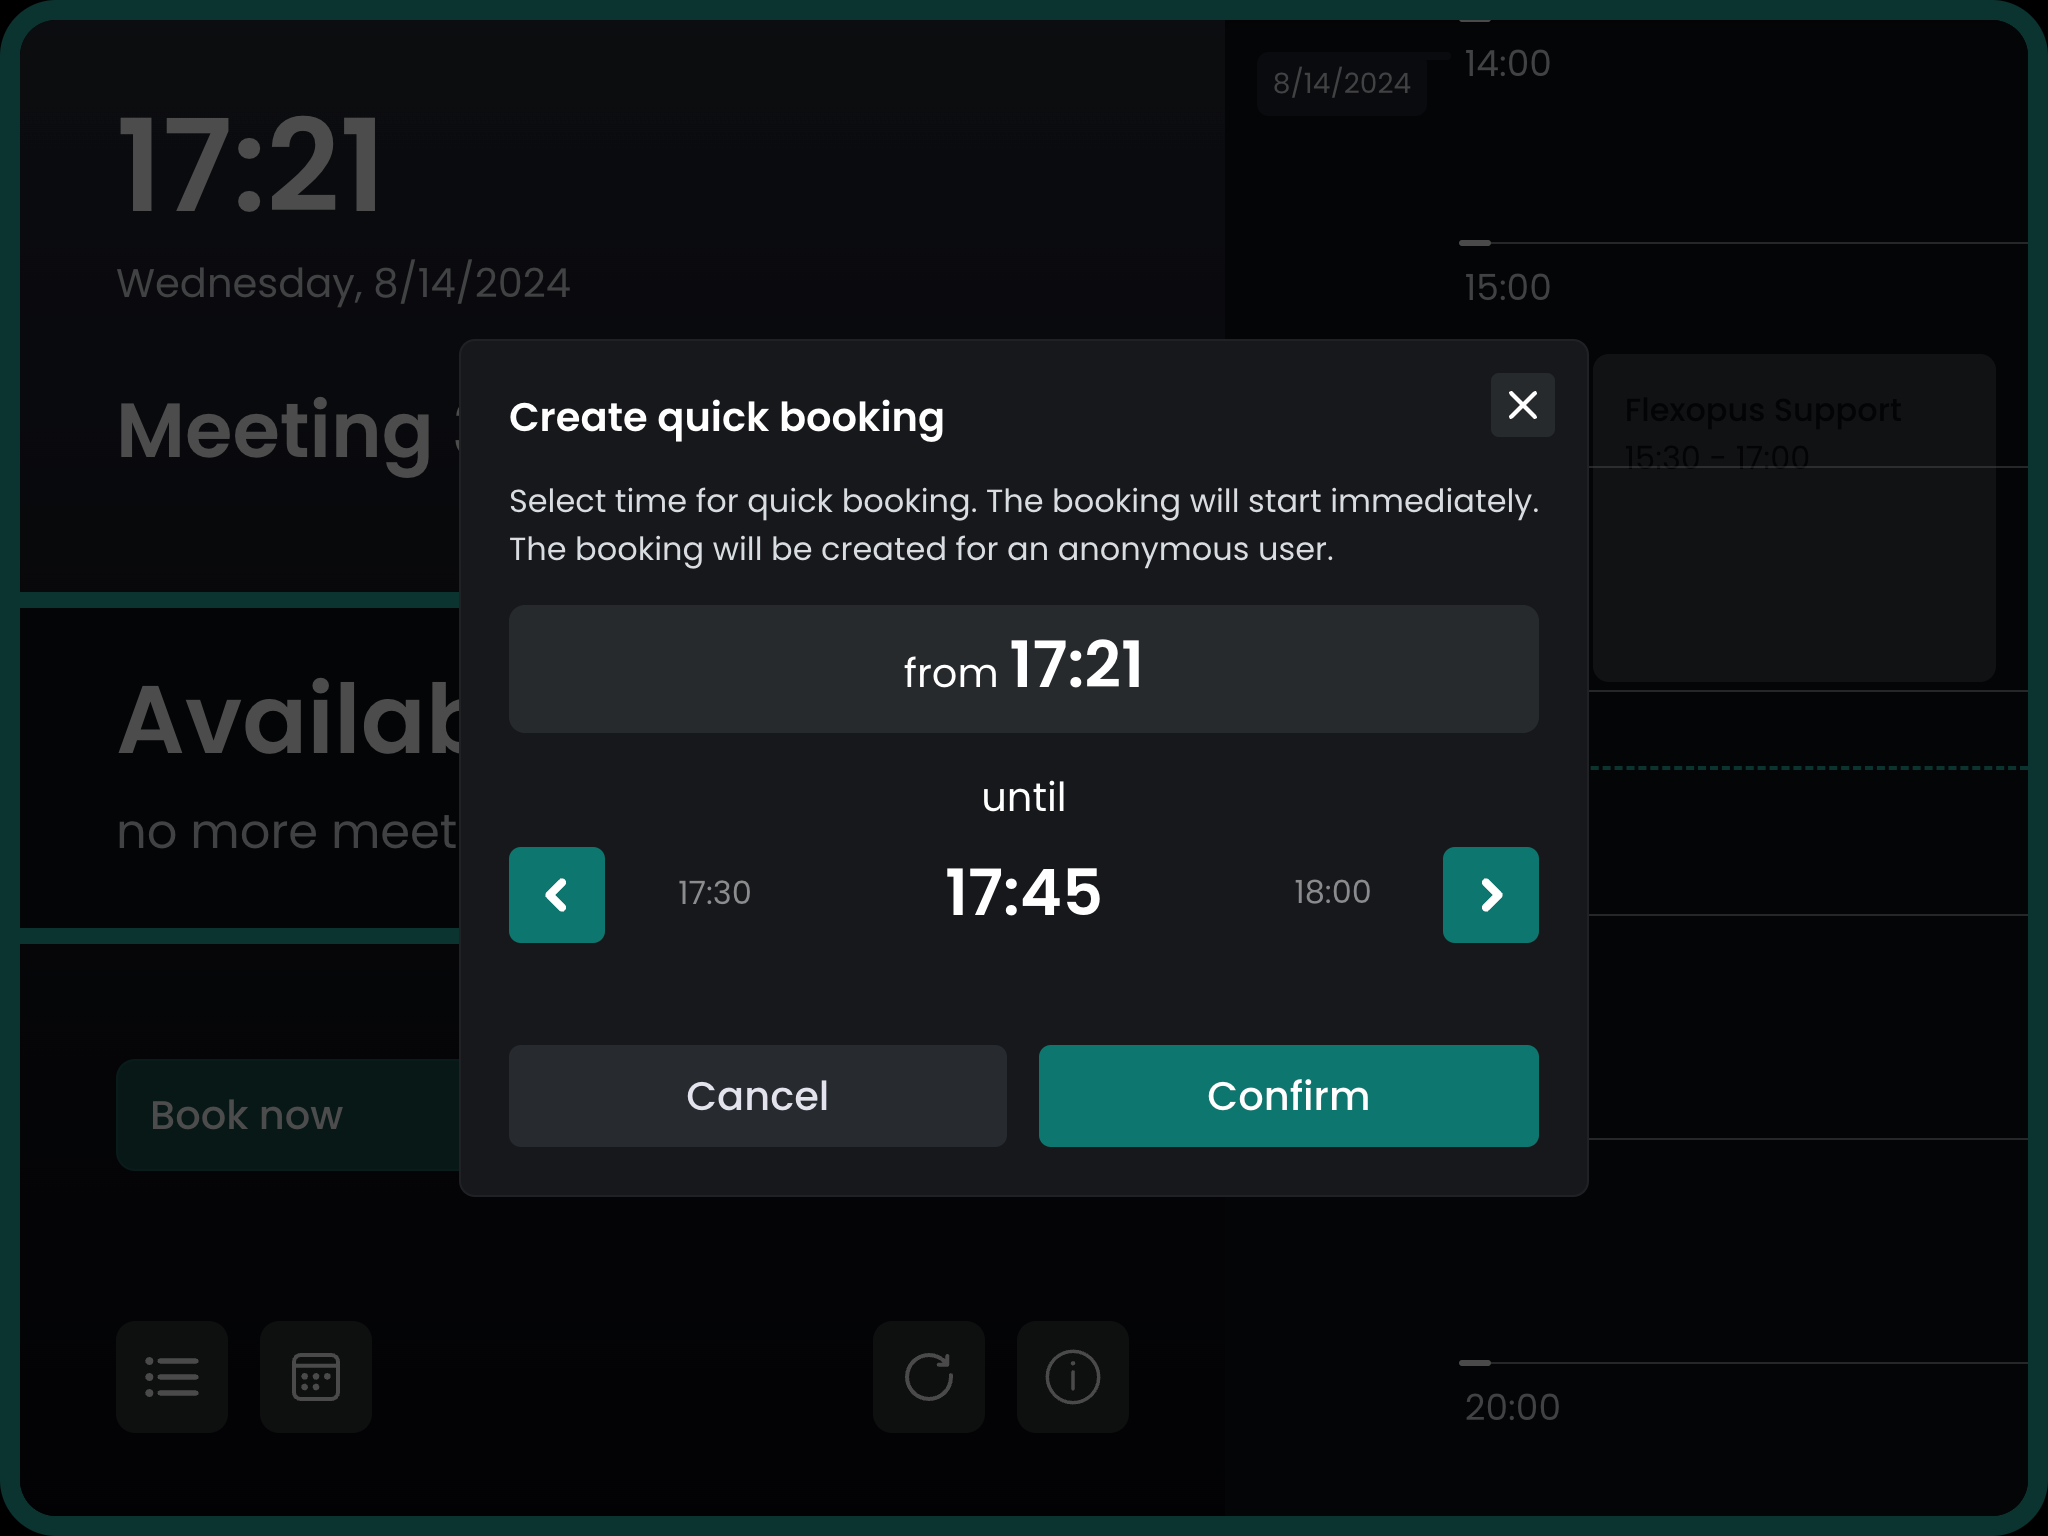
As ad-hoc bookings are checked in automatically, there is no pending status. However, since they were created using the display device, you can also edit the end time or check out from the meeting using the display.
Early check-in
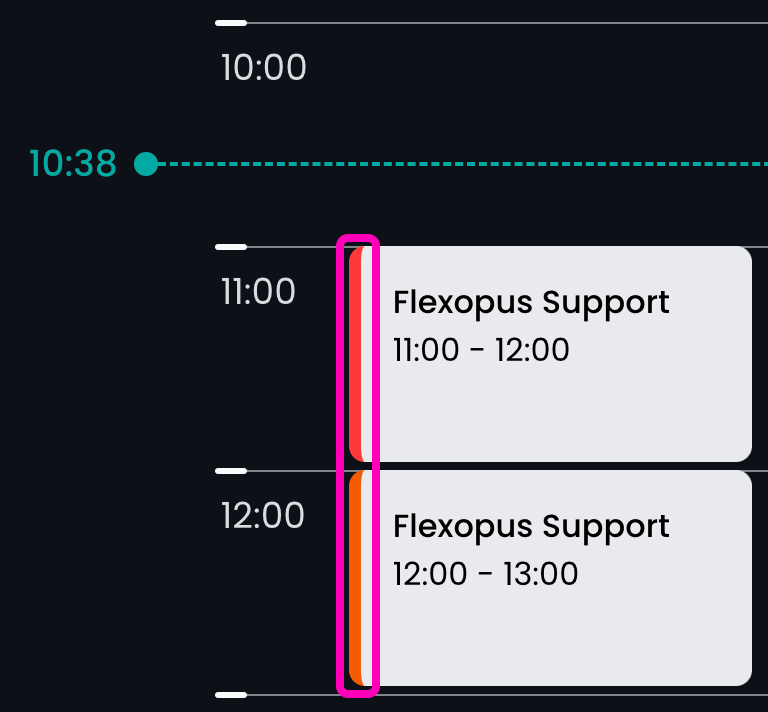
Regular check-in (using the large Check-in button) only becomes available when the booking starts. However, you can check in for a booking a few minutes before it starts, depending on your check-in grace period settings. To perform an early check-in, tap a booking in the timeline scroller on the right side of the home screen. If you are inside the predefined check-in grace period, the Check-in will be available in the opening dialog.
The check-in status of a booking is marked with orange and red colors in the timeline view.
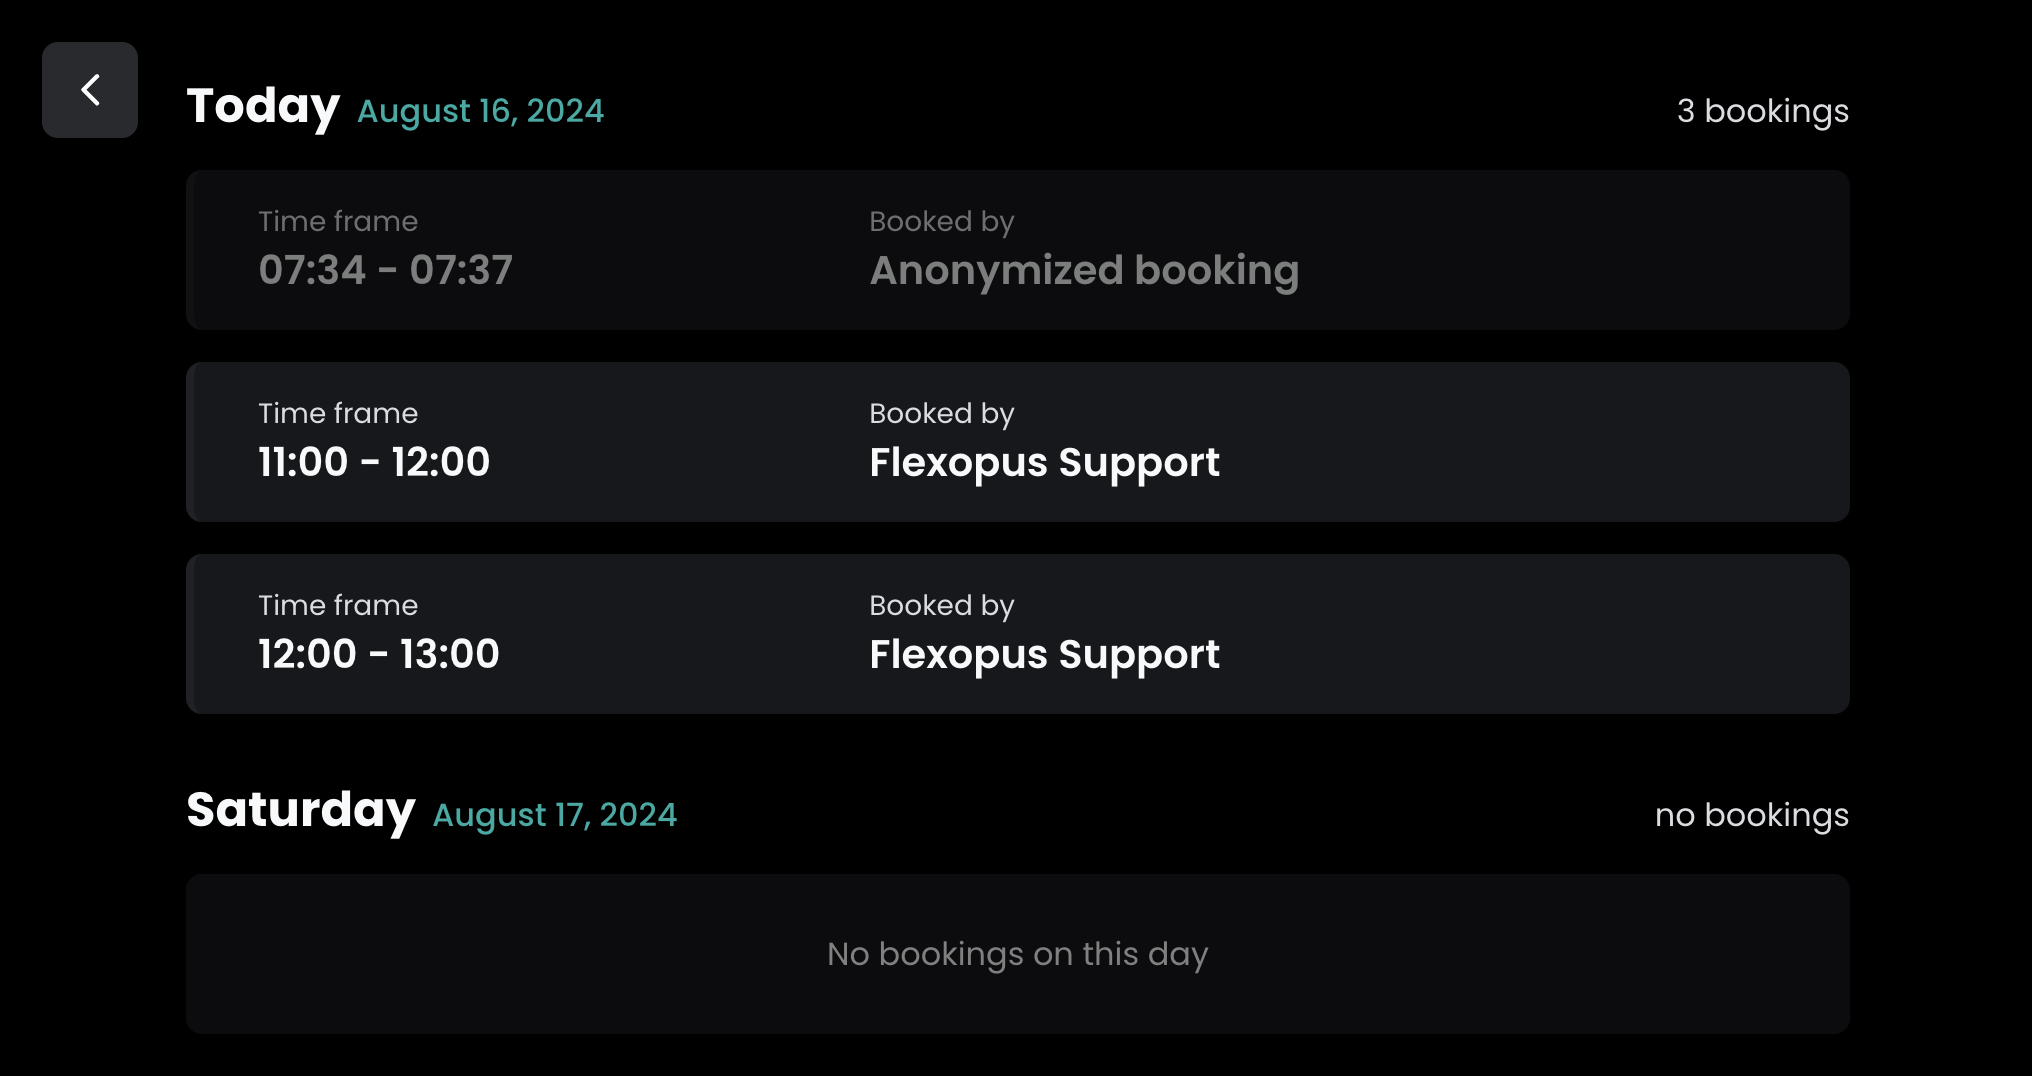
List view
To get a more compact overview of the upcoming bookings, click the list view button in the bottom left corner of the display screen. Scroll down to see bookings far ahead in the future, tap on any of them to see details or check-in, or tap the < button in the top left corner to return to the home screen.
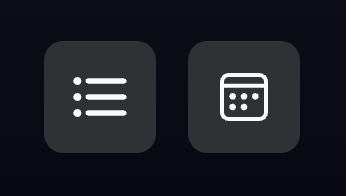
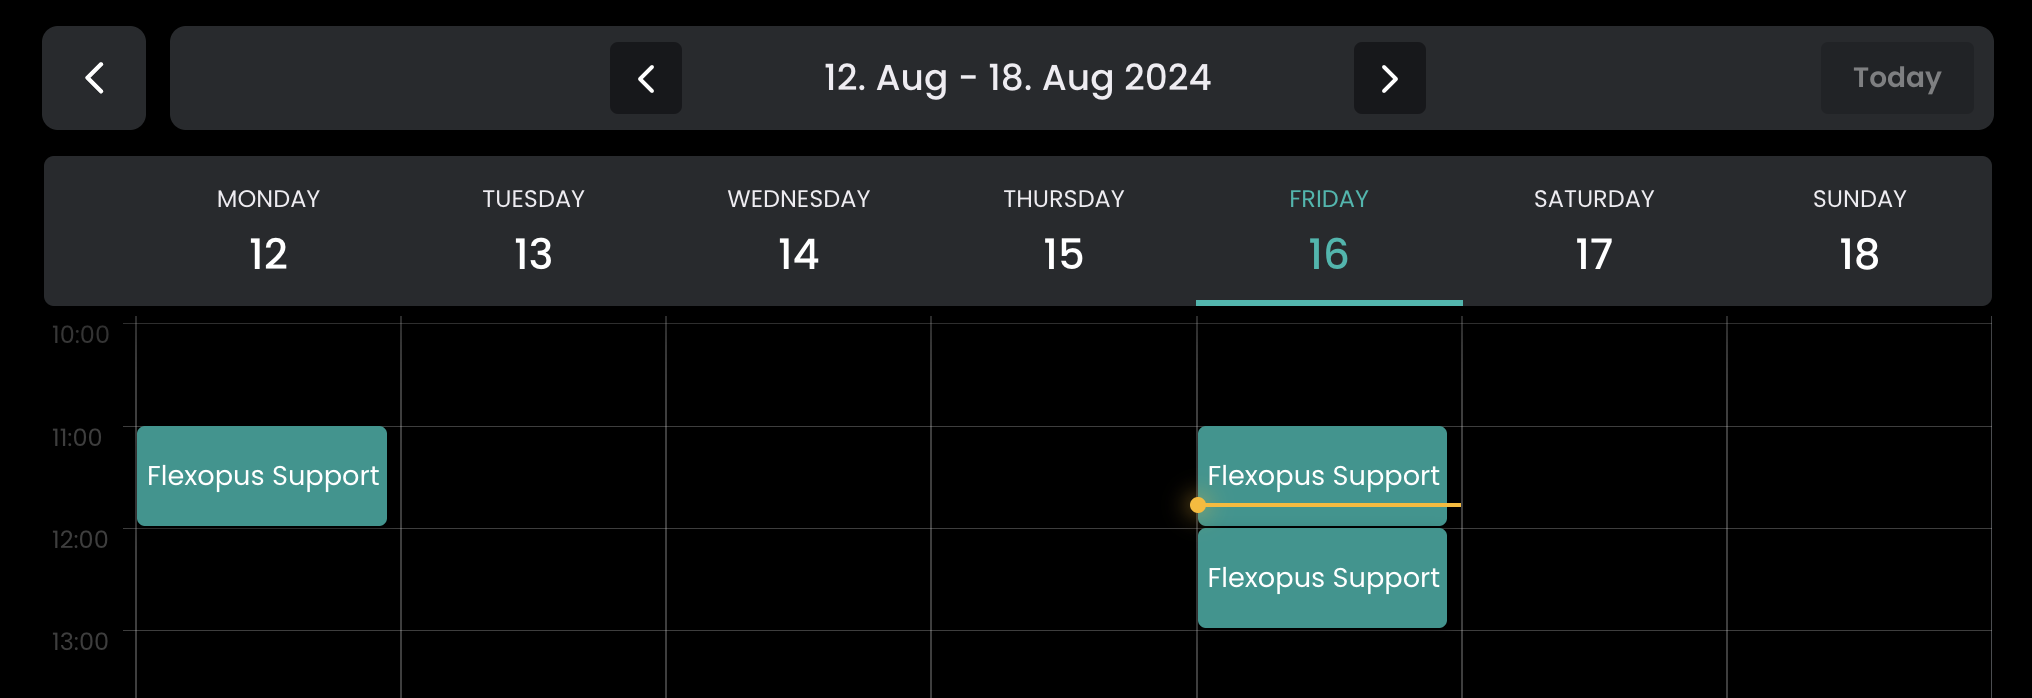
Calendar view
Similarly to the List view, you can tap on the calendar icon to open the Calendar page, which provides a weekly overview of the bookings. In the calendar, you can also view past bookings.