Basic Floor Plans
Introduction
The Flexopus application supports two types of floor plans. This article is about Basic Floor Plans, you can read about Advanced Floor Plans in this article.
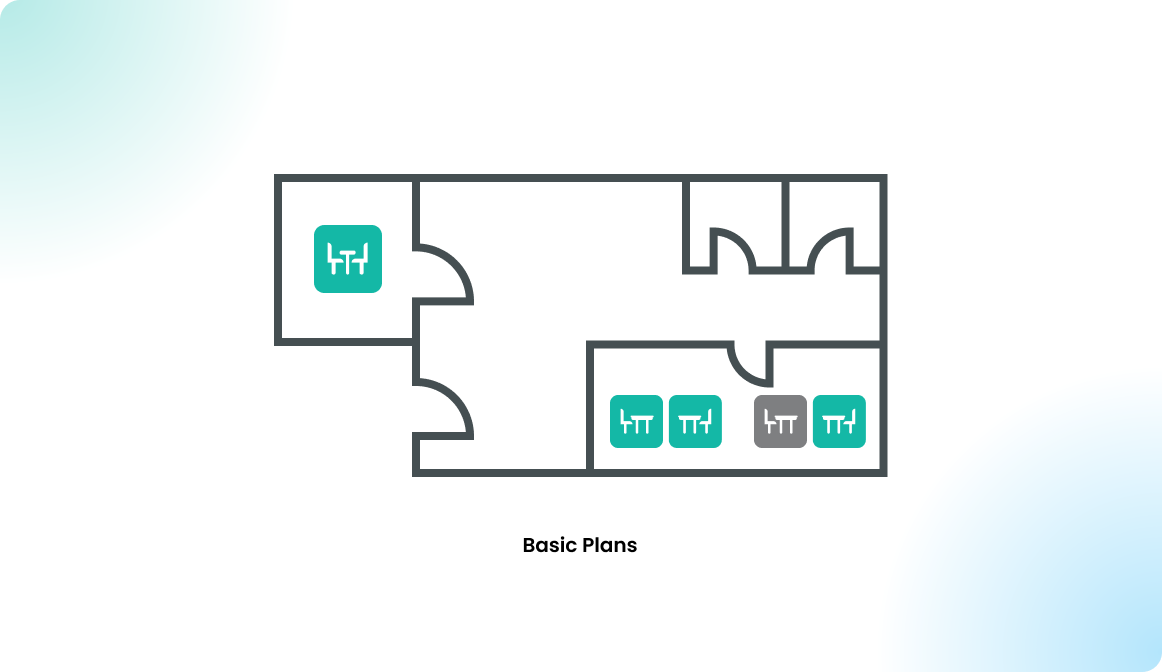
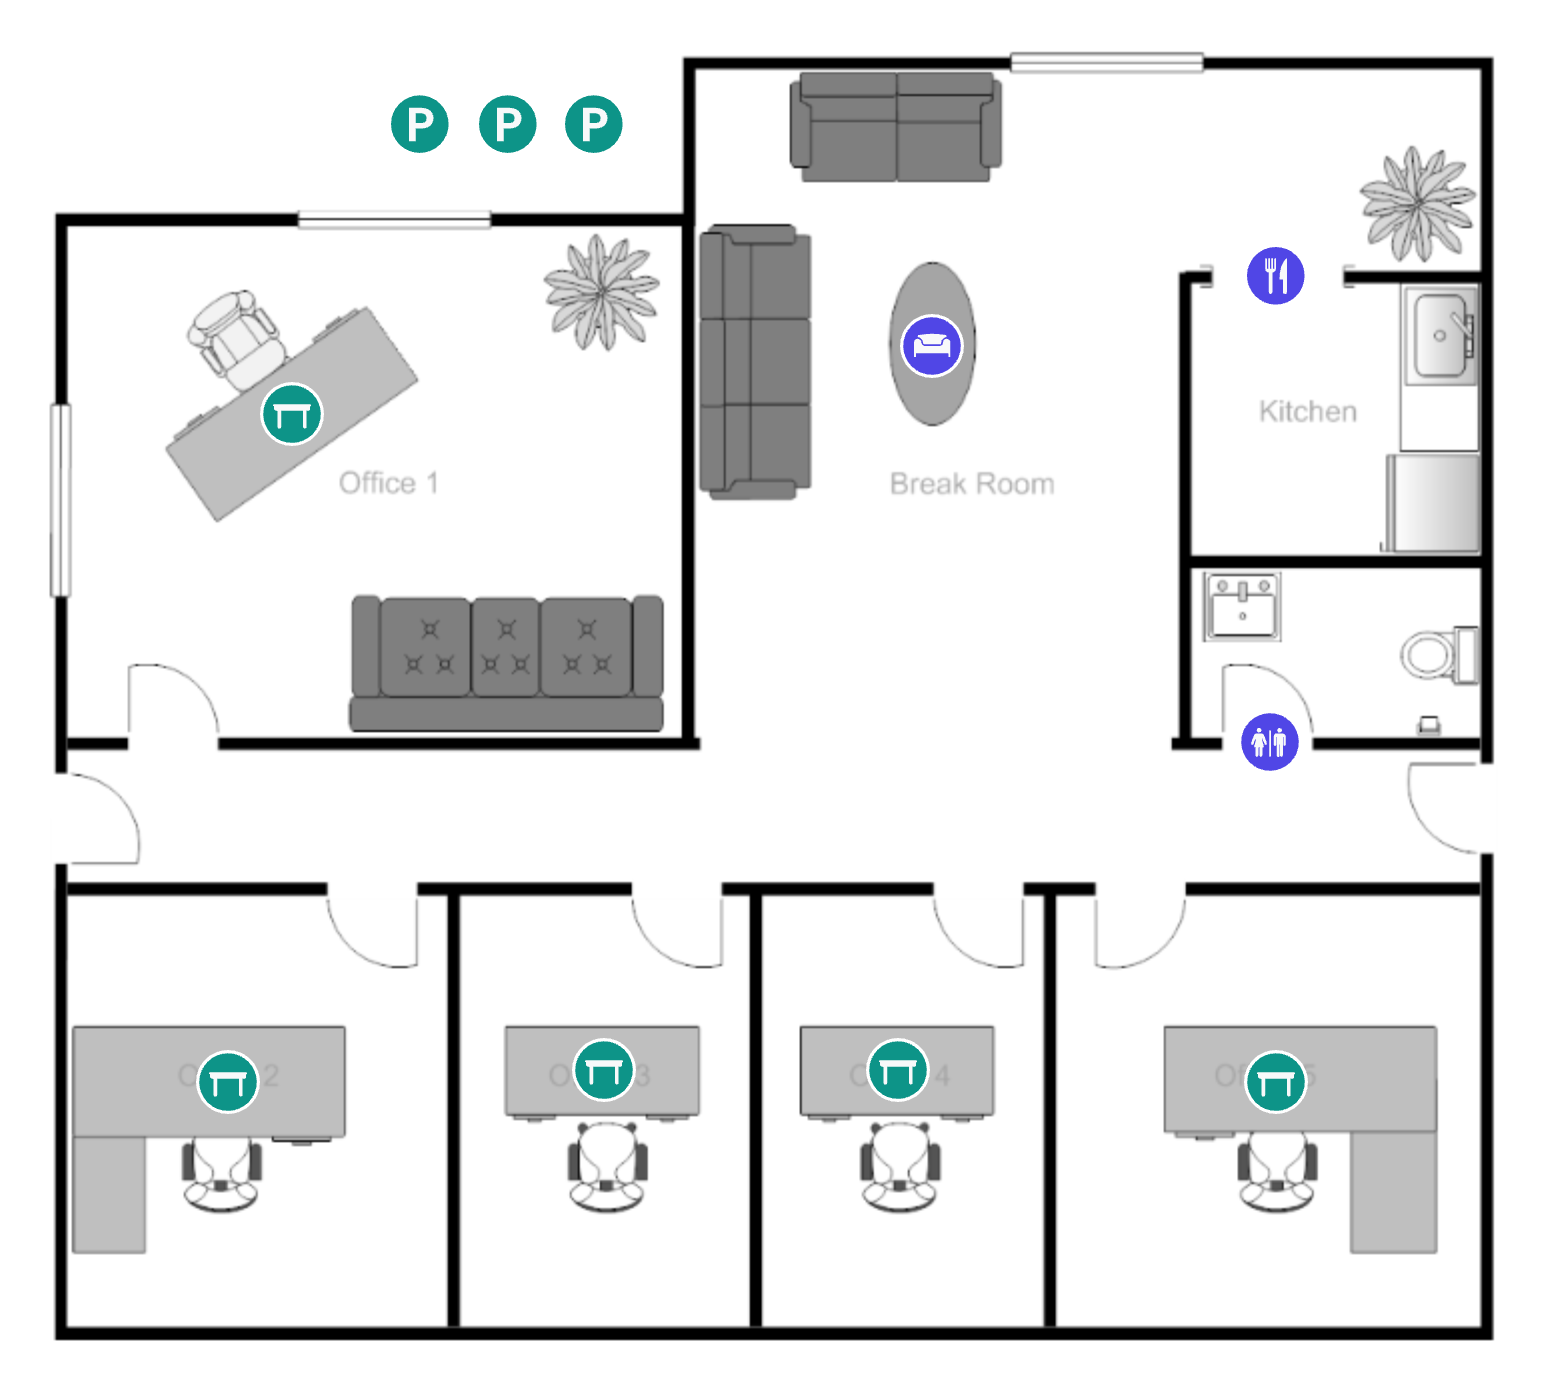
Basic Floor Plans in Flexopus rely on an image of the floor plan uploaded by the user. You can upload any type of image that fits your needs, such as a hand-drawn sketch, architectural plan, emergency plan, or professional design. On the uploaded plan, you can place two types of resources:
- Bookable resources: Desks, meeting rooms, or parking spots that users can reserve.
- Static, special resources: These provide additional information and are not bookable.
This flexibility allows you to create a functional and informative floor plan tailored to your workspace.
How to create a plan
STEP 1 - Create floor plan in Flexopus
To create a floor plan in the Flexopus application, follow these steps:
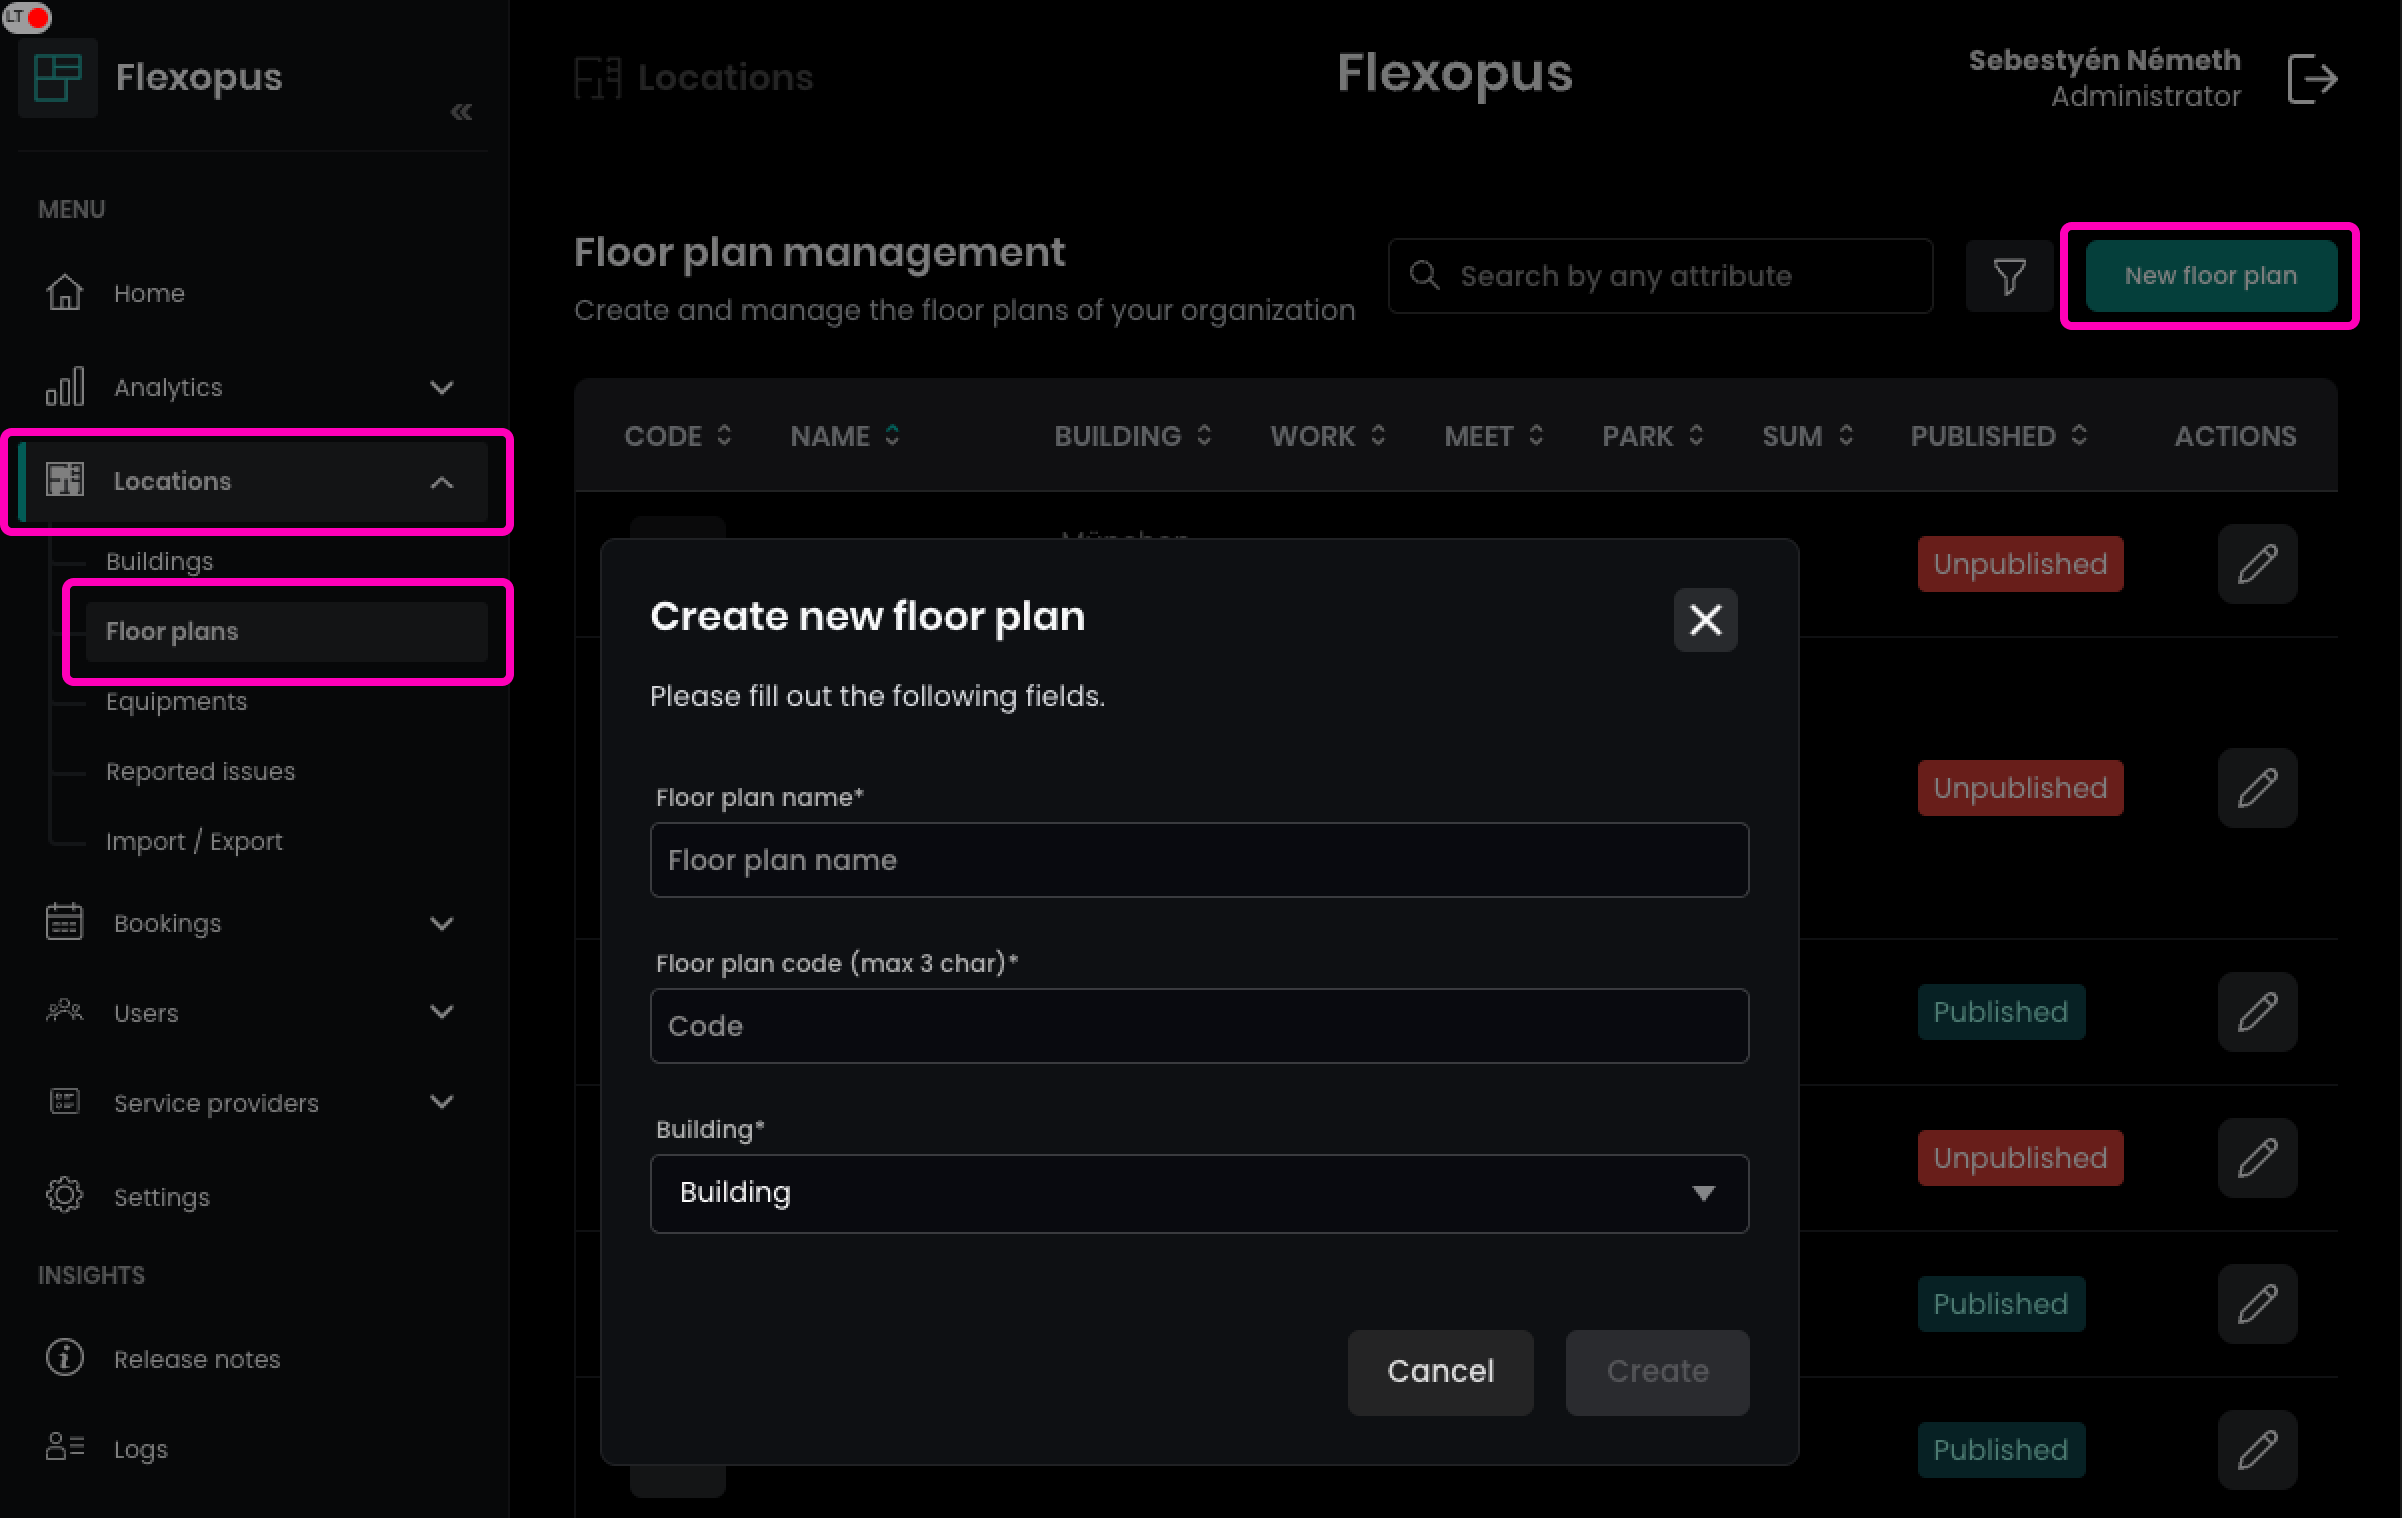
- Go to Administrator Dashboard > Locations > Floor plans.
- Click on New Floor Plan.
- Enter a name for your floor plan.
- Assign it to a building.
This will set up your new floor plan for further customization and resource placement.
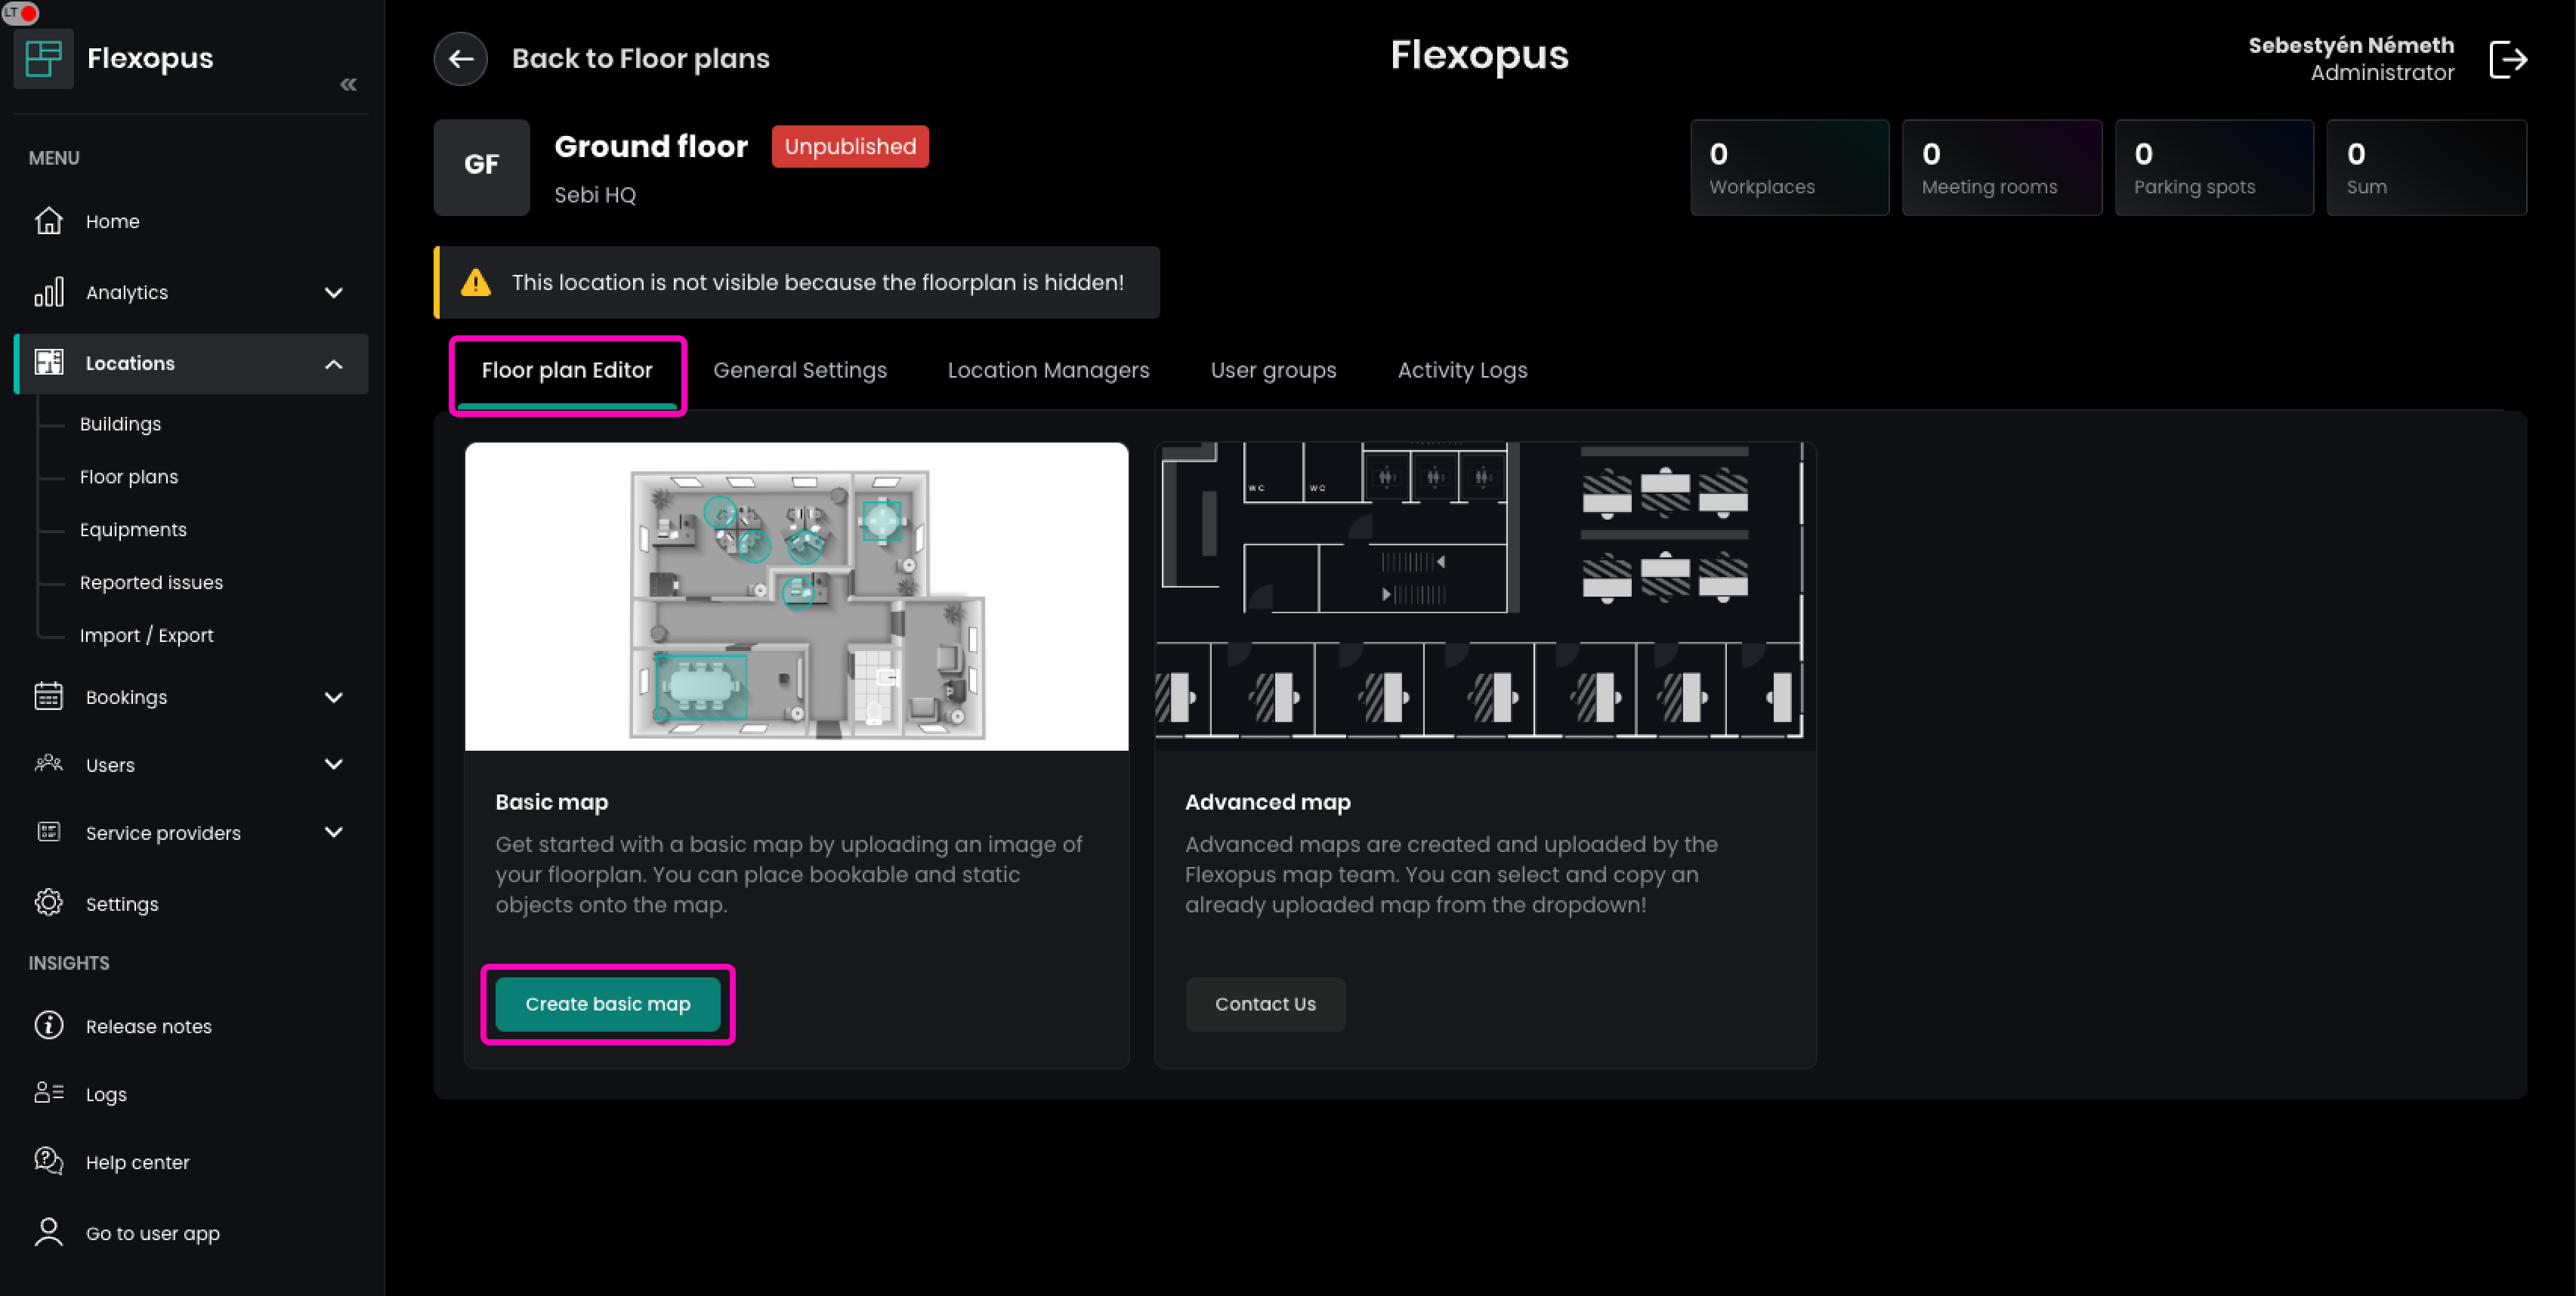
To continue setting up your floor plan in Flexopus:
- Navigate to your newly created plan's page.
- Select the Floor Plan Editor tab.
- Click on Create Basic Map.
You will then be redirected to the Floorplanner application, where you can start customizing your basic floor plan.
STEP 2 - Design your plan
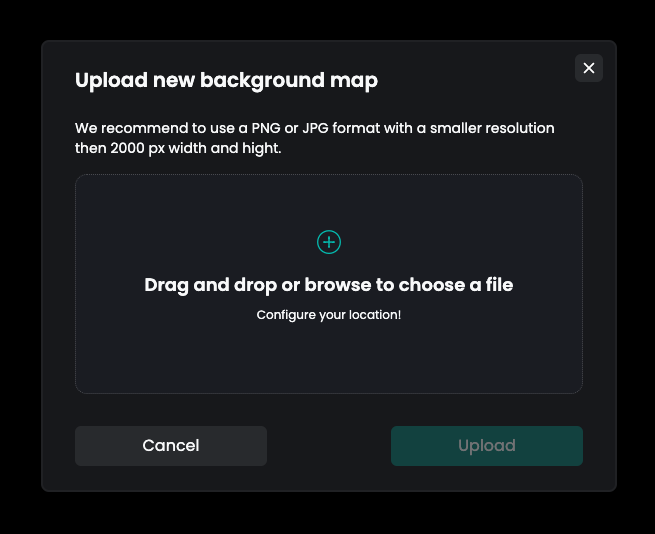
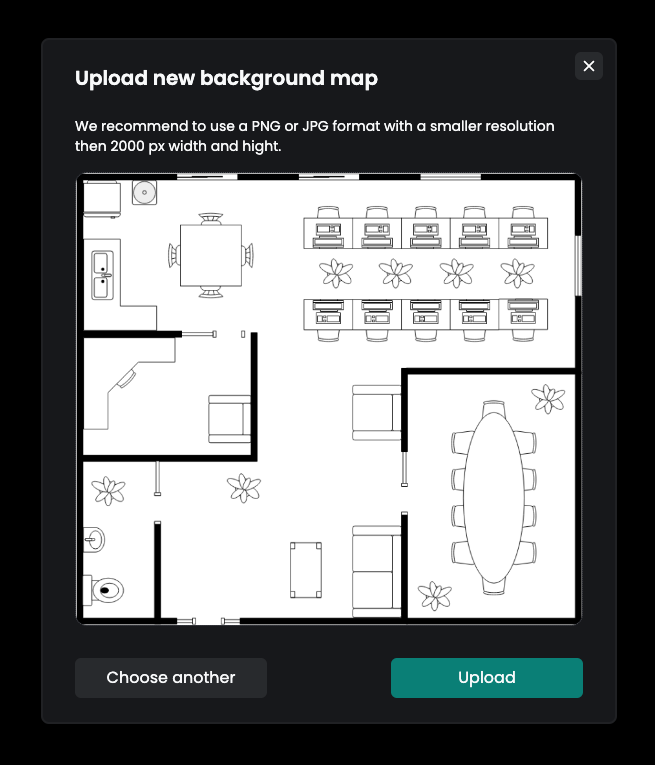
After closing the welcome screen, you will be prompted to upload an image of your floor plan. Select and confirm the uploading of the image file.
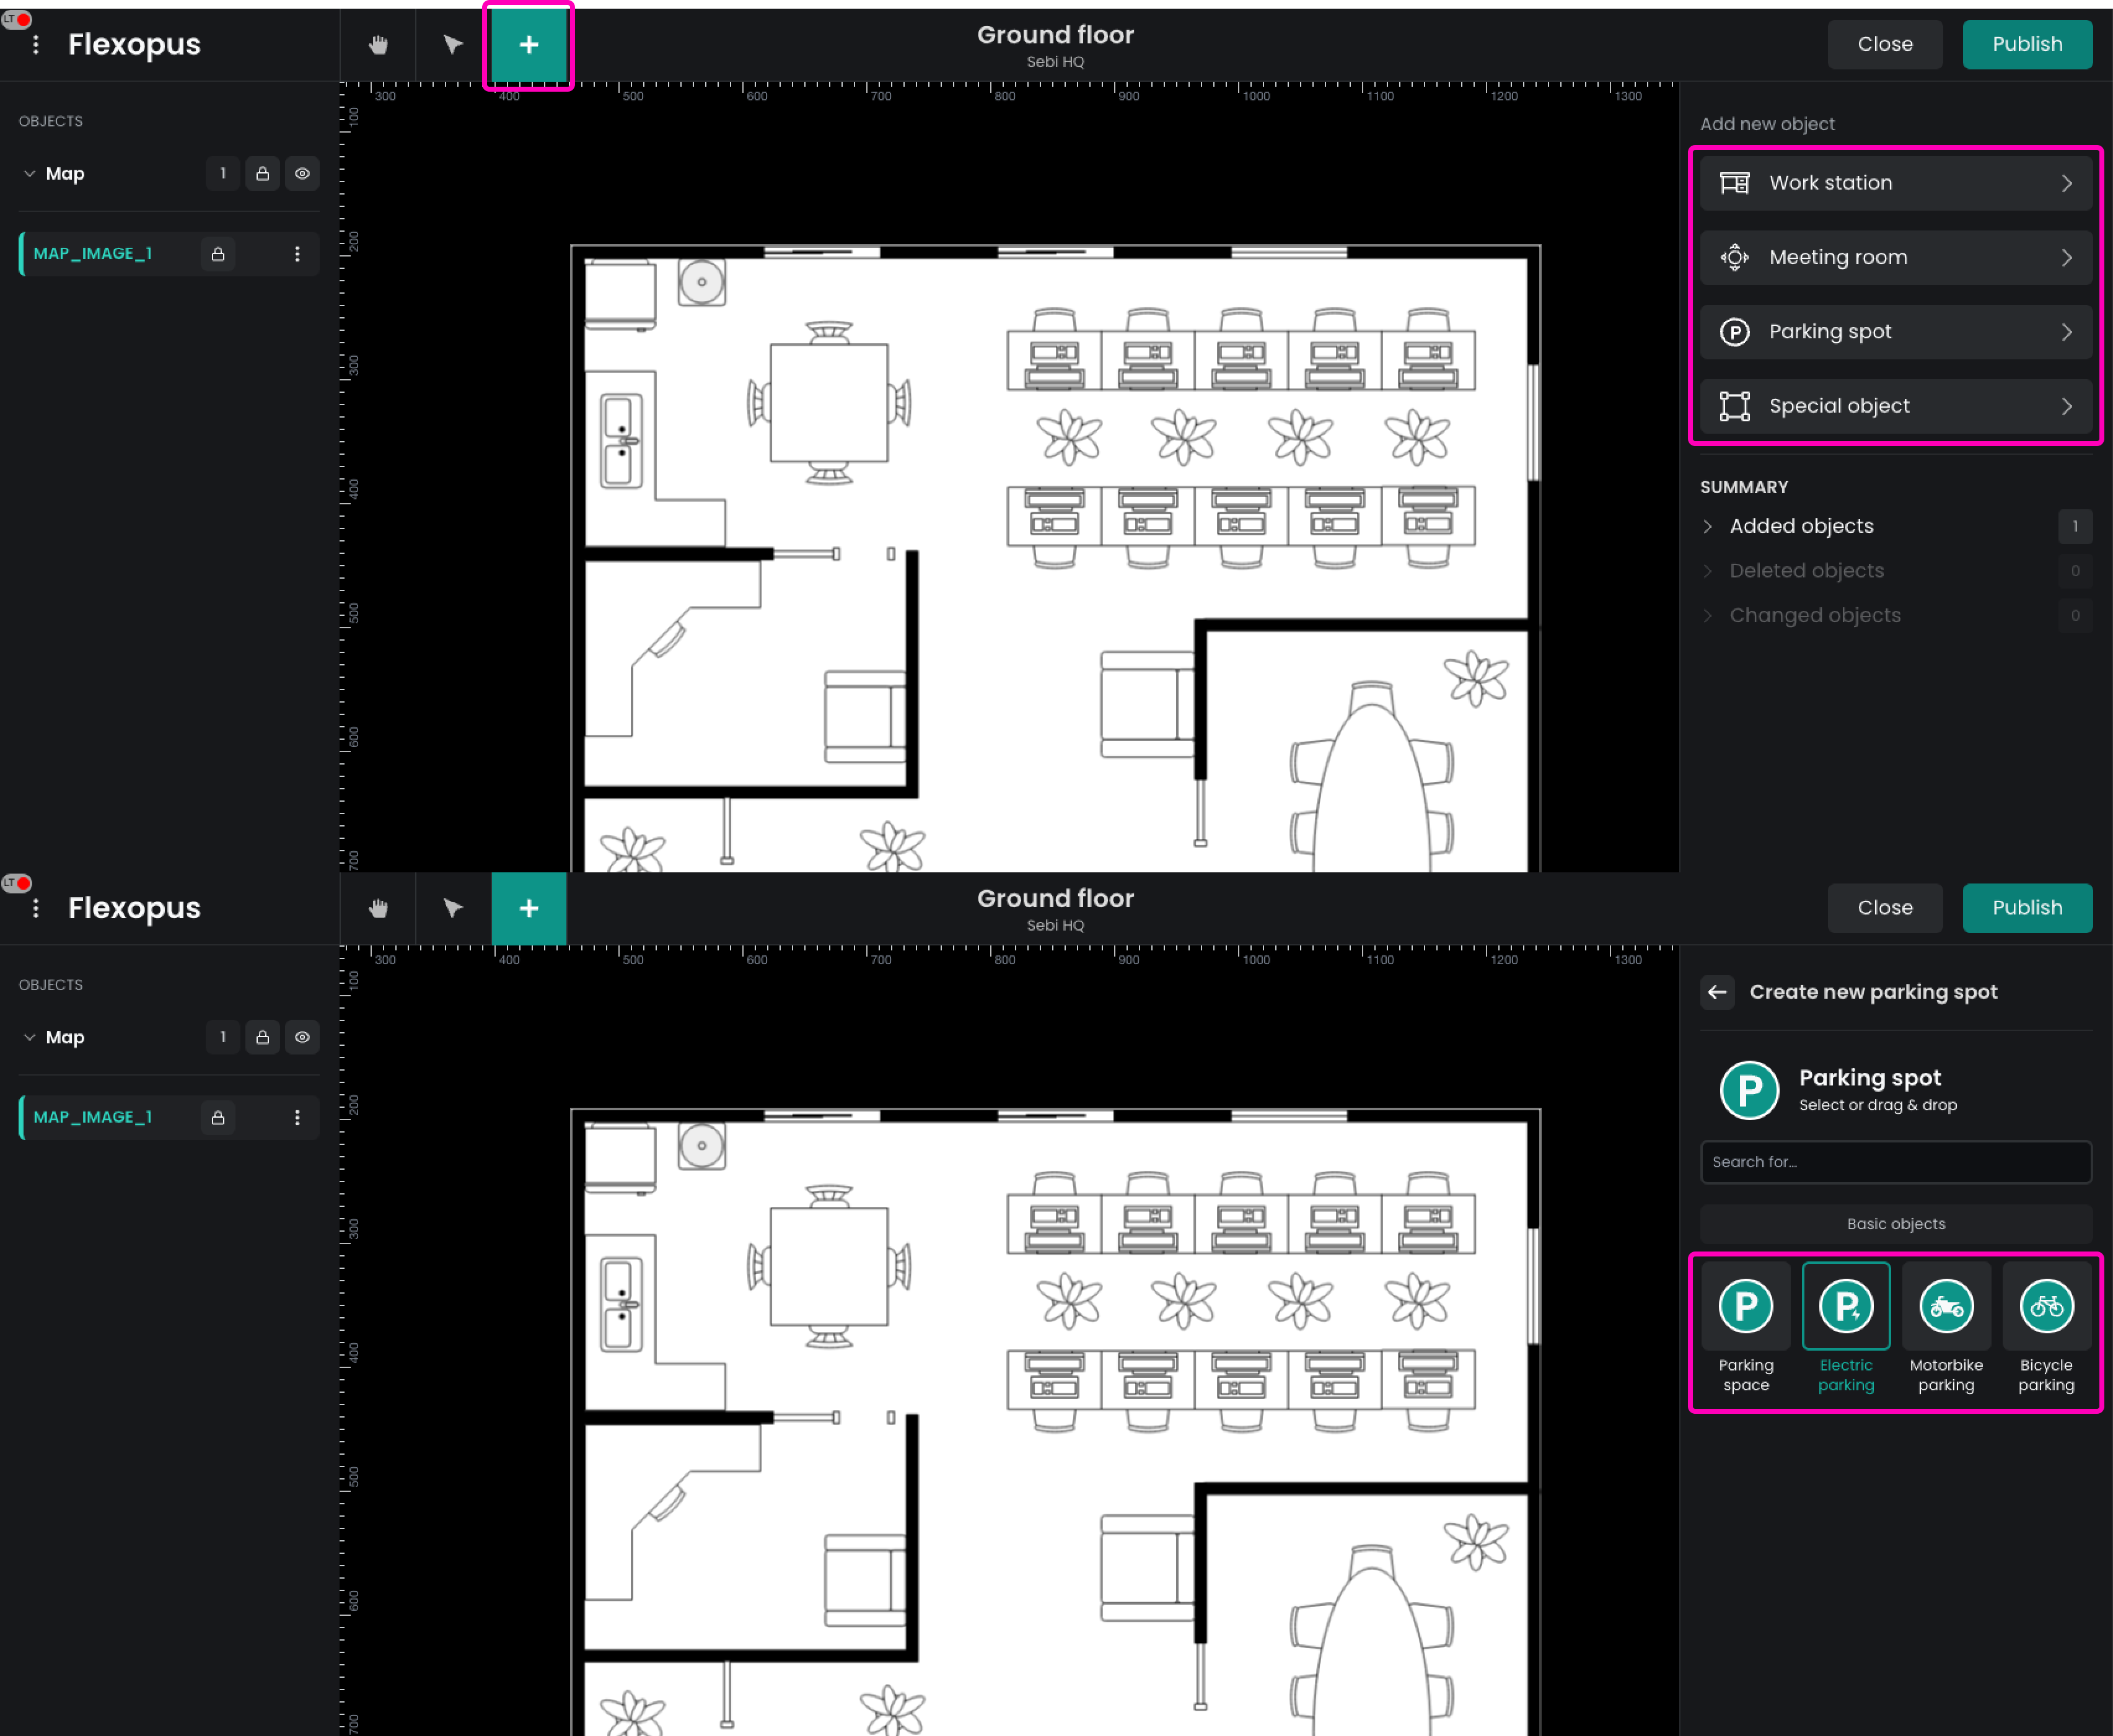
To place resources on your floor plan in the Flexopus Floorplanner:
- Select the Create Resources (+) tool.
- On the right panel, choose the type of resource you want to place (e.g. desks, meeting rooms, or parking spots).
- If applicable, select a specific variant of the resource.
- Once you've decided on the desired variant, click on the plan to add the resource.
This allows you to design your workspace by placing the necessary bookable or static resources on the floor plan.
You can introduce changes to the resources by selecting them from the list in the left panel, or on the plan with the selection tool. The properties of the selected resource are displayed on the right panel.
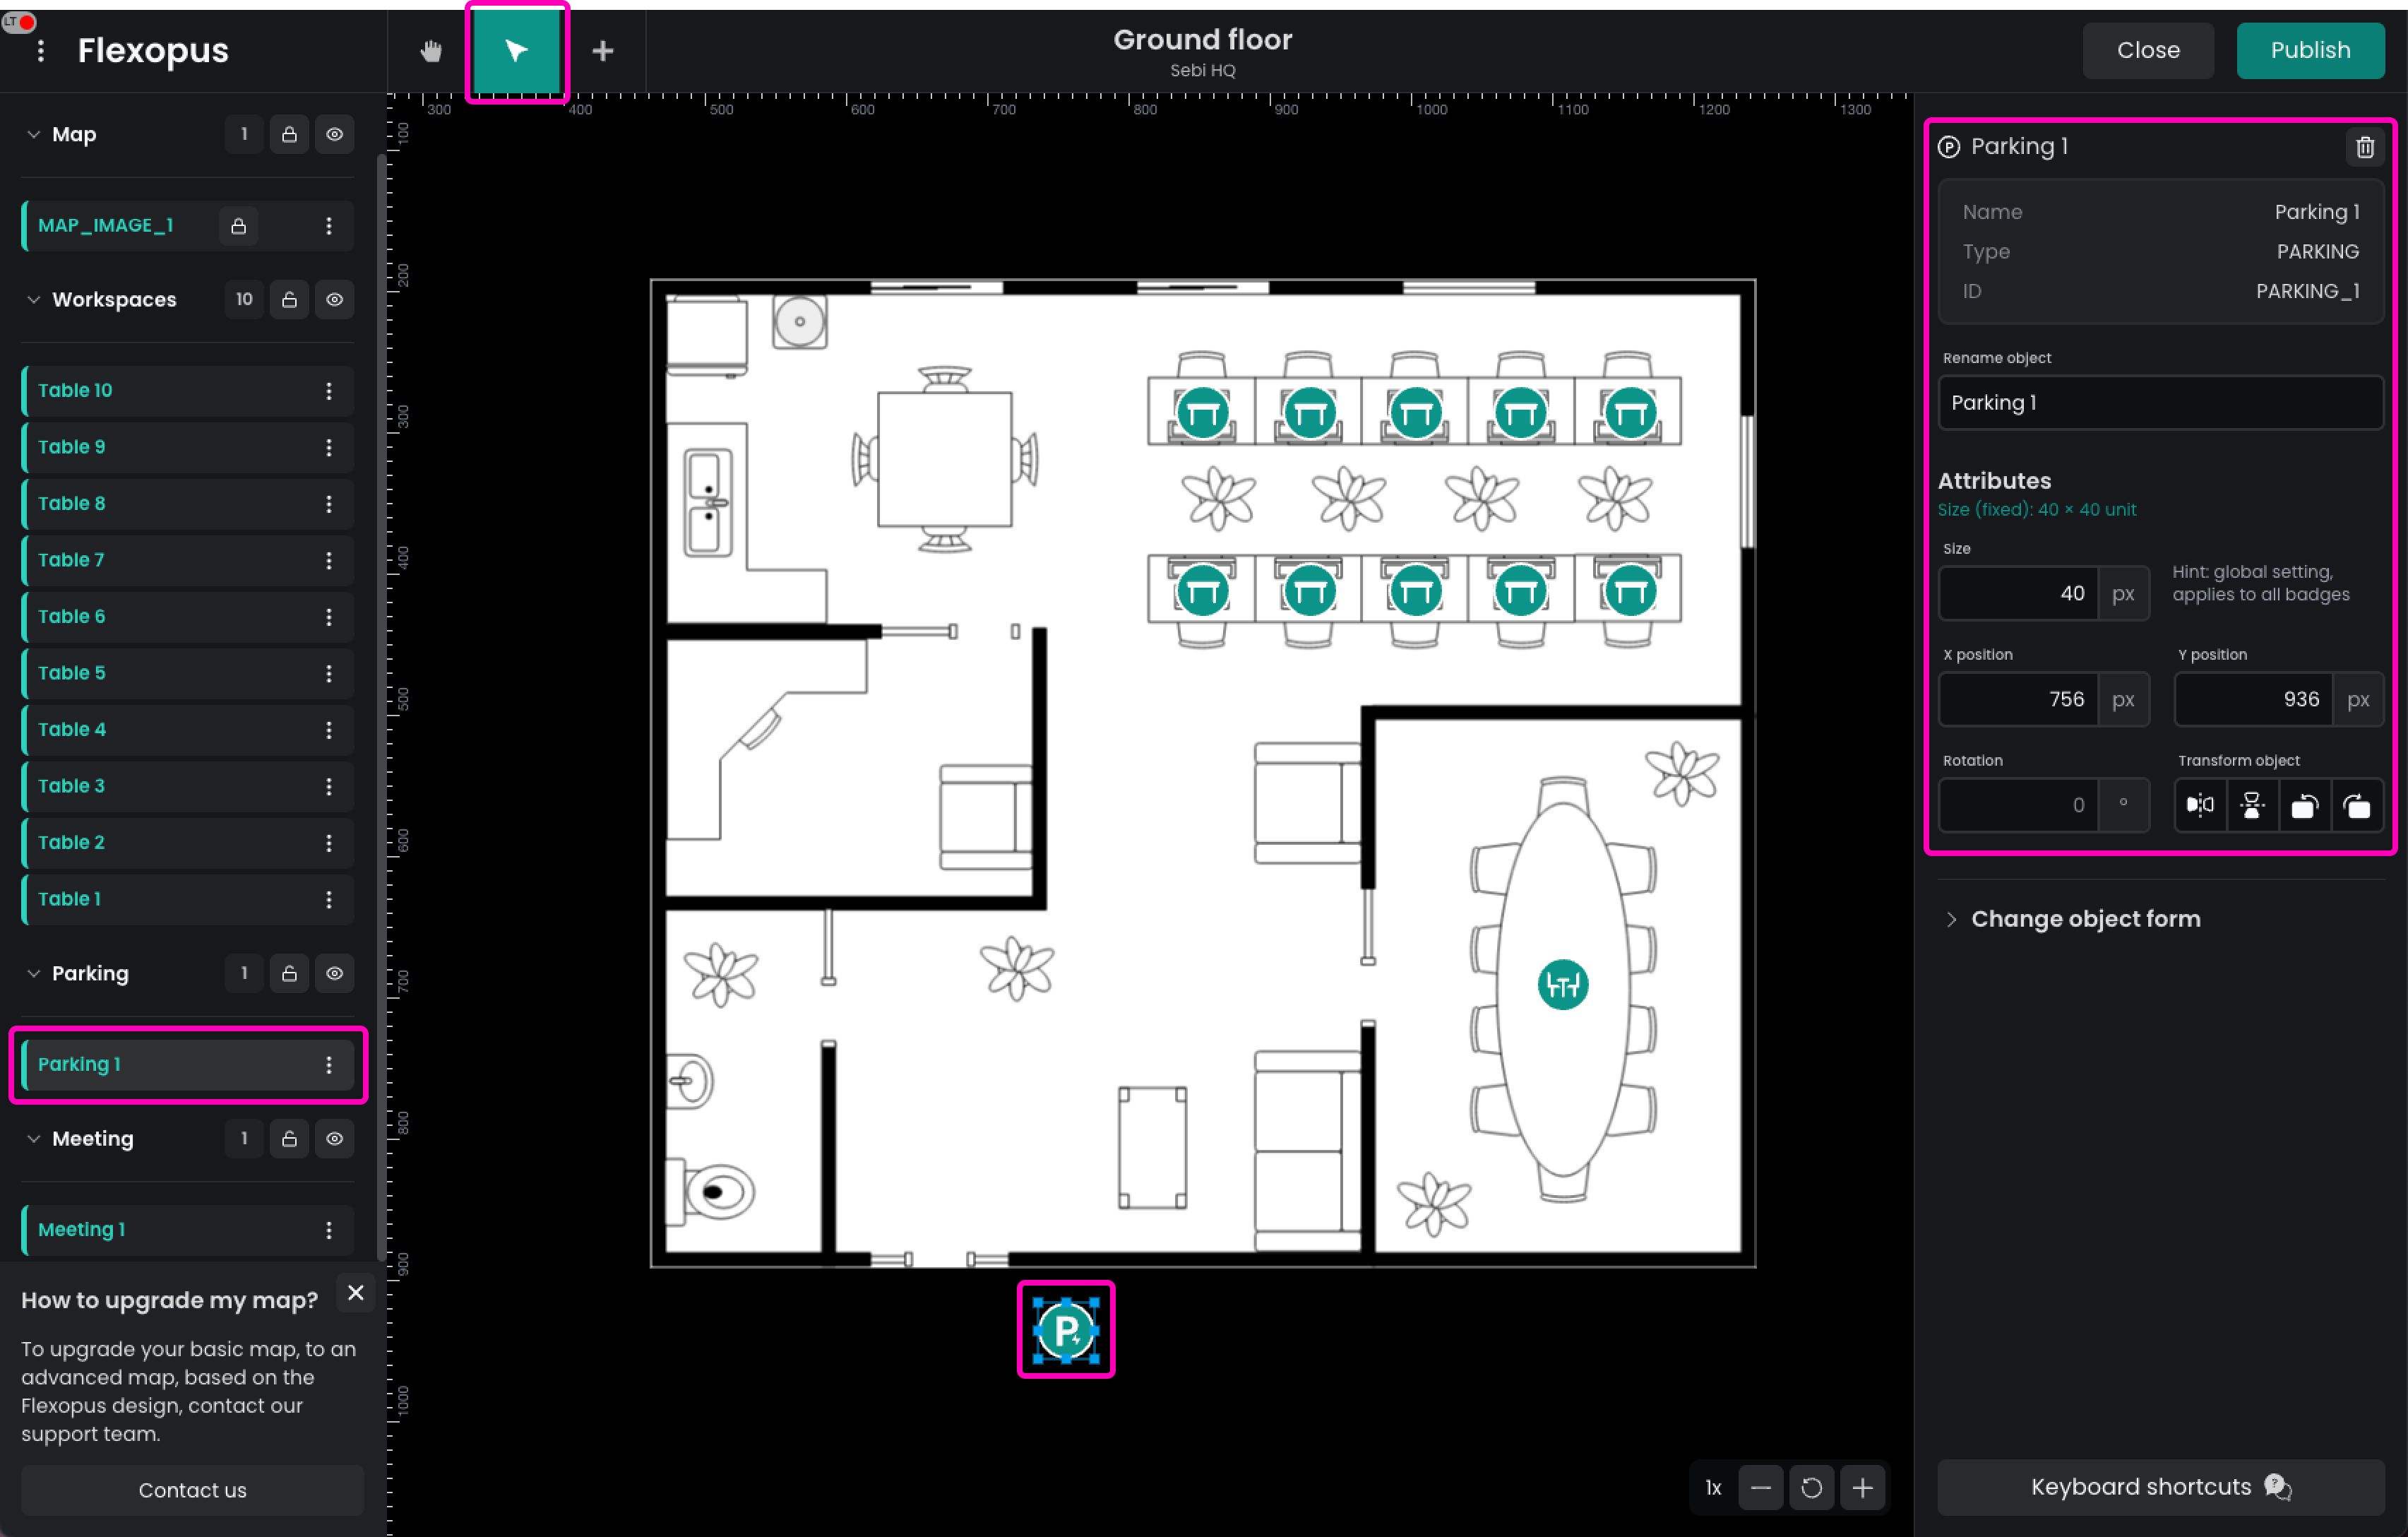
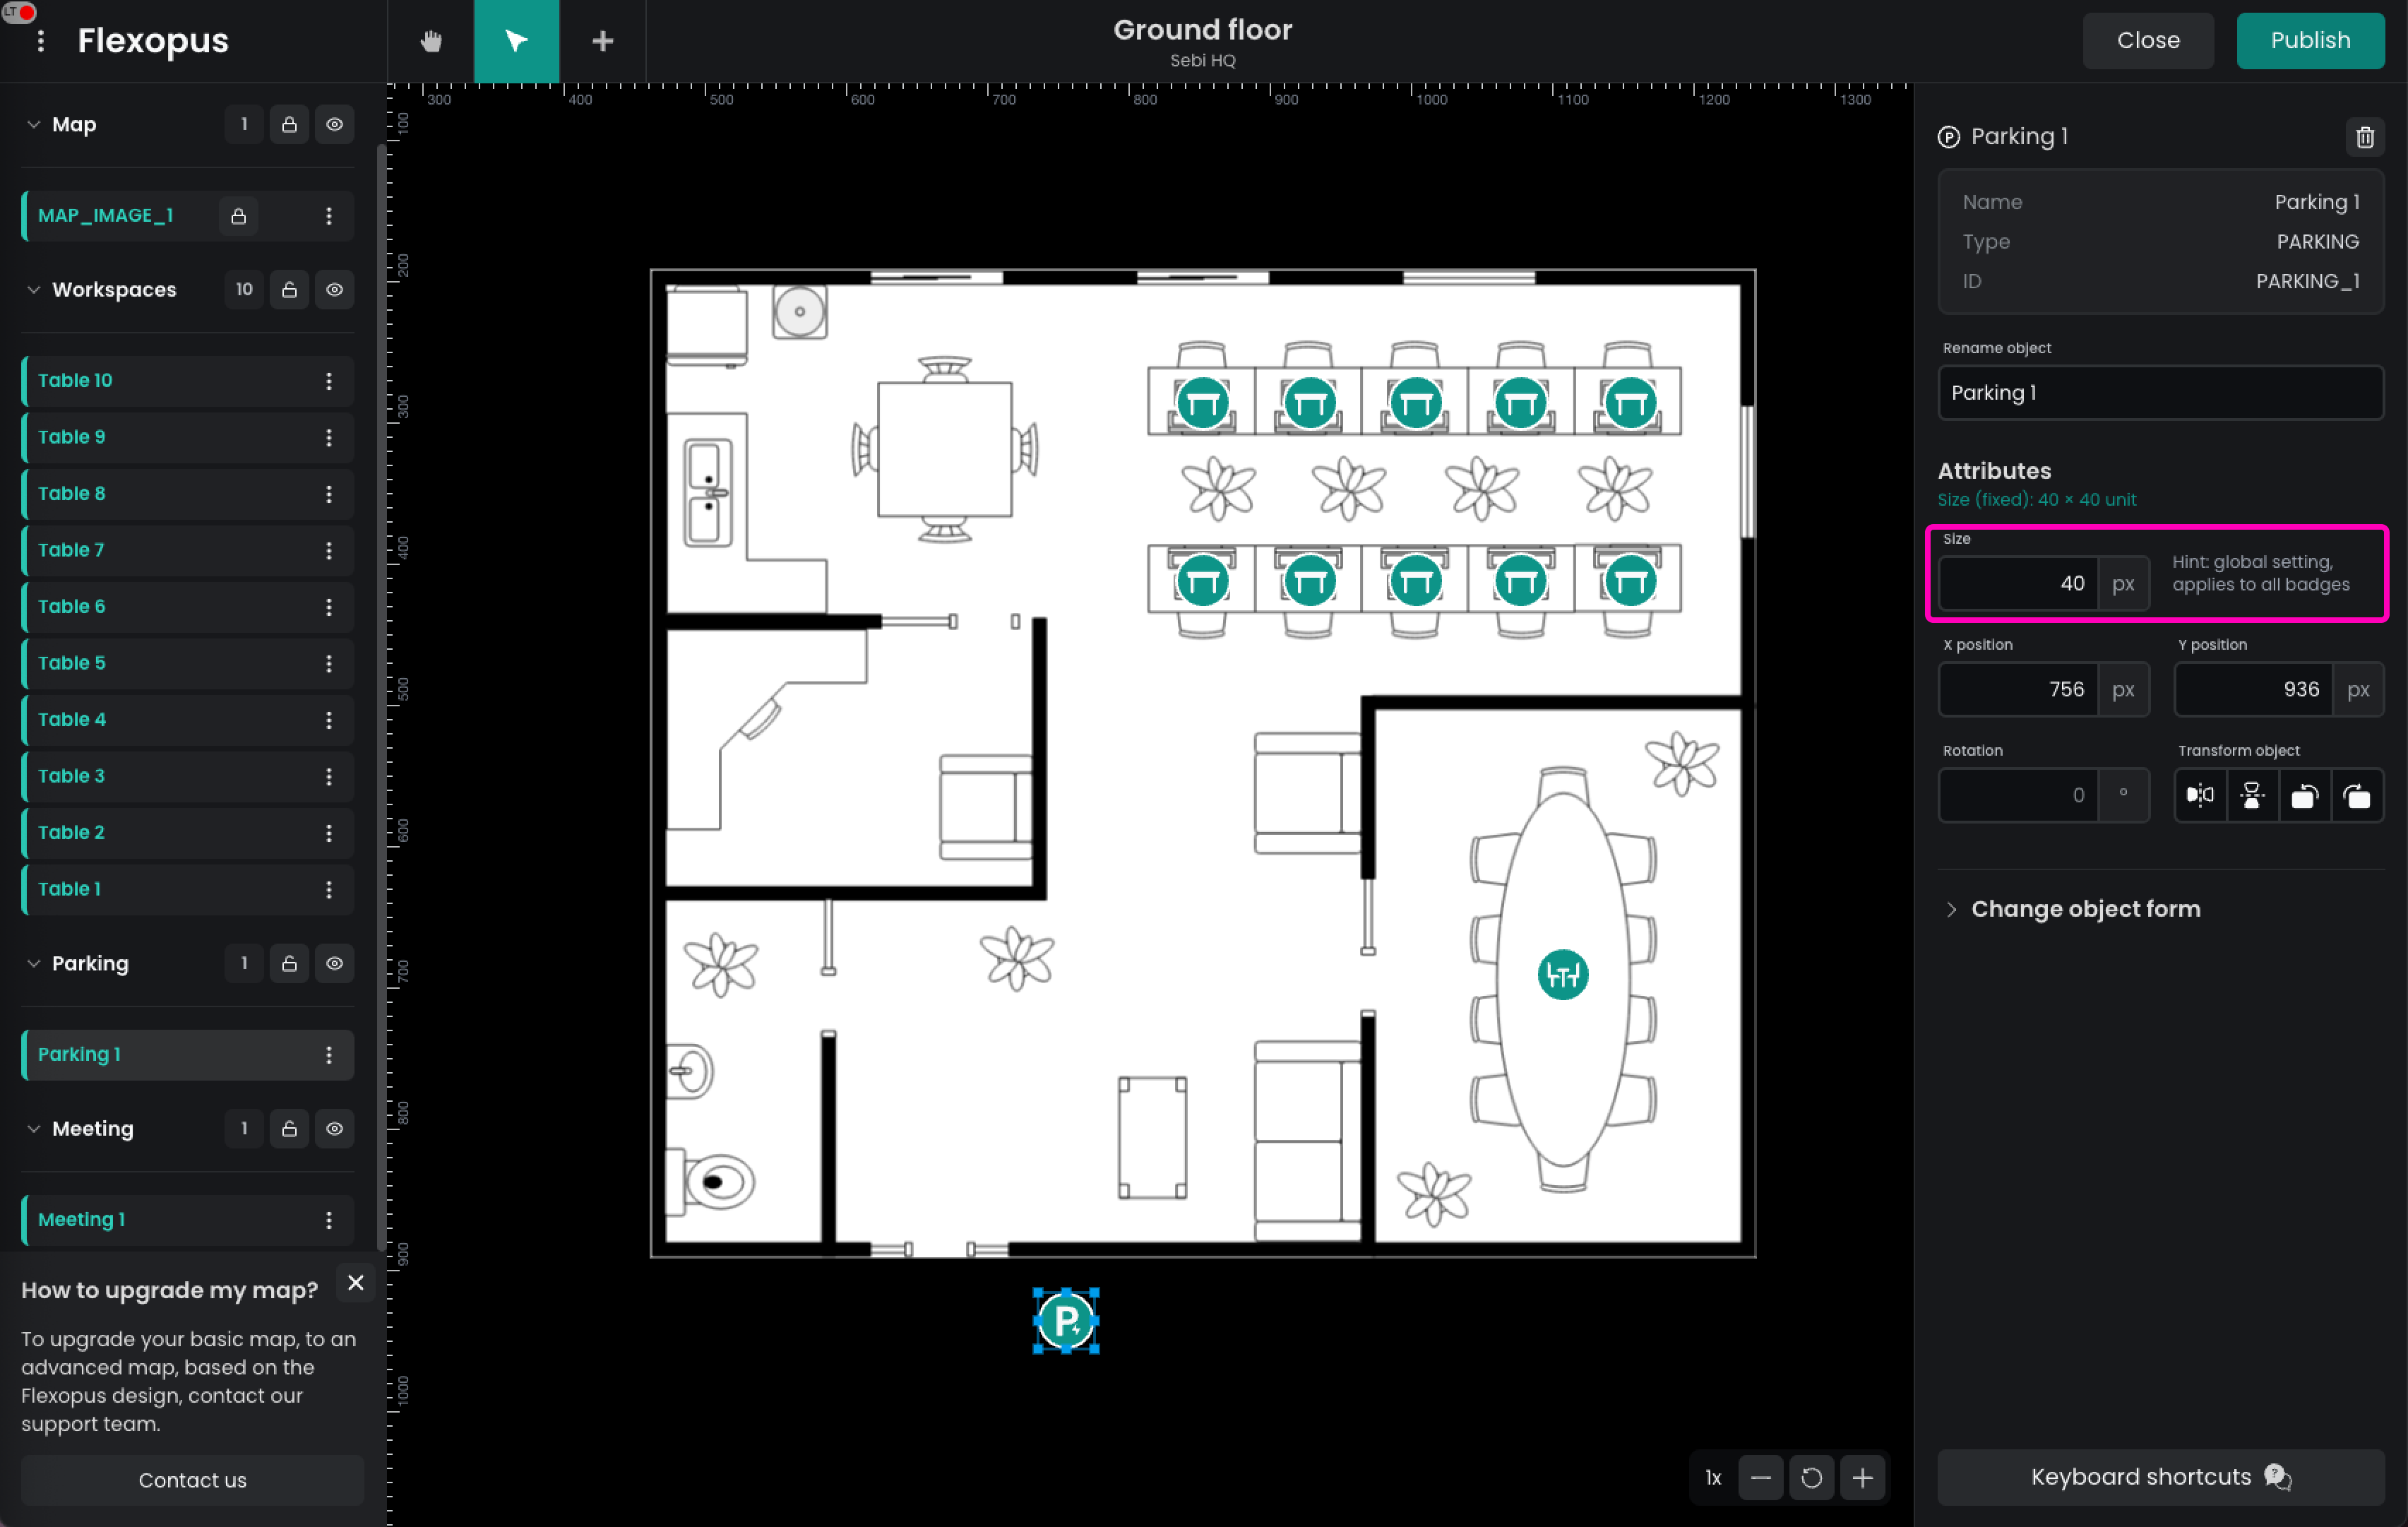
On limited plans, resources have a globally set size by default. To modify this global setting:
- Select any resource on the plan.
- In the right panel, locate the size attribute.
- Adjust the size as needed.
This change will apply to all resources of the same type, allowing you to customize the layout to fit your needs.
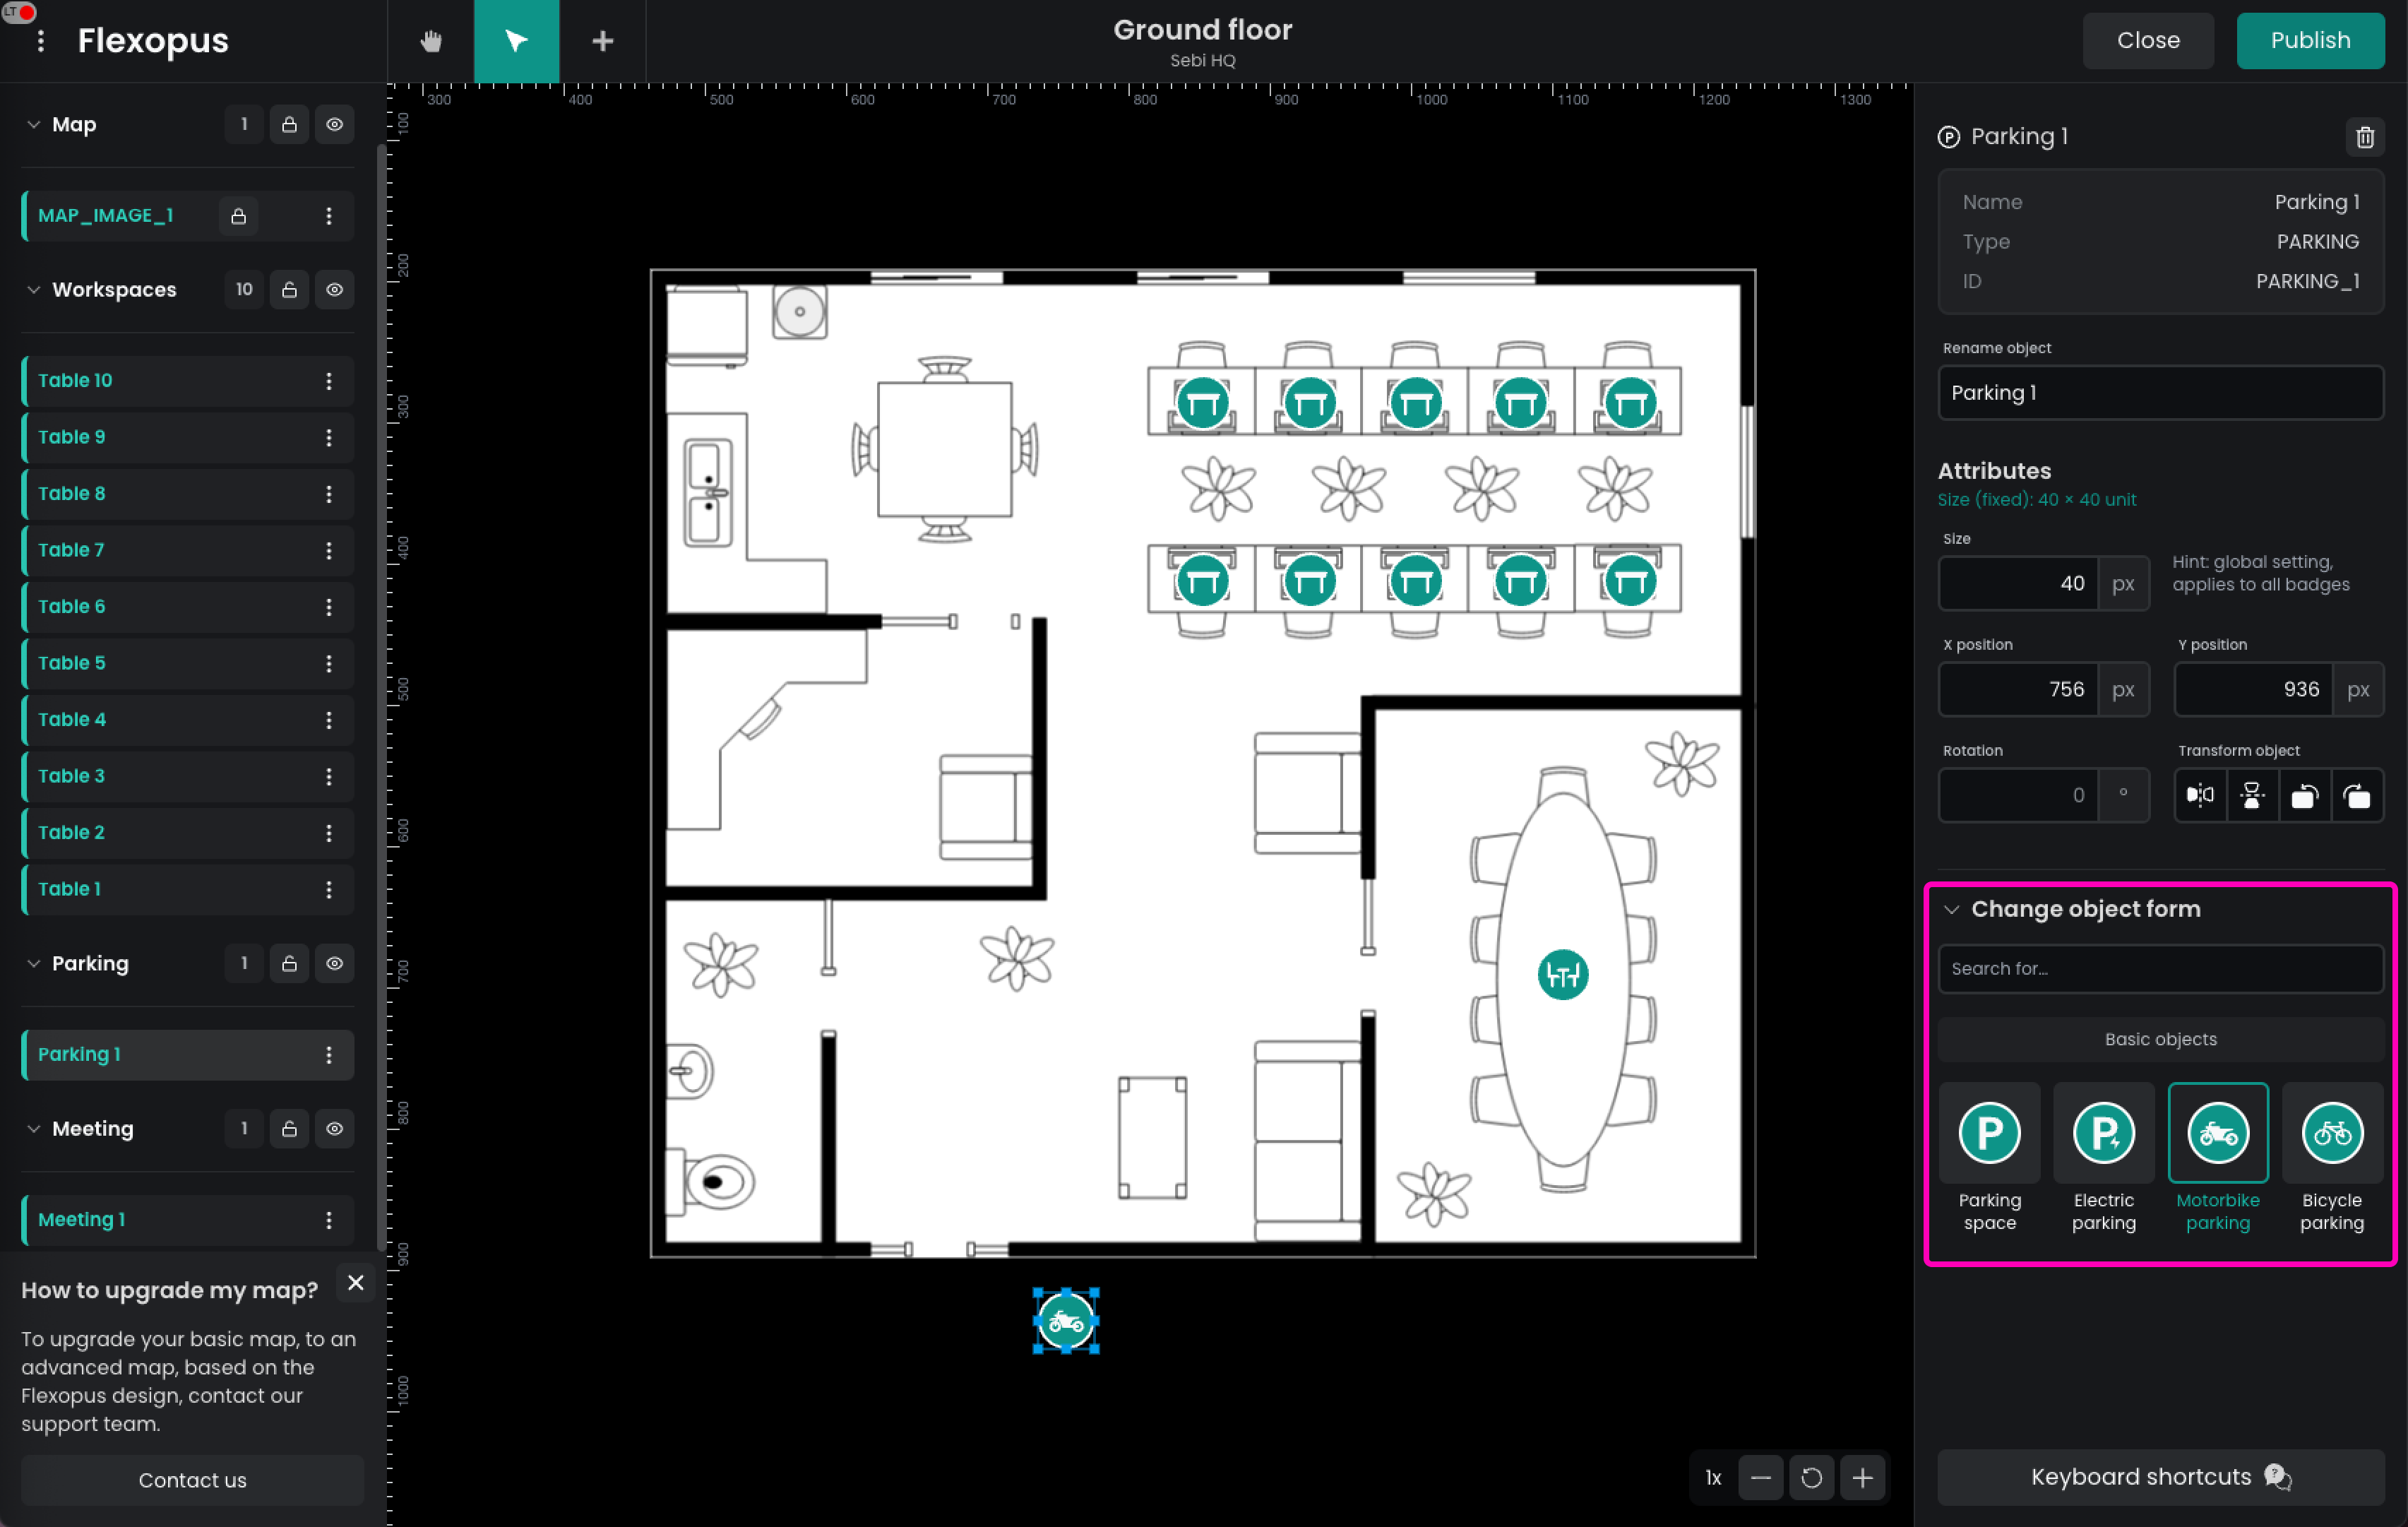
You can change the resource variant by following these steps:
- Select the resource on the map.
- Expand the Change Object Form menu.
- Choose the desired variant from the list.
This allows you to easily switch between different variants of the same resource type to suit your floor plan.
To delete a resource in the Flexopus Floorplanner:
- Select the resource you wish to delete.
- Click the trash icon in the properties panel, or press Del/Backspace on your keyboard.
- Confirm the action in the popup.
You can also select multiple resources and delete them all in one action, making bulk deletions easier.
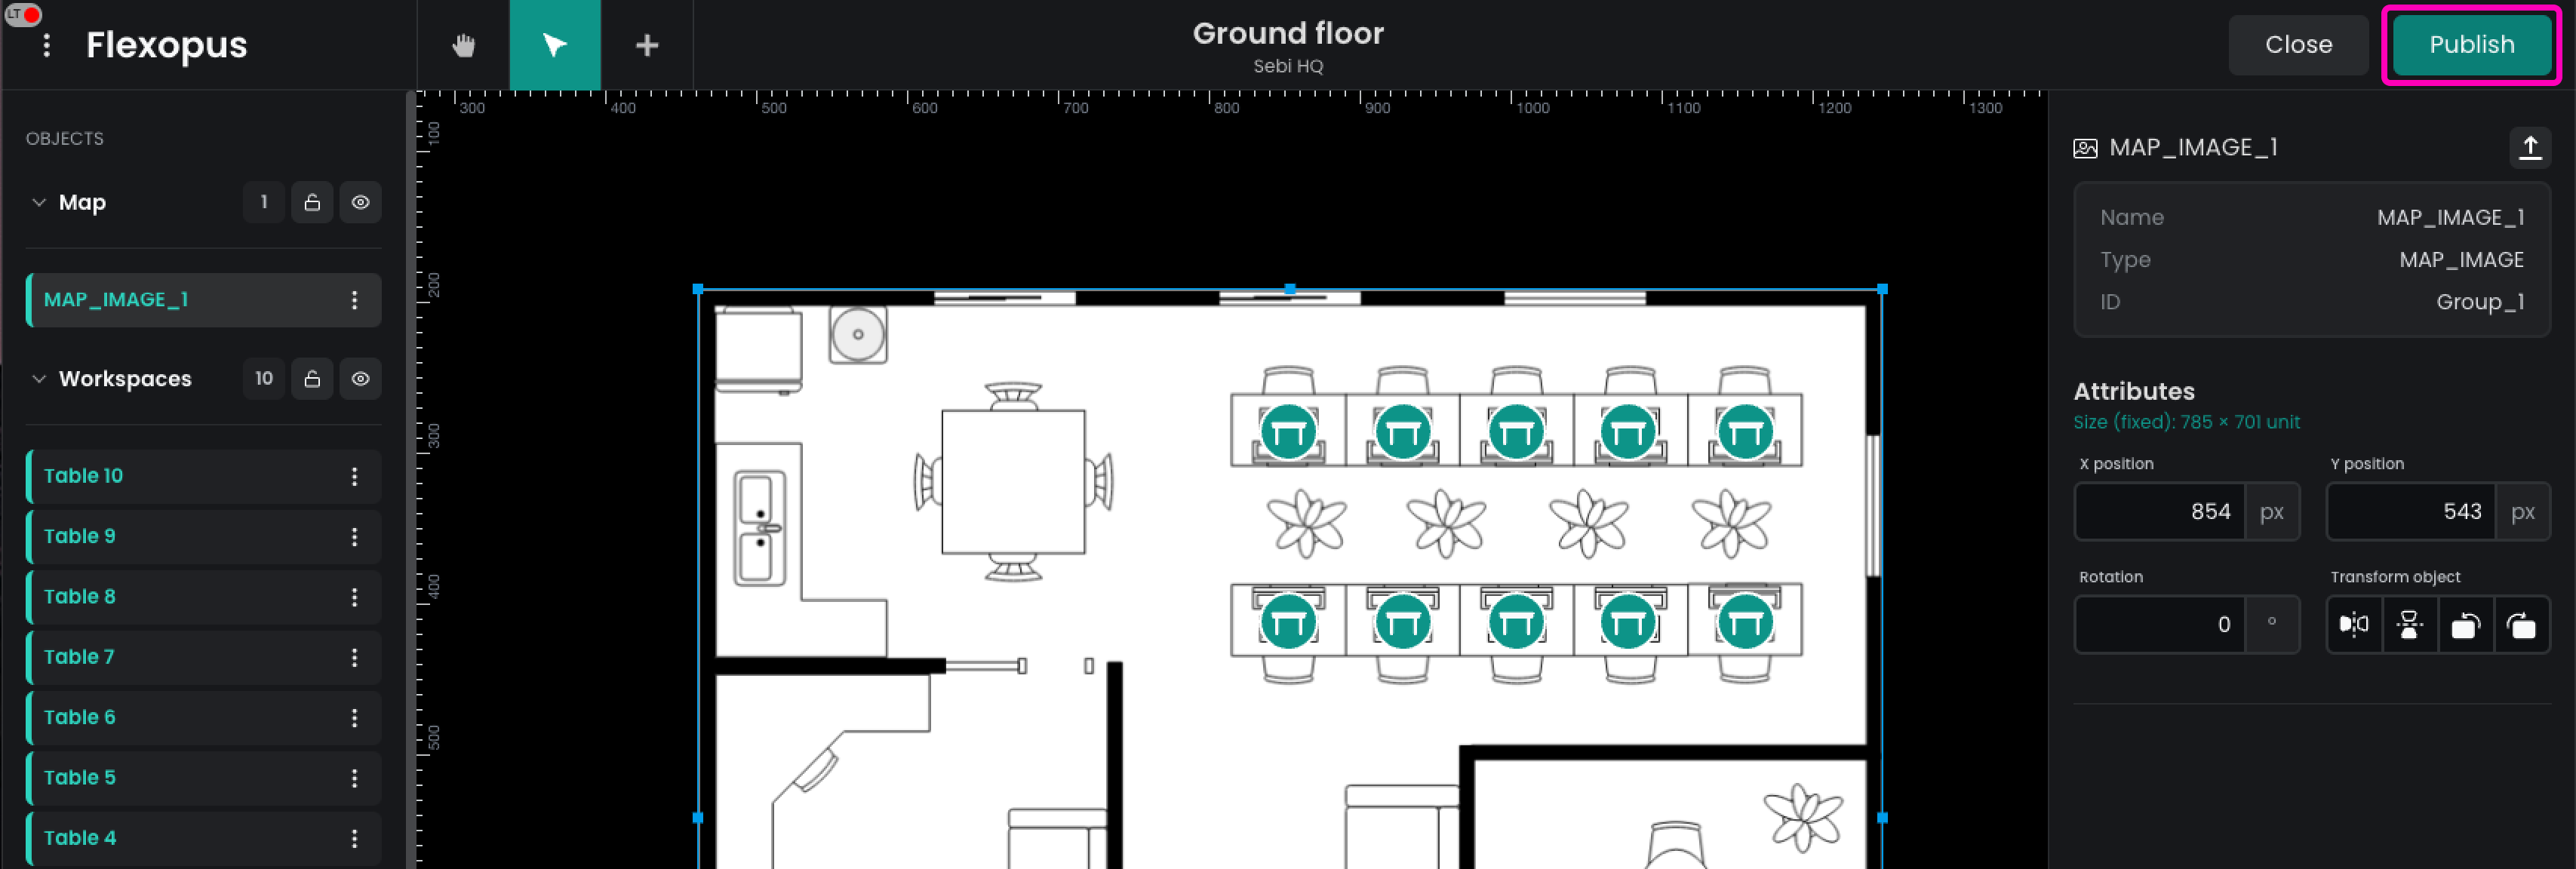
STEP 3 - Publish changes
Once you have made your changes, click on Publish to save and apply them to your floor plan.
After clicking Publish, you will be redirected back to the Flexopus application. To finalize your plan, click Update Map to confirm and save all your changes.
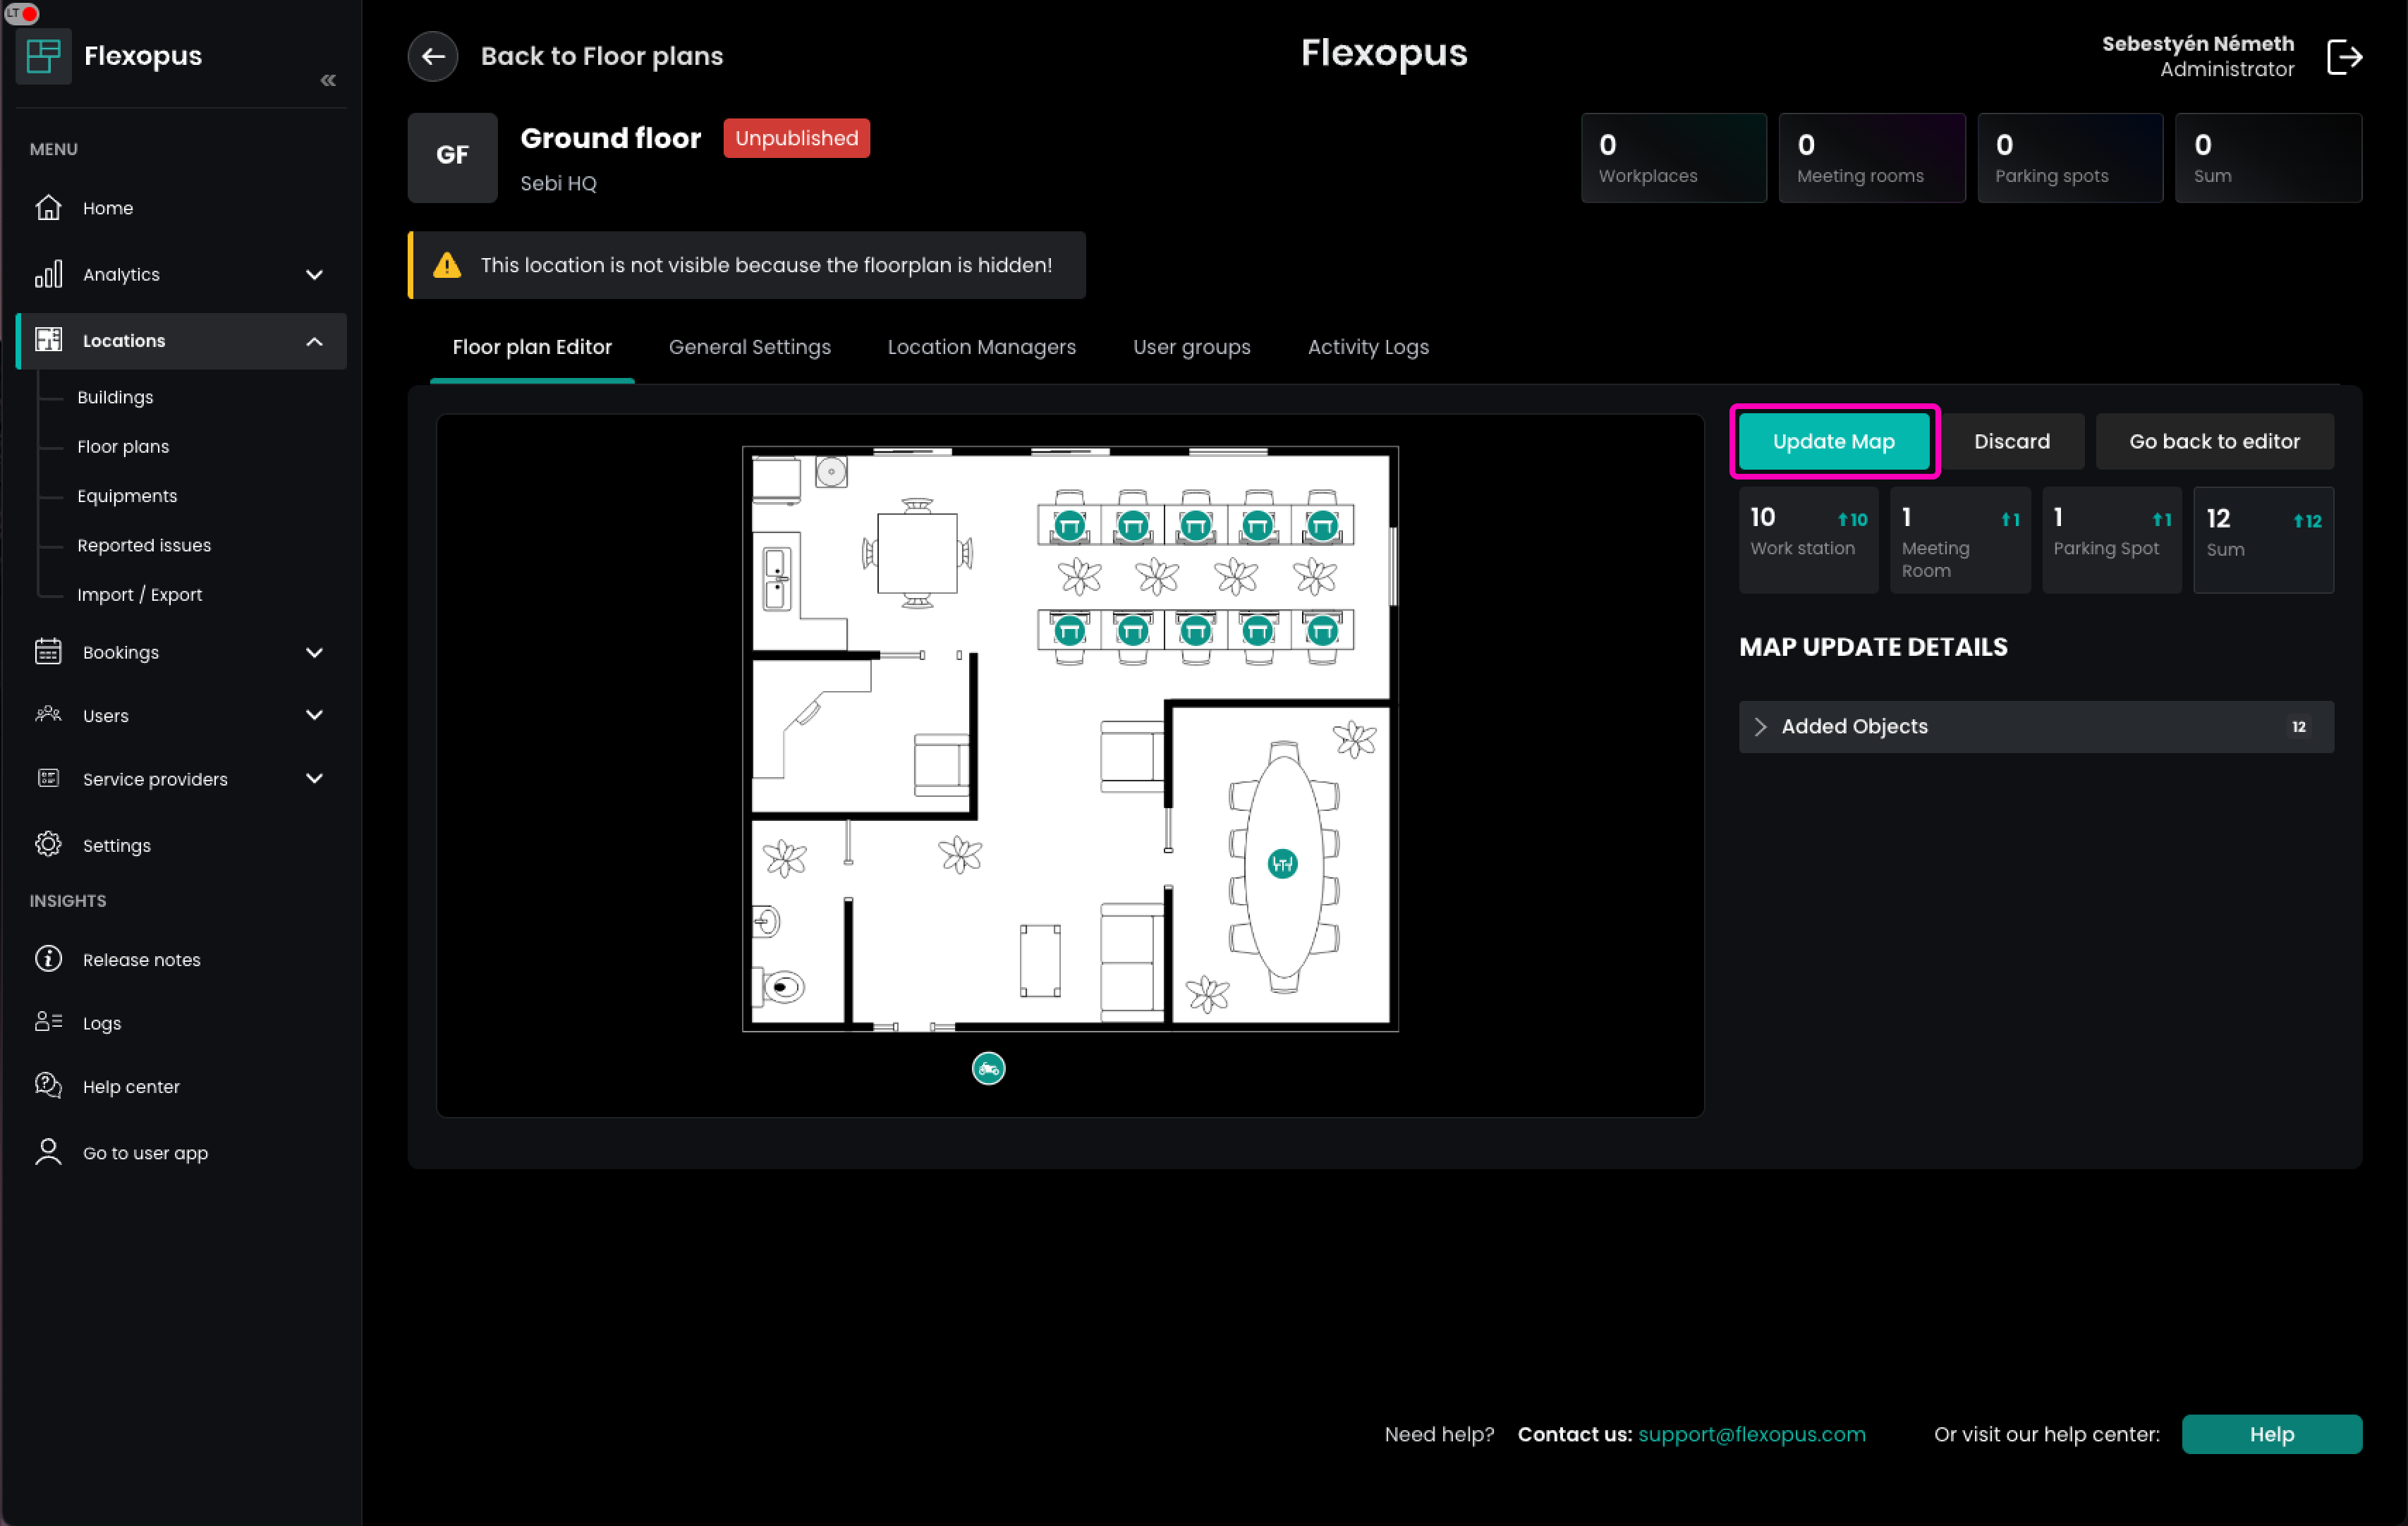
Plans are not automatically saved while you make changes in the Floorplanner. If you close the application before confirming your changes in the Administrator Dashboard, all your changes will be lost. Be sure to publish and confirm the updates in the dashboard to save your work.
How can I modify the background image?
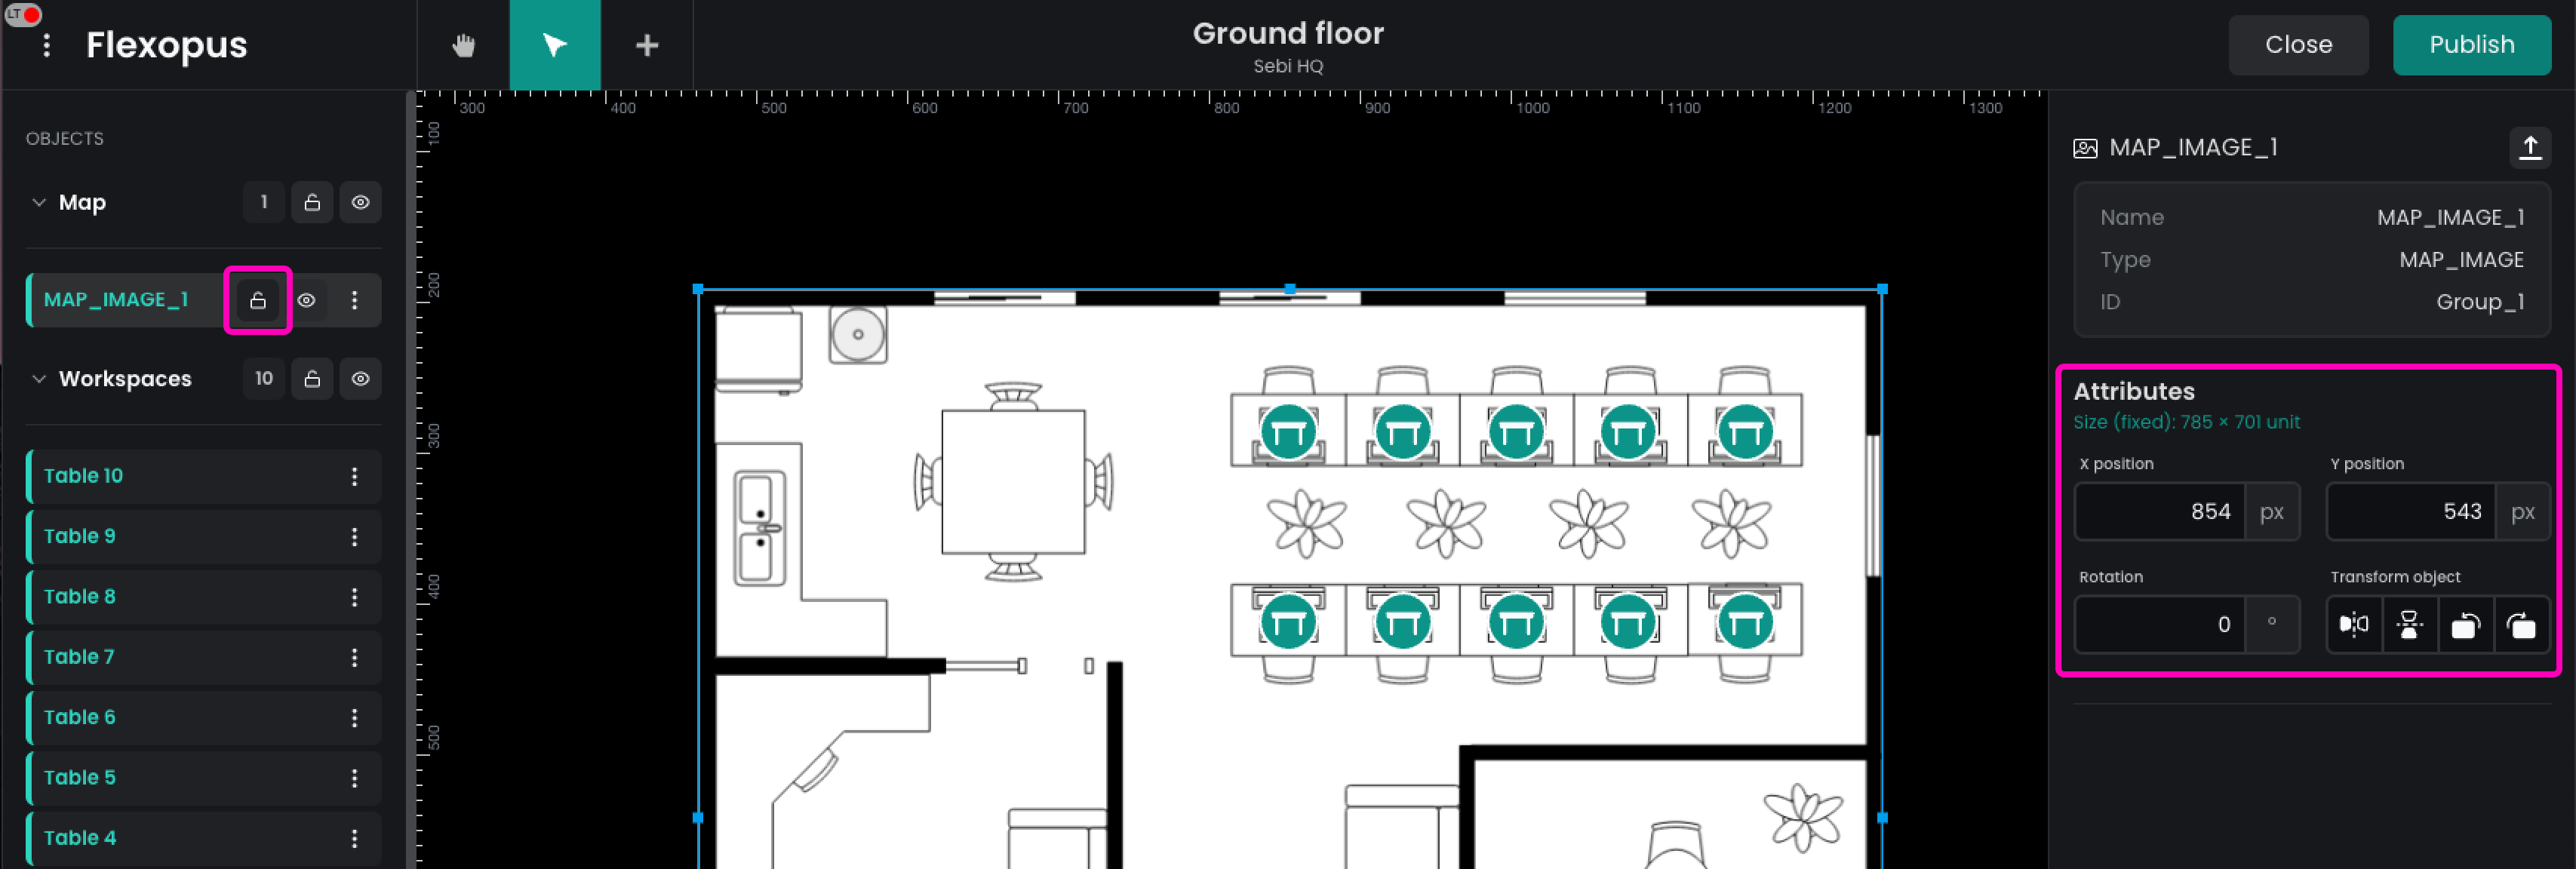
The background image is locked by default in the Floorplanner to prevent accidental movement. To unlock it:
- Click the lock icon in the left sidebar.
- Once unlocked, you can scale, move, rotate, or mirror the image as needed.
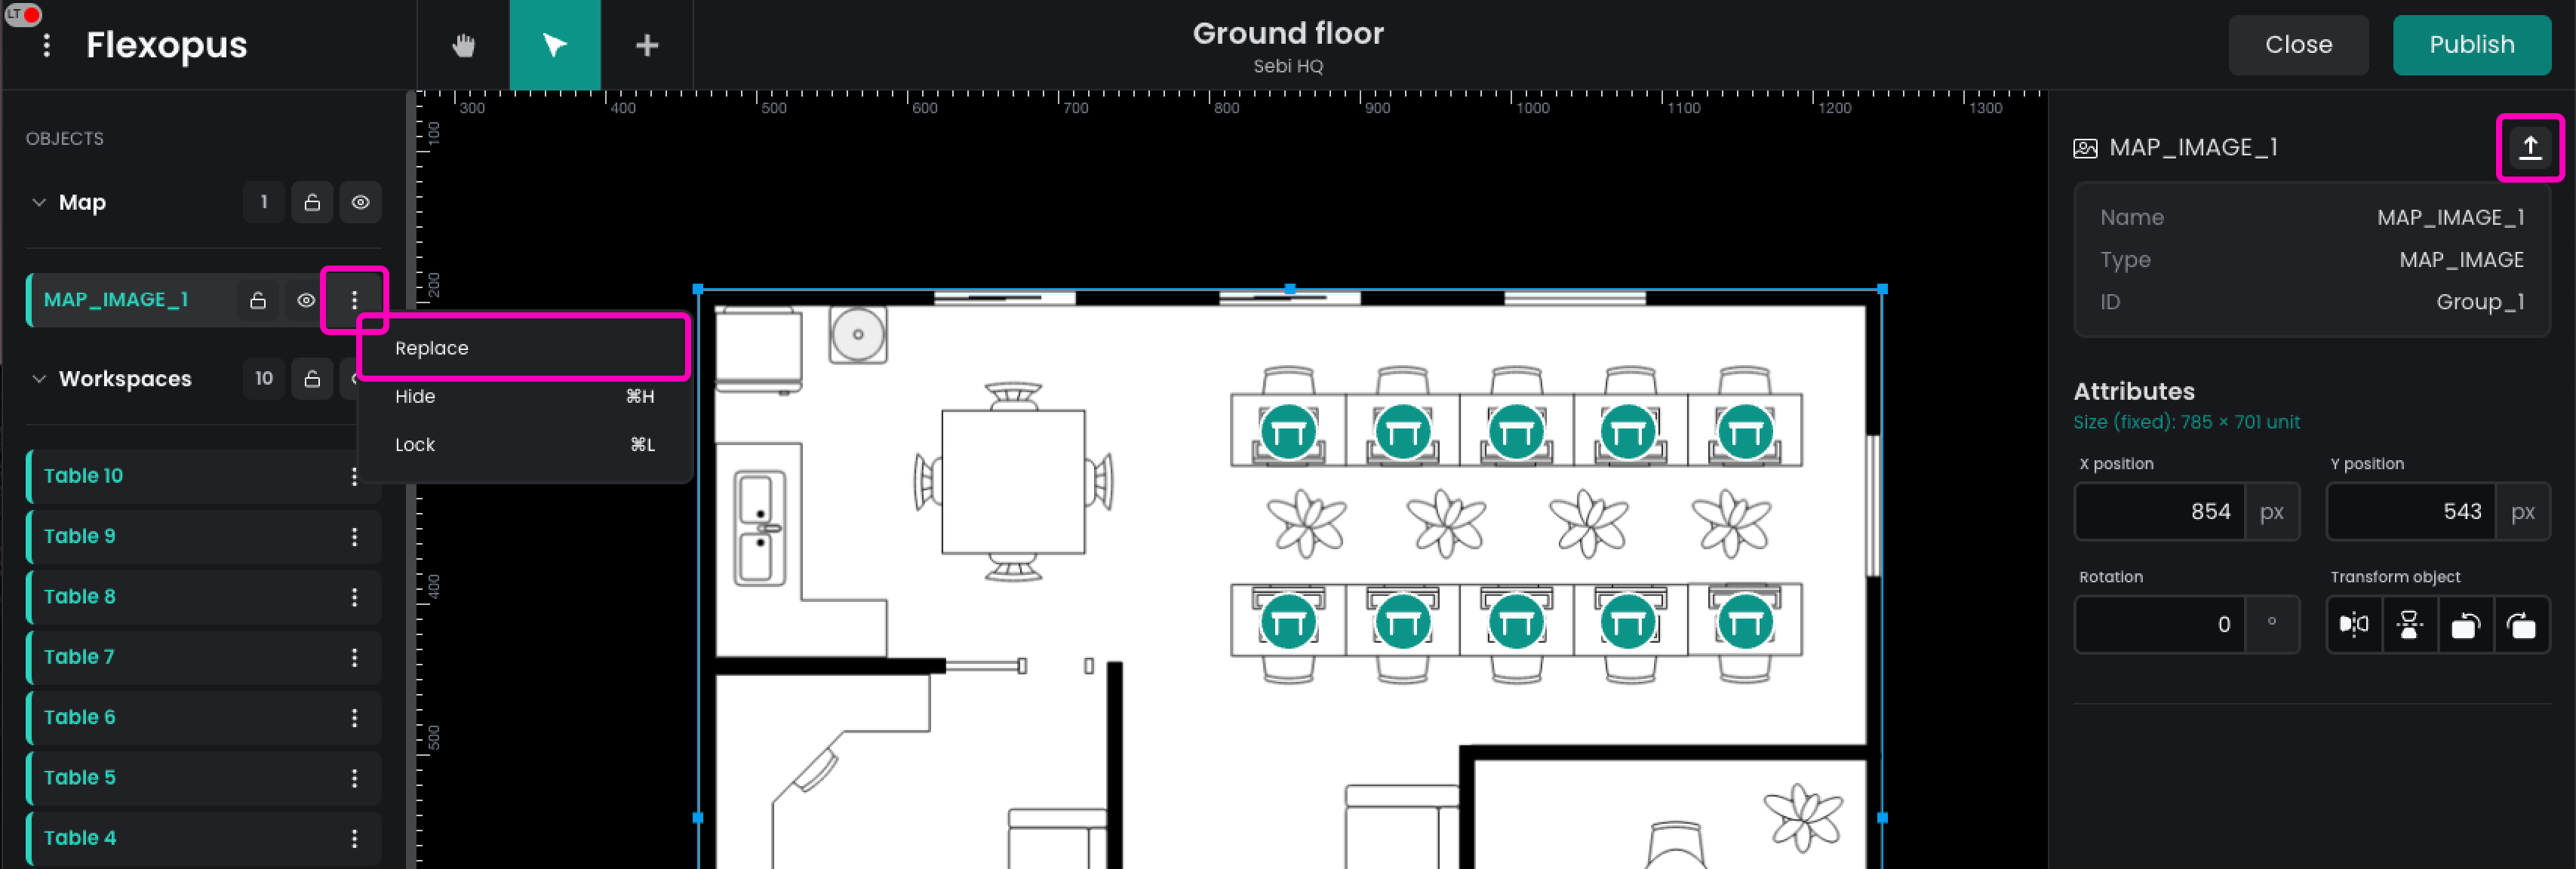
If you wish to replace the background image, select Replace from the left sidebar menu or from the top of the right panel.
Troubleshooting and FAQ
How to upgrade my plan?
Overcome basic floor plan limitations by upgrading to a premium floor plan. Read more about premium plans here, or contact us.
Can't delete a resource
Resources with active bookings cannot be deleted. To delete a resource, you first have to delete all bookings it may have.
I have closed the Floorplanner, are my changes lost?
Unfortunately, yes. Currently, we are not saving any drafts of a plan you are editing. We recommend making small, incremental changes, and saving your work regularly.