Book for Colleagues
Overview
A normal user can reserve one desk or parking spot at a time, based on global settings and user groups. However, in special cases, like a company event or team day, they may need to reserve multiple resources.
Create booking as an admin
As an administrator, you can create reservations for the users with fewer limitations:
- Unlimited time
Users are usually limited to create reservations X day ahead in the future, this limitation does not apply to administrators. - Unlimited resource amount
Users can create only one reservation at a time, as an administrator you can create multiple parallel reservations. - Check In advance
If the check in module is active, users need to check in on the target date. As an administrator, you can check in booking in advance as well.
STEP 1 - Select user & type
As an administrator in Flexopus, navigate to Dashboard > Bookings > New Booking. In the first step, select the user. Then, choose the type of booking you want to create, such as a workstation, parking spot, or meeting room.
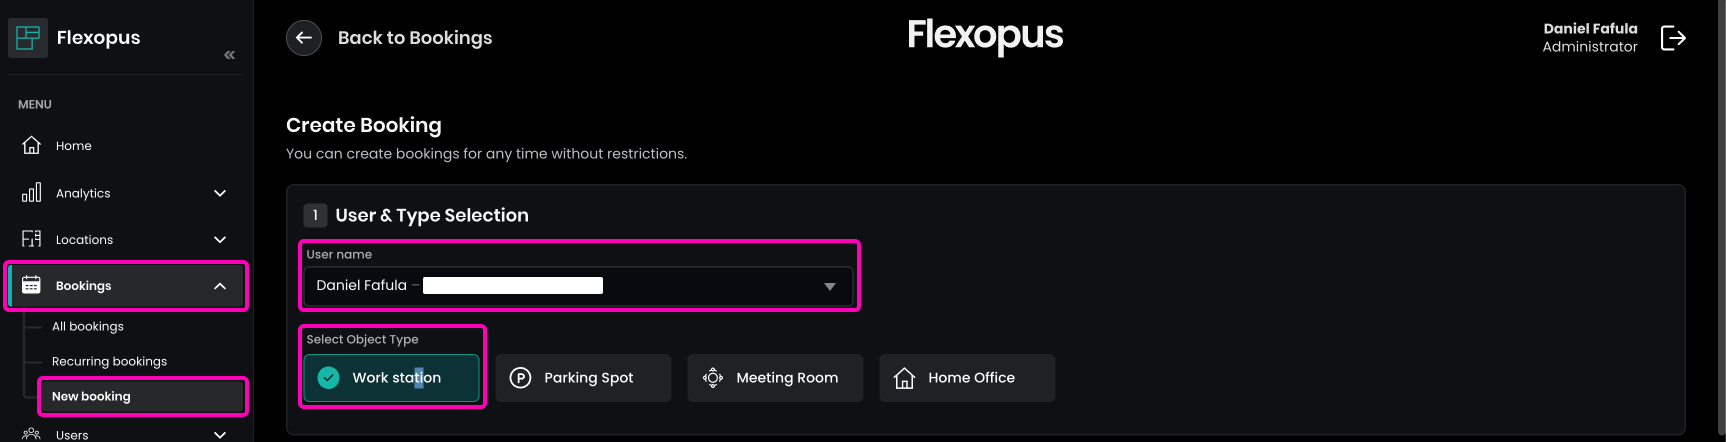
It's possible that your organization does not offer all resource types. In this case, you will have less options for the admin booking.
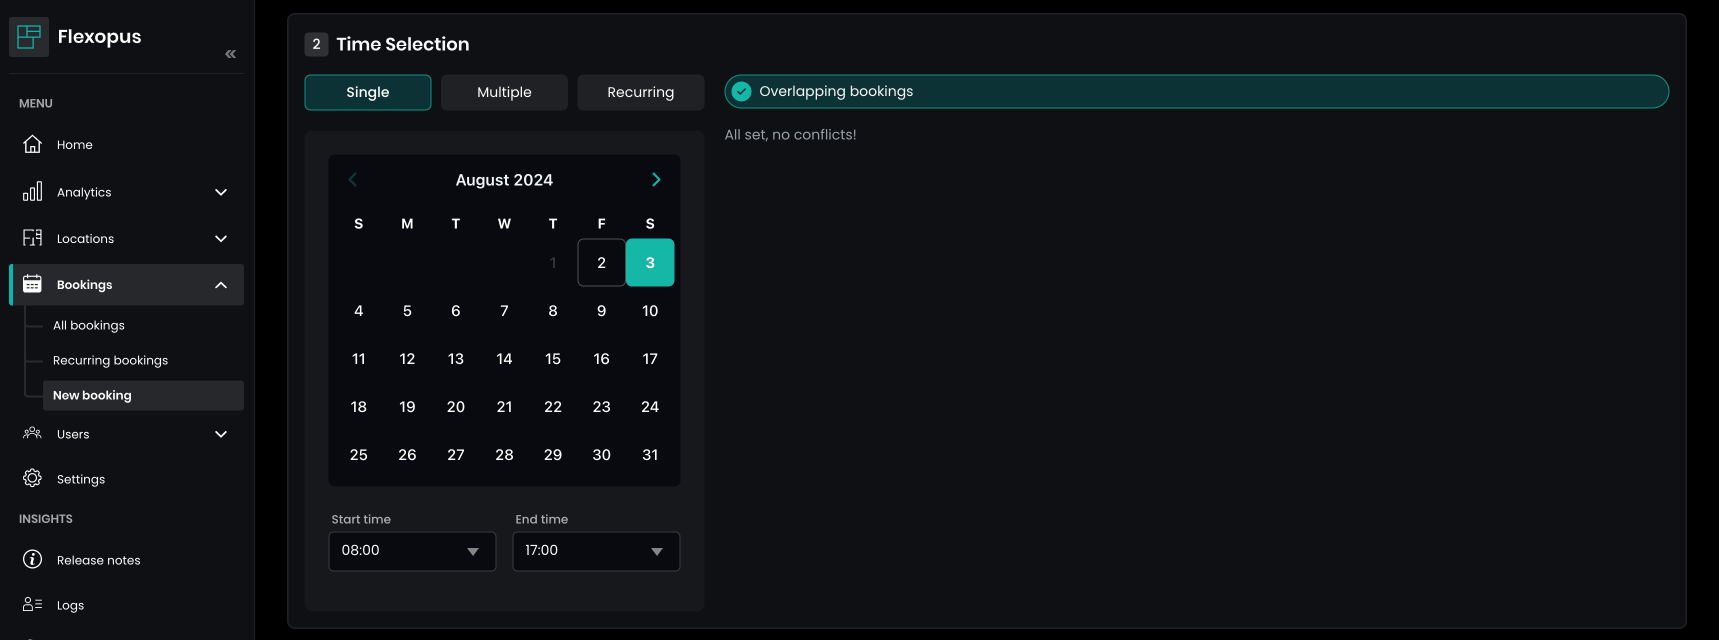
STEP 2 - Select date & time
In the second step, select the date and time for the reservation:
- One day
Book only for the selected date - Multiple days
Create a single booking for each day in the selected time frame. - Recurring reservation
Create a recurring reservation week.
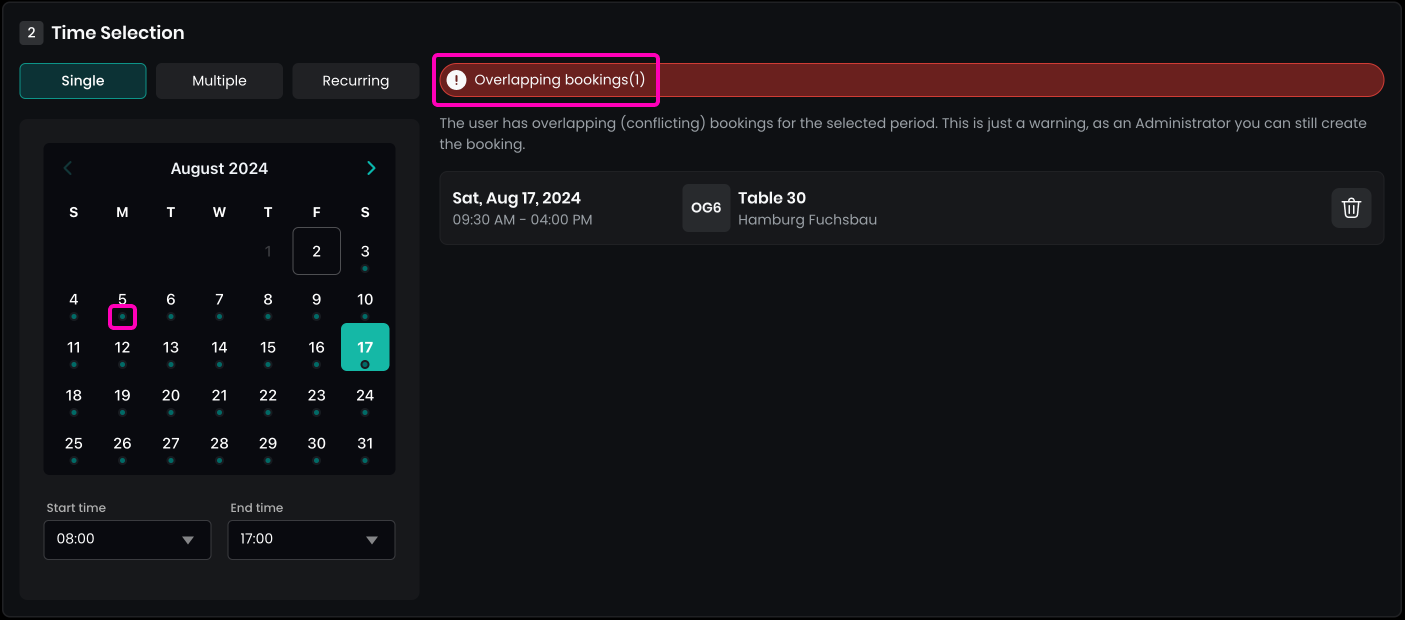
Flexopus will automatically check if the user has any overlapping reservations for the selected dates. As an administrator, it's important to be aware of existing bookings within the selected time frame. However, you have the option to ignore these overlaps and proceed with creating a new booking for the user if needed.
In the calendar, dots show which days the user already has a booking for the selected resource type. Conflicts for the chosen dates appear on the right side. You can delete these bookings directly if needed, or leave them and create new bookings alongside the existing ones.
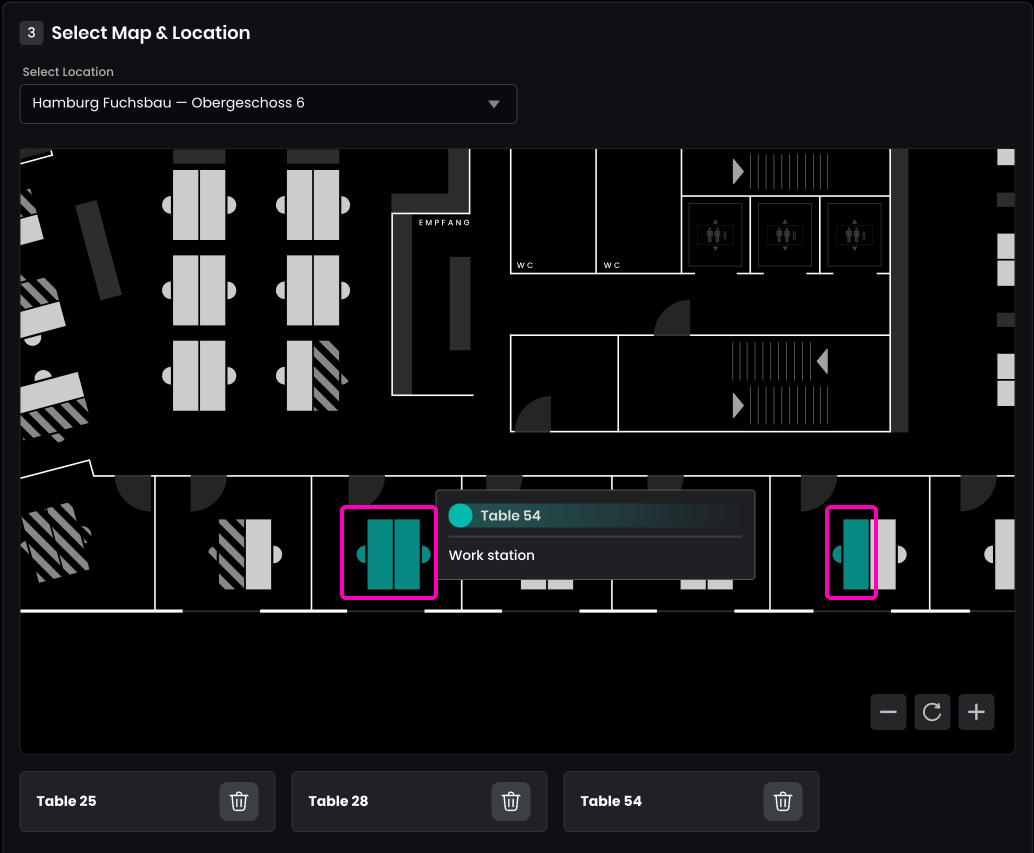
STEP 3 - Select resources
In the last step, select which floor plan you want to book on, and select one or multiple resources.
At the end of the booking flow, you will see a summary and an option to check in the booking in advance, in case the check in module is activated for you.