Buildings
Buildings
In Flexopus, buildings, floors, and resources are organized in a hierarchical structure. This article explains how the building abstraction level functions and provides an overview of the settings available for buildings.
Overview
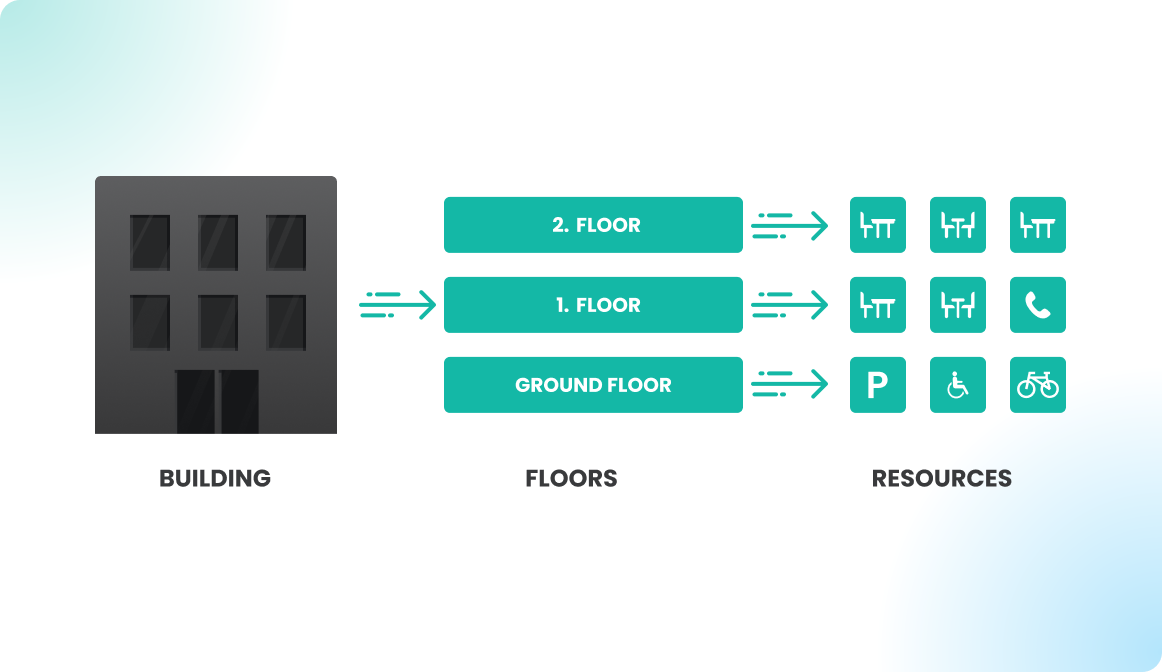
A building in Flexopus contains one or more floors, grouping them into a single entity. A building can represent a physical structure or can include additional corresponding floor plans, such as parking garages. You can also create multiple buildings across different time zones, depending on your needs.
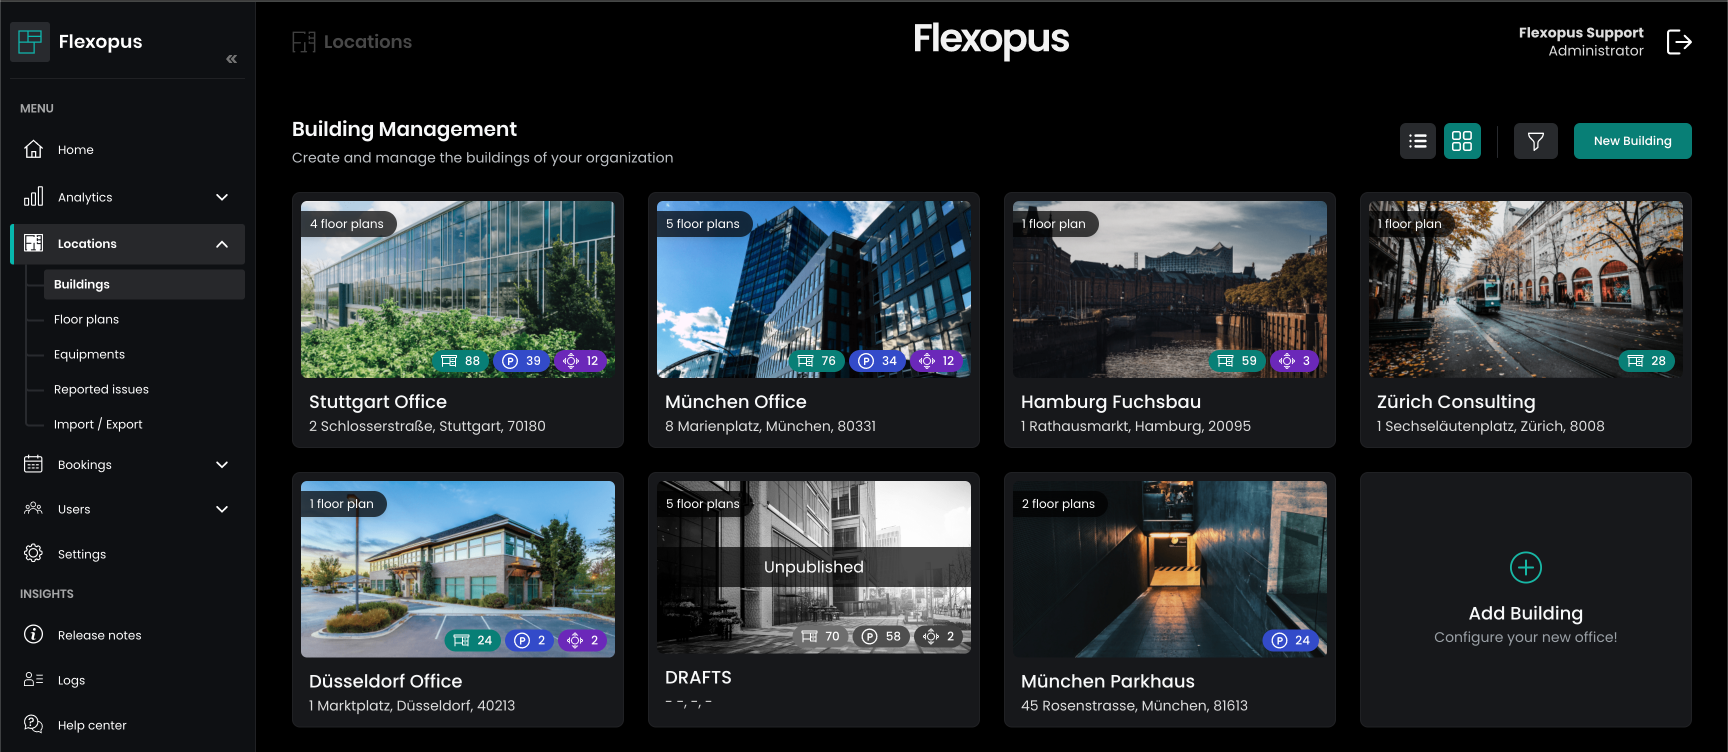
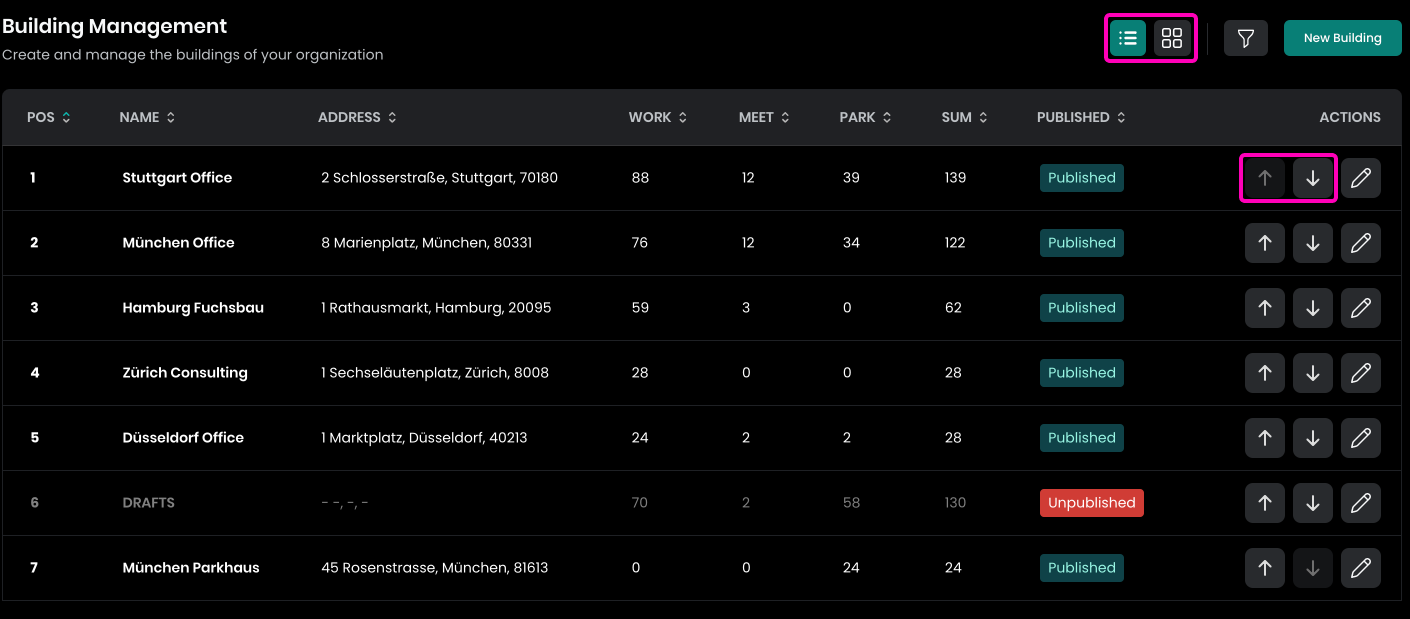
The different buildings can be put in order. This order will be used to display the buildings to the users on the live plan or in the booking process.
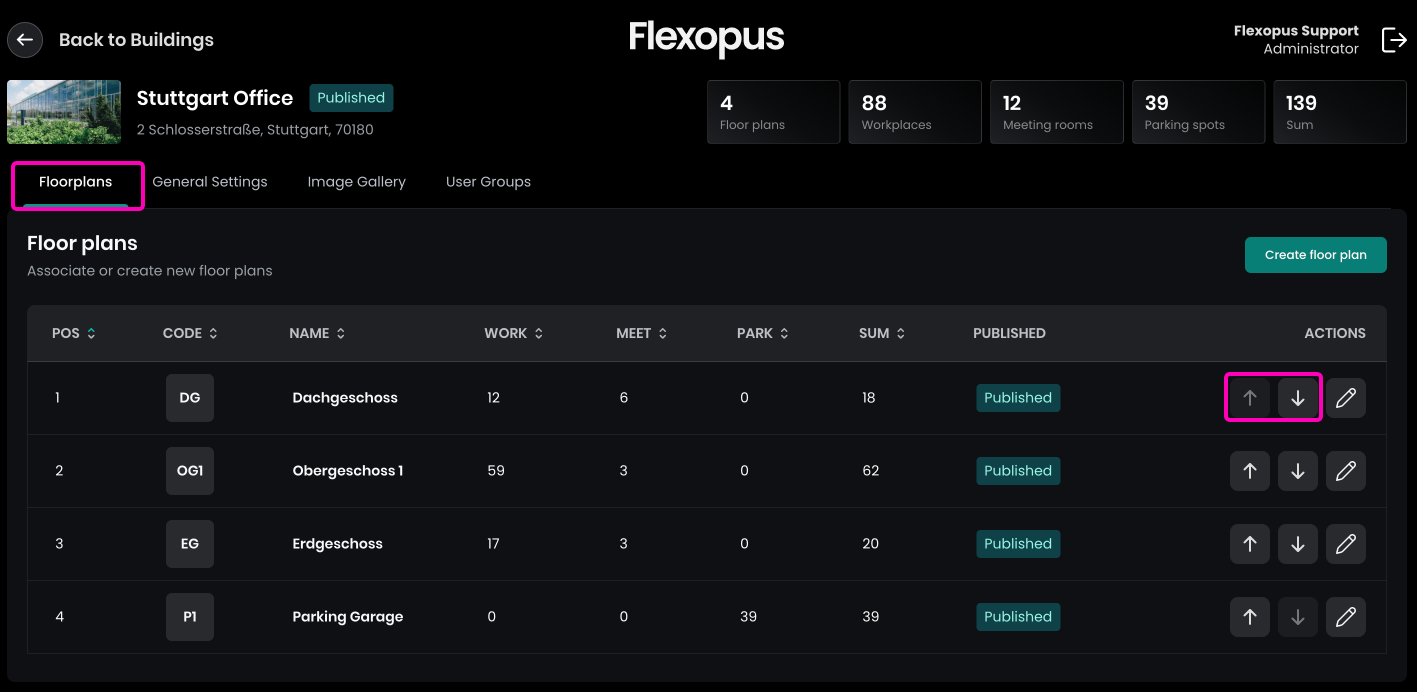
If you open a building, you can see the associated floors in a list. You can also order the floors.
New floors can be added to buildings in Flexopus. Note that each floor within a building shares the same timezone as the building. You can view the building's timezone in the building settings, where you can also edit details such as the name, address, and visibility of the building. Additionally, you can upload an image for the building and restrict access rights by using user groups. The management of user groups is described in this article:

Add building
As an administrator, navigate to Dashboard > Locations > Buildings and click the Add Building button. You'll need to enter the building name, address, and timezone.
After creating the building, you will need to publish it. It is recommended to first create the floors for the building before publishing.
We created a help video with a step-by-step guide on setting up buildings and floors. Watch it here: https://youtu.be/41IBNtecJYY
Delete building
Deleting a building is recommended to be done in two steps:
- Unpublish the building: This hides the building from users. To achieve this, open the building and navigate to the
General Settingstab. Note that you can only unpublish the building if all associated floors are also unpublished. - Delete the building: Once the building is unpublished, you can proceed to delete it. Be aware that deleted buildings cannot be restored.