Resources
Resources
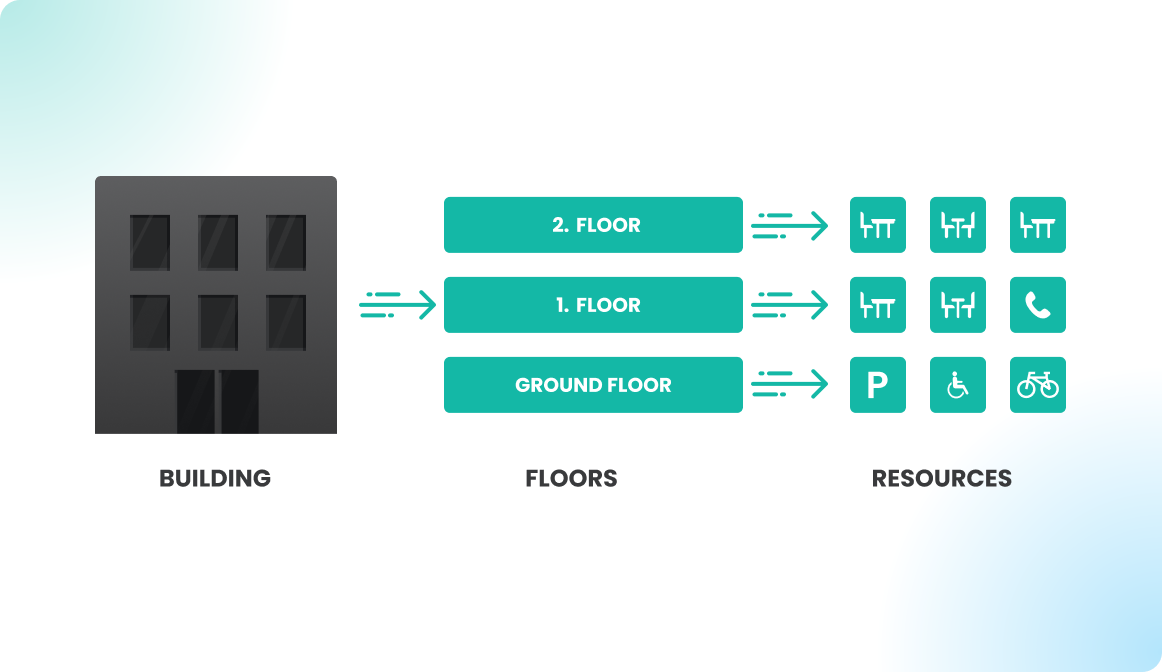
The buildings, floors, and resources are orchestrated in a hierarchical structure in Flexopus. In this article, we explain how the resource abstraction level works and showcase the settings of the resources.
You can also check out our help video explaining how to adjust the properties of resources: https://www.youtube.com/watch?v=7OgEMXxzT1Q
Attributes
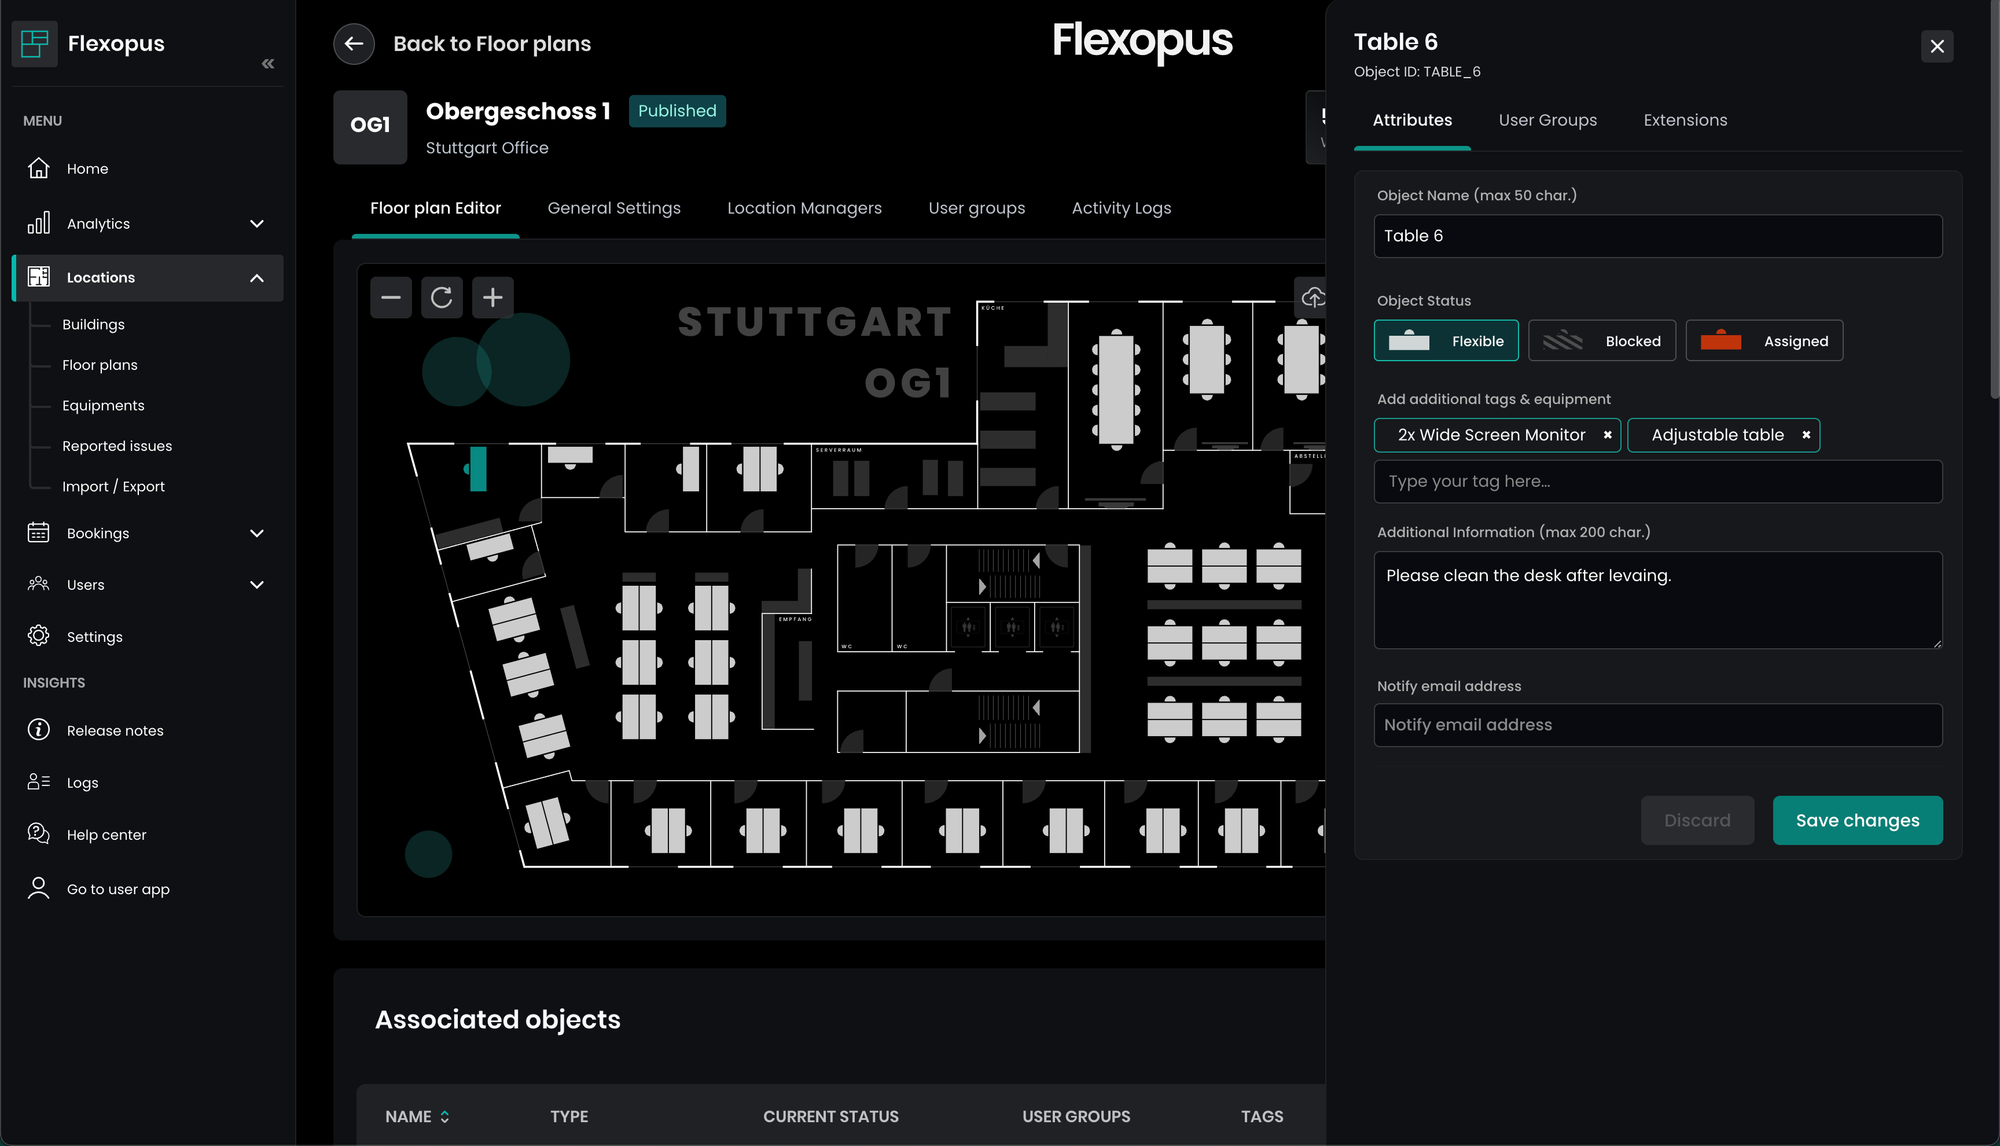
When you click on a resource, the attribute editor will open, allowing you to edit the following attributes:
- Name: The name of the resource.
- Object status: The current status of the resource, which can be:
- Flexible: The resource can be reserved by users with the appropriate access.
- Blocked: The resource cannot be booked by users.
- Assigned: The resource is permanently assigned to a specific user and cannot be booked by others.
- Tags & Equipment: Configure equipment such as a double monitor or adjustable desk. You can define and assign custom tags, and multiple tags can be applied.
- Additional note: Add a custom note for the resource, such as “Clean the desk after leaving.”
- Internal note: Document relevant information such as approval history for fixed assignments, reasons of object blockings, or other objects-specific notes. This note is only visible within the admin area.
- Notify email: Set an email address to receive booking confirmations for this object.
Object status
The most important attribute of a resource is its status, which can be set to flexible, blocked, or assigned:
- Flexible: By default, all resources are flexible. This means the resource can be booked by users who have the appropriate access rights. Flexible resources are considered shared, as they are not associated with any user by default.
- Blocked: A blocked resource cannot be booked by anyone. This status is used for resources that are temporarily or permanently unusable, for reasons such as technical defects or to provide more distance between colleagues.
- Assigned: An assigned resource is permanently allocated to a specific user. The assigned user does not need to make reservations for the resource, and it cannot be booked by others. This is typical for employees with a permanent workstation.
User Groups
In the User Groups tab, you can define which user groups have access to the resource. For more detailed information, refer to this article:

Extensions
In the Extensions tab, you can manage integrations, such as:
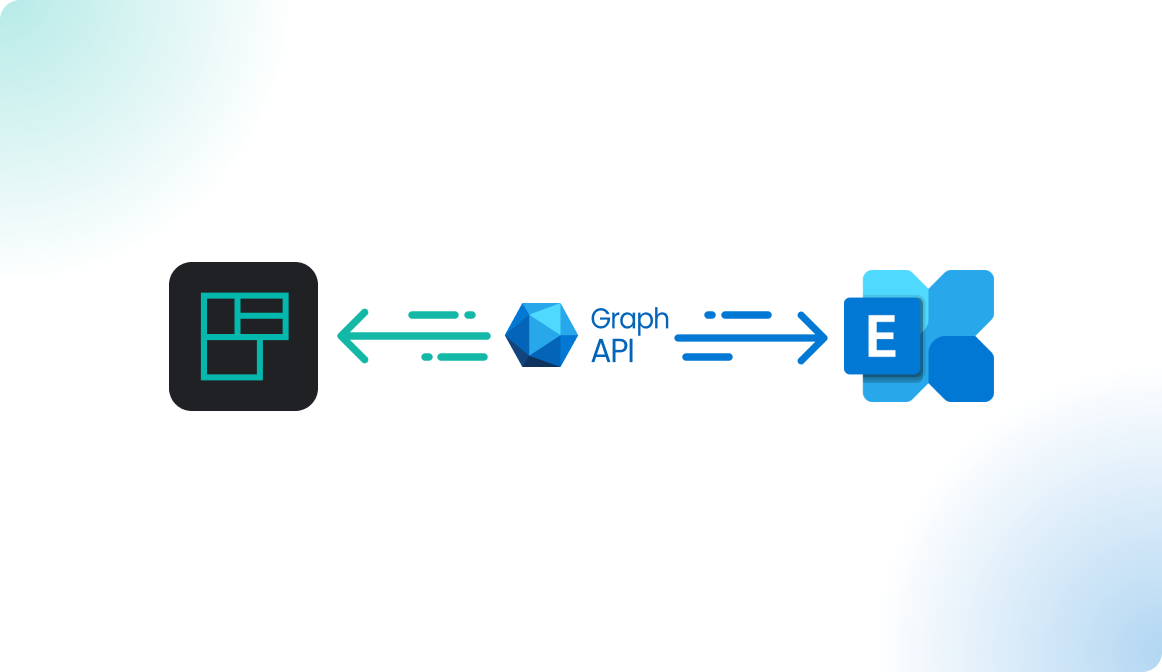
- Microsoft Exchange: Synchronize reservations with a Microsoft Exchange Online resource. We recommend using this integration primarily for meeting rooms.
For more information, read the full article here:
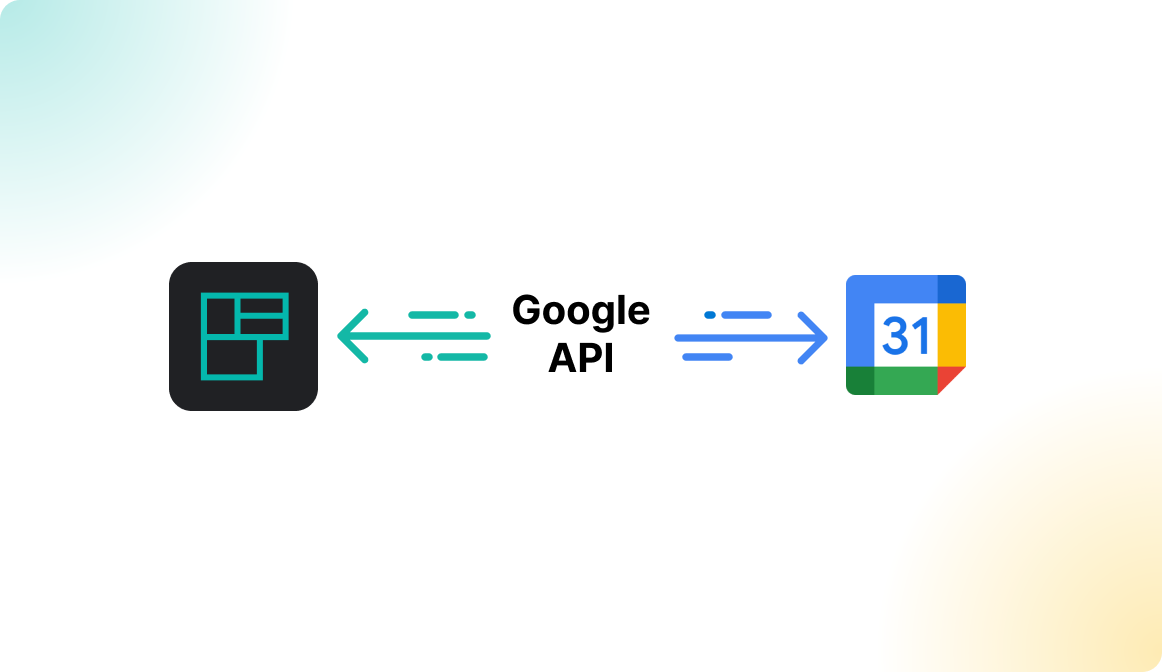
- Google Calendar: Synchronize the reservations with a Google Calendar resource. We only recommend this for meeting rooms! Read more here:
- Digital Signage: Connect a display to the resource to show its current and upcoming reservations directly on the screen.
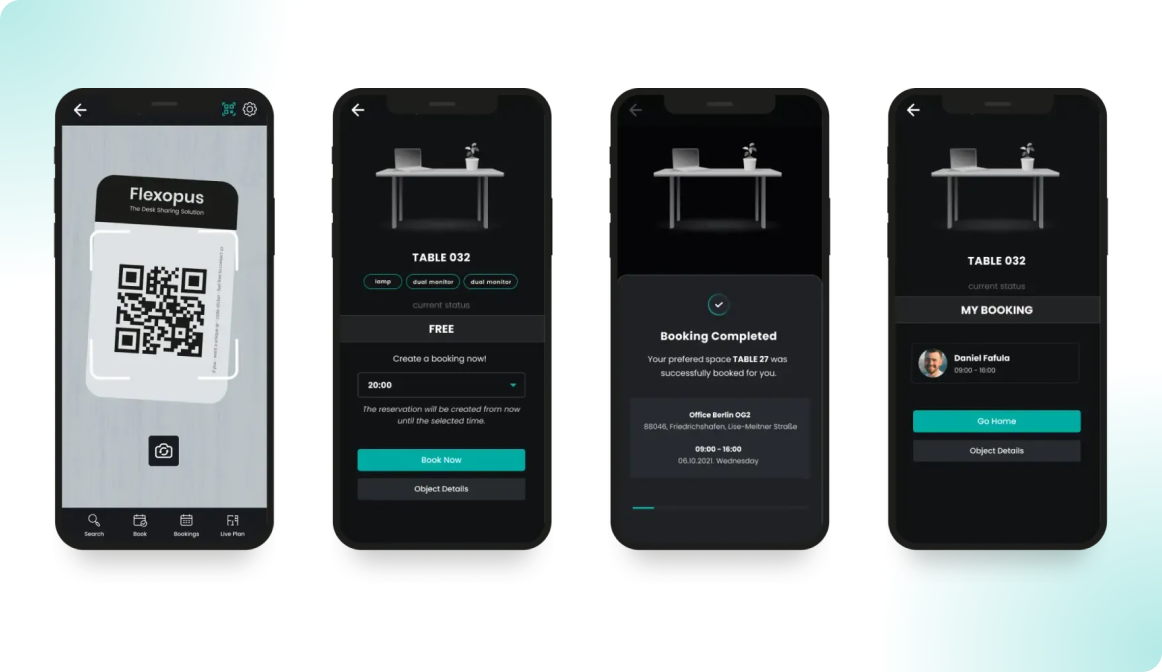
- QR Codes: Learn more about the QR code module in the corresponding article for detailed information on how to use QR codes with resources.
For further details, refer to the related articles.
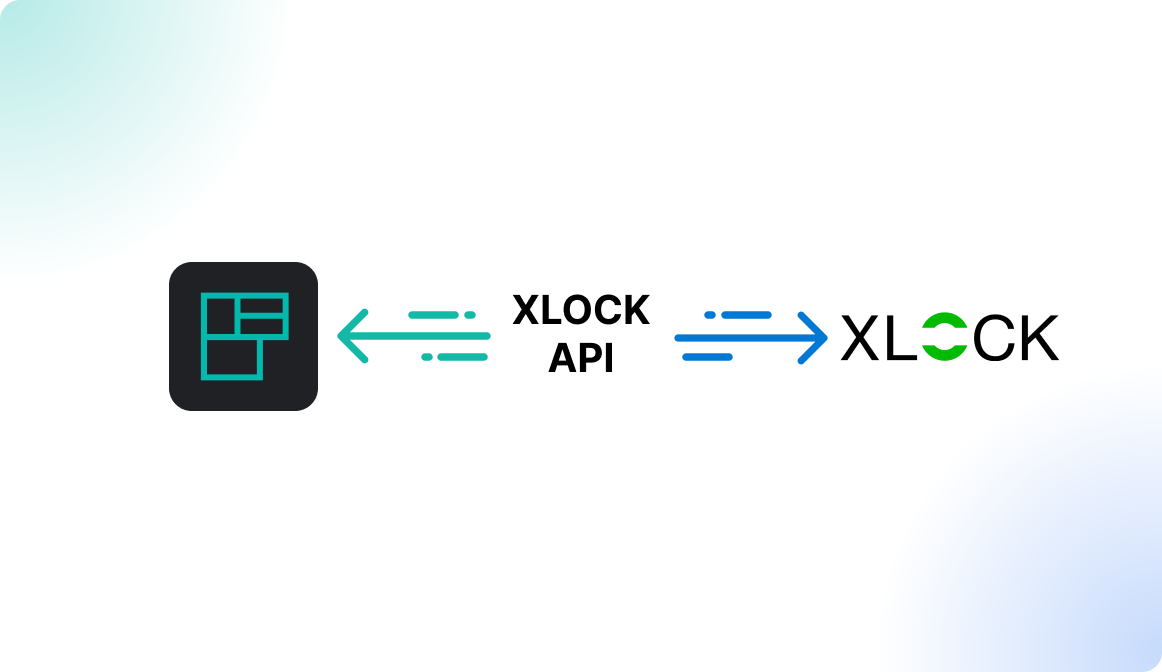
- Smart Locks: This feature is currently in BETA testing. The concept is to associate a smart lock with a resource, allowing users to unlock it if they have a reservation for that resource.
For more details, read the full article here:
- Public Calendar Link: Generate a publicly accessible calendar link for the resource, allowing others to view the reservation schedule without needing special access.
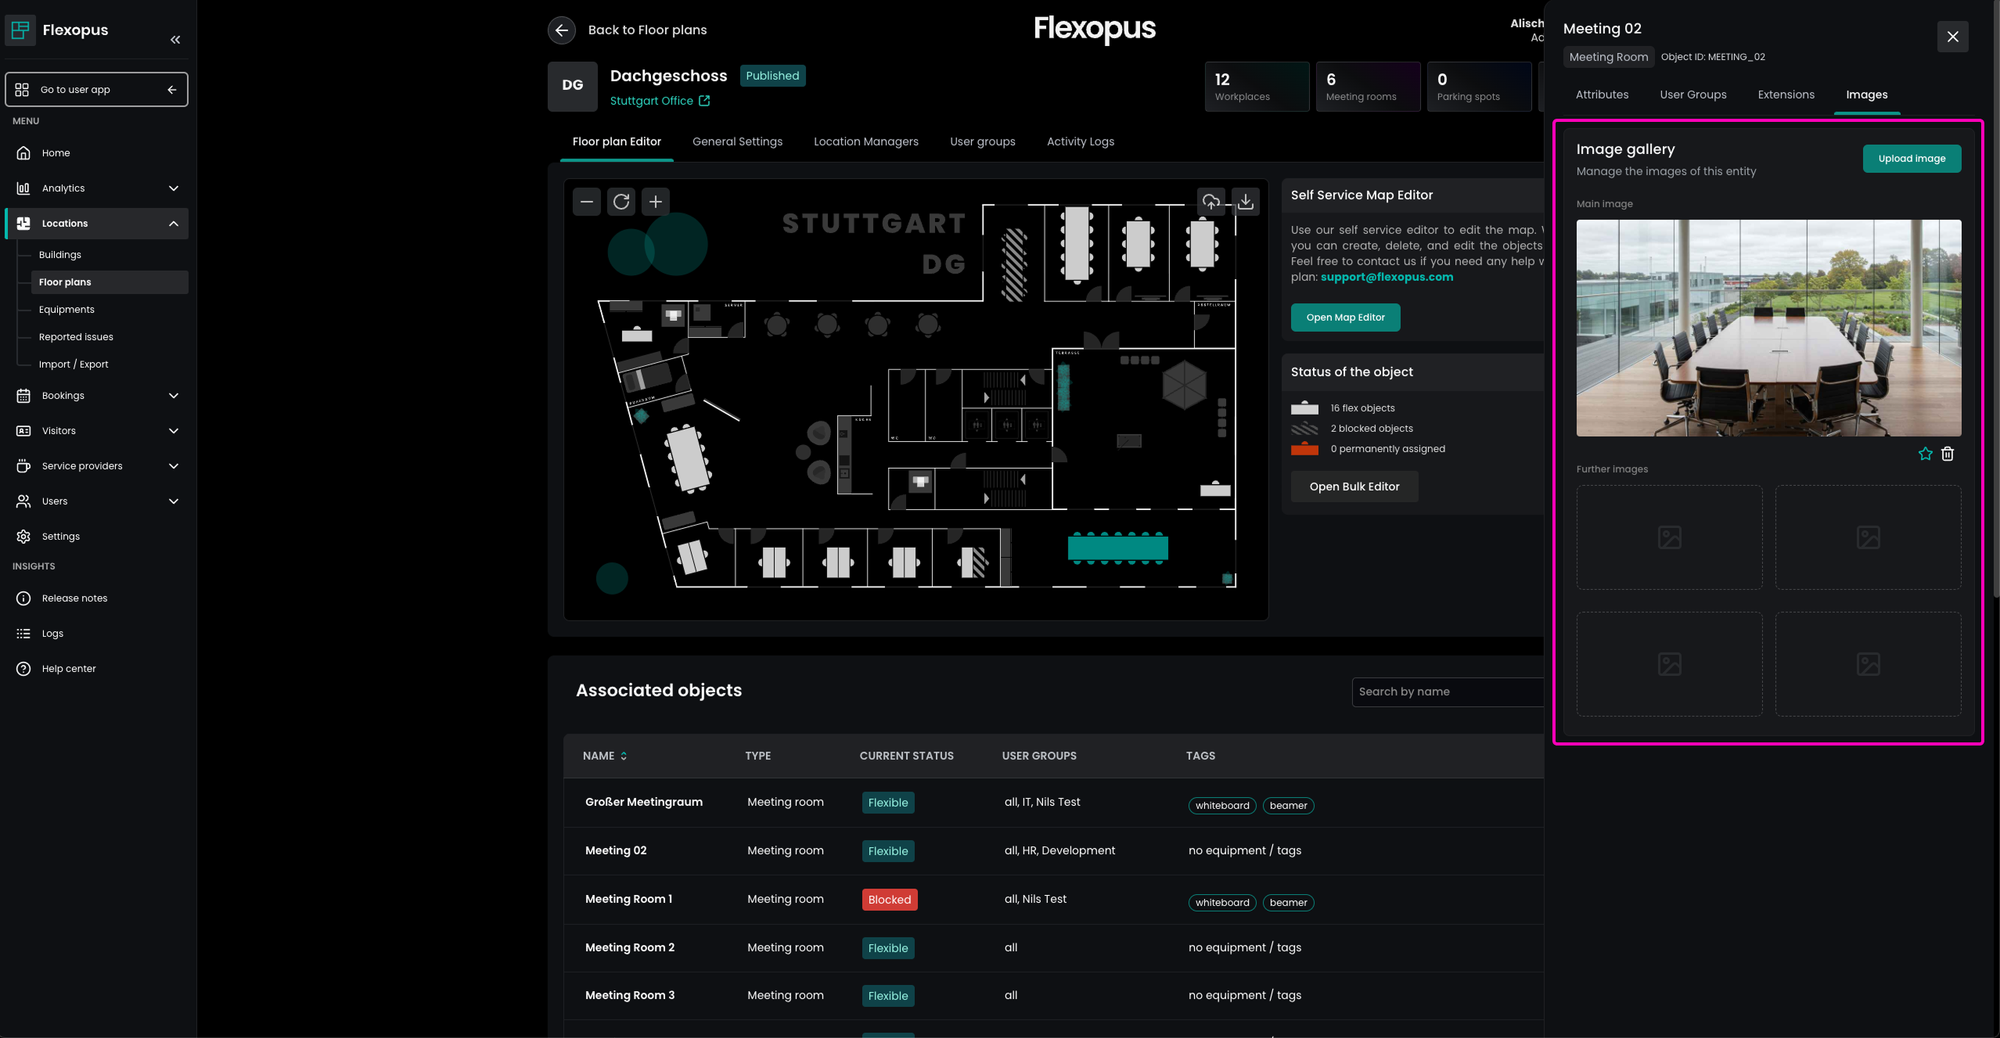
Images
In the Images tab, you can assign images to the object. These images will be displayed during the booking process and in the object’s detail view, helping users to better identify and choose objects.
Add resource
Adding a resource to a floor can be done by using the integrated Map Builder at any time by a Flexopus administrator. Learn how the Map Builder works:
Alternatively, you can also contact our support team to make the required changes for you at support@flexopus.com. You are welcome to reach out!
Delete resource
To delete a resource using the inbuilt Map Builder:
- Open the Map Builder and click on the resource you wish to delete.
- Confirm the deletion.
Note: You can only delete a resource if it has no active or future reservations. To delete the reservations:
- Navigate to the Floor Plan Editor tab.
- Scroll down to the reservations table.
- Click the Delete Bookings button to remove the associated reservations.
Once the reservations are deleted, you can proceed with deleting the resource.
Bulk Editing
Often, it's necessary to apply the same attributes to multiple resources, such as workstations in a hybrid work environment, where the setup is typically consistent. Editing resources one by one can be time-consuming. To streamline this process, you can use the Bulk Editor found in the Floor Settings to apply changes to multiple resources at once.
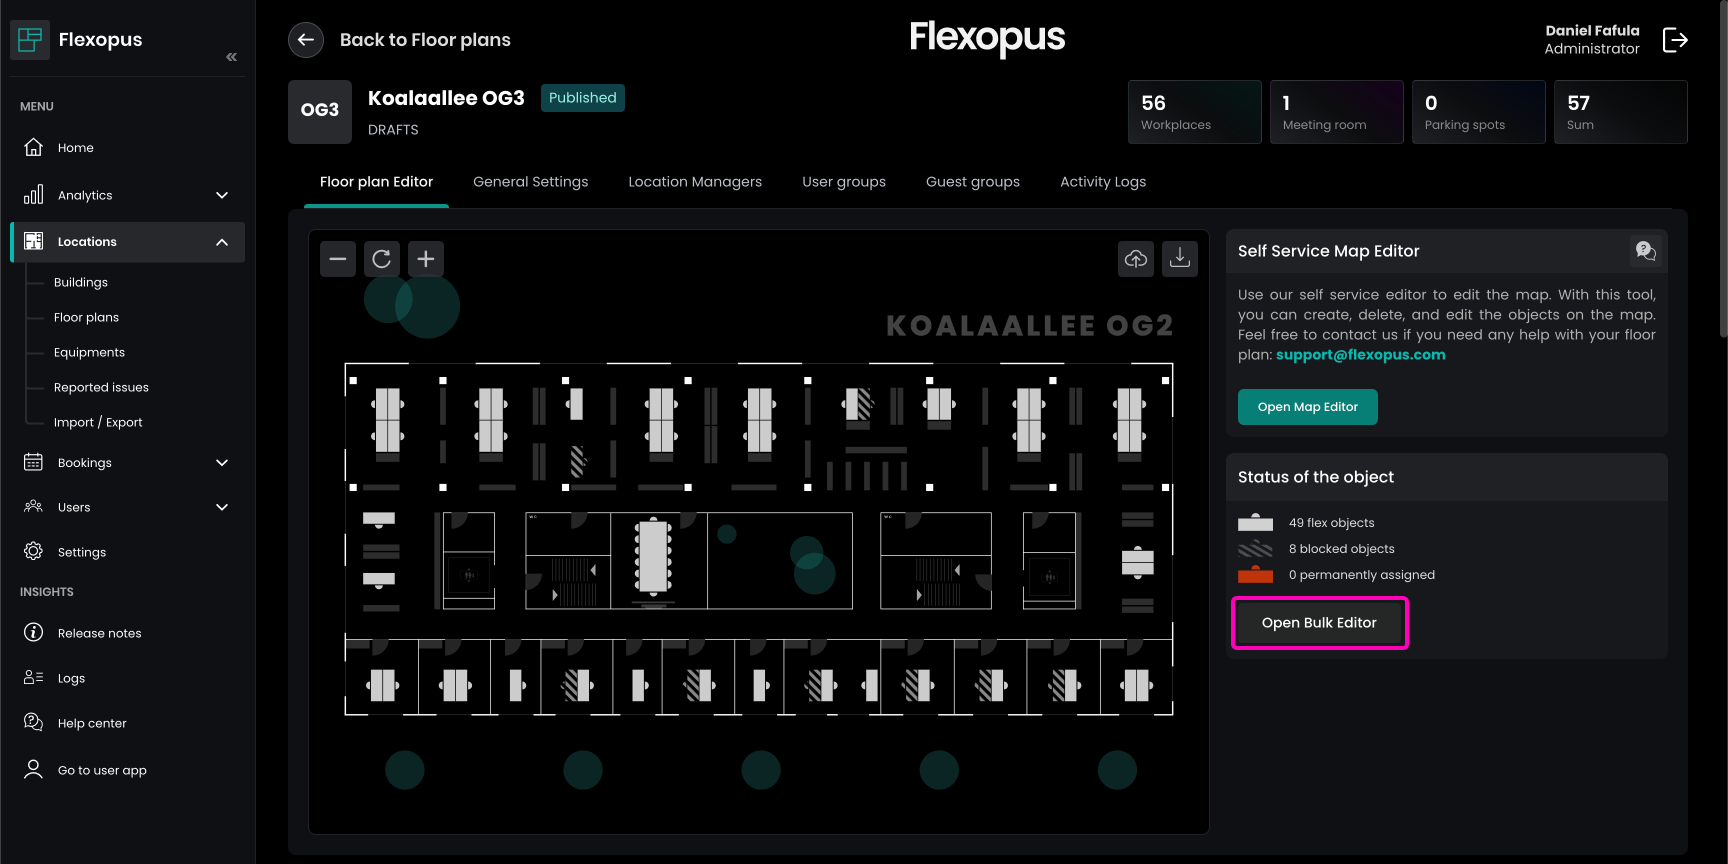
Click the Bulk Editor button to begin. Manually select multiple resources on the floor plan by clicking on them. When a resource is clicked, it will be added to the selection and highlighted. If you click on it again, it will be deselected. This allows you to efficiently manage and edit multiple resources at once.
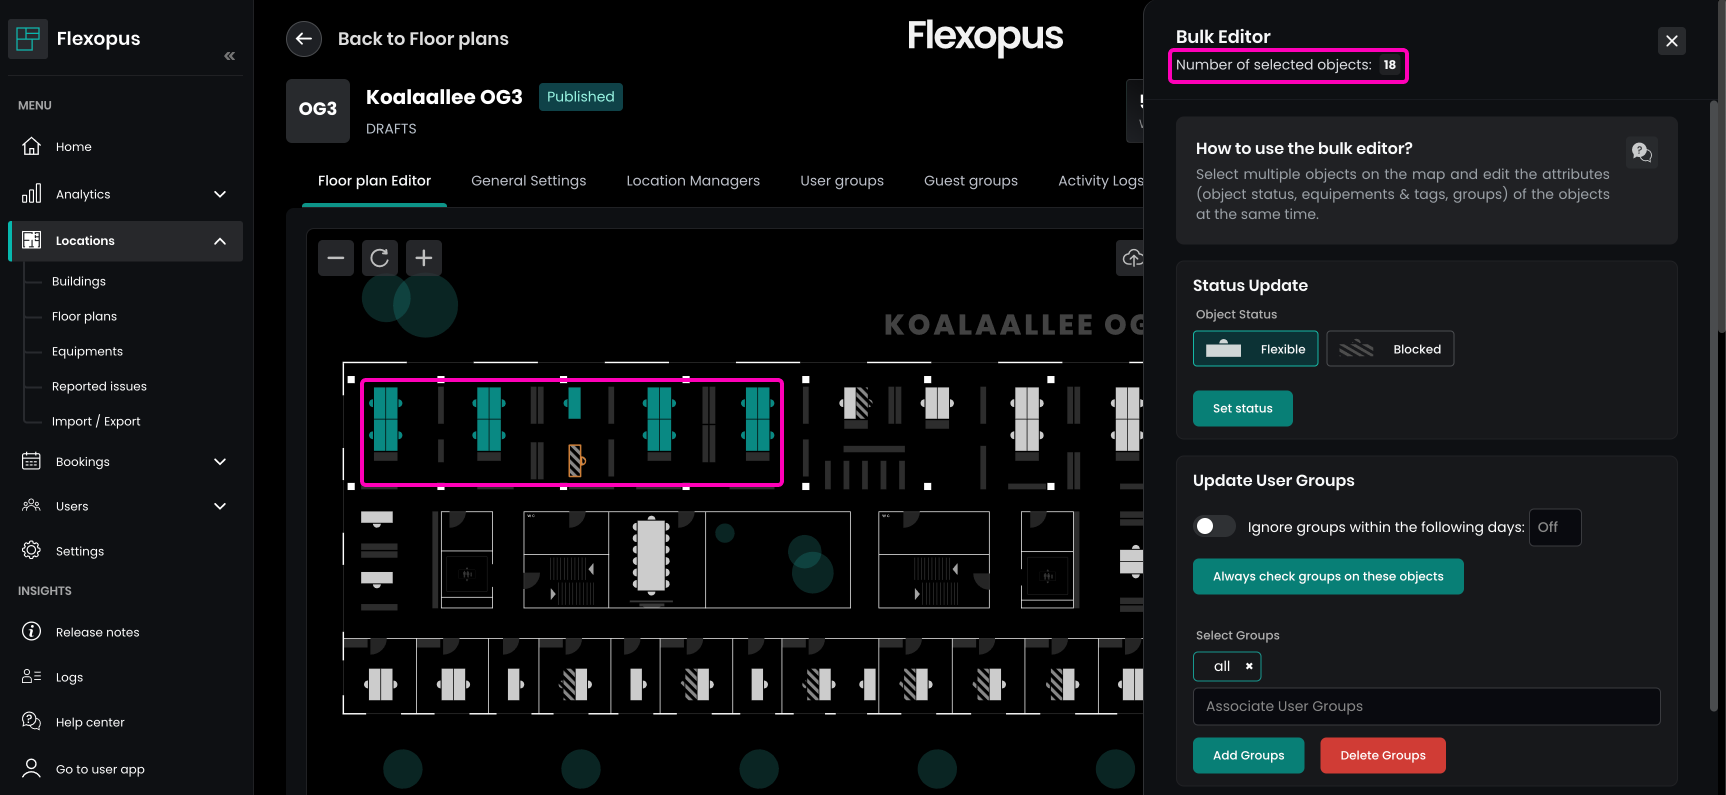
After selecting the resources, you can perform the following operations in the Bulk Editor:
- Object Status: Change the status to flexible or blocked.
- User Groups: Add or remove user groups.
- Guest Groups: Add or remove guest groups.
- Tags & Equipment: Add or remove tags and equipment.
- Notify Email: Set an email address to receive notifications for the selected resources.
For other properties, you will need to edit them manually, or you can try using the Import/Export functionality to make bulk changes.
Import / Export
As an alternative to bulk editing within Flexopus, you can export resources along with their associated attributes to a CSV or XLS, edit them externally, and then import the changes back into Flexopus.
To do this:
- Navigate to Dashboard > Locations > Import / Export as an administrator.
- Download your current objects for editing.
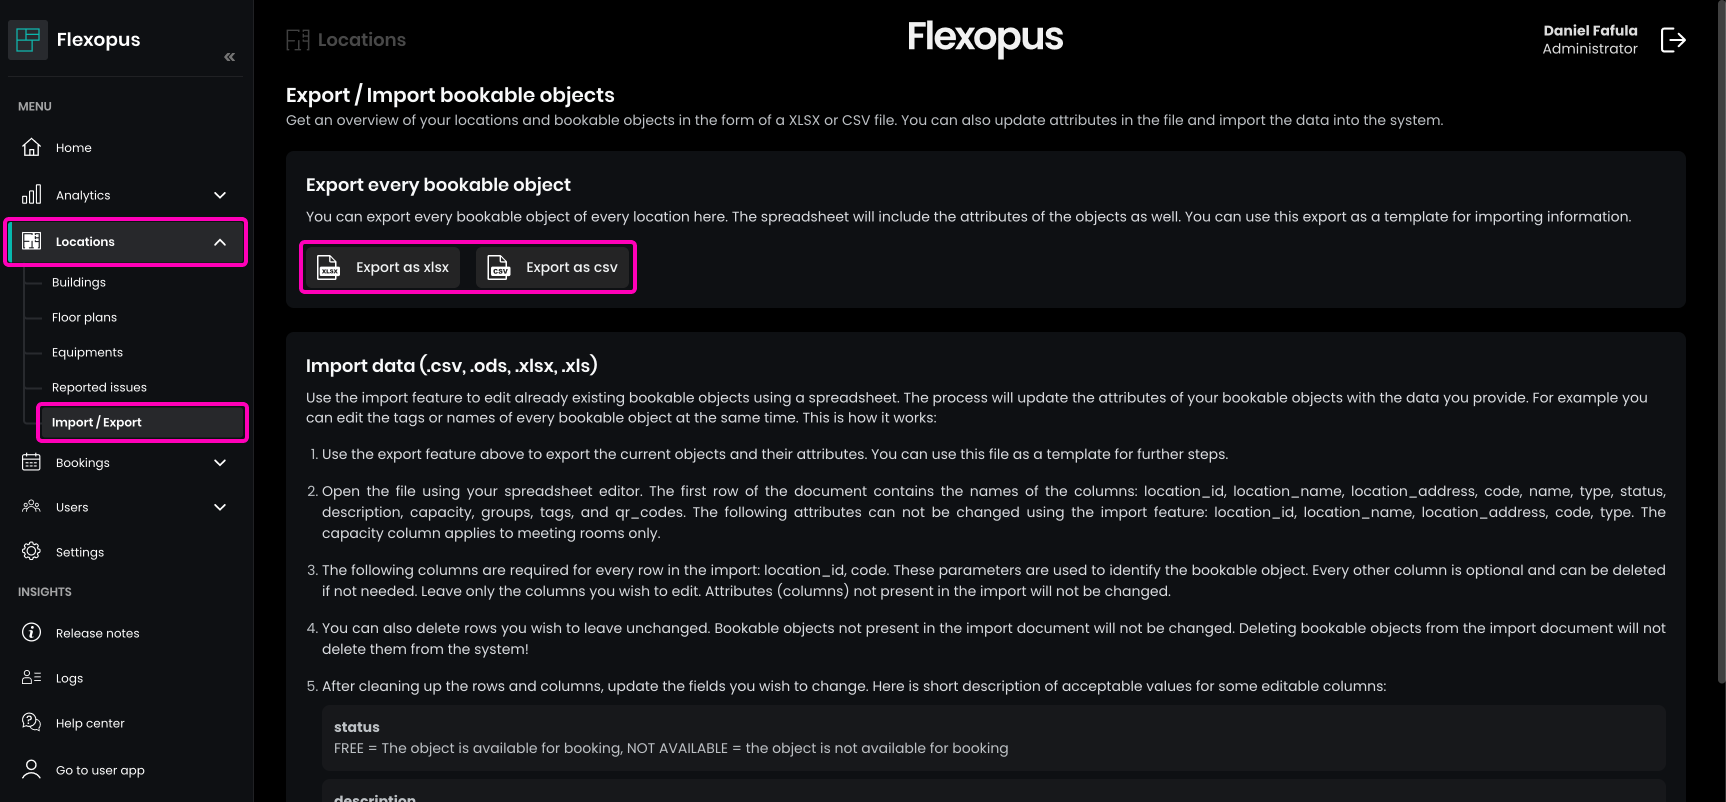
- Once you have exported all the resources, edit the list according to the instructions provided on the Import/Export page in Flexopus. Be sure to carefully read the instructions.
- Once you've made your changes in the spreadsheet, you can import the updated file back into Flexopus to apply the changes.
Important Note: Any changes made in the spreadsheet will overwrite the corresponding attributes in Flexopus. Ensure that you only import changes for the resources and attributes that you genuinely want to modify, as the import process will replace the existing data.
Tags & Equipment
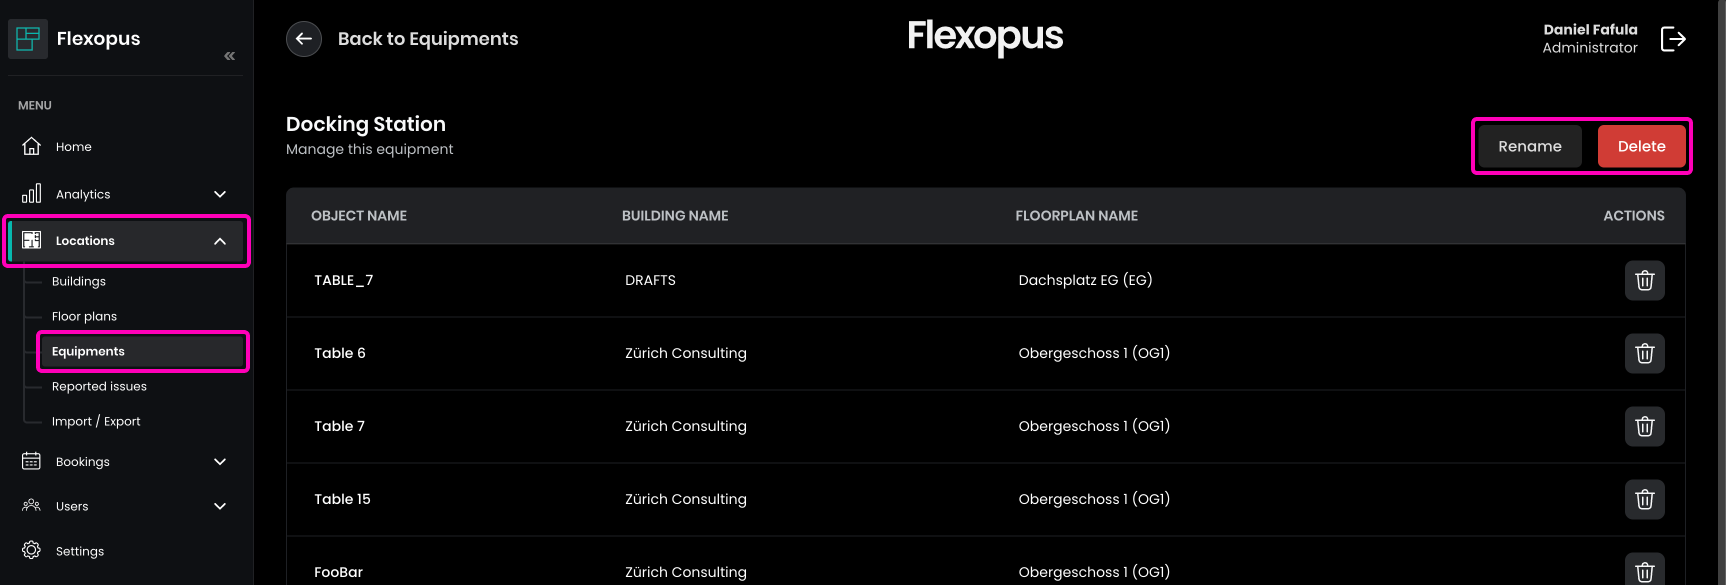
Assigning equipment and tags helps users find the best resource for their specific needs. Users can search for features such as a double monitor, 4K monitor, ultrawide monitor, silent area, height-adjustable desk, video editing PC, special hardware, or docking station. You can create any equipment name and assign it to a resource. It's recommended to use short, clear names for the equipment.
Over time, it can be easy to lose track of which equipment and tags are connected to your resources. For a better overview, navigate to Dashboard > Locations > Equipments. There, you can see all the equipment and tags created in the system. By opening equipment, you can view which resources are currently associated with it, and you can also rename already associated equipment if needed.
Use Cases
This part is still WIP...
In this section, we answer some commonly asked questions, that may help you to configure Flexopus in the right way..