QR Codes
Introduction
You can connect QR code stickers to Flexopus resources, such as workstations, meeting rooms, and parking spots, allowing users to access these resources by scanning the assigned QR codes. Each QR code contains a unique ID linked to a specific resource. After scanning the QR code, users can handle the following use cases:
- Check-in for their reservation.
- View resource details such as availability or assigned equipment.
- Make a booking for the resource if it's available.
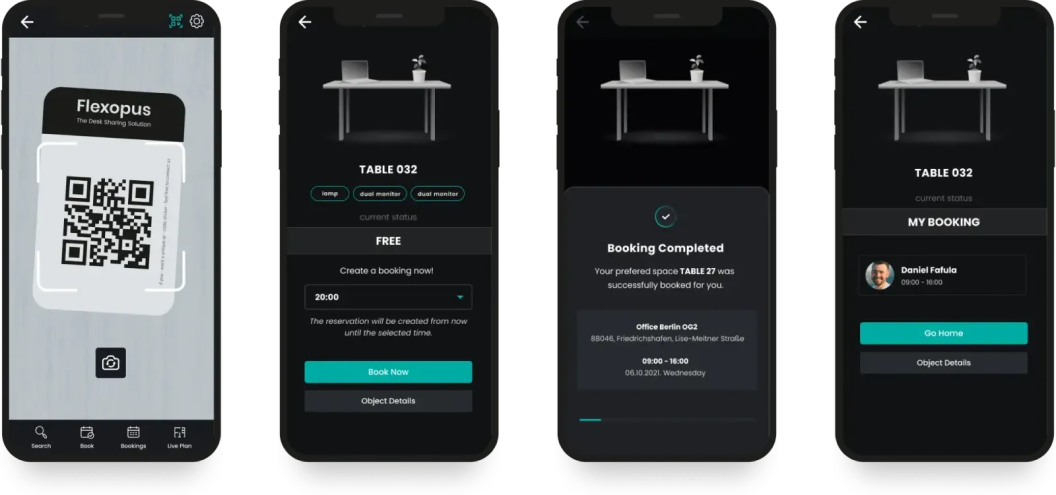
USE CASE 1 - Ad-Hoc reservation onsite
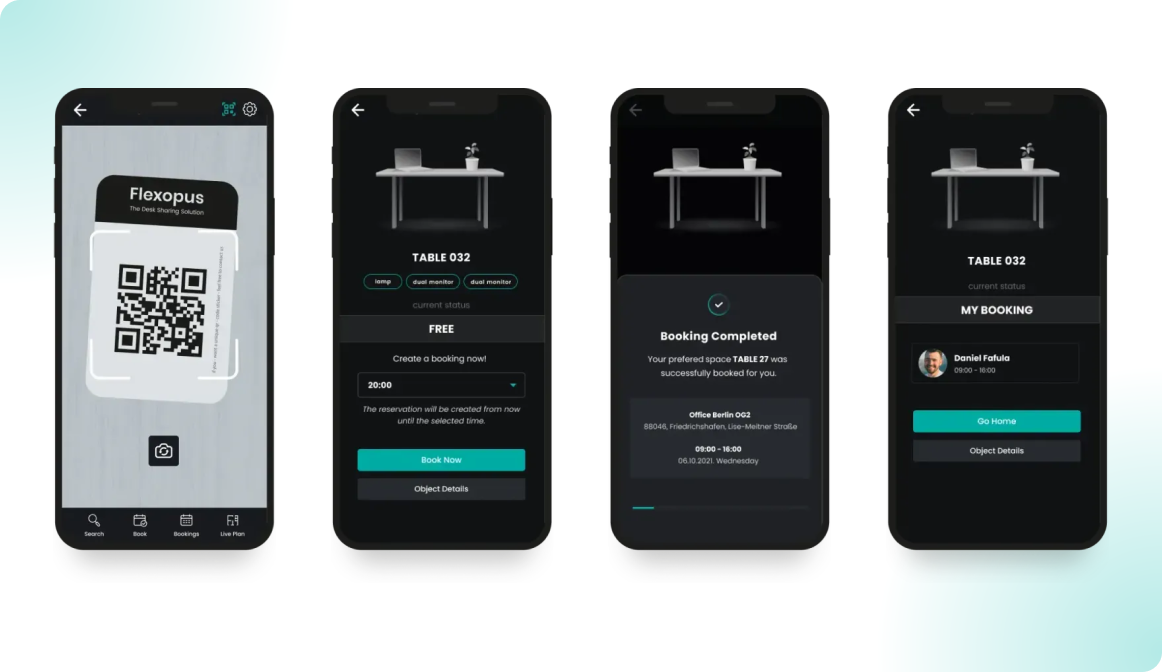
Users often forget to book a workstation in advance and only realize it once they arrive at the office, especially between 08:00–09:00 in the morning. At that time, it's easy to see which desks are likely still available. In this situation, the user can simply walk to the desk, scan the QR code, and select how long they plan to use the desk that day.
Since many details are already clear (e.g., location), this becomes a quick two-step process:
- Scan the QR code on the desk.
- Select the duration of the reservation.
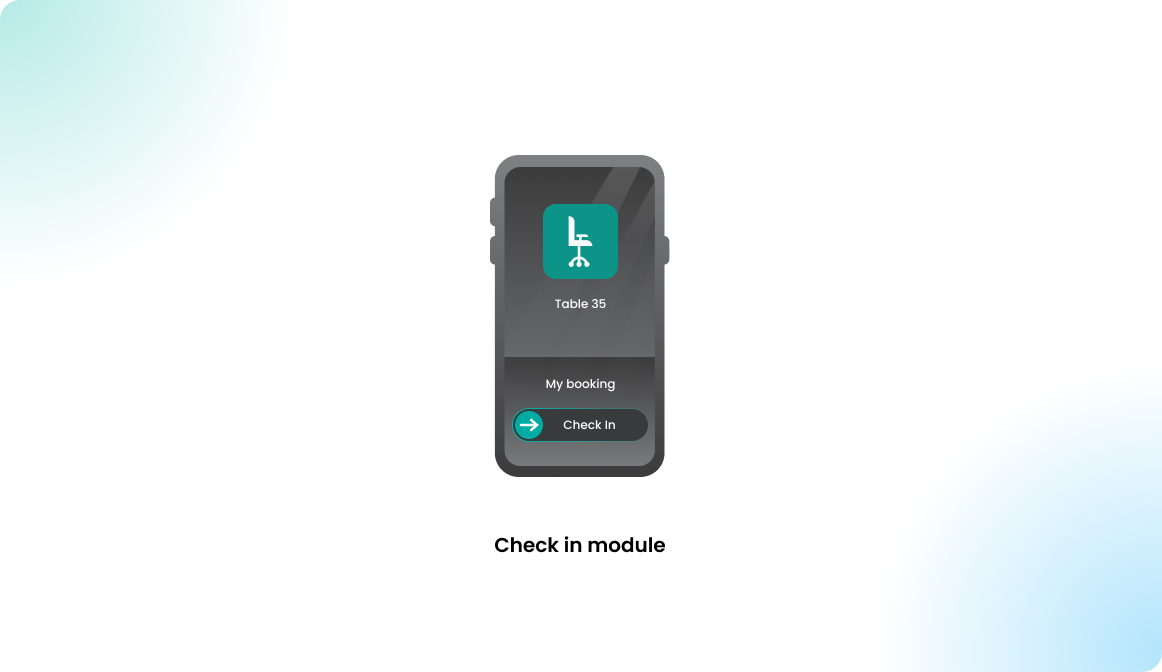
USE CASE 2 - Check-In booking
If the user has already made a reservation and only needs to confirm it, they can scan the QR code for direct access to the check-in option. This makes check-in more convenient, but users can also check in by opening the app and visiting their booking for that resource.
For more details, you can explore the check-in module.
USE CASE 3 - Remind users
The biggest benefit of the QR code module goes beyond its software features—it serves as a visual reminder for colleagues to use the application. The QR code stickers on resources act like advertisements, encouraging users to create bookings, even if they initially forgot. By constantly seeing the stickers, users are prompted to make accurate reservations, improving booking accuracy.
A key metric for a successful rollout of a resource booking app like Flexopus is the accuracy of utilization statistics, which are calculated based on these bookings. The QR codes help enhance this accuracy.

We can expect that some users will ignore or forget to use Flexopus. Typically, around 80% of real utilization can be tracked through bookings in the system, while 20% occurs without a booking. The goal is to increase that 80% as close to 100% as possible, though reaching 100% is unlikely. A more realistic target is 95%.
Using QR codes is a simple and cost-effective way to help achieve this goal by reminding users to create bookings, improving the accuracy of utilization tracking. Therefore, we recommend using QR codes.
Configuration manual
STEP 1 - Get the QR codes
To get the QR codes for your resources, follow these steps:
- Request the QR codes by emailing the Flexopus support team.
- Include the following information in your email:
- URL of your Flexopus application.
- Number of QR codes you wish to receive (we typically send a few extra).
- Your name.
- Postal address.
Once we receive your request, we will prepare and send the QR codes to you by post. The QR codes are free of charge for Flexopus customers and are designed to be unique and cleaning resistant, ensuring they are durable and high quality.
STEP 2 - Stick QR codes
Once you receive the QR codes, place them on the resources you want to connect them with, usually workstations. We recommend placing the QR codes on the right or left corner of the desk. It's best to first place the QR codes on all desks before moving on to the next step of assigning them in Flexopus.
STEP 3 - Connect QR codes
To assign QR codes to resources in Flexopus, follow these steps:
- Install the Flexopus app from the Play Store or App Store on your mobile phone.
- Log in to Flexopus as an administrator on the normal user side.
- Go to one of the workstations with a QR code.
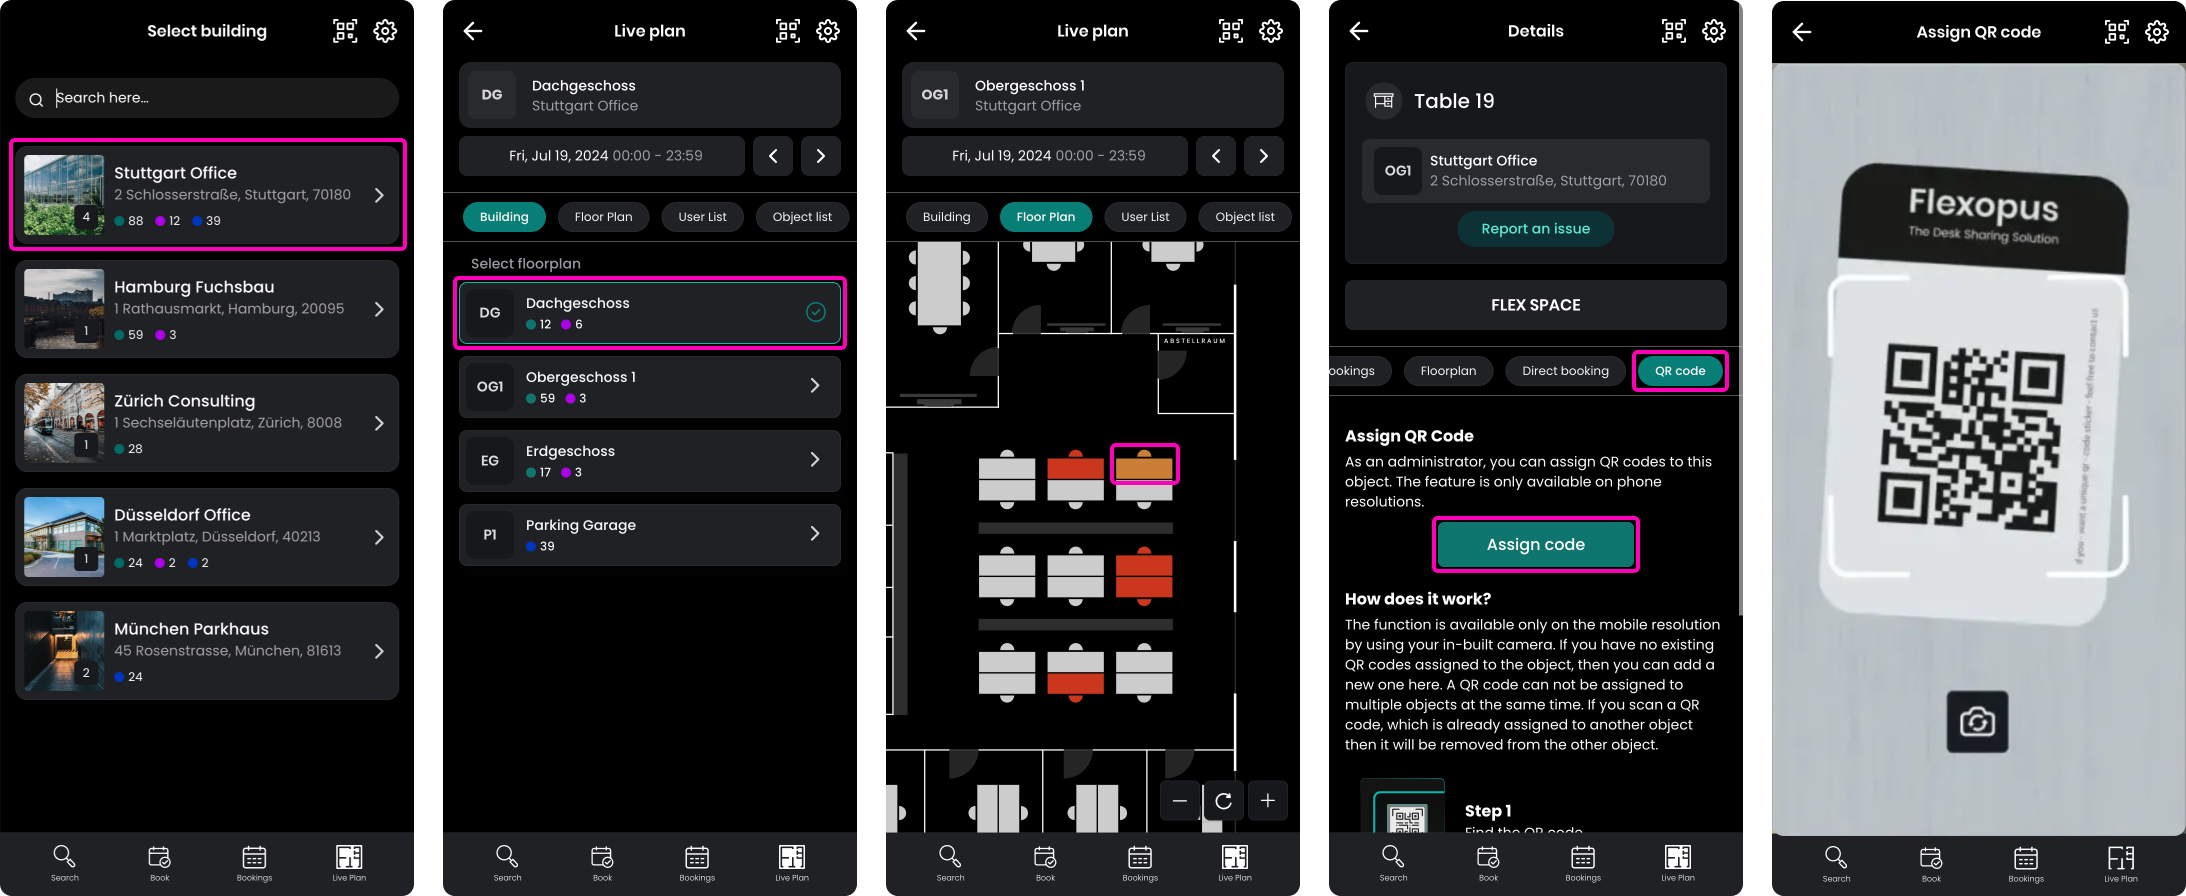
- In the Flexopus app, navigate to the live plan.
- Select the building and floor you are currently on.
- Click on the resource in the floor plan.
- As an administrator, you will see a tab called QR codes (this tab is only visible to users with administrative permissions).
- Click the Assign code button and scan the QR code.
This process links the QR code to the specific resource.
Note: Each QR code can only be connected to one resource. If a QR code was previously linked to another resource, reassigning it to a new one will remove the old assignment. This isn't a major issue since you are physically in front of the resource and can verify the connection. The reassignment of the QR code doesn't cause any data loss—it's simply a link update.
STEP 4 - (Optional) Verify connections
To verify if a QR code is correctly connected to a resource, simply scan the QR code and check if the resource matches the one shown on the floor plan. However, if you followed the step-by-step process (first attaching the QR codes and then connecting them in Flexopus), verification may not be necessary.
Sometimes, customers connect QR codes first and attach them later, which could lead to misplacement and require verification.
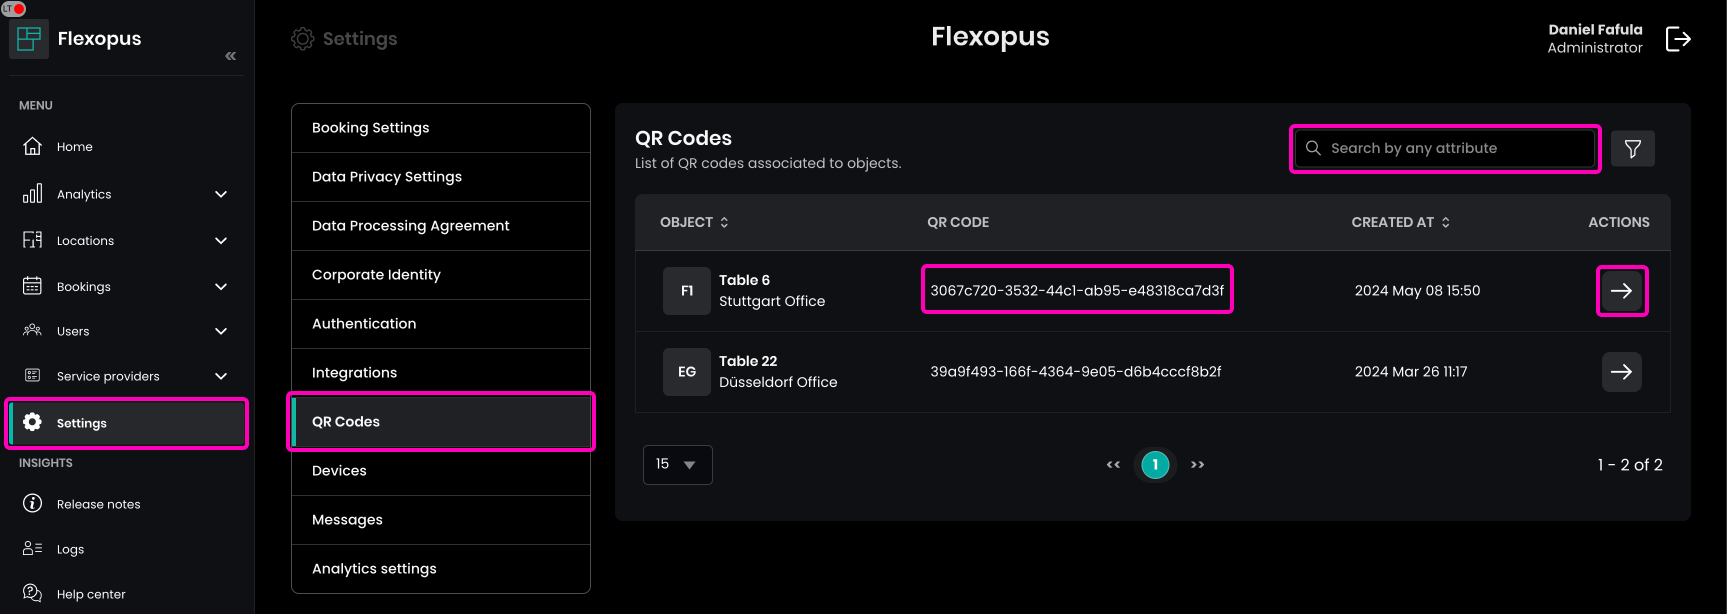
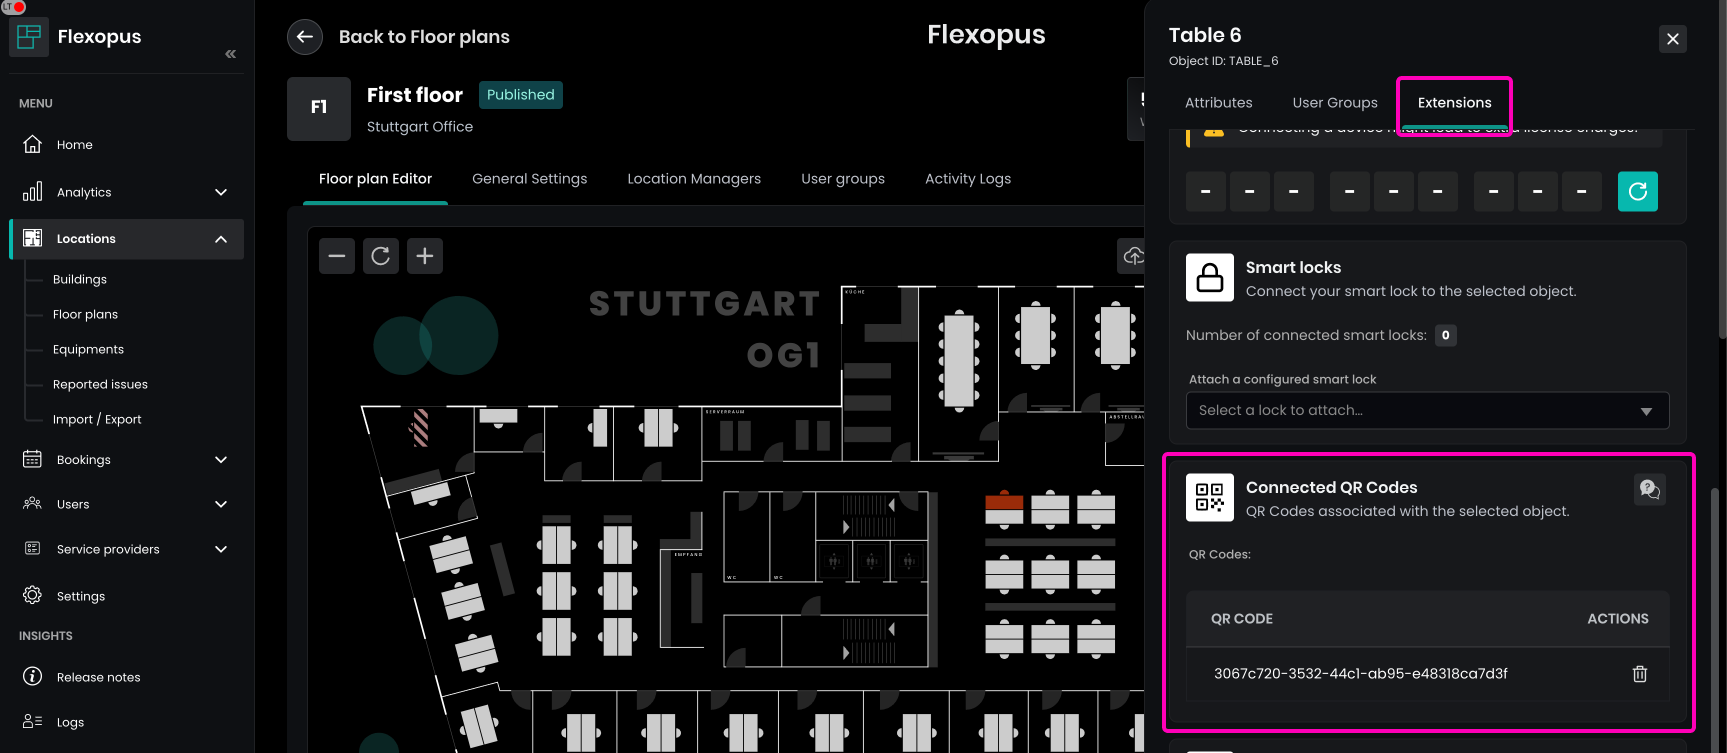
Additionally, each QR code has a UUID (e.g., 88a5f404-9054-47f4-9611-e73ac771140f) printed on it. You can verify the connection by going to Dashboard > Settings > QR codes in Flexopus and searching for the QR code's UUID to see which object it's linked to.
By clicking on Show Details in Flexopus, the floor plan will open, allowing you to view the corresponding resource attributes. There, you can also verify the connected QR code UUID to ensure it matches the resource.
STEP 5 - Test connection
Open the Flexopus mobile application as a normal user and click the QR code scan button. Scan the QR code on the desk and create a reservation for today. It's enough to test it for one resource.
Deleting QR codes
To delete a connected QR code in Flexopus:
- Navigate to Dashboard > Floor plans.
- Select the relevant floor plan and the resource associated with the QR code.
- Go to the Extensions tab and delete the connected QR code.
Note: If you delete the QR code and wish to reconnect it, you'll need to be onsite to do so.
If you're unsure how many QR codes are connected or where to delete them, go to Dashboard > Settings > QR codes as an administrator to view all connected codes.
Removing QR codes from desks
To easily remove QR codes, all you need is a hairdryer, a flat object (e.g. set square, plastic card) and some oil.
- Heating the QR code: Hold a hairdryer to the QR code for about 5 minutes. The heat will loosen the adhesive and the QR code will be easier to remove.
- Remove carefully: Use a flat object such as a set square or plastic card to lift one corner of the QR code. Then peel it off slowly and evenly.
- Remove adhesive residue: If any residue remains, apply some oil (e.g. cooking oil or baby oil) to a cloth or cotton pad and rub the affected area until the adhesive is completely removed.
This method removes QR codes without damaging surfaces.
Troubleshooting & FAQ
I need more QR codes
Write us an email and we will send more.
I did not receive the QR codes
Write us an email and we will send new ones. Sometimes they might get lost in the process. If you do not receive them within 1-2 weeks, we can send you new ones.
iOS older than 14.3: camera support
iOS supports the use of the camera function only from iOS 14.3. If you use an older version of iOS, you need to update it or use another device with which you can set up the QR codes.
Android devices with multiple camera
For Android devices with multiple cameras, do not select a wide-angle lens, otherwise the QR codes will not be recognized correctly.