Booking Process
Overview
With Flexopus you can book a workplace, a meeting room or a parking space in just four steps. After logging into your Flexopus account, you can reach the booking area in the application menu on the left-hand side via the button Book.
You can create a reservation in just a few steps:
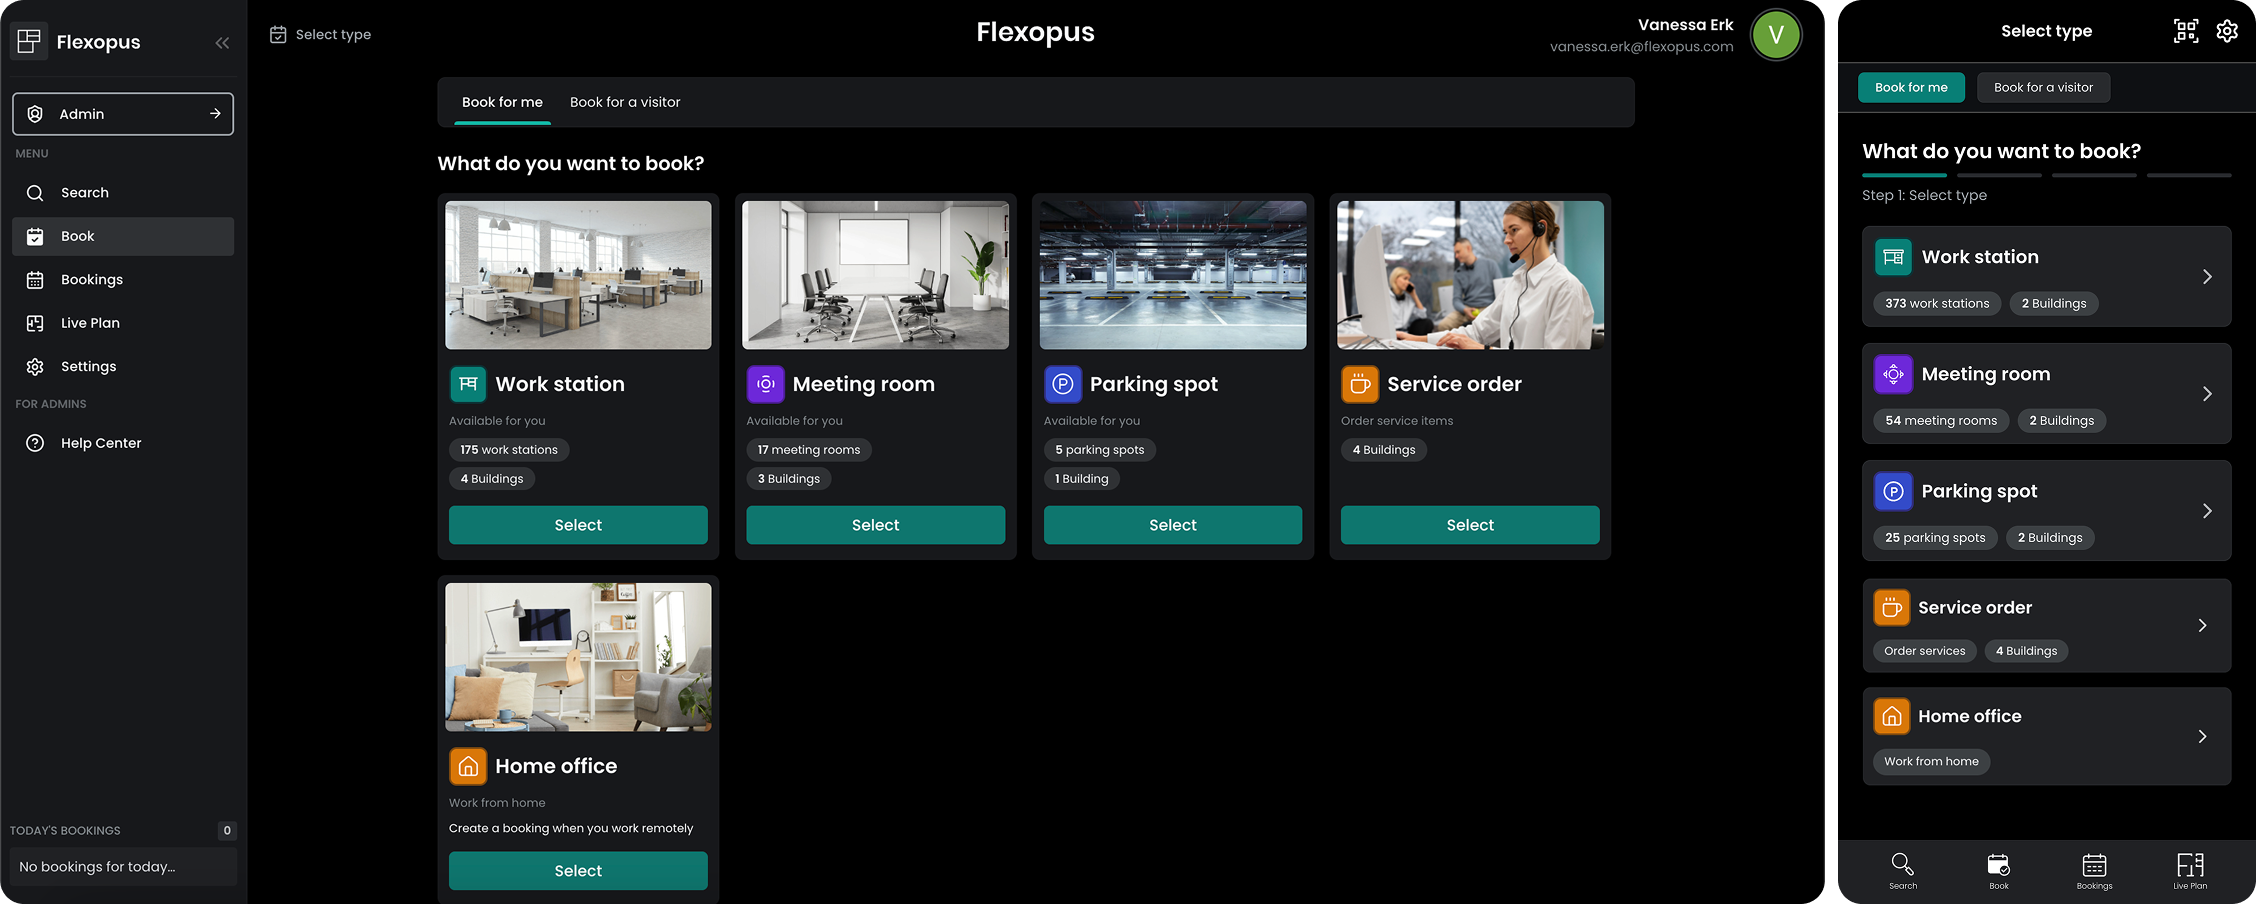
STEP 1 - Select the type of resource
In the first step, you can decide whether you would like to book a workstation, a meeting room or a parking space. In the overview, you will see the number of available resources. Please note that the maximum permissible advance booking may differ for the different resource types.
STEP 2 - Select date & time
In this step, you can select the date and time of your reservation. Here you have 3 options: Single, Multiple or Recurring (optional). You will be able to create reservations with configured limitations.
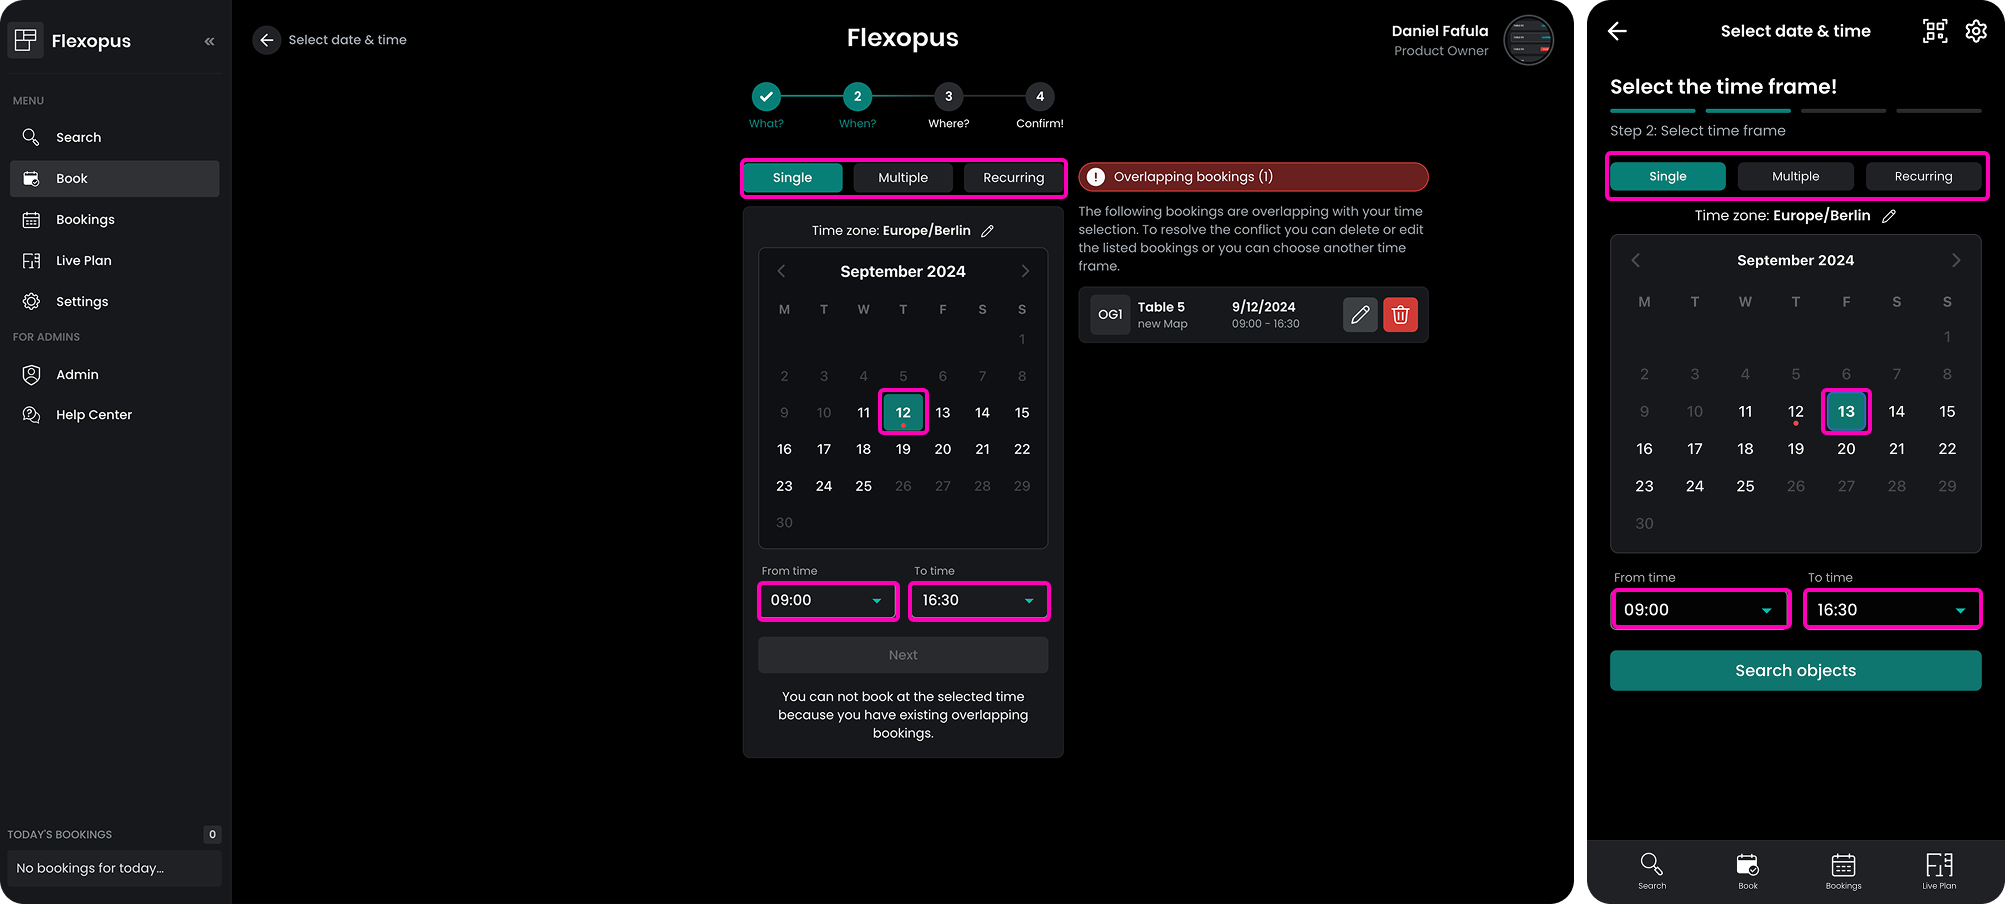
Single reservation
You can now select a date and the start time and end time of the desired booking.
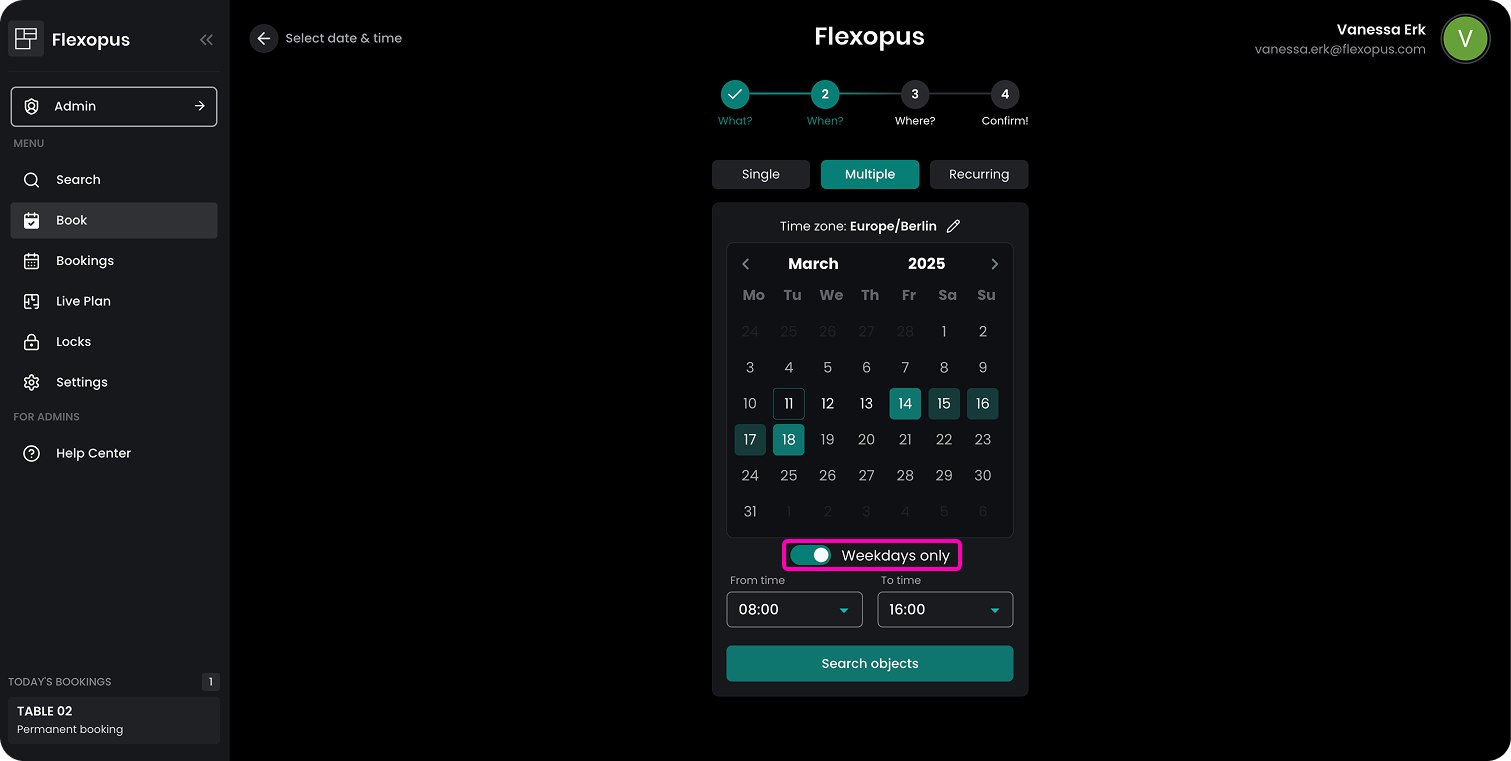
Multiday reservation
You can select multiple days and pick a start time and an end time. A separate reservation will be created for each day in the selection. This way you can delete the reservation day by day, in case you change your mind later on.
You can toggle the Weekdays only setting to exclude weekends from your booking list. This ensures more efficient and structured workspace reservations.
Recurring reservation (optional)
Optionally, an administrator can enable the option to create recurring reservations, however creating recurring reservations is actually counterproductive towards a flexible office concept. Creating a reservation that repeats from Monday to Friday every week could be equal to not having a flexible office concept at all. For this reason, this option is often disabled in the booking flow.
Still, in some cases, recurring reservations can make sense. You can find more information about the serial bookings here:
Conflict checking
Each time you try to make a reservation, the system will check to make sure you’re not booking multiple desks at once. As a normal user (not administrator) you are not supposed to book multiple desks or parking spots for the same time slot. Bookings for visitors will have to be done in a different work flow.
STEP 3 - Select building & floor
Next, you need to select a building for your reservation. You can see how many resources are available for your selected timeframe.
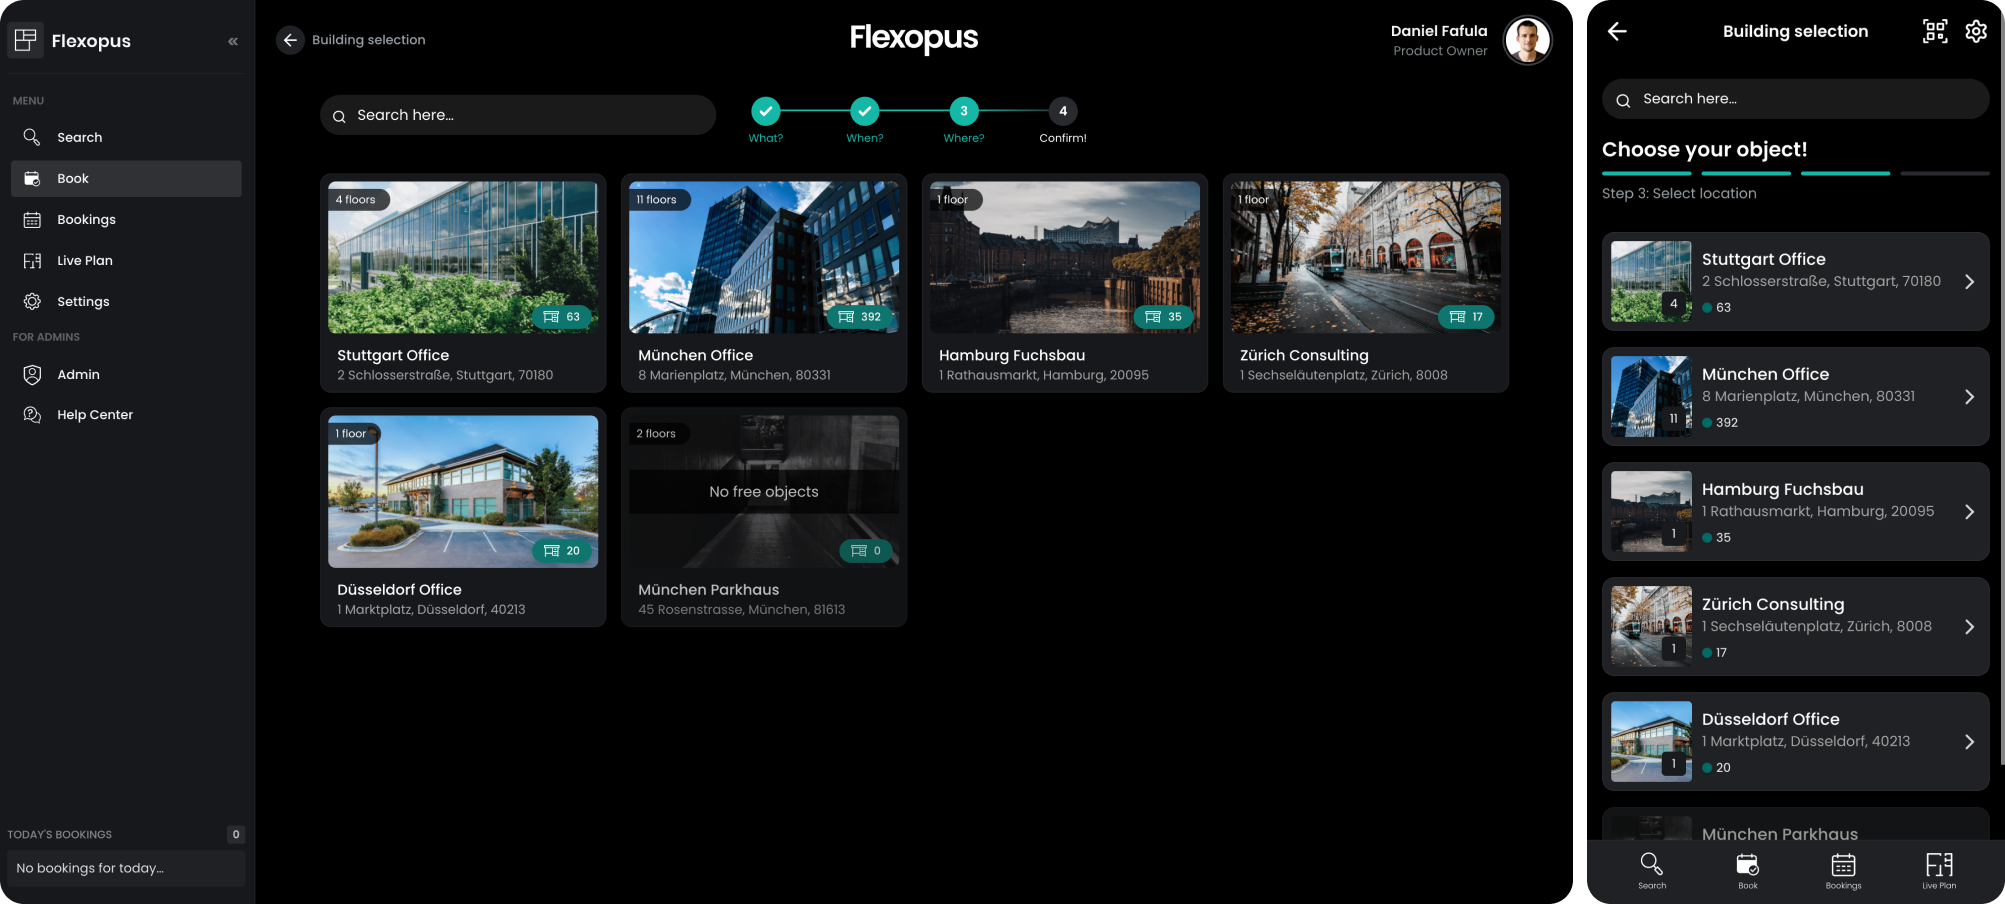
In case all resources are occupied for a building, or you have no access rights to book a resource, then booking a resource for the building is not possible.
Also, if you are trying to create a reservation within the wrong time zone, the application will tell you that you need to change the timezone accordingly.
Once you selected the building, you need to select the floor you want to book on. One building can have multiple floors.
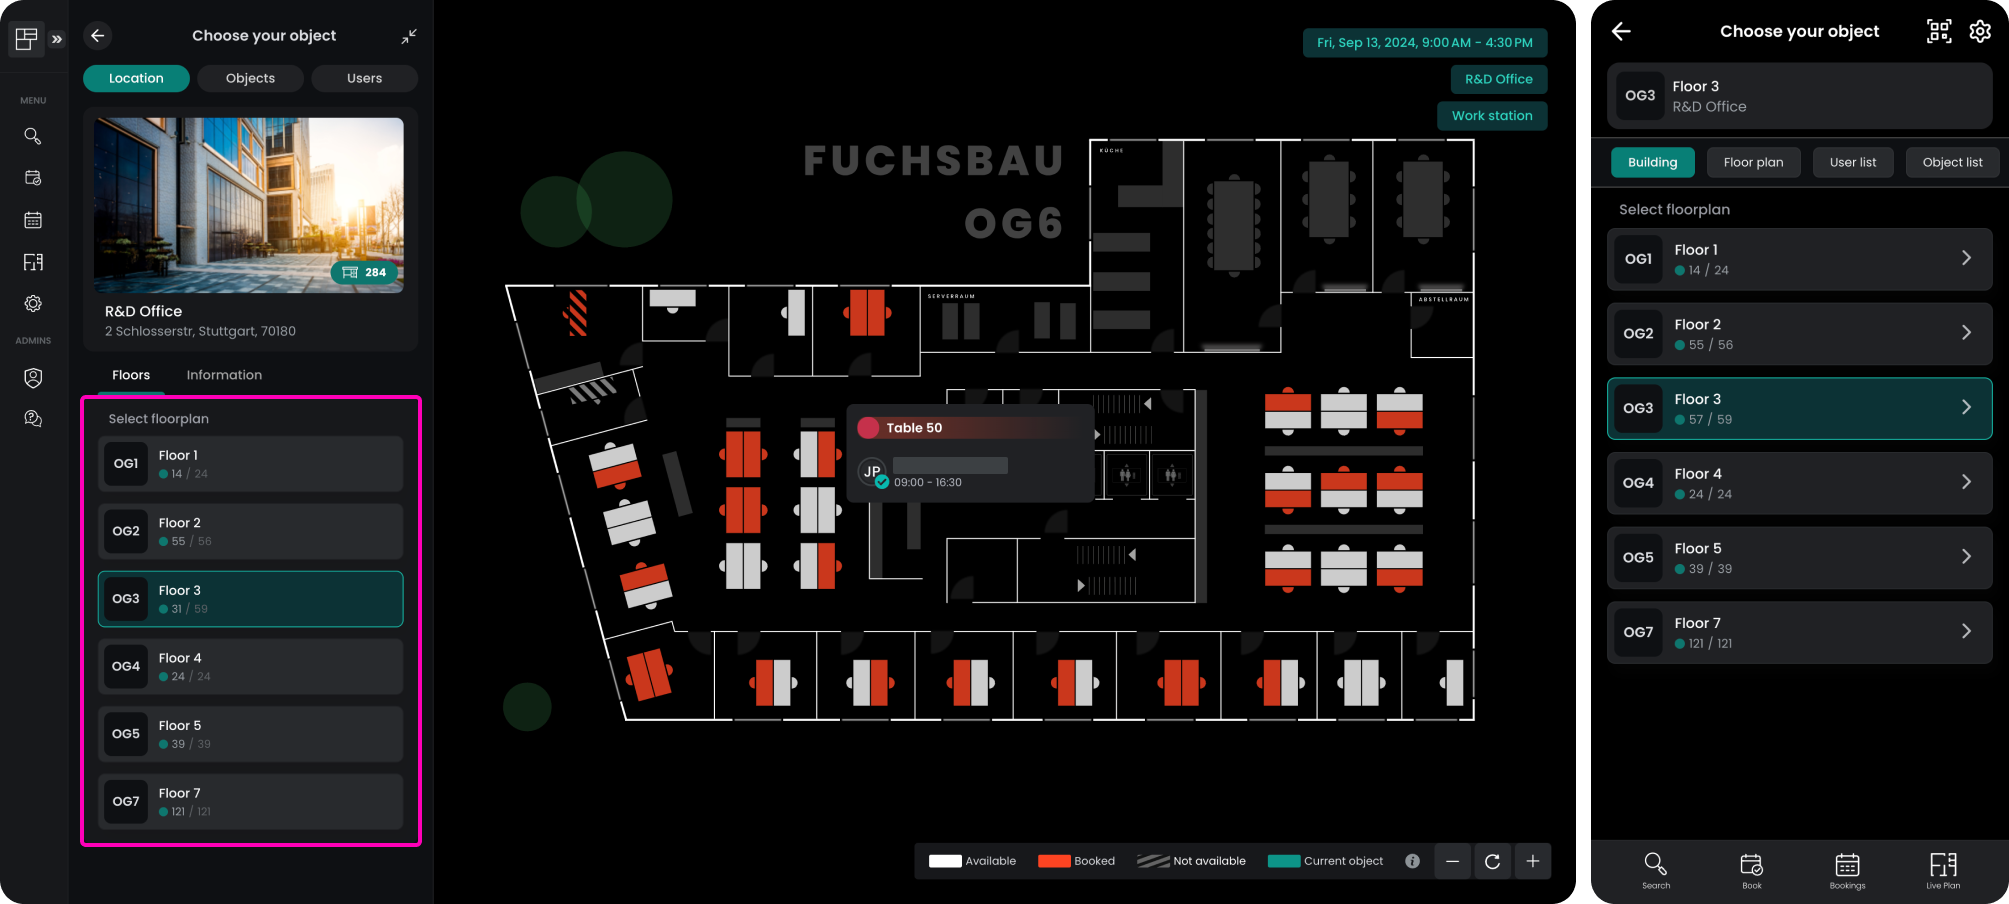
STEP 4 - Select resource
After selecting the location, you choose the resource that best suits your planned working day and provides the right properties. As soon as you hover your mouse cursor over a resource, you receive information about the booking status:
- Name of the resource
- Reservation status of the resource
red=booked,white=free - Who booked the resource?
- Equipment tags such as
double monitor,adjustable desketc. - Special notes of the resource

The legend at the bottom of the screen gives you information about the drawings in the floor plan. You can also filter the resources based on equipment tags or names.
After clicking on a resource, you have the opportunity to check and confirm your details again. Click on Confirm Booking to complete your booking.