Visitor Registration for Users
Overview
With the visitor management module, an external guest can be registered as a visitor, ensuring a structured entry process. Steps include:
- Visitor Profile Creation: Requires at least the visitor's name and email address. Additional details, like company name or phone number, may be needed based on admin settings.
- Document Acknowledgment: Preregistered visitors may need to accept specific documents (e.g. visitor data policy, code of conduct) as defined by your organization.
- Check-In and Check-Out: Reception or the host can check in the visitor on arrival and check them out upon departure, providing clear records of office access.
Use cases
With the visitor management module, you can cover the following use cases when inviting a visitor:
1 - Invite a new visitor
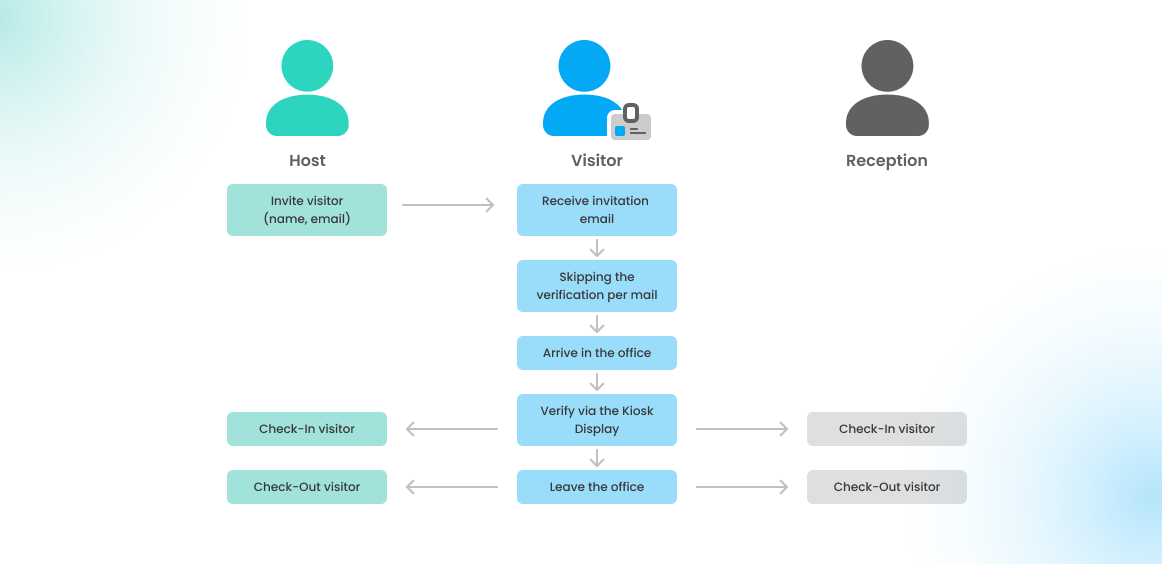
The most typical use case is inviting an external visitor to your office when you know their name and email address. In this case, the visitor will be added as an unverified visitor in the system, and an invitation email will be sent to them. Using the email link, the visitor can complete verification before the visit by filling out required information and accepting any provided visitor documents.
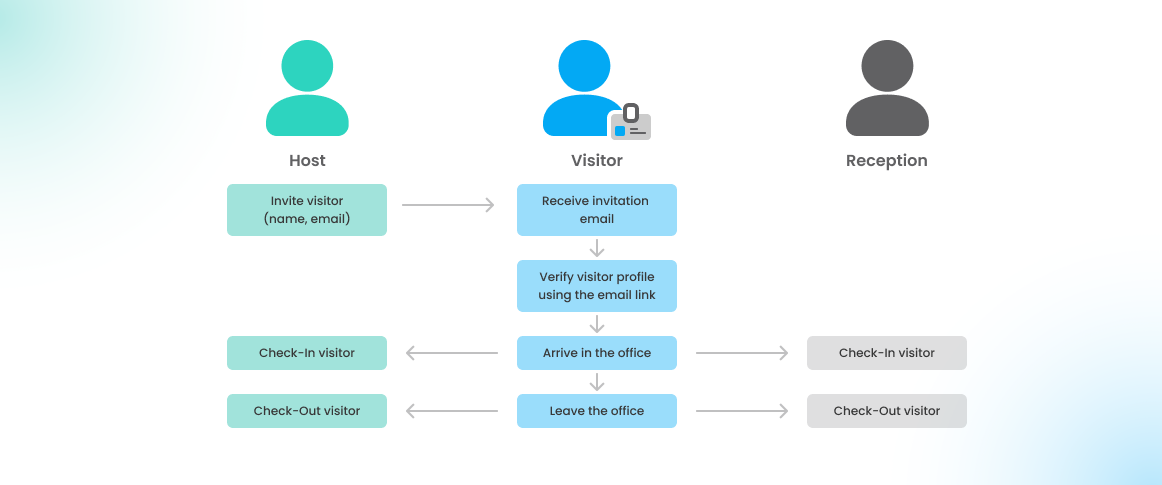
In case the visitor ignores the invitation mail with the prior verification process, the visitor kiosk display can be used to verify the visitor on site, in case your company configured a visitor kiosk for the office.
2 - Invite a verified visitor again
In case an already verified visitor gets invited into the office again, the visitor profile verification doesn't need to be done once more. The verification needs to be repeated only if the system administrator changes the requirements for the visitor verification. For example, by updating the visitor documents.

3 - Invite an unknown visitor
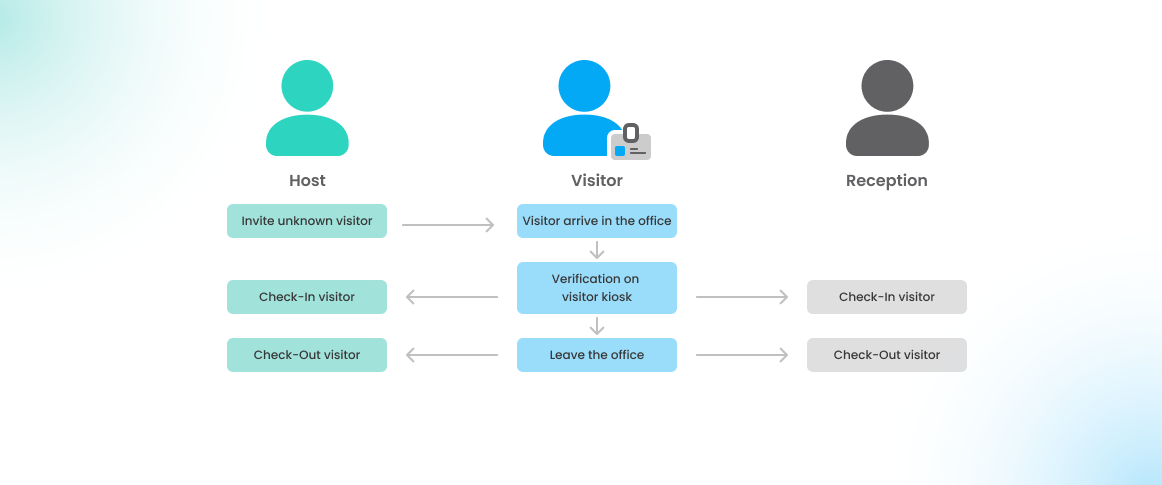
If you have an unknown visitor arriving for maintenance or similar reasons without prior registration, the most efficient way to handle this in Flexopus is to use a visitor kiosk tablet:
- Provide the Visitor Kiosk Tablet: Hand the maintenance worker the visitor kiosk tablet.
- On-site Profile Completion: Ask them to fill out their profile information directly on the tablet, including any required fields such as name, company, and contact information.
- Document Signing: The visitor can also review and sign any required documents, like the visitor data policy and code of conduct, on the kiosk.
This approach ensures that all required information and consent are obtained without registration in advance.
4 - Visitors without prior invitation
If a visitor arrives unannounced and without an invitation:
- Provide the Visitor Kiosk Tablet: The receptionist or colleague who greets the visitor can hand them the visitor kiosk display.
- Visitor Profile Verification: The visitor can fill out their profile information on the kiosk, including any required fields and necessary document consent.
- Contact the Host: The receptionist can then contact the host to verify if they were expecting the visitor.
- Document the Visit: Once verified by the host, the visitor’s completed profile can be recorded in Flexopus as an official visit, ensuring accurate records and office security compliance.
This process allows for quick, on-the-spot registration while keeping track of unexpected visitors.
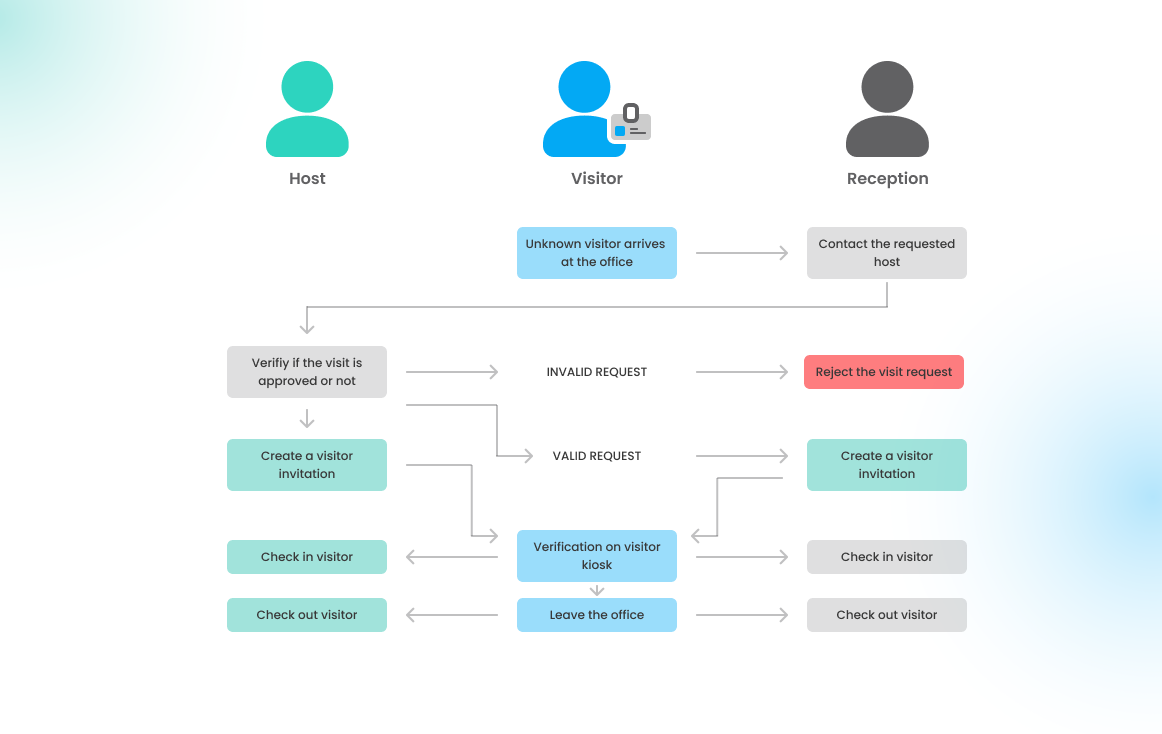
Visitor registration process
In this section, we describe the visitor registration process.
STEP 1 - Configure invitation
To register a new visitor:
- Go to the Book Page: Open the application and navigate to Book > Book for a visitor > Visitor registration.
- Register the Visitor: Follow the prompts to enter the visitor's details and complete the registration process.
This option is available if enabled for you as the host, allowing for a seamless setup for expected visitors.
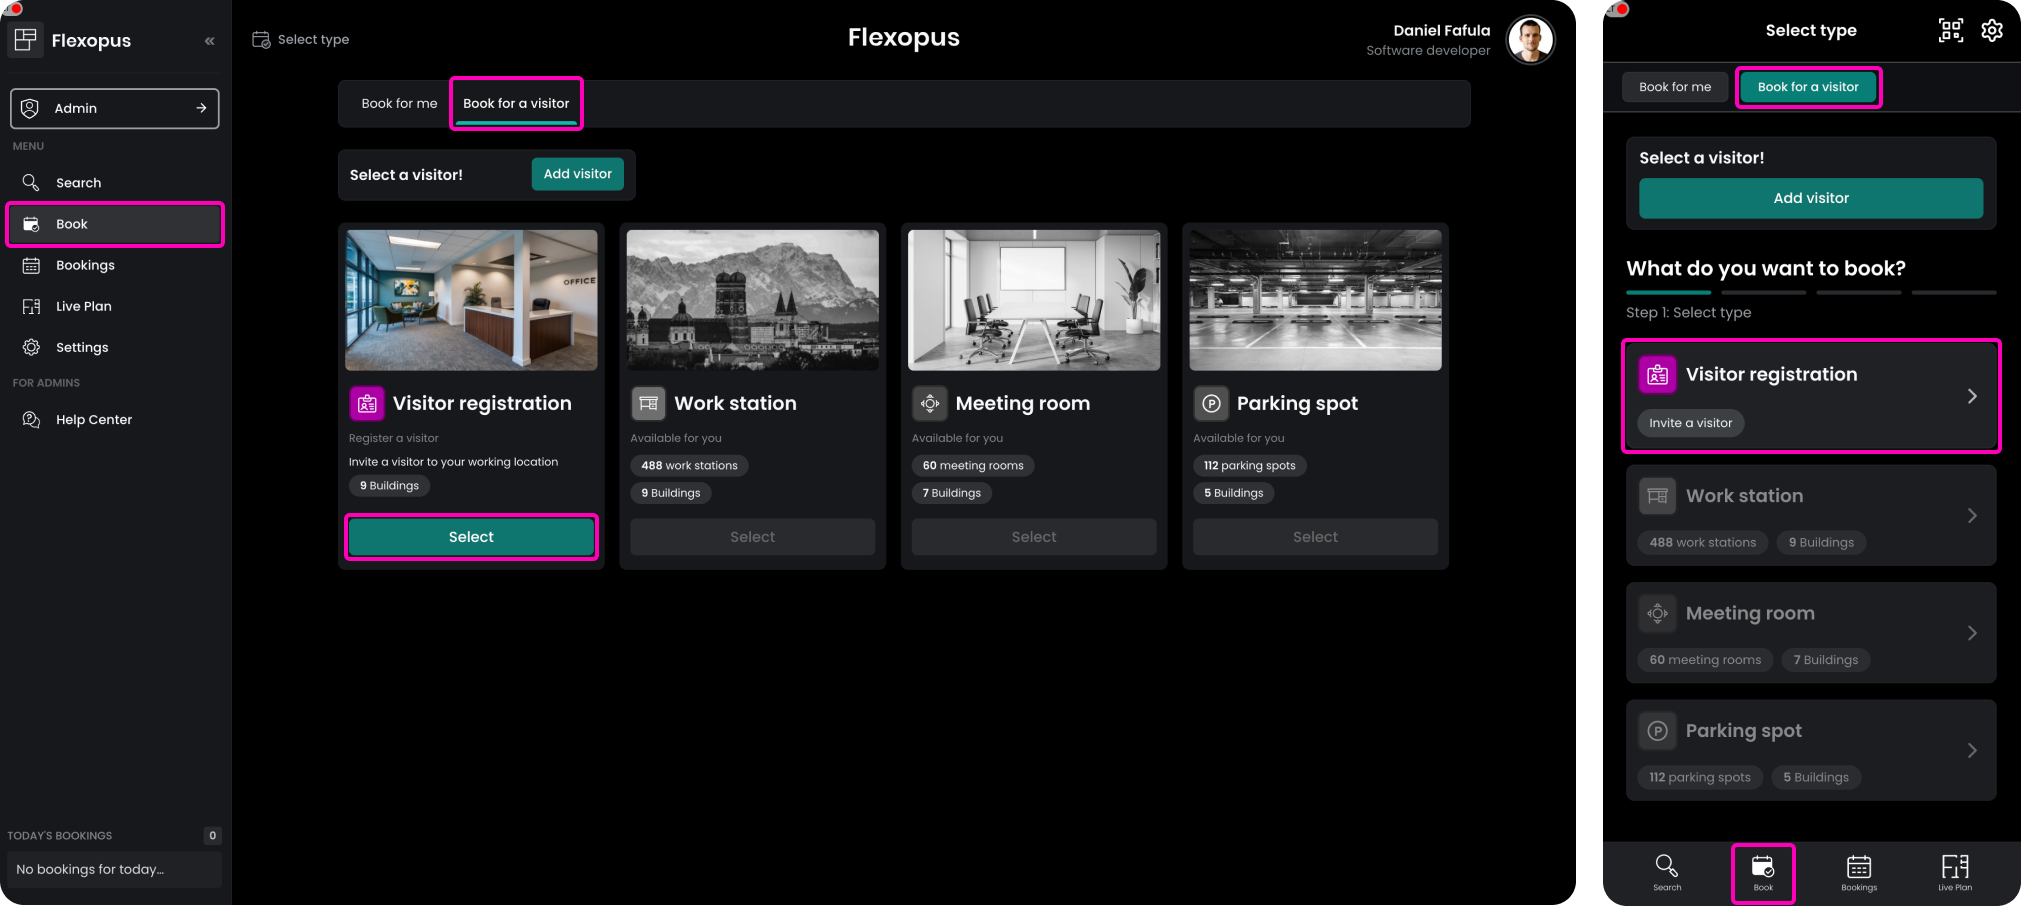
After selecting the visitor registration option, the visitor form will open.
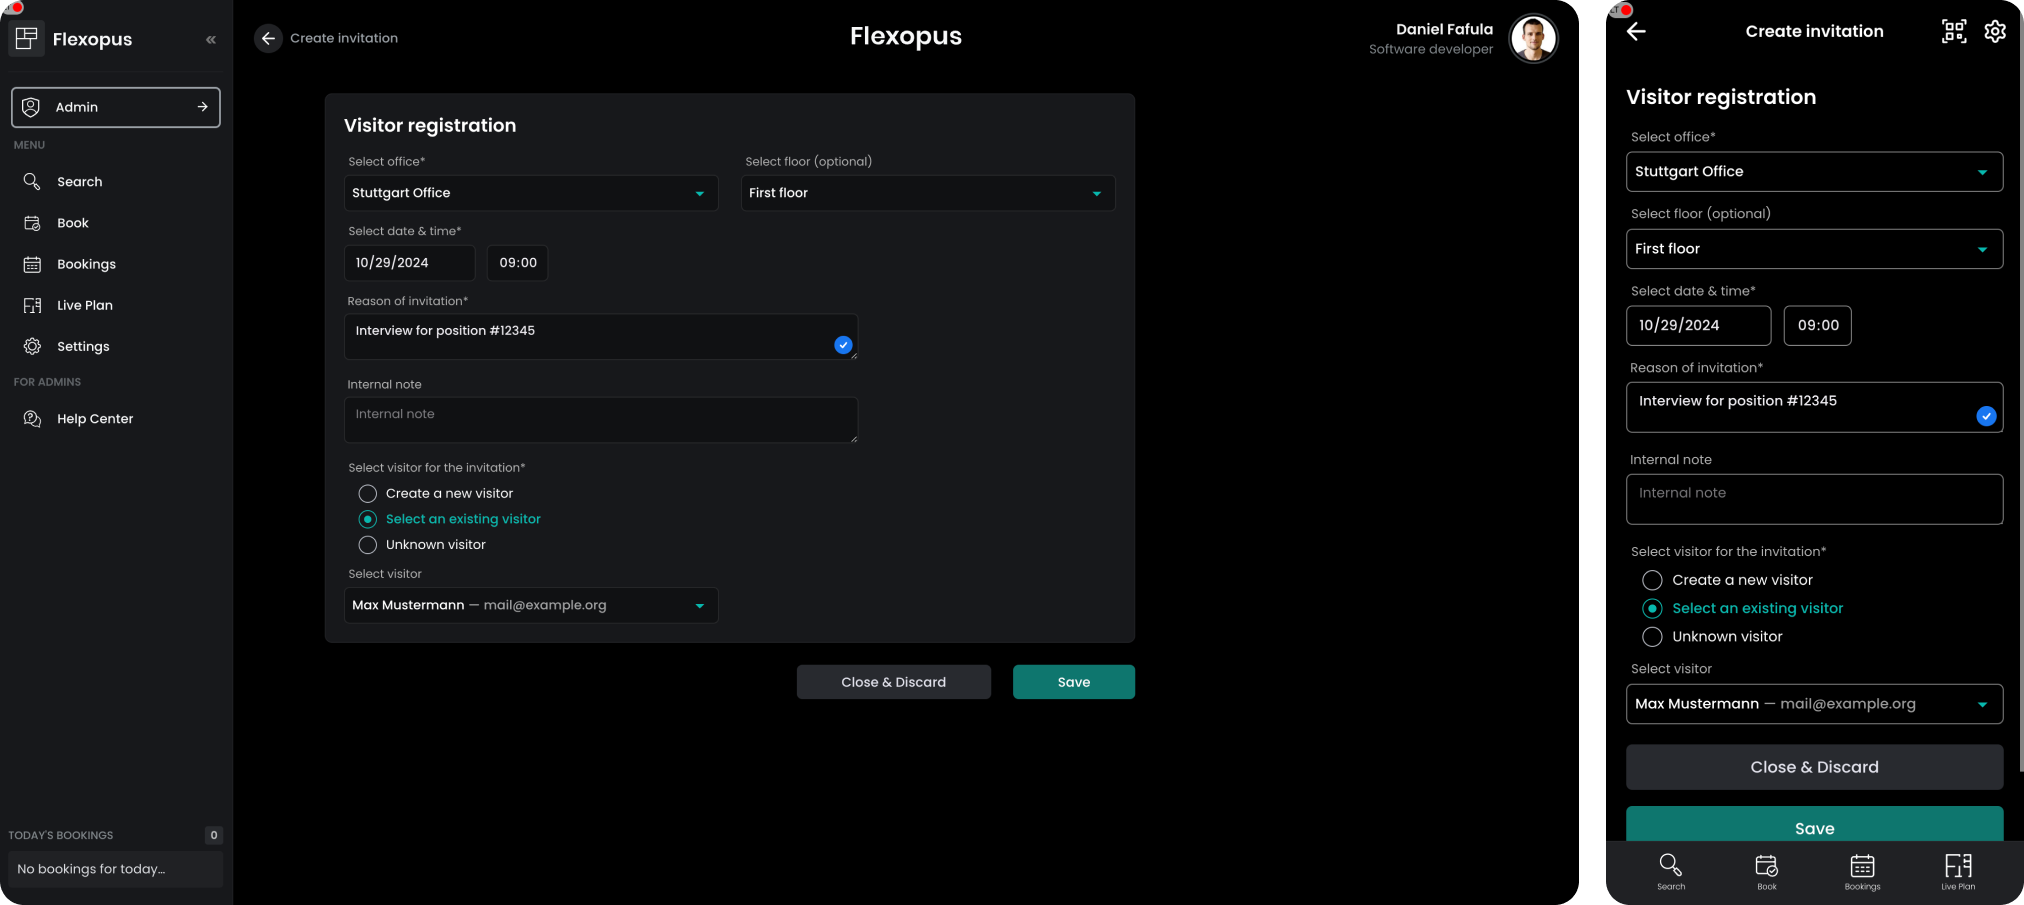
To create a visitor invitation, you can enter the following parameters:
- Office & Floor: Specify the office where you expect the visitor. Selecting the floor is optional.
- Arrival Due Time: Set the expected arrival time. While the visitor may arrive a bit earlier or later, it’s helpful to specify an approximate time.
- Reason of Invitation: Provide a reason, like an interview or a family visit. This information is sent to the visitor and visible to the host and administrators. This field is required.
- Internal Note: Optionally, add a note for internal use regarding the invitation.
These details help organize and manage visitor logistics efficiently.
STEP 2 - Select visitor
When completing a visitor invitation, select the appropriate visitor type:
- New Visitor: For new visitors, the name and email fields are required. While other fields are optional, you may configure them as necessary for visitor verification. You can pre-fill information to assist the visitor in completing the verification.
- Existing Visitor: For visitors who have already completed verification, you can select them from the existing visitor list. This avoids the need of repeated verification, making it preferable to use an existing visitor profile whenever possible.
These options streamline the process and ensure verified visitor profiles are reused effectively.
Unknown Visitor:
If you’re expecting a visitor without knowing their exact details (e.g. maintenance workers), you can create an invitation for an unknown visitor. In this case, it’s recommended to leave a detailed internal note to identify who is arriving.
STEP 3 - Invitation
Once the visitor invitation parameters and the visitor data are configured, you can finalize the invitation. An invitation email will be sent to the visitor. The invitation will be listed among your bookings.
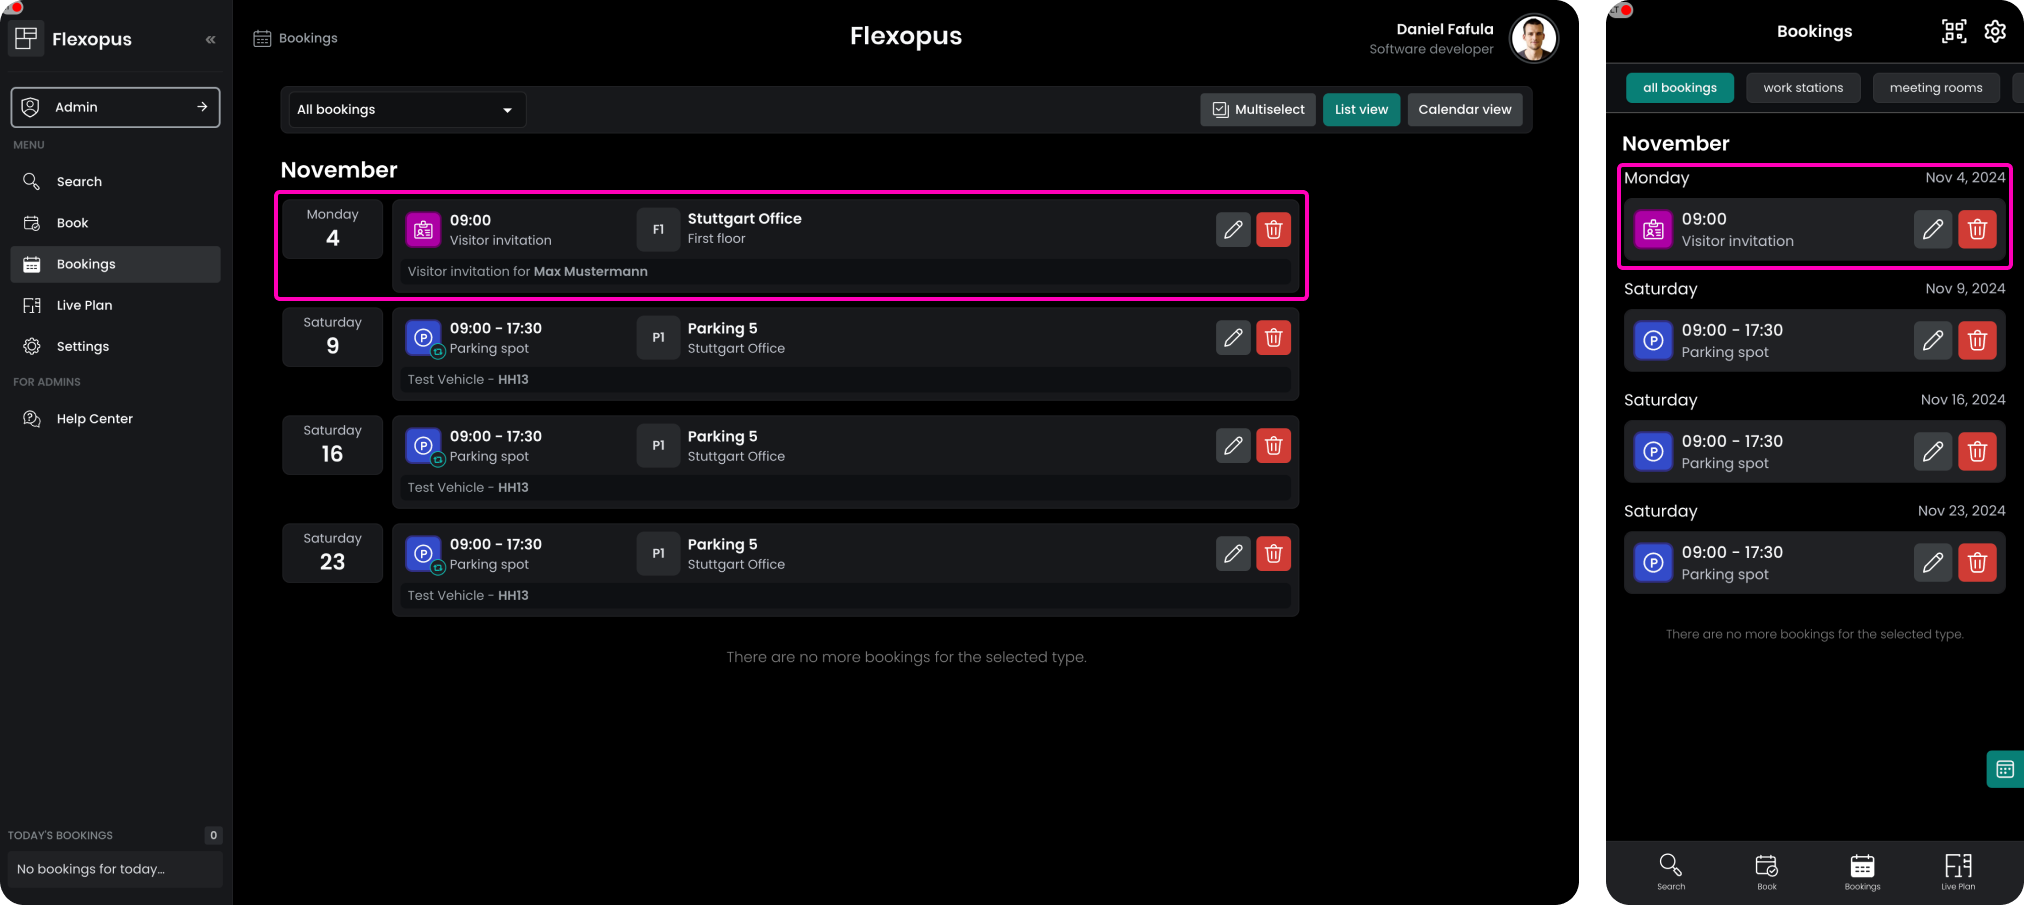
STEP 4 - Verification options
The verification process is where the user fulfills their visitor profile based on the configured requirements and accepts the configured visitor documents. Without a proper verification, a check in is possible. There are two ways to do the verification process:
- Before the visitor arrives
Verify visitor profile using the link in the invitation email - Once the visitor arrives
Verify visitor profile on site using the visitor kiosk tablet
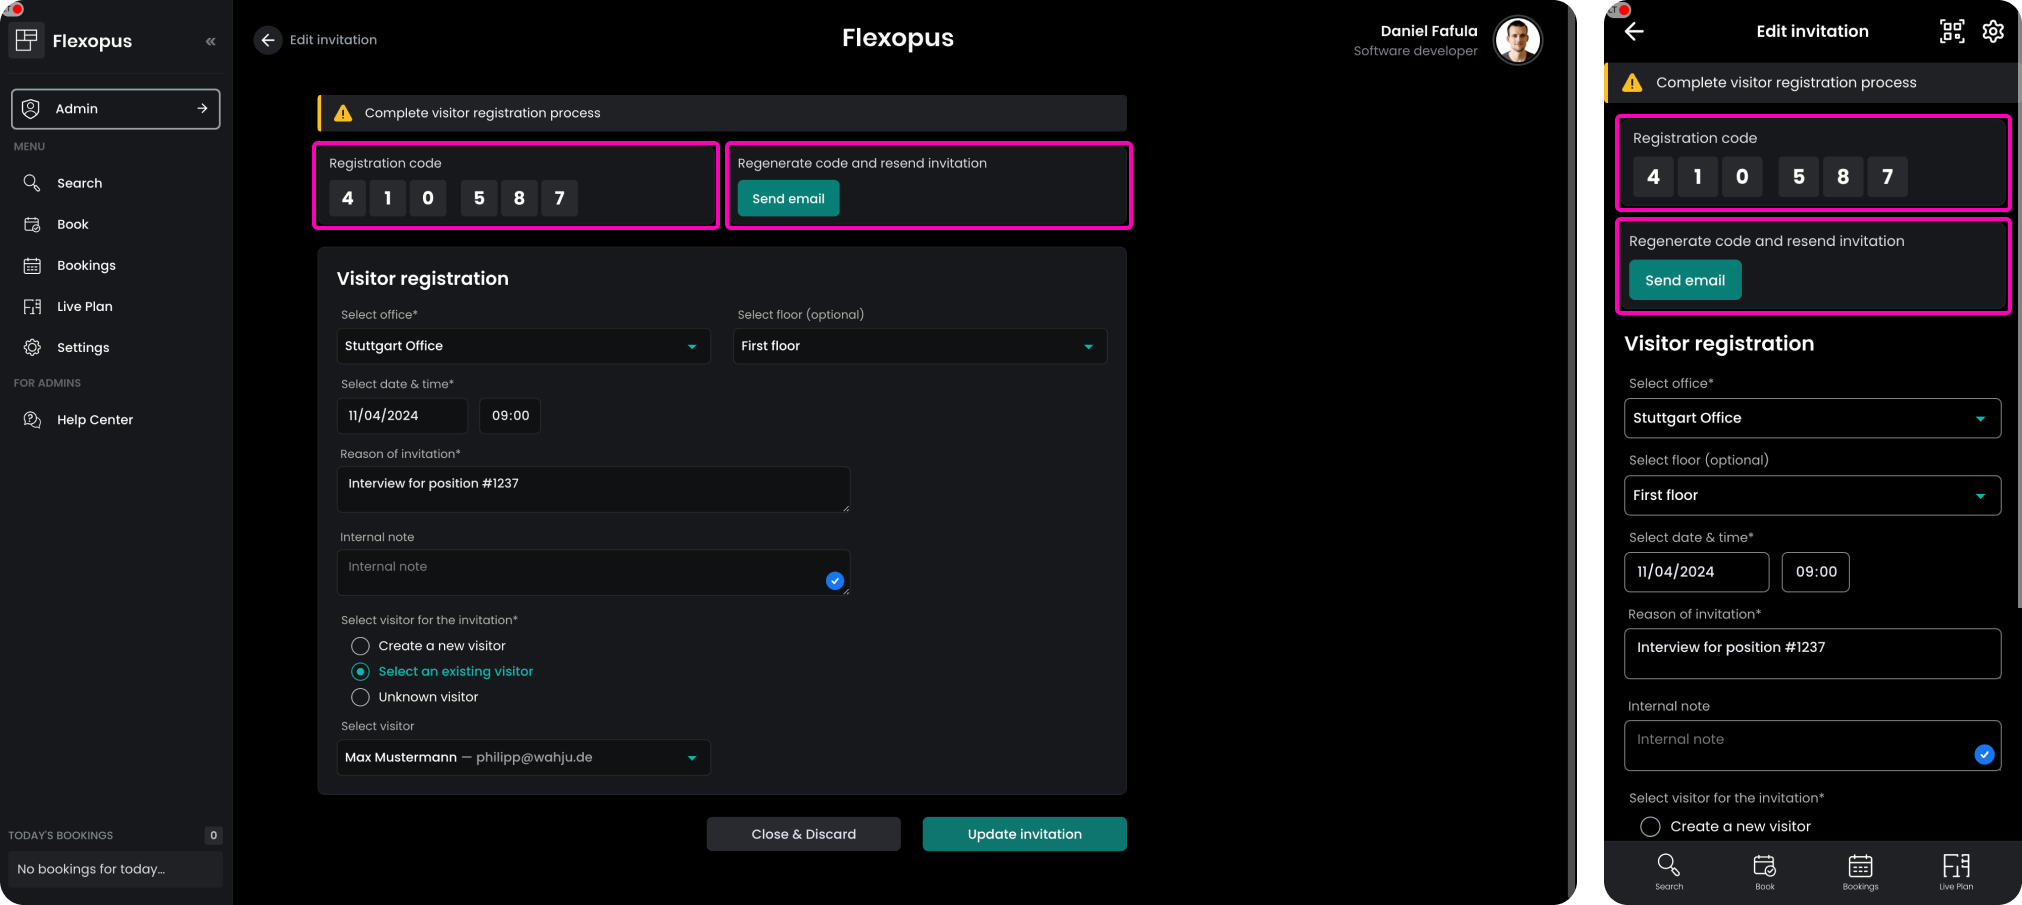
Both the verification processes can be triggered by the host by opening the invitation.
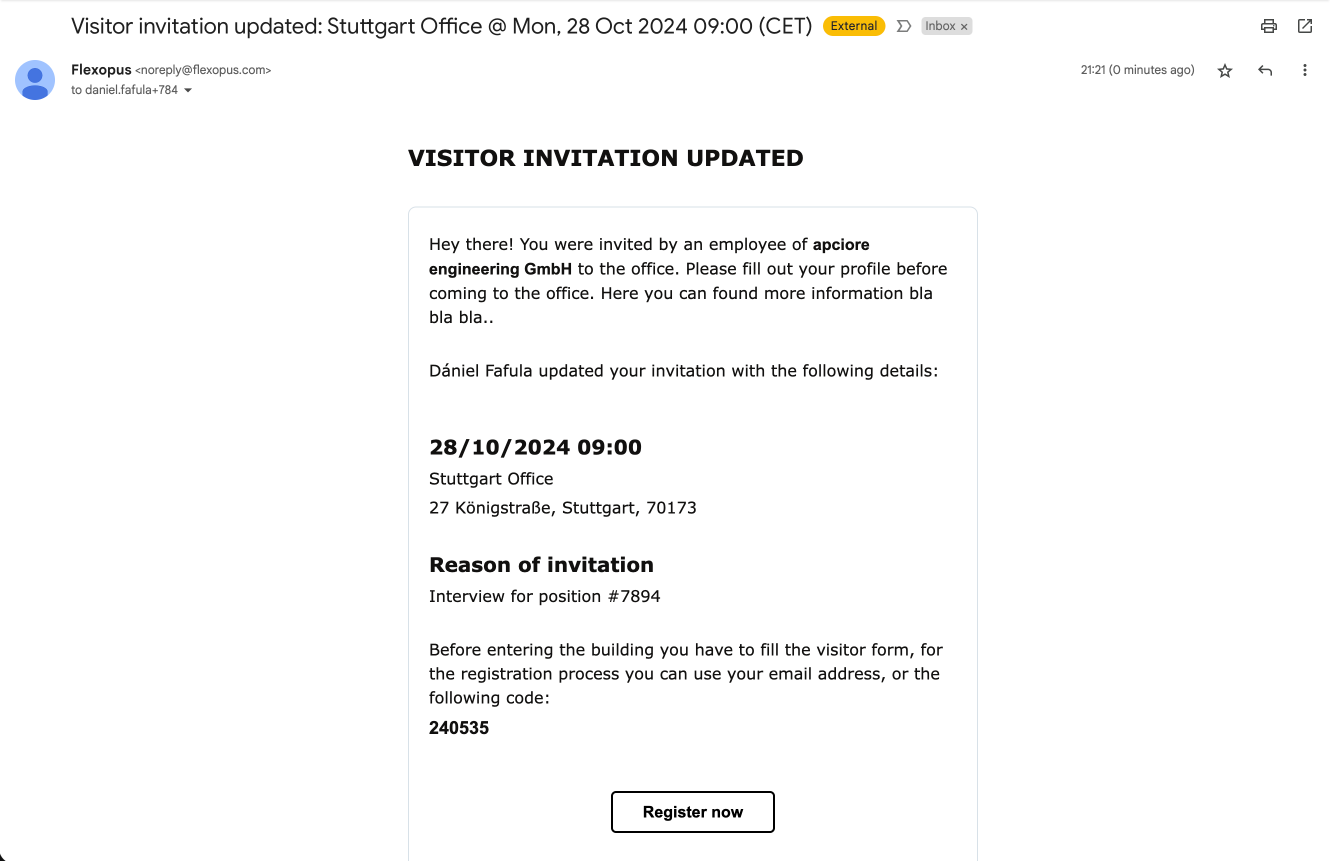
Verification using the invitation email link
The invitation email includes a unique invitation specific link, which leads the visitor to a verification form. On this form, the visitor can enter the missing profile attributes and accept the documents.
Verification using the visitor kiosk tablet
Often, the visitors may forget to complete the profile verification process before the first visit. In this case, the visitor needs to do it on site. A preconfigured visitor kiosk tablet can be given to the visitor. The host, the admin, or the visitor can enter the 6-digit code associated with the invitation.
STEP 5 - Verification
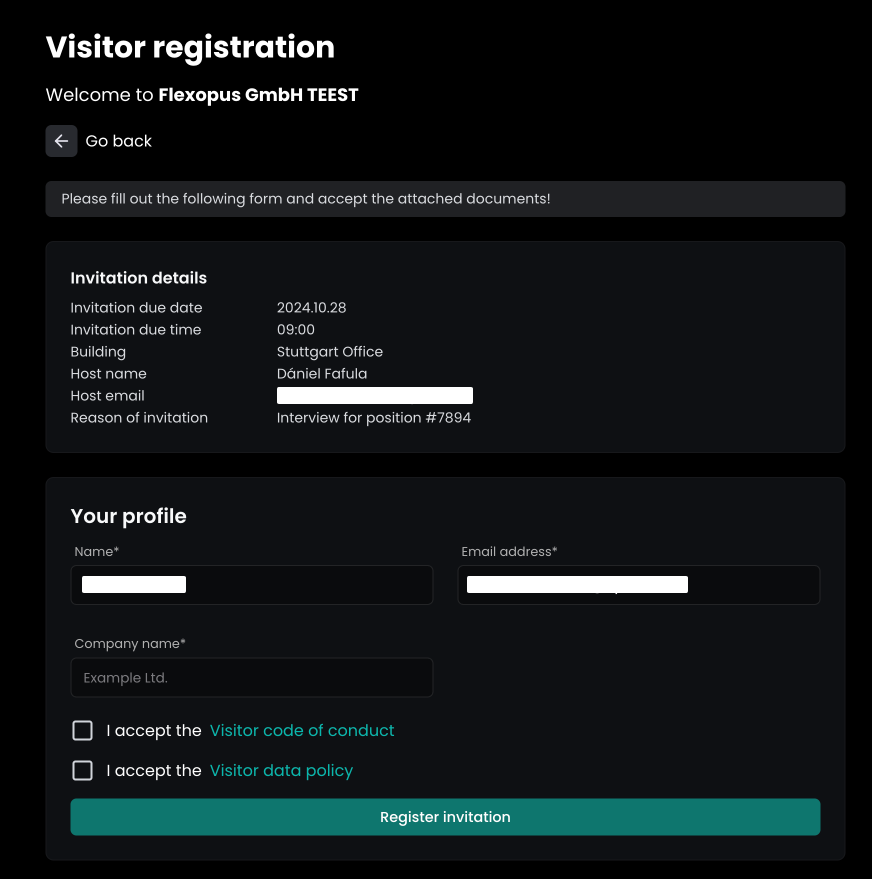
No matter which option is chosen for the verification, the same form will open:
- The first section shows the invitation details.
- The second section shows the attributes that need to be filled out.
- The third section shows the documents that need to be accepted.
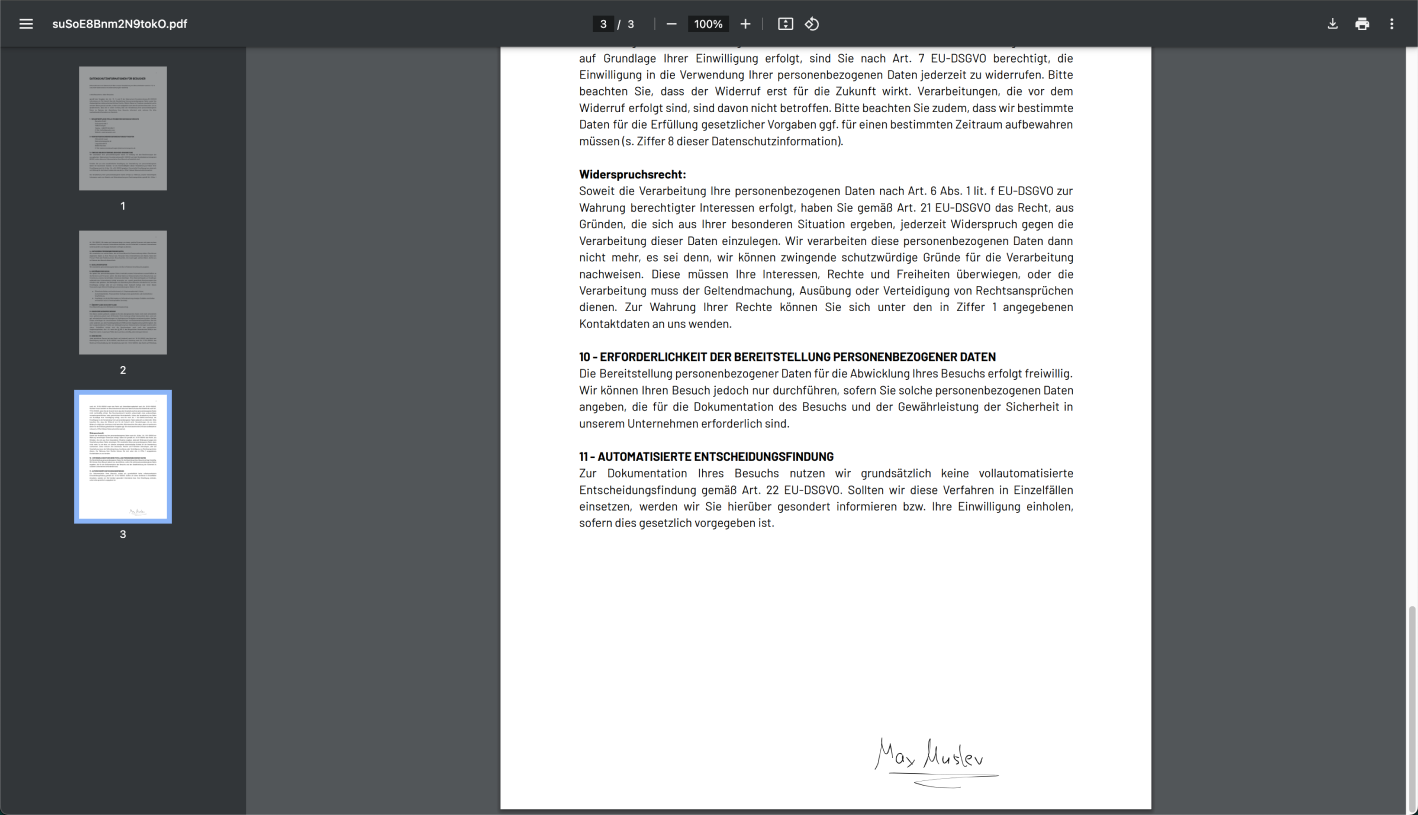
Optionally, a signature can be requested from the visitors, which will be copied to the last page of the required documents:
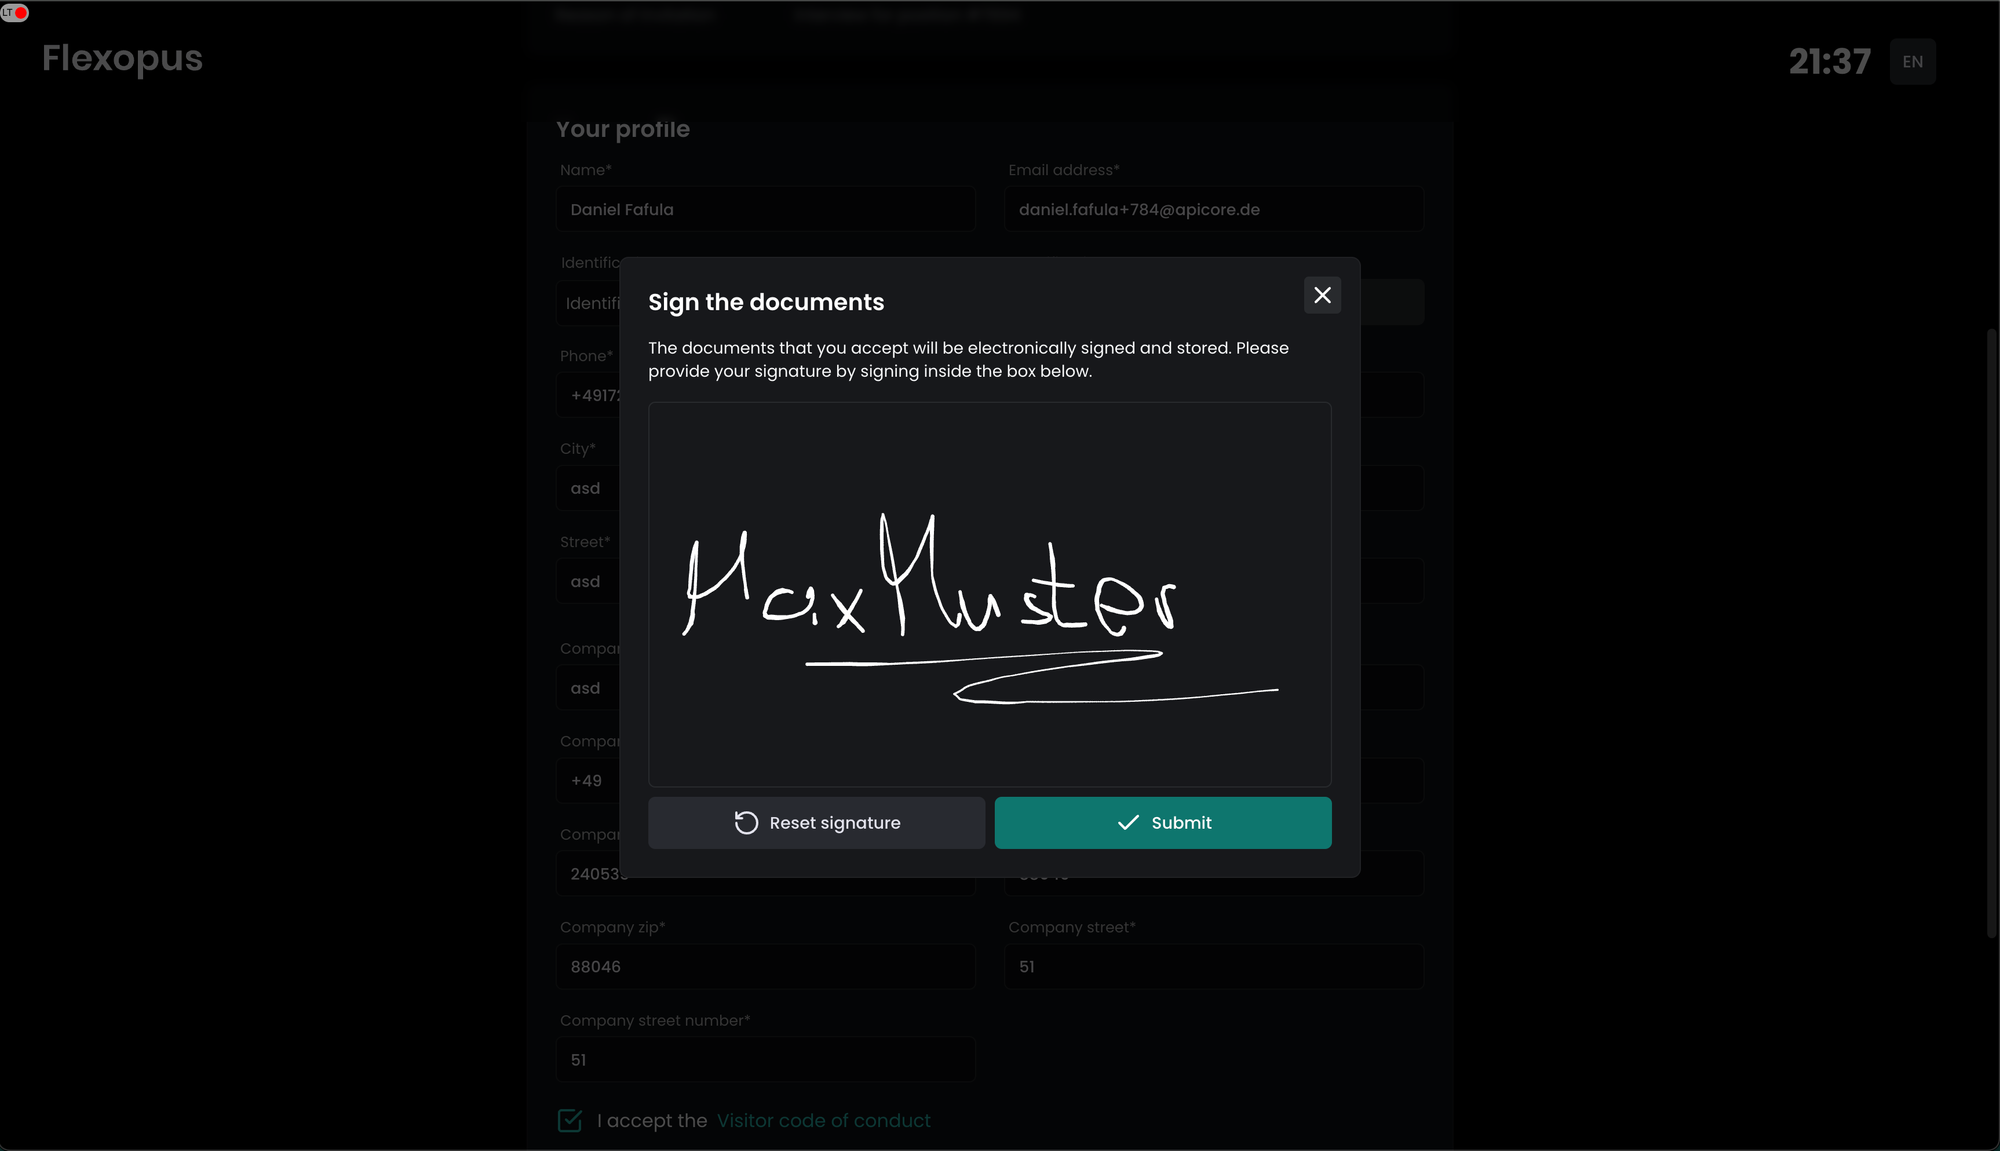
In case a signature is configured as a mandatory step, the signed documents will be stored in the verified visitor profiles under the signed documents section. Flexopus is not storing the signature in a plain format. They are always embedded in the documents and only the PDFs are stored as long you require it based on the privacy settings. The signature will be copied to the last page on the documents.
STEP 6 - Check-in / Check-Out visitor
Once the visitor verified their profile, the host or the visitor administrator can check in the visitor on the target day.
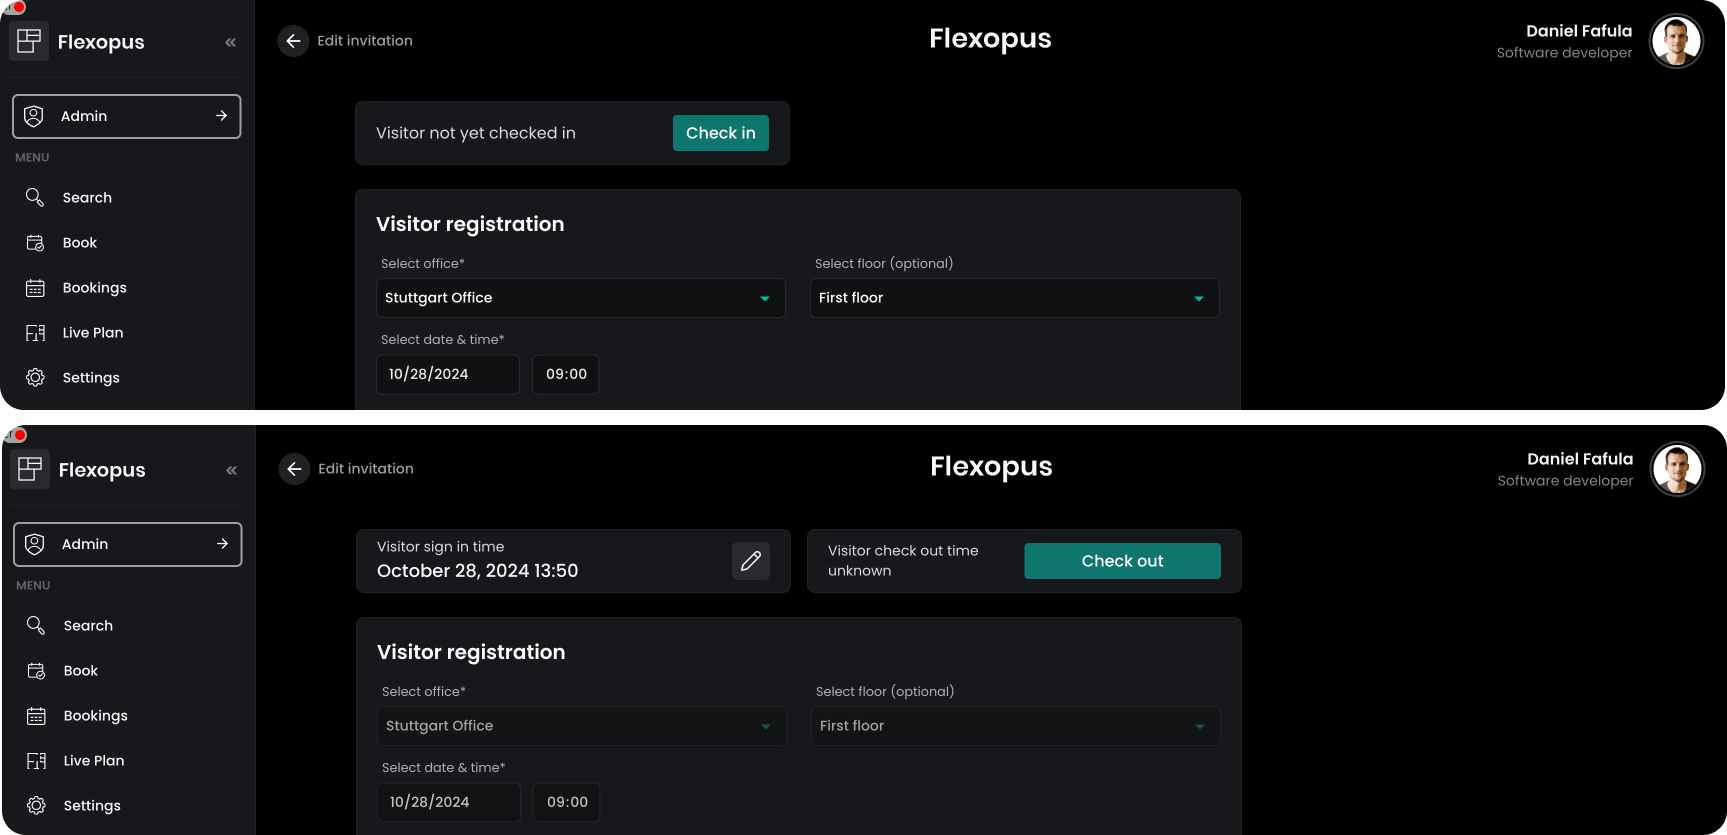
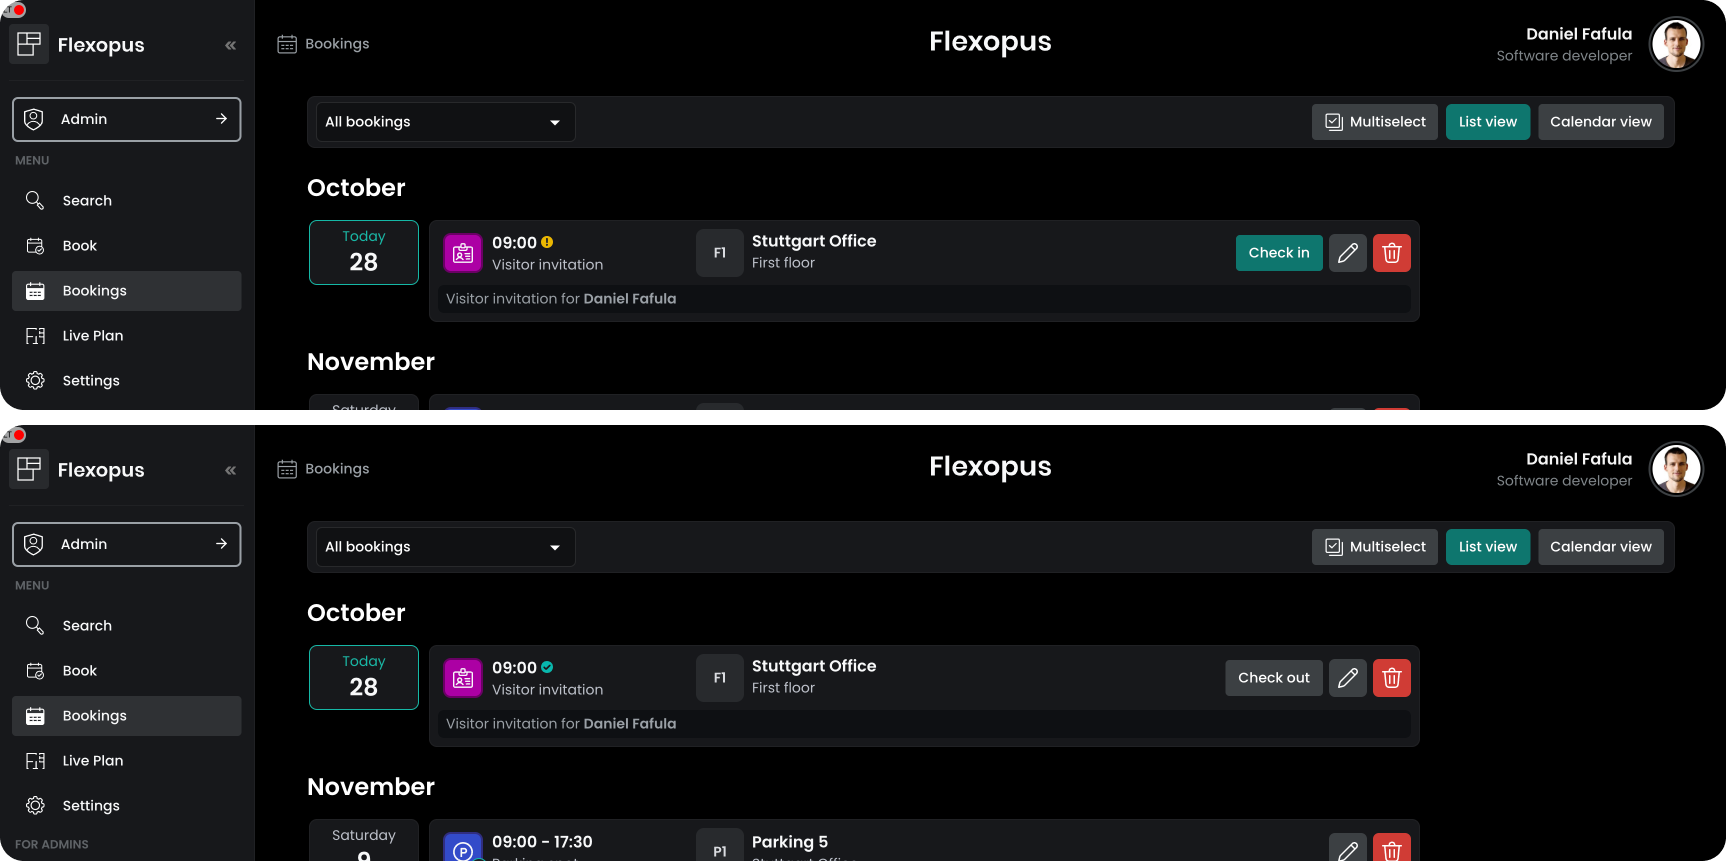
Clicking on the check-in button, the current time will be documented. After the check-in, the check-out button will be displayed. Clicking on the checkout button, the current time will be used. The check-in and check-out time can be edited afterwards based on the settings you configured for the visitor management.